Hey everybody! I talked to FABO member/sponsor Dave@Hellwig THREE years ago, and he recommended the 55906 for my application. I did my research and decided that it was a decent middle of the road bar that a few other members have used. Kinda right in the middle between the cheaper Addco bar and the high end Hotchkiss bars. I don't plan on autocrossing my car, but I would like for it to handle a little bit better than it does now. I have new Monroe shocks, .920 torsion bars, a Firm Feel 20:1 steering box and a completely rebuilt front suspension. I did this on my garage floor with normal hand tools. No lift. The instructions say to install the bar with the weight of the vehicle on the front end not suspended.
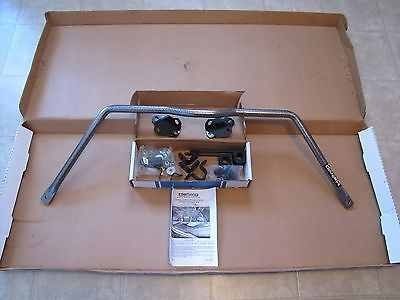
I picked up this Hellwig front sway off of eBay for $55 cheaper than I could have bought it at Summit so I decided that it was too good of a deal to pass on. It's a 1 1/8" hollow bar and comes with all of the hardware to bolt to my non-sway bar equipped car. Here's how it looked upon arrival.
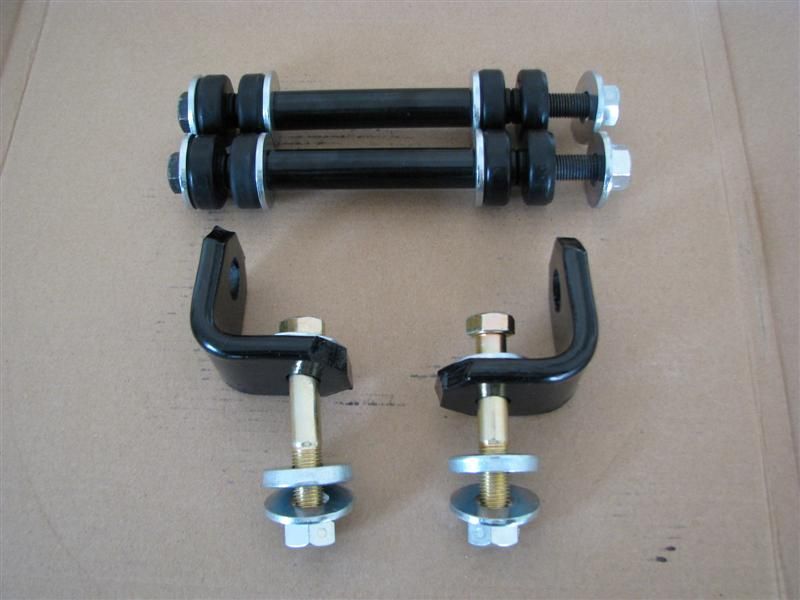
The first thing I noticed was that the bar was bigger than I had expected, and even though it is hollow it still seems like it weighs quite a bit. I guess I should have put everything on a scale before getting started to see how much weight I'd actually be adding to my front end, but it's too late now. The second thing I noticed was how heavy duty all of the hardware was. Grade 8 bolts were used throughout and the brackets that mount under the lower shock bolt were very beefy.
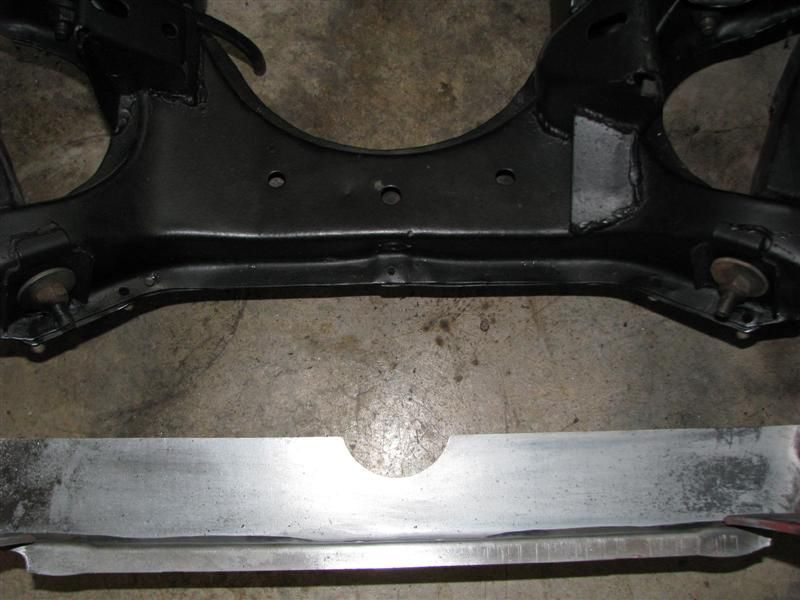
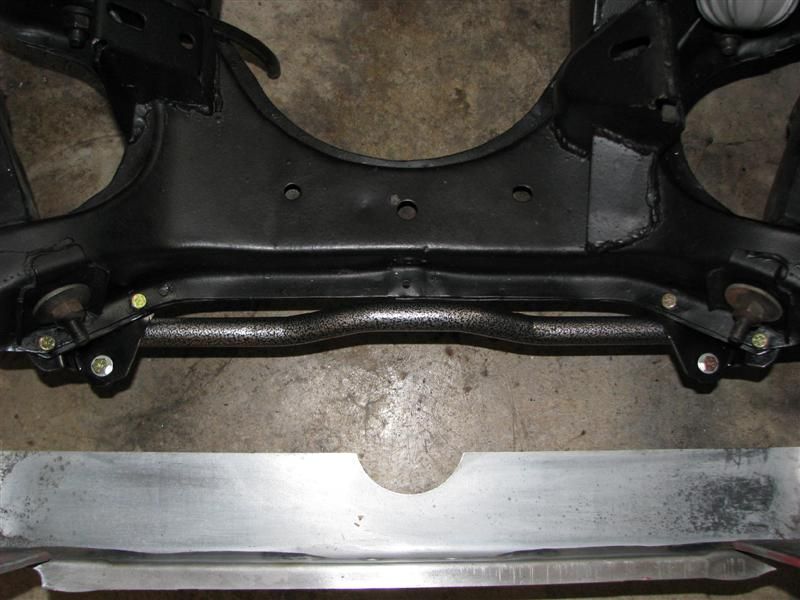
I started by mocking up the brackets that bolt to my K member and that's where I hit my first snag. The brackets lined up okay, but the supplied bolts wouldn't fit through the existing holes in my K member. A quick pass with a 3/8" drill bit through the K frame and the holes were good to go. I touched them up with a little spray paint just so they wouldn't start rusting there. You can see the two mounting holes on each side of the front of the K frame. They are on either side of the strut rod.
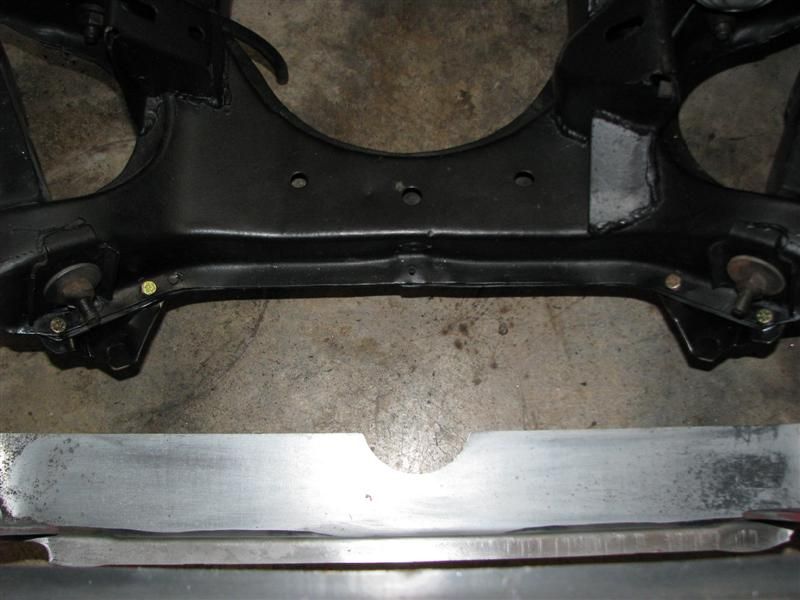
I bolted the mounting brackets to the K member but left everything loose per the instructions so that I could wiggle everything around as necessary if needed. Here's the brackets bolted into place.
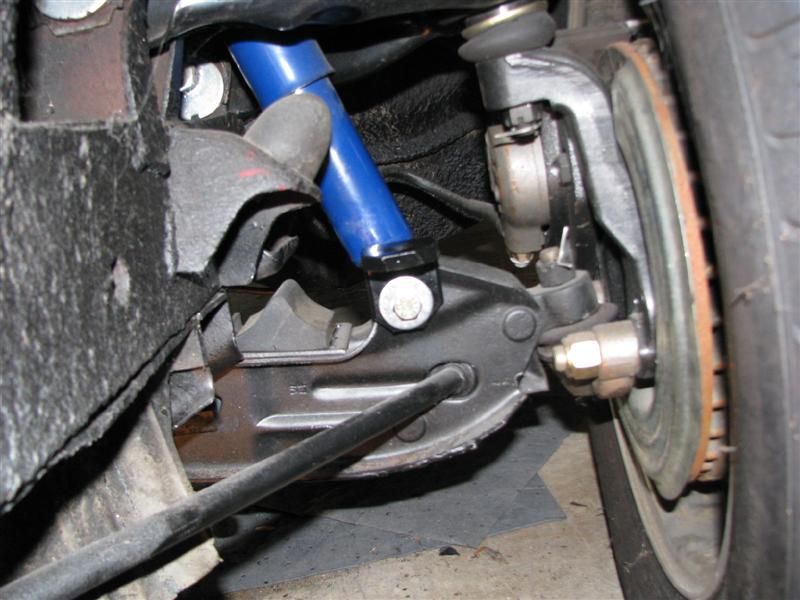
Mounting the bracket to the lower shock bolt was pretty easy. The hardest part was trying to control the expanding gas shock with one hand while trying to push the new bolt/bracket assembly through the hole at the same time. Again, everything was left loose per the instructions.
The rest was pretty easy also. I put the rubber mounts onto the sway bar approximately where they needed to go as shown in the instructions using the lube provided. I had my sway bar end links, rubber bushings, washers and nuts all ready to go. I mounted the bar loosely to the K member mounts which allowed me to slide the bar side to side as necessary to center it. The rest was just assembling the sway bar end links in the right order. It's all in the instructions and looks something like this when done.
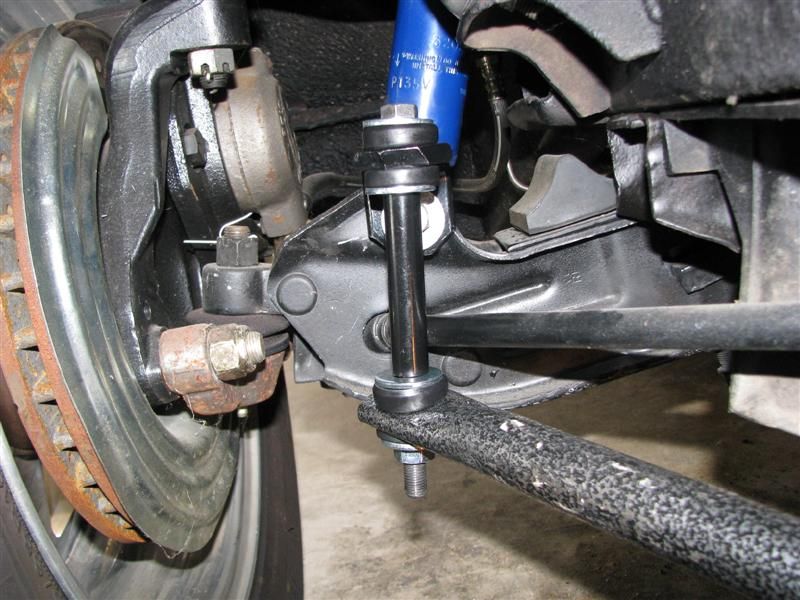
The last step was to go back and torque everything down. Here is one final pic of the bar installed from the top. It should be noted that the nuts for the shock bolts and the sway bar links are self locking nuts that need extra force to tighten down.
Overall, I'd have to give it a 2-3 out of 10 on the difficulty scale. It would have been easier if I'd had someone to help me, or a lift. It took approximately a hour and half to do the job by myself. I hope this helps someone who may be sitting on the fence about installing a sway bar on their car. Unfortunately, I still don't have an engine in my car, so I won't be able to tell you how well it improves the handling characteristics of my car. Hopefully in a couple of months I can update this thread a fill you in on those details.
I picked up this Hellwig front sway off of eBay for $55 cheaper than I could have bought it at Summit so I decided that it was too good of a deal to pass on. It's a 1 1/8" hollow bar and comes with all of the hardware to bolt to my non-sway bar equipped car. Here's how it looked upon arrival.
The first thing I noticed was that the bar was bigger than I had expected, and even though it is hollow it still seems like it weighs quite a bit. I guess I should have put everything on a scale before getting started to see how much weight I'd actually be adding to my front end, but it's too late now. The second thing I noticed was how heavy duty all of the hardware was. Grade 8 bolts were used throughout and the brackets that mount under the lower shock bolt were very beefy.
I started by mocking up the brackets that bolt to my K member and that's where I hit my first snag. The brackets lined up okay, but the supplied bolts wouldn't fit through the existing holes in my K member. A quick pass with a 3/8" drill bit through the K frame and the holes were good to go. I touched them up with a little spray paint just so they wouldn't start rusting there. You can see the two mounting holes on each side of the front of the K frame. They are on either side of the strut rod.
I bolted the mounting brackets to the K member but left everything loose per the instructions so that I could wiggle everything around as necessary if needed. Here's the brackets bolted into place.
Mounting the bracket to the lower shock bolt was pretty easy. The hardest part was trying to control the expanding gas shock with one hand while trying to push the new bolt/bracket assembly through the hole at the same time. Again, everything was left loose per the instructions.
The rest was pretty easy also. I put the rubber mounts onto the sway bar approximately where they needed to go as shown in the instructions using the lube provided. I had my sway bar end links, rubber bushings, washers and nuts all ready to go. I mounted the bar loosely to the K member mounts which allowed me to slide the bar side to side as necessary to center it. The rest was just assembling the sway bar end links in the right order. It's all in the instructions and looks something like this when done.
The last step was to go back and torque everything down. Here is one final pic of the bar installed from the top. It should be noted that the nuts for the shock bolts and the sway bar links are self locking nuts that need extra force to tighten down.
Overall, I'd have to give it a 2-3 out of 10 on the difficulty scale. It would have been easier if I'd had someone to help me, or a lift. It took approximately a hour and half to do the job by myself. I hope this helps someone who may be sitting on the fence about installing a sway bar on their car. Unfortunately, I still don't have an engine in my car, so I won't be able to tell you how well it improves the handling characteristics of my car. Hopefully in a couple of months I can update this thread a fill you in on those details.


