help removing instr. cluster

-

Jakes70Dart

Well-Known Member
Joined
Oct 6, 2013
Messages
62
Reaction score
1
Location
bethany
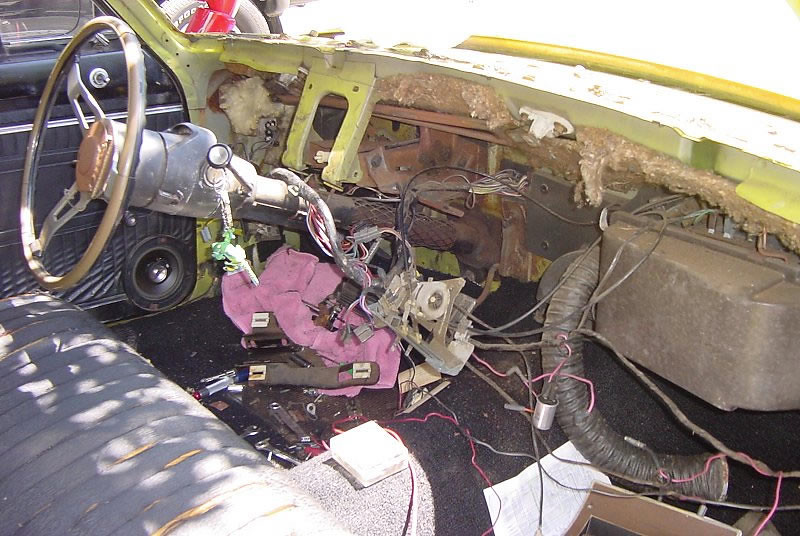
Hey guys been trying to figure out how to get the instrument cluster out to change the wipersand make them work again (seized up) and I disconnected the speedo line but the restof the wires ddon't seem to have enough slack to give me access to the back of the cluster... so if there are any A body guys near central illinois or have any photos or insight to help please do... plus I would pay someone to come redo it for me LOL I'm having a headache with this one, being 6,1 330lbs makes Iit hard to play under the dash:violent1:
 
My 69 service manual (Barracuda) says to disconnect the speedo and the left side electrical connectors by sticking your hand up under the dash. Then you have enough slack to pull the instrument panel out enough to disconnect everything else. I removed my glove box and was able to disconnect the heater/AC connections (but it wasn't easy). Also some folks recommend dropping the steering column but it makes a difference if you have a column shift . I'm planning on removing my instrument panel so I've been gathering info. I was also trying to find a vacuum leak in my heater/AC system so I found out about the glove box thing just the other day.

Treblig
 
I had the same grief, trying to replace the headlight switch in my '67 Valiant. I tried dropping the steering column, to free the instrument cluster. You're right, though - you don't gain much wiggle room with a 3-on-the-tree shifter. I was finally able to get at the switch but it definitely did not feel like the right way to be doing it.

It didn't occur to me to blindly disconnect the connectors behind the instruments, which has got to be the answer. Next time, I'll try that first.
 
When I was pulling the instrument cluster out of my 69 Dart, I could not figure out why I could not get enough slack to pull the cluster more than about halfway out of the dash. Turned out that the wiring harness under the dash going to the right side of the cluster was hanging up right under the center of the dash on a bolt or something (I forget what exactly it was). I used an extra long flat head screwdriver and pushed the harness down to clear that hang up and the cluster pulled right out.
 
kinda dreading tearing it apart any farther... older it is the more can of worms ya open up..
 
Lol dude, drop the column, remove the screws, unplug the connectors and there ya go, do the ammeter bypass while your there, quit being scared. I tap danced all over my 74' like a ballerina, nothing to fear. Put some back into it.
 
If you haven't, take out the 4 nuts that hold the seat and remove the seat. This makes it much more comfortable to get to. This way you will not need to be a contortionist to get to!
 
Drop the column down--- remove the headlight pull switch & unscrew it from the dash.(if you blind pull the connection you will break the plastic connector)
the back side of the dash has "U" shaped clips that hold the harness in place --bend them back & the harness will have more room.

what is wrong with your wipers--- you might be able to fix with out tearing the dash apart. long extensions & a trouble light should get you there.
Lawrence
 
Sometimes it is easier if you get a mirror and a flashlight in there to get a look at things. Can also save you from taking extra/wrong stuff apart when working blind. I got an old yard sale 'make-up' mirror that works good. Its like a 5-6 inch circle. One side normal other is magnified. I originally got it for inspecting my chimney, but great for stuff like this. I have a few of the small mechanics inspection mirrors, but nice to get a bigger picture.
 
On my 73 Dart, I removed the glove box liner and took both wiper assemblies and out through there. Then I replaced both pivot seals (I did one from the glove box opening and my great wife replaced the other one from under the dash) and bushings (got it all from Schumacher)...FYI, something I read about from one poster on FABO was to heat up bushings in pot of pretty hot water (to make them more pliable and then push a needle through the back of them so as to provide a pressure relief spot so bushing can seat properly when pushing them on because if not you will be fighting (and cursing) trying to get it pushed on.....this REALLY helped a lot...just my 2 cents. I did not need to remove instrument panel to do this.
 
I'm 6'1" and close to 300 and the seat removal trick is the best advice here. Drop the three bolts that hold the column to the dash and the three that bolt it to the floor and let it fall down. You don't have to take it all the way out but it does need to be down to let the gauge cluster out. Reach up and pull the main plugs before pulling out the cluster.

BTW: If you are rebuilding the wiper transmission linkages with new bushings and don't want to pull the dash, remove the wiper arms. Use a long extension to take out the two bolts that hold each wiper post under the dash and remove the center nut that holds the linkage to the back of the wiper motor. Go under the hood and remove the three bolts that hold in the wiper motor and remove it. The three piece transmission linkage can be easily fished through the opening the wiper motor was installed in. It can be rebuilt on the bench and installed the same way..throught the wiper motor hole. You'll spend far less time on your back than trying to install the bushings with the linkage in the car.

Oh, and DISCONNECT THE BATTERY BEFORE FISHING OUT THE LINKAGE RODS!!!
 
Hi Jake- I did cluster on my 70 Dart a year ago. I assume that's what you're working on by your screen name? It was a bit of a bear getting the column down far enough to get the cluster to tilt forward enough to get it out. The gear indicator hump was in the way. I kept working it and loosened up everything mentioned above and finally it cleared and came out. It helped to have my teenage daughter hold the column down while I could get my hands on the cluster and finesse it about. Some guys will tell you it was just drop out and others will tell you it's tough. Both are true- depends upon your car and technique a bit.

As previously mentioned, take the fifteen minutes to remove the front seat. Most of that 15 minutes is spend feeding the seatbelts through the seat back. Have two people to help lift it out or you might tear your carpet and gouge the door sills with the studs on the bottom of the seat. I put down a nice piece of foam and it was so comfortable to work on the the underside of the dash at that point I could have easily taken a nap.

I'm really serious about the next part too. As long as you're already tearing into it, take this time in the winter to also take out the glovebox and pull your heater box. There will be a ton of leaves and other crap in there. While it's out also remove the vent tower on the drive's side and with these out you can reach up and give the underside of the cowl a really good cleaning because it is also likely full of debris. After I got mine spic and span, I bought a sheet of rubberized magnetic sign material and cut out a cowl vent cover for my Dart. When I park it at work in the fall I lay that over the cowl and it keeps stuff from dropping in. Repair any other issues with the heater box and reseal it. Check the heater core for tiny leaks. I simply replaced mine not knowing how old it was.

You may also have jute hanging loose. Take the time to glue that back up to the underside of the dash. Pull the radio and the heater control head too.

Check your wiring really good now too and look for anything suspicious. Overheated distorted or cracked insulation. Most cars this age have had somebody hacking on the dash wiring at least once. This is the time to fix and clean-up any wiring issues and to get all the harnesses back up in the proper clips they once were in.

I also repainted my dash at this point as long as everything was off it. That made my interior look so much better. It was kind of the finishing touch.

Now is the time to do all this and you will be rewarded with years of less trouble from these components. Take everything out and off and access is very good from the underside and through the front openings. It looks much worse than it is. The more you take off the easier it is to get to the next item. Just put it all back in the same order. It seems like much more than you probably intend to do at this point but you'll be happy when you're done. Don't forget to clean the dust out of the inside of your cluster lens so the view is clear. If you're not going to repaint, tape up the top of the column with masking tape so that you don't scuff or gouge the paint when the cluster comes out. By the way- after the trouble it gave me coming out, it slid right in without any resistance. Who would have thought.

View attachment DSC_0248fb.jpg

View attachment DSC_0369 em.jpg

View attachment DSC_0368 em.jpg

View attachment DSC_0574em.jpg
 
RobJ, I really like the added gauges in the dashboard instead of hanging under it! Looks much neater,

Taking the seat out and dropping the column helps a lot. I have a plan I call "while I'm in the neighborhood". While I'm under there I repair, remodel or replace anything that looks like it might become troublesome. Doing as much as possible "while I'm in the neighborhood" means I don't have to dismantle it again!

BC

I'm going to have to borrow that from you! That's what I always end up doing and just never had a name for it.

I did a lot of other small things too while I was under there and also replaced all my cluster lamps and repainted the needles while it was out. I replaced the wiper shaft seals and generally gave it all a good once over...or under I guess. I also painted the cluster and the heater control bezels and installed two blue lights under the top lip of the heater control bezel so that I can see the controls in the dark. I buffed the chrome knobs and bezels for the headlight and wiper switches.

I originally had the gauges under the dash and they were in the way of the fuses and the parking brake handle. Plus they were hard to see. At the same time I was trying to hide my stereo somewhere to keep the original look of the dash. I tried everywhere and the only places that really worked were out of the way. My Dart is my driver so I finally just thought- Why am I making it all so inconvenient to use when I will be using it every single day? I just decided to alter the dash and mount the stereo there. At that point I looked at the instruments and got to thinking. I already made a big rectangle hole over here....

The other thing that helped in the decision was that the rim blow wheel was no good and the person before me drilled three holes in the dash to mount a push button horn button. You can see it in the before photo. It was going to be a repair job there or I could put the gauges in that place and get them up and out from under the dash. Two birds with one stone. On the other side of the column I have a voltmeter in the same position. It sits nicely next to the wiper switch. Ultimately, on the fender tag and broadcast sheet it's a generic 318 Dart (not a 340) that I drive every single day and will likely drive until I get too old and then the next person can do what they want with it. People will disagree and I'm good with that because I also like seeing the total original cars but this works for me and I'm digging it.

Again, I had planned to do quite a bit under the dash but after it was all apart and "while I was in the neighborhood", I looked around and made a list of things to take care of which grew as I got deeper into it. It sure is easier to do everything at one time even if the car is down a little longer than planned. Every time you begin to disassemble things on the dash you stand the chance of breaking or scratching something. Best to do it once and be done.

View attachment DSC_0573 fb.jpg
 
Glad you liked it, Rob. It's been an operating principle of mine for a long time, the name just sorta happened.
As you said "...and will likely drive until I get too old and then the next person can do what they want with it."
My car, my money and MY choices and when the car goes to it's next stop, it'll be subject to someone else's choices.

BC
 
tons of fun!!!
7111915891_4d0809fe67_b.jpg
 
Hey cal- so much for taking out the seat for easier access! :salute:

A wet bar with a stock of flexi straws that will reach from a tumbler to your mouth when you're on your back.....hmmmm
 
I have a plan I call "while I'm in the neighborhood". While I'm under there I repair, remodel or replace anything that looks like it might become troublesome. Doing as much as possible "while I'm in the neighborhood" means I don't have to dismantle it again!

BC

I generally do things that way -
I decided to clean up my engine and bay this past summer - turned out to be a big 'neighborhood'

while I was in the neighborhood... I got a gasket kit from DMT to at least do the firewall. Dropped the engine, K and suspension. ended up doing rebuild on engine and trans and complete front end. Painted the bay and replaced or 'refurbished' everything as it went back in.

while I was in the neighborhood...of course some of that firewall stuff is accessed from inside. While it was out, I rebuilt the AC/ heater box.

while I was in the neighborhood...It did not make sense to do that without addressing leaks. Removed windshield and dash. Replace glass and gasket. Replaced dash pad and painted dash. Cleaned up and re-taped all harnesses.
while I was in the neighborhood...cleaned, painted and insulated firewall.

while I was in the neighborhood...replaced bushings and seals in wipers.

After all that, with everything back together I found I still had a leak through the wiper pivot shaft. If you are working on the wiper pivots either replace the bushings, add grease zirks or both...I did get in to the right one through glove box opening this past fall and pulled it to add a zirk, but I think I messed up the seal cause it was too cold and the caulk rope stuff was not soft enough. I will need to get at it again when its warmer.8)
 

Attachments

  • 2013-07-05 16.16.13.jpg
    60.5 KB · Views: 340
Right now waiting on some parts to show up and lately it's been a snow storm here in illinois
 
The wipers are sized up on something so gotta pull em out to get them torched and working again
 
Ok finally got the cluster out and pulled the pivots out... had to completely disassemble one pivot by grinding off the peened washer on the base of the wiper stud and had to braze it back on once I had it turned down on the lathe and cleaned up...now she spins free as a bird...(headache) I was "trying" to read up on doing the ammeter bypass... seems a tad complicated and some people were saying to do the one wire alternator fix too...that part seemed too complicated seeing how its currently a wiring nightmare from a previous owner overspraying every line of wire under the hood..so trying to color trace my lines will be impossible..changed out the voltage limiter on the back of the cluster...need to find one of the black twist light holders too..missing one of them and gotta track down a couple of new bulbs for it also...under the dash was like playing in a razor blade amusement park..
 
-
Back
Top