AlV
Crabs in a barrel
Greetings FABO,
I just installed my brake system (well almost) BUT something isn't right. I'm tied up on a few things and need some help getting oriented to make sure I have the right stuff (I thought I did) and the correct configuration.
I'm working on a 1969 Dart that I converted from 10" drums to K-H up front.
Components:
* All lines are Finelines Products, I ordered all new SS lines (cross overs for the K-H Calipers, 4 Piece front side, and the 2 piece front to rear).
* I picked up a combo 5 port valve from a member a few months back and ditched the original 5 port block that came with the drum setup.
The issue:
All of the assembly went well until I started on the front to back line set. Based on the information from several websites it appeared to me that the correct configuration for disk drum arrangments was the 2Pc front to back line set. However, I cannot couple the 2 pcs. together because I am missing a junction fitting.
Now, I think what I need is the 1 pc. line set because It seems like the 2pc. front to back line uses the hold of block as a connection point for the 2 lines just after the 5 port combo block.
Questions:
1. Do I need the hold off block if I have the combo valve installed?
2. Can I use the hold off block in conjunction with the combo valve or with that cause problems?
3. From what I read it seems as though the 1 pc. front to back was used with the drum setup but I'm wondering if there is any reason why I couldn't use it with my disk - drum set up?
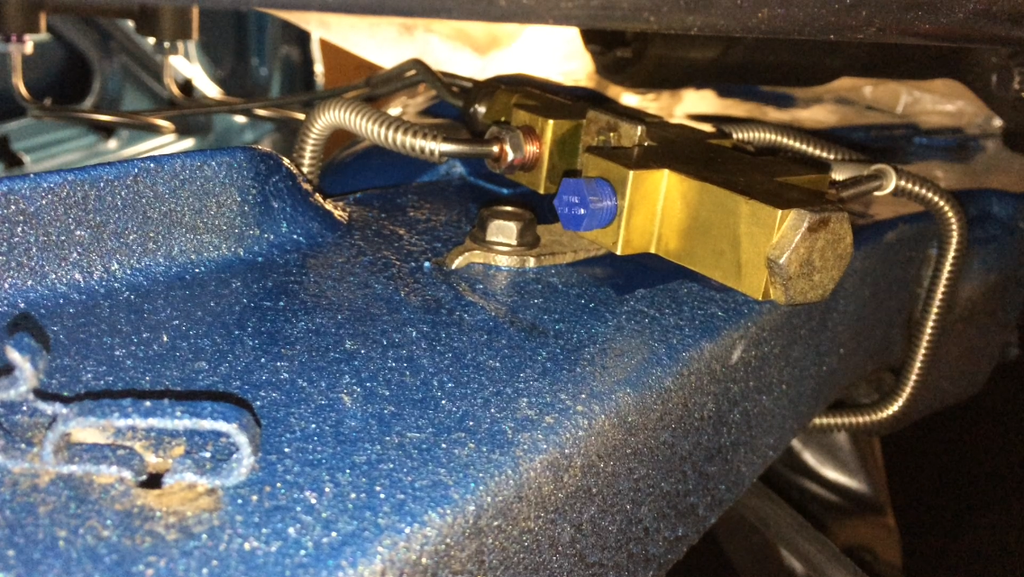
Pictures for reference
My Valve:
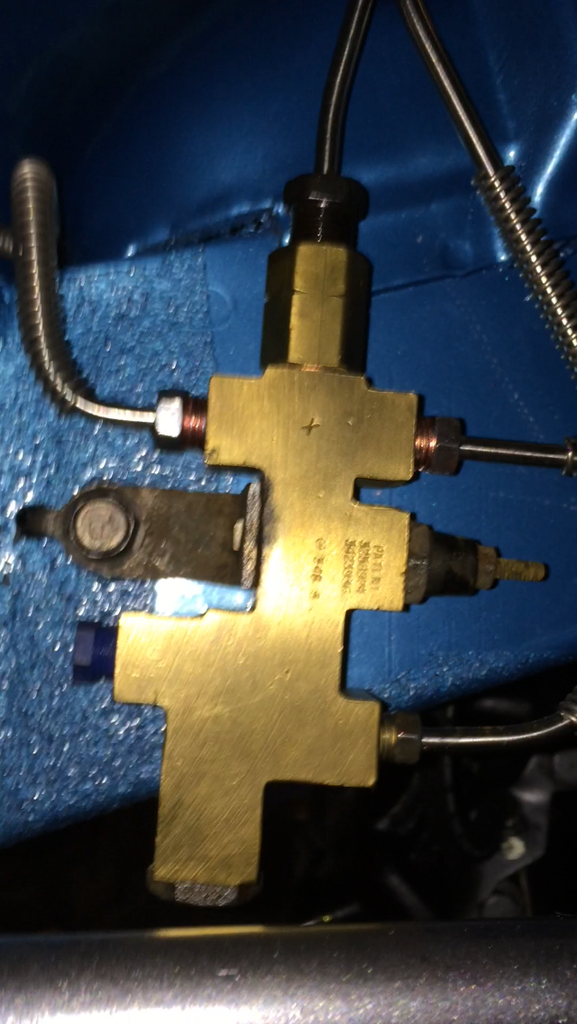
Hold off valve

I guess what it comes down to is, am I going to return the 2pc line for the 1 pc. or am I going to look for the hold off block.
thoughts?
Thanks in advance.
AlV
I just installed my brake system (well almost) BUT something isn't right. I'm tied up on a few things and need some help getting oriented to make sure I have the right stuff (I thought I did) and the correct configuration.
I'm working on a 1969 Dart that I converted from 10" drums to K-H up front.
Components:
* All lines are Finelines Products, I ordered all new SS lines (cross overs for the K-H Calipers, 4 Piece front side, and the 2 piece front to rear).
* I picked up a combo 5 port valve from a member a few months back and ditched the original 5 port block that came with the drum setup.
The issue:
All of the assembly went well until I started on the front to back line set. Based on the information from several websites it appeared to me that the correct configuration for disk drum arrangments was the 2Pc front to back line set. However, I cannot couple the 2 pcs. together because I am missing a junction fitting.
Now, I think what I need is the 1 pc. line set because It seems like the 2pc. front to back line uses the hold of block as a connection point for the 2 lines just after the 5 port combo block.
Questions:
1. Do I need the hold off block if I have the combo valve installed?
2. Can I use the hold off block in conjunction with the combo valve or with that cause problems?
3. From what I read it seems as though the 1 pc. front to back was used with the drum setup but I'm wondering if there is any reason why I couldn't use it with my disk - drum set up?
Pictures for reference
My Valve:
Hold off valve
I guess what it comes down to is, am I going to return the 2pc line for the 1 pc. or am I going to look for the hold off block.
thoughts?
Thanks in advance.
AlV

 rayer:
")


