Offset spring kits???

-

mopowers

Well-Known Member
Joined
Feb 15, 2006
Messages
8,546
Reaction score
4,751
Location
West Sacramento, CA
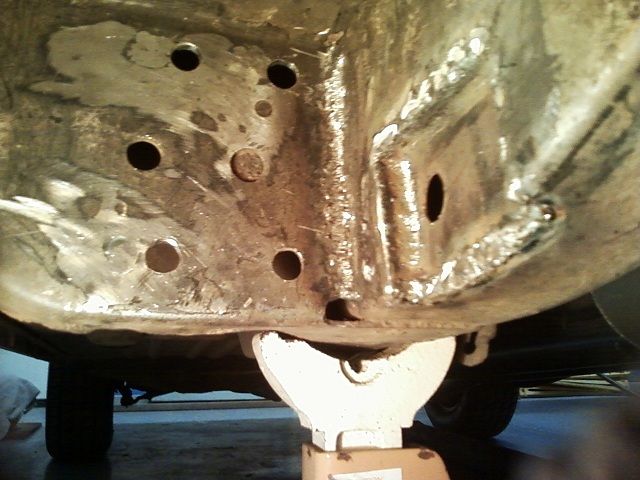
Has anyone relocated their springs 1/2" by just redrilling the holes for the front and rear hangers 1/2" inboard? I'm in the middle of doing this and it seems a lot easier and cheaper than just buying one of Mopar's offset kits.

Also, why does Mopar advertise their kits as a 3/4" relocation, when in fact you can only move the front hanger 1/2" before it hits the frame?
 
I guess I just don't see how they get 3/4" with their 'kit.' There's only a 1/2" between the stock front hanger location and the frame rail. Do the shackles have 3/4" offset? Even if they did, it wouldn't translate to 3/4" at the spring perch.

I just finished one side on my 1/2" move yesterday. I notched the frame for the front hanger bolt and just redrilled the holes to make the hanger flush with frame. Then drilled new holes in the rear hanger to utilize the stock holes.

Sure beats the $220 the Mopar kits sell for. I can't believe no one else does this.
 
Drilling holes where the hangers mount will result in figure 8 like holes and weakened structure.
For 3/4 offset some cut a hole in the frame rail, others cave it in with a hammer, either works. Shaved hardware helps too.
 
For 3/4" of offset, you'd have to cut a hole big enough for the whole hanger to slide into the frame 1/4". At that point the frame structure would be seriously compromised.

When I re-drilled, I welded up the old holes and cut the overlapped section of frame rail spot welded to the piece the hanger bolts to, so the hanger butts the frame with no interference. Then I just welded that joint to maintain the structure. I'm really surprised no one has done this?!

I bought a set of used 3/4" offset spring hangars for an a body . the guy said he didn`t like the way they fit his car.(got them dirt cheap, 35 plus shipping if I remember right)) the bolts were offset enoughe to get 3/4 w/ the existing hole in the frame elongated just enough to get the front hangar in, it changed mine just 1/2 hair shy of 3/4", the back ones were offset exactly 3/4, and I made the pads exactly 3/4, worked like a charm .
really didn`t help that much on tire clearance tho! ----bob

So, are the front hangers offset at all where the front spring eye is, or are the mounting studs just moved over?
 
The mounting studs are in the standard location.
The front spring eye is moved over. The bracket itself is offset for the front spring eye.
The rear shackles are moved over with a bent "S" shape.
These two mods move the spring over requiring the pad on the axle to be modded or moved over. The centering locating pin has moved inboard.
 
Well, I decided against paying for the 'kit.' I was able to get a 1/2" more clearance just by redrilling the holes, and notching the frame for the head of the hanger bolt. There's also a piece that folds over and spot welds to the frame that I removed and just welded it back straight to the frame.

The back side was even easier. Just had to weld up the existing holes in the hanger bracket and redrill them 1/2" over. You can utilize factory holes for this.

0213131906a_zps505694d4.jpg


0213131906_zps6be1946a.jpg
 
I have a set of new offset shackle brackets for sale if youre interested.


NOW you tell me... haha! It's cool; I just moved the rear hanger as close to the frame as I could. I have about 1/4" between the shackle and the frame. It bought me a 1/2", so I'm happy. All this to make sure my 255/60/15s don't rub.

Thanks though.
 
I did not want to hack up the frame or even drill it. Putting 4 new holes in the frame bracket would be cause of concern for weaking the area.

I went with the DR DIFF kit.

Right up against the frame, no drilling and 4 spring height settings.
2 on the bracket and 2 additional if you swapped side to side.

Great kit!!!!

I was going to buy his kit, but he was out of them. He actually gave me the idea for what I did.

I drilled 4 new holes in the frame, but welded up the old ones. Did that weaken it?
 
I was going to buy his kit, but he was out of them. He actually gave me the idea for what I did.

Cass is A+ in my book. not out for the buck, but just to help the mopar community. He told me he has like 3 or 4 mopars, just doesnt have time to put into the projects. I'd love to see his cars up and runnin someday :D
 
You wasted your time notching the rail for the nut. You can put the hanger flush against the rail. You just need to enlarge the hole on the inside of the rail . Mount the hanger with out the spring using the four studs holding it against the rail. Then put the spring in place and install the bolt through the enlarged hole on the inner side of the rail Then put the nut on the outside of the hanger. The large bolt will also hold the hanger against the rail if you do not enlarger the outer hole in the rail.

The nuts that are welded on the off set brackets were a factory screw up. But it would have cost to much to recall them after it was discovered. Wth the nuts rewelded on the outside It was a slip in and drill one hole app. Slide your factiory hangers in and see for yourself. No brainer. My duster was notched for the off sets. Now I have to fix the slots they cut in the rail. I will use the large bolt to hold the to inside of the hanger to the outside of the rail. If some don't understand what I am saying I can take some pics.

Remember to check the hangers to make sure they are square with the chassis. These mounts on the car are not always square and make for a uneven axle location. I had to move my spring on my one car back 1/2 inch on the pass. side. using longer studs and a spacer. I could the line lock the car and it would stay straight in the smoke box without turning the wheel. Before making this adjustment it would always want to spin around doing a burnout. Using the holes on the bottom of the rail and comparing from side to side you can visually see if one side is back farther then the other if its a big difference. It is very rare to see a perfect body. Unless they were Race "bodies in white" from mopar

Yeah, there are several ways of doing it. I just didn't want to enlarge the hole big enough for a 5/8" socket. Plus, it really didn't take that long to cut the frame, flip the cut piece and re-weld it. Just a different way of doing it, that's all. I also didn't want too many threads of the bolt riding against the inner sleeve of the bushing.
 
Cass is A+ in my book. not out for the buck, but just to help the mopar community. He told me he has like 3 or 4 mopars, just doesnt have time to put into the projects. I'd love to see his cars up and runnin someday :D


He's definitely a good guy! I buy from him whenever I can.
 
He's definitely a good guy! I buy from him whenever I can.

don`t understand drilling holes in the frame, I elongated mine w/ a rotary file, no big hole nodrilling, just no more than nessesary/-----like I said, worked like a charm, my new dana 60 w/ the pads weled on by others, fit like a glove,------ 3/4"--------------------------bob
 
don`t understand drilling holes in the frame, I elongated mine w/ a rotary file, no big hole nodrilling, just no more than nessesary/-----like I said, worked like a charm, my new dana 60 w/ the pads weled on by others, fit like a glove,------ 3/4"--------------------------bob

Nice! That's a good idea! Can you do me a favor and measure how far apart your springs are at the perches??
 
-
Back
Top