The I'm-Learning-As-I-Go 1965 Valiant Post

-
I don't see where it would hurt to lube the UCA bushings at all. I have never rebuilt a mopar suspension,but from what I have read and been told a lot easier than a GM suspension which I have done.

The home made tool thread I will start you will be surprised how many members here do have different ways to make tools.

http://www.forabodiesonly.com/mopar/showthread.php?p=1666916#post1666916

Here is one I know I will need and you might also.

http://www.forabodiesonly.com/mopar/showthread.php?t=166811
 
I'm by no means a real car mechanic. Some guys have built a ton of mopars and taken these cars completely apart and put em back together. The only real mechanical experience I've had is working in a nonprofit bicycle shop for kids in a low income neighborhood. Lots of our tools were homemade and we'd often put together bikes with all the wrong parts and find some way to make the tools we had (what wasn't stolen) work for us.

I'll contribute what I can - but honestly, I'm just making it up as I go along.

Some tools, I think, can't really be made unless you've access to machining equipment (and have the know-how to use it). And some tools have to be bought, just simply because they perform precision work. IMO, pressing stuff in isn't really a big deal.

That said, are you guys lubing up your UCA bushing shells (the metal part) before pressing them in? It was kinda rough going in, and having lube on the metal might be a good anti-seizing thing to do in case they ever need to come out.

Yes,lube em up. I use copper never sieze,but Im sure anything would be fine.

Dude,your what hot rodding is all about! Making do with what you have is the essence of hotrodding,not these high dollar rigs you see here. Anyone can open thier wallet,but it takes true genious to do it without big $$.

Congrats!! Your a gear head!!
 
Modified my UCA bushing press design a little.

Threaded 2 nuts closer to the middle of the threaded rod, and counter tightened / loosened them against each other to lock them in place. This prevents the nuts from loosening up.

mattsvaliant00031ucabushingpress.jpg


This time I reversed the wrenches. Adjustable on the "fixed" end (on the outside of the A arm), ratcheting wrench on the inside. I tighten on the end opposite the fixed side, this ensures I can just slide the rod out without further trouble.

mattsvaliant00032ucabushingpress.jpg


This is my carpet bushing press. I'm leveraging my body weight against the wrench I'm using to tighten.

mattsvaliant00033ucabushingpress.jpg


All in!

And I cleaned up the spindles... Woot!

mattsvaliant00034spindles.jpg
 
In a recent mopar action magazine,I read an article which included some really good info on urethane offset upper control arm bushings. Made in autralia by Peddars suspension,here is the websight.

pedars.com.au

The part # is;EP6215. This is a set of 4 bushings
 
Small update.

Decided to forgo all the Chinese crap from O'Reillys. I'm figuring that I only really want to do this suspension upgrade once, and not have high-stress areas catastrophically fail on me. Getting anything to Hawaii becomes a bit of a beast when it needs to be shipped, and luckily, Amazon offered free shipping on US made Timken bearings, Raybesto flex-line hoses, and MOOG offset bushings.

You have to be real careful because some of the O'Reilly stuff is labeled MOOG, but is made in China. So anyway, on to the update.

I made a new press to push out the standard UCA bushings.

mattsvaliant00035ucadejavu.jpg


Needed a larger diameter pipe to accommodate the extra wide flange on the outside of the bushing. Used the same concept to put it in to push it back out, needed to buy a few extra large diameter washers. Total carnage at Home Depot, $5.21.

I laid both arms flat on the ground and marked a line where they met, to give me a rough reference line where to aim the arrows.

mattsvaliant00036ucadejavu.jpg


Front bushings, arrow away from the car.

Rear bushings, arrow toward the car.

Dimples on the UCA mark the front.

mattsvaliant00037ucadejavu.jpg


Aaand they're in! Definitely a lot easier to push them out and put them back in now that I have a good method and process to do it.

So now that the major pieces are together, I started to unbolt the passenger front suspension today.

Started by taking off all tension on the torsion bars and removed the shock. Used the floor jack to support the whole assembly. Removed the drum brakes except the backing plate (nuts were a little stubborn, so got a good soaking of PB Blaster). Loosened, but did not remove, the UCA cam bolts. Swung the tie rod out of the way and tried to take the nut off the strut rod where it meets the LCA...

mattsvaliant00038unbolting.jpg


...and it all came to a grinding halt. Various leverage devices were attempted. Breaker bar felt close to snapping.

It's days like this I wish I could afford a 1/2" impact wrench.
 
Very nice! Your 4 door Valiant is identical to mine. I have a white 65 4 door Valiant with light blue interior. I'll post pics later. The only difference is mine has a 273.
 
Haven't posted in awhile...

Started work on reconditioning the rotors. They had about 40 years of oxidation and crust on them.

mattsvaliant00039preppingrotors.jpg


Brought the rotary tool back and and gave it the same treatment as the drums....

mattsvaliant00040preppingrotors.jpg


And painted them...

mattsvaliant00041preppingrotors.jpg


And back from O'Reilly's, drums and rotors freshly turned. Put a light coat of grease on the braking surfaces until I'm ready to install the calipers.

mattsvaliant00041rotorsturned.jpg


Yanked the torsion bars with my homemade tool. Broke about 3 of them. Now I know why they make them out of metal. The best one was made out of a pair of 2x4's with the groove for the torsion bar drilled perpendicular to the grain.

mattsvaliant00042torsionbarremoval.jpg


Yanked UCA's, knuckles, lowers, strut rods...

mattsvaliant00044allout.jpg


Repainted the strut rods...

mattsvaliant00043strutrodrefreshing.jpg


Everything's out.

mattsvaliant00045allout.jpg


Some goodies came in the mail... Thank god for Amazon and their free shipping to Hawaii.

mattsvaliant00046wootcalipers.jpg


mattsvaliant00047wootmaster.jpg


Not crazy about the phenolic pistons in the calipers but I figure since it's not going to be a daily driver it'll be fine for now. Hopefully by the time they go bad there'll be some nice replacement stainless pistons. Anyone got a source of these for 1976 A body calipers?

After pressing the washers on the MOOG offset UCA bushings, I realized the arms wouldn't fit on the UCA camber bolt mounts. Darter6 mentioned that there might be a bit of a "crush" that develops over the years from the torque put on the camber bolts, so it led to this tool to spread the mounts a hair so I could get the UCAs in.

It's a simple hex bolt with a nut on each inside side of the mount. One wrench is used to hold the bolt in place, the other wrench turning one nut counterclockwise to open up the space. Little bit of a trick I figured out on spreading old steel bicycle frame dropouts to fit newer (and wider) style hubs. The press ensures that it spaces both sides evenly. And I figure that whichever side got most of the "crush", it'll likely uncrush in the same amount and side.

mattsvaliant00048ucamountspreadertool.jpg


Uppers, lowers, and knuckles in.

mattsvaliant00049boltedup.jpg


More later.
 
very talented work you are doing i love your home made presses for the bushings....Great Job!!!!
 
Right on! You go Matt! Really enjoy the ingenious method's you come up with. Simply using the ole grey matter instead of spending a zillion dollar's is the way to do it.

After seeing your prior post about the 2" chunk of pipe and allthread,I was inspired to pick up some allthread,washers,nut's and bolt's. I have an old chunk of pipe I cut out and replaced,but with a bit of sand blasting it'll be nice and clean again!
 
mattsvaliant00051torqued.jpg


Torqued everything down. Greased up every zerk. The only thing I've left untorqued are the tie rods, as I'll need to adjust it a bit in order to be able to drive it down to the alignment shop.

Started prepping the rotors - cleaned and regreased the races. Originally bought a set of Chinese-made wheel bearings, but figured that it would be safer to equip high-stress high-heat areas like bearings with American stuff. So returned the Chinese-made "National" "Moog" bearings to O'Reilly and ordered a complete set of Timkens (L68149 - inner bearings, LM11949 - outer bearings) through Amazon. Ironically, the better bearing came out cheaper - with free shipping to Hawaii. Rock on, Amazon.

So put the inner bearings in, and seated the seals with a 2" PVC piece of pipe. Once seated, I pushed it all the way in with a piece of wood a few gentle taps with a punch.

mattsvaliant00052wheelbearingsseals.jpg


And then mounted the rotors, outer bearings, washer, nut, cotter pin (not pictured):

mattsvaliant00053wheelbearingsseals.jpg


For the tightness of the nut I used Tom Condran's advice - increase tension until bearings are seated with no play, and then tighten a skosh more.
 
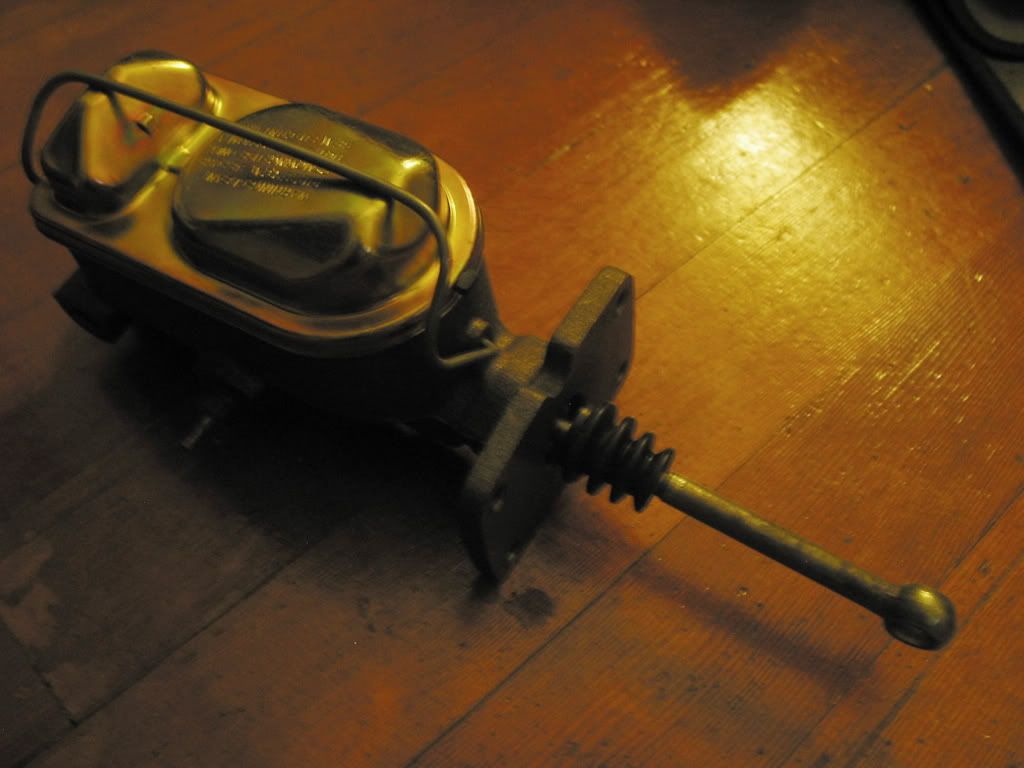
Onto the master cylinder!

I salvaged the old pushrod out of the single pot drum master, stretched new rubber grommet over the end of the pushrod and snapped it into place on the new piston. Incidentally, removing the old pushrod was a ***** - I ended up hacksawing and pliering (is that even a word?) the aluminum piston to ****.

mattsvaliant00054mastercylinder.jpg


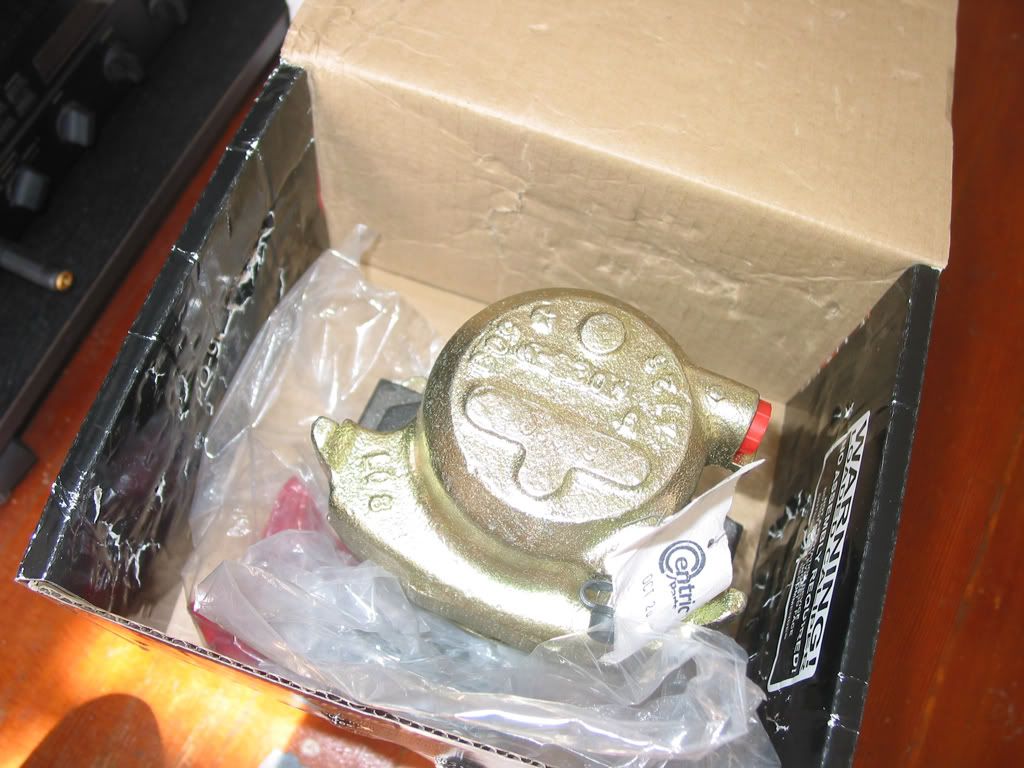
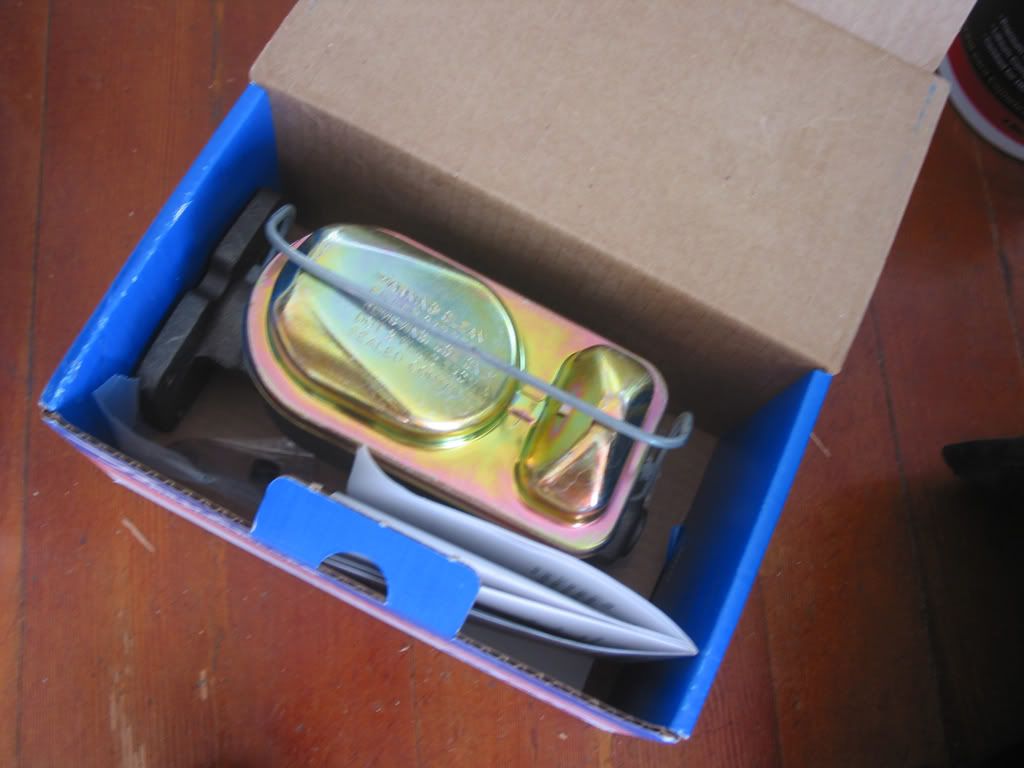
When I test fit the master, I noticed that the mounting plate has less surface area than the original master because the later masters don't have the bracket that ensures the piston stays in the master where it belongs. So there's this big gaping hole in the firewall above the new master. I wasn't too keen on all kinds of hot gasses coming into the car via the hole in the firewall.

Condran suggests tapping two new holes so you can fasten the old piston-retaining bracket to the back of the new master; however, I didn't have a way of tapping new holes, and even if I did, it presents a couple of problems:

(1) You can't position the bracket the same way as the original (as to cover the hole in the firewall) because there's literally no material to tap, and

(2) If you reposition the bracket then you have the big hole in the firewall.

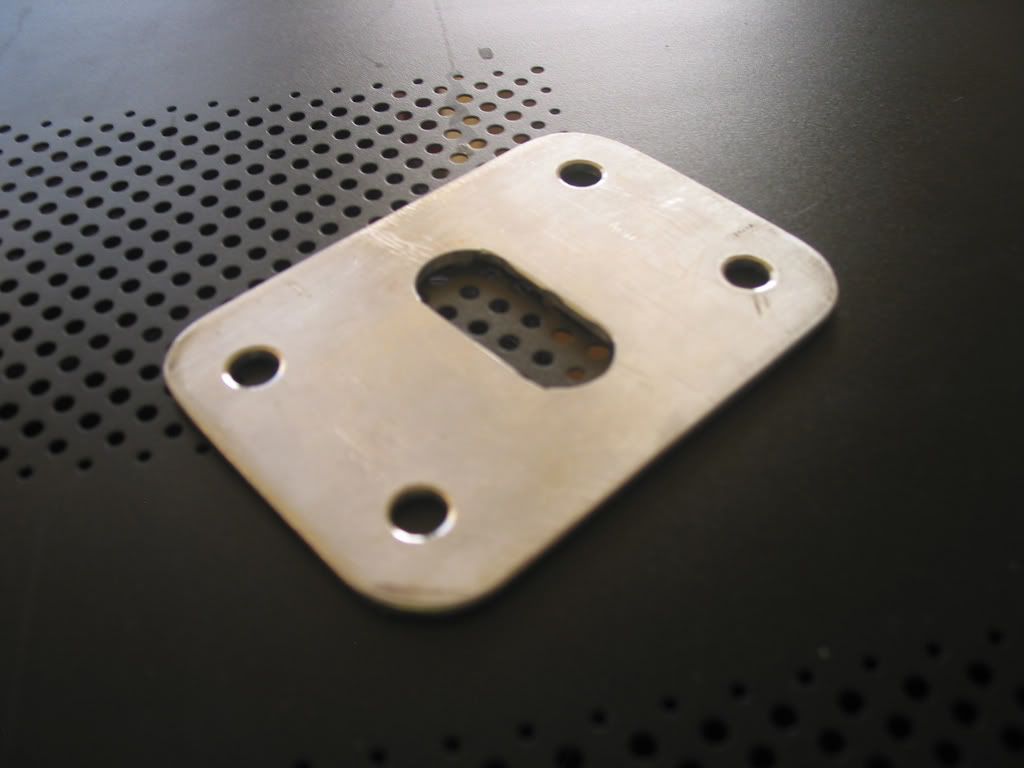
I didn't like either solution, so I came up with another idea. I'd make a secondary backing plate that would mount to the firewall, with a slot cut in the center just large enough to allow the pushrod to pass through, but prevent the piston from backing completely out should the snap ring retainer decide to come out.

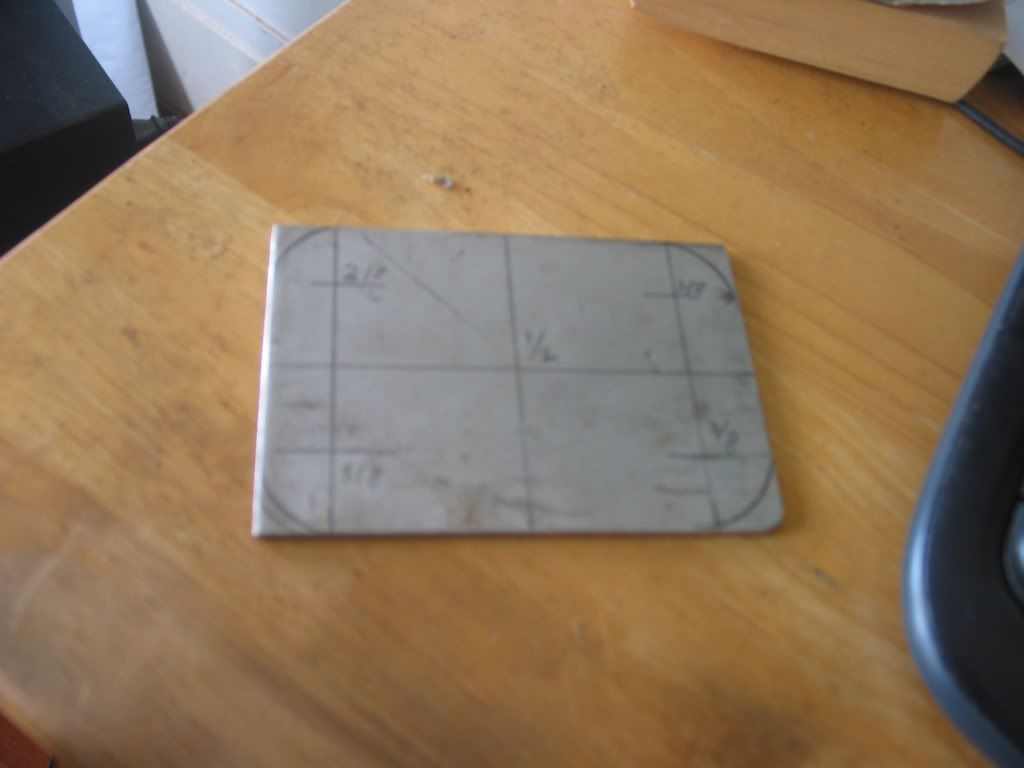
So got a piece of 1/8" stainless steel plate that a friend donated to my cause (Thank you Dave!) and traced the following design:

mattsvaliant00055mastercylinder.jpg


And using some cobalt steel bits, a metal working step drill bit (pricey!), a buttload of oil, a bench grinder, various metal files, and a ton of patience, crudely fabricated the backing plate:

mattsvaliant00056mastercylinder.jpg


(Definitely one of the perks of working in a tool store - discounts up the wazoo)

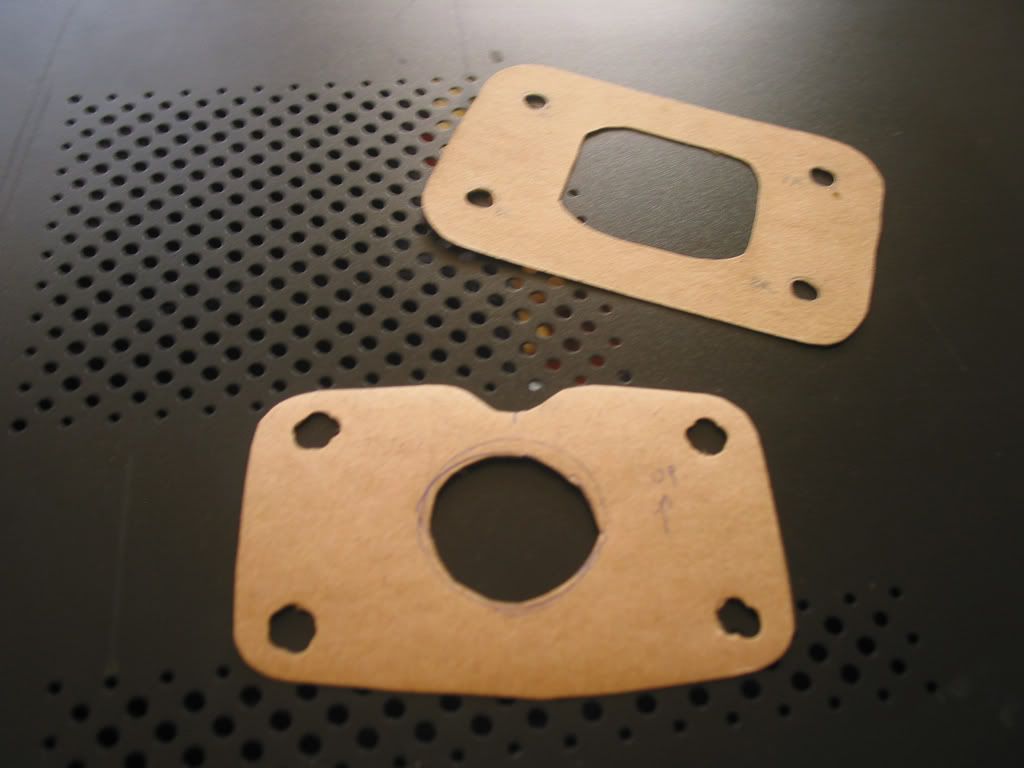
And made some custom gaskets out of gasket material:

mattsvaliant00057mastercylinder.jpg


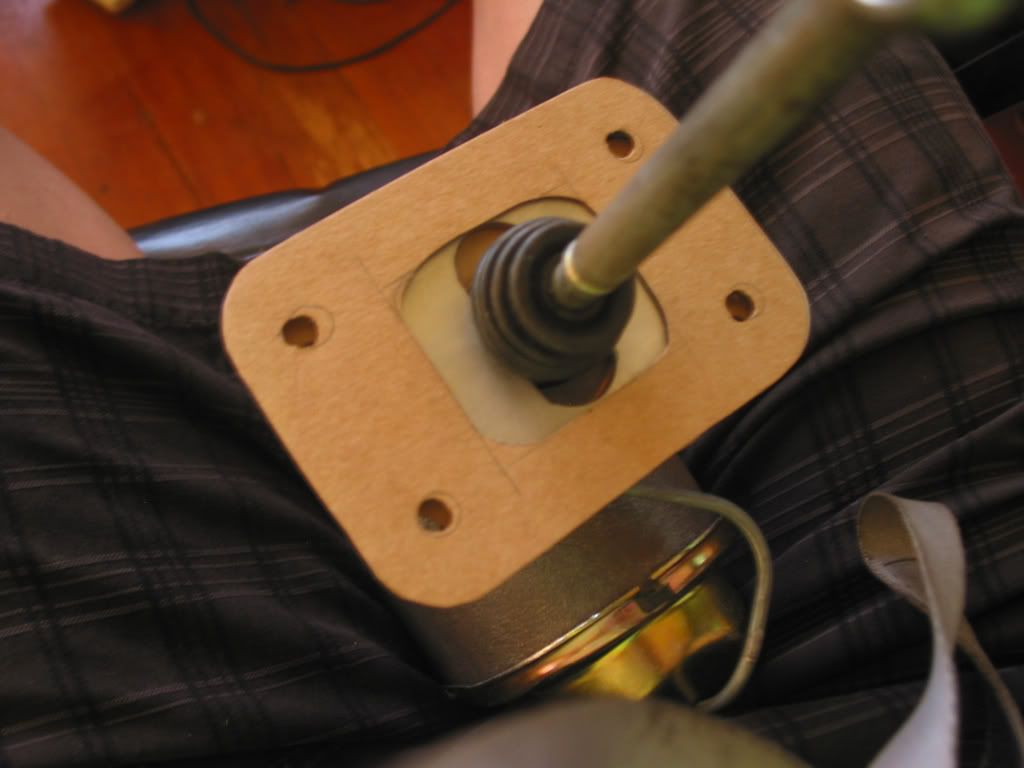
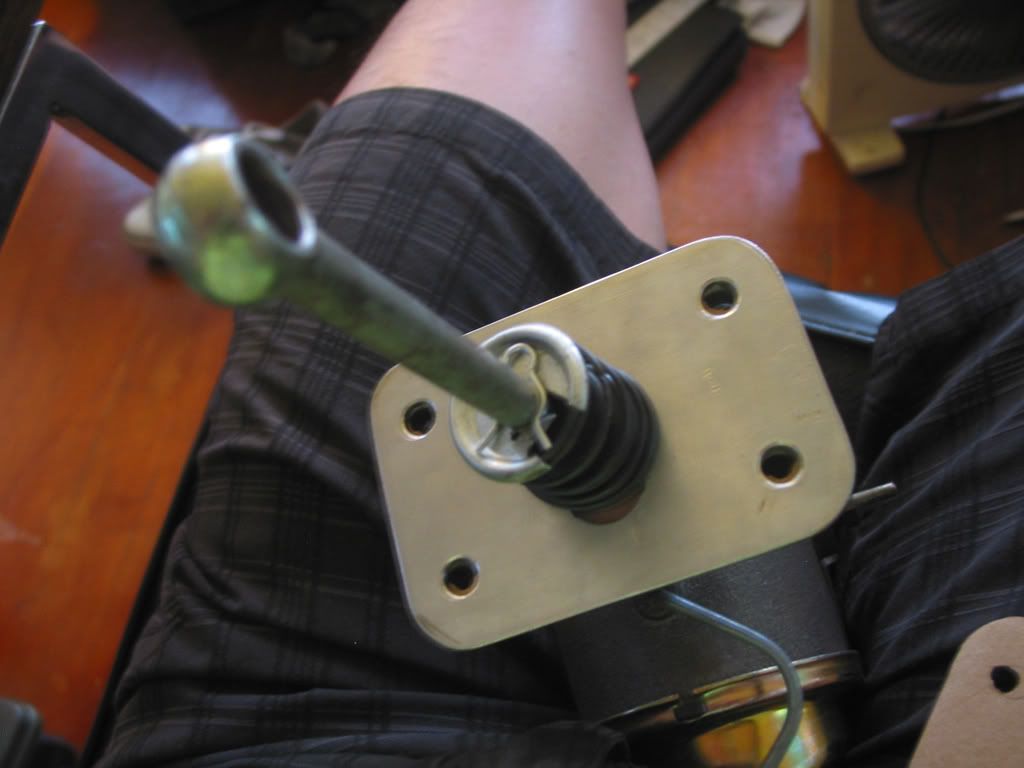
Put it all together...

mattsvaliant00058mastercylinder.jpg


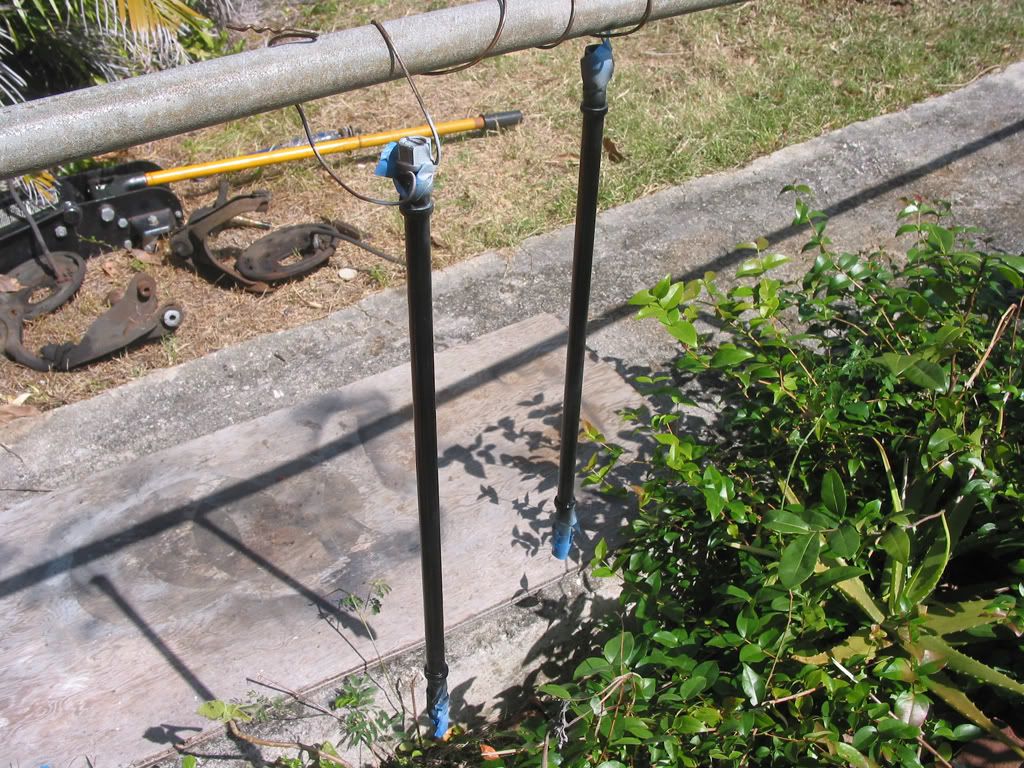
Put the spring, rubber boot, and spring retainer on. Did not like the way the spring retainer only had the bendable tab that keeps it "locked" on end of the pushrod, so I added a small locking pin that fits right in the groove to keep everything nice and seated.
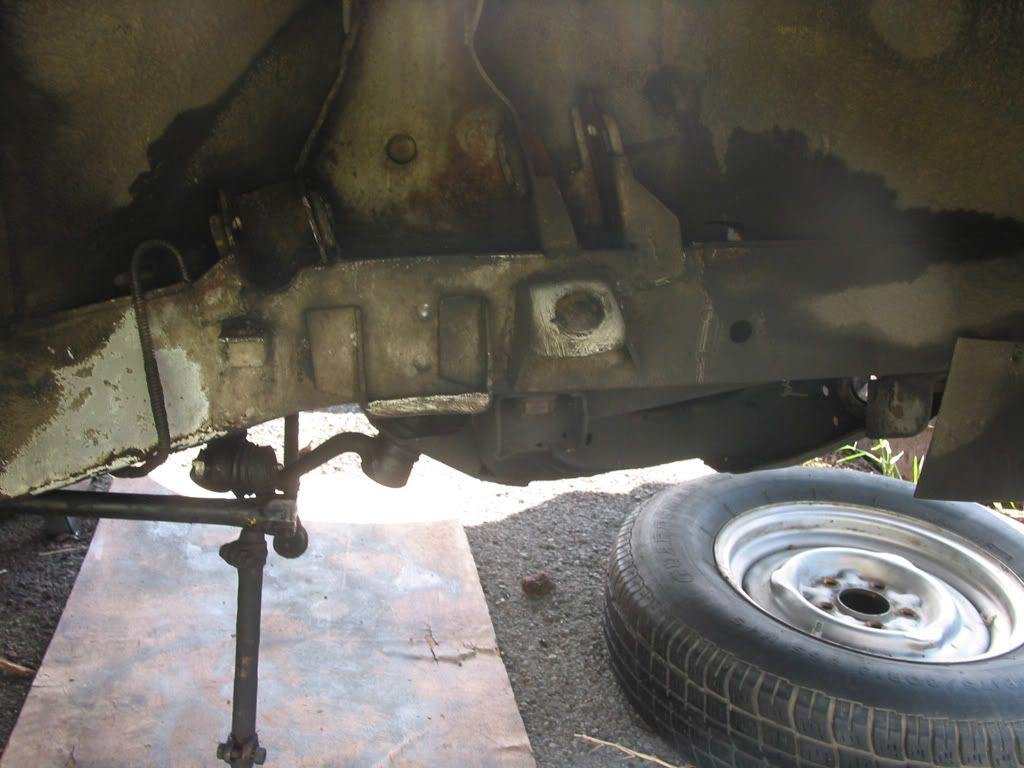
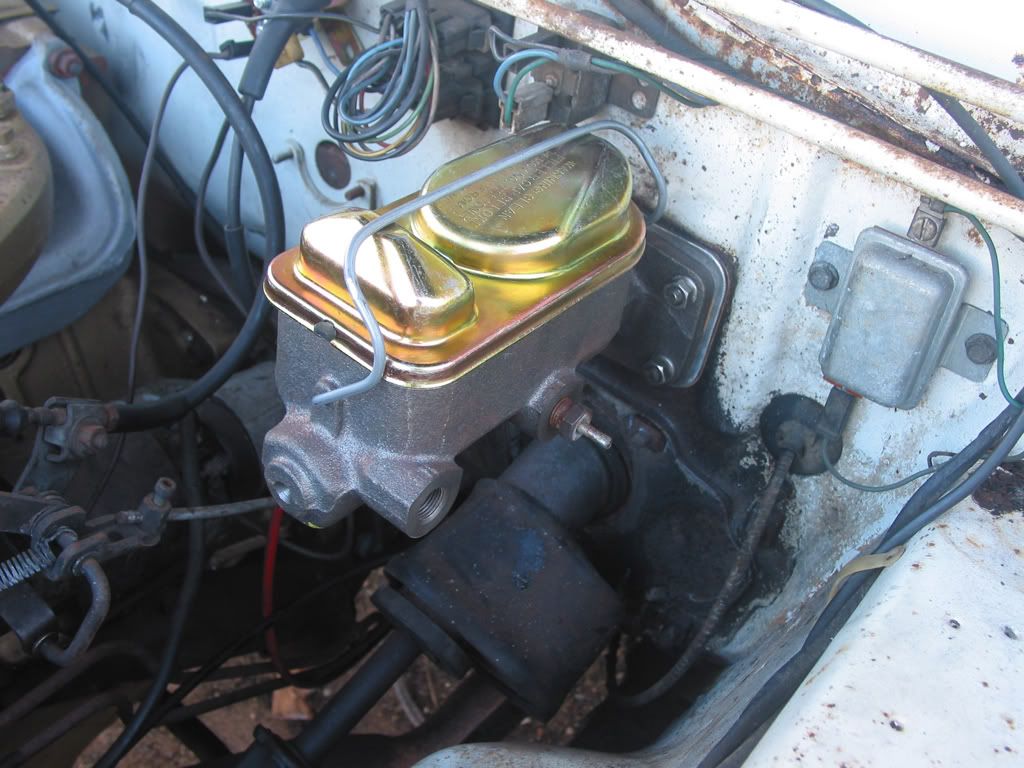
mattsvaliant00059mastercylinder.jpg


It's in!

mattsvaliant00060mastercylinder.jpg
 
This weekend scored a set of 4 used 195/70R14s. Got them for less than a third of the retail price, and they still have 95% of their tread left. They cleaned up quite nicely. Just wanna thank Dave Hammock for giving me a ride out to Kaneohe to acquire this set.

mattsvaliant00061wheels.jpg


I'm starting to mock up the brake lines, but it's an awful bit of a beyotch to get under the car and run unbended line to make sure everything's all nice and tight. Since I have the new tires, I'm going to put the back wheels on so I can jack up the front nice and high. The driveway my car sits on isn't quite level so I don't feel completely safe putting the nose up high on 4 jack stands.

Hit the drums with brake cleaner to get the protective film of grease off the machined surfaces and mounted the drums...

mattsvaliant00062wheels.jpg


Cleaned up the lug nuts using wire brushes and vinegar (the brushes scrape away the layers of surface rust, and the acid in the vinegar neutralizes the rust chemically)...

mattsvaliant00063wheels.jpg


mattsvaliant00064wheels.jpg


Mounted the back wheels...

mattsvaliant00065wheels.jpg


And voila!

mattsvaliant00066wheels.jpg


She's beginning to look like a car again. More later!
 
Let down the back so I could get the front up higher...

Today was a great day to work on the car. Sun was obscured by clouds, no rain - and it stayed like that ALL FRIGGIN DAY. WOOT

So I went to work on the brake lines. I bought about 25 feet of 3/16 copper nickel brake line, thinking it would be enough. But because of my noobishness I did the lines. And then redid the lines. I wanted it fairly tidy and I had to figure out a good place to stick the Wilwood proportioning valve.

BTW... Getting the hard lines up around the frame rails and into the engine compartment and across the firewall is a B I T C H with the engine in the way... you guys make it look easy! And trying to figure out a good way to measure and bend the line is both a pain on and off the car. But on the car turned out to be relatively easier.

So pardon my amateurish line bendy techniques...

mattsvaliant00067lines.jpg


mattsvaliant00068lines.jpg


Not super crazy about how close the line gets to the UCA. Mental note to self, may need to make a bracket in the future, or at the very least come up with a better solution....

Front lines by the master...

mattsvaliant00069lines.jpg


Mounted the proportioning valve near the back end of the torsion bar...

mattsvaliant00070lines.jpg


mattsvaliant00071lines.jpg


Taped up the flex line ends, to keep out the Hawaii weather and the little critters that like to hang around my car...

But now the line I made to go from the master to the prop valve is too short. So I'm going to have to remake it.

Looks like I'm going to need more lines.
 
the work you are doing on the lines look's awesome, I worry if copper line is strong enough for the pressure of the braking system but the work you have done look's fantastic!!!!
 
Brake line is just fine! That stuff is stiff,and a real ***** to bend. I'd use a little heat on the pipe,as it bends much easier. Gotta wear gloves though!
 
i thing it´s nothing copper line it´s Cunifer CN102 ( Copper-nickel brake line)

yep it's cunifer... good stuff. you can make most of the bends by hand, but it looks a lot cleaner if you use a pipe or something with a radius on it.
 
Yes Sir, at my fish i've installed the same material, you can make easyer most of the bends by hand

best staff ever for brake lines

I wish you alle the best for your brother
 
if that is the case then I want some for my next build, my thumbs still hurt from the last car I bent brake lines for,I have the tubing bender and it just doesn't do the job I can do by hand. will it hold paint well? i like mine to look like painted steel
Yes Sir, at my fish i've installed the same material, you can make easyer most of the bends by hand

best staff ever for brake lines

I wish you alle the best for your brother
 
Had to do errands today but when it was sunny for a brief period I put the calipers on.

mattsvaliant00072rotorscalipers.jpg


Feels like forever since I started this project. And it's finally coming together.

I still need more line so in the meantime I'm starting on other stuff. Started prepping the carb today. More later.
 
So far so good Matt. I remember beofre you started,and your doubt's. Look at you now! All you have achieved with VERY little $$,and just using your God given brains instead of throwing money at it.

WELL DONE MY FRIEND!
 
-
Back
Top