You are using an out of date browser. It may not display this or other websites correctly.
You should upgrade or use an alternative browser.
You should upgrade or use an alternative browser.
1969 Dart Street/Strip (Re)Build
- Thread starter clinteg
- Start date
-
Update!
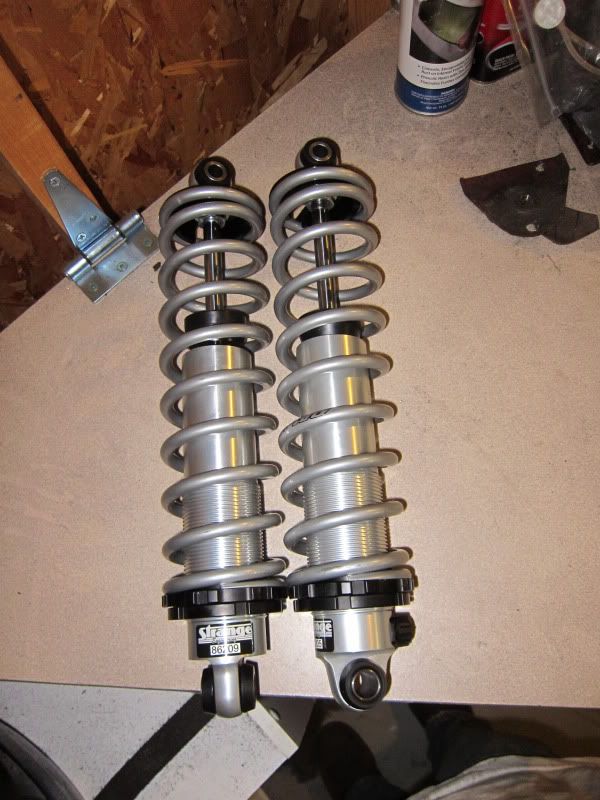
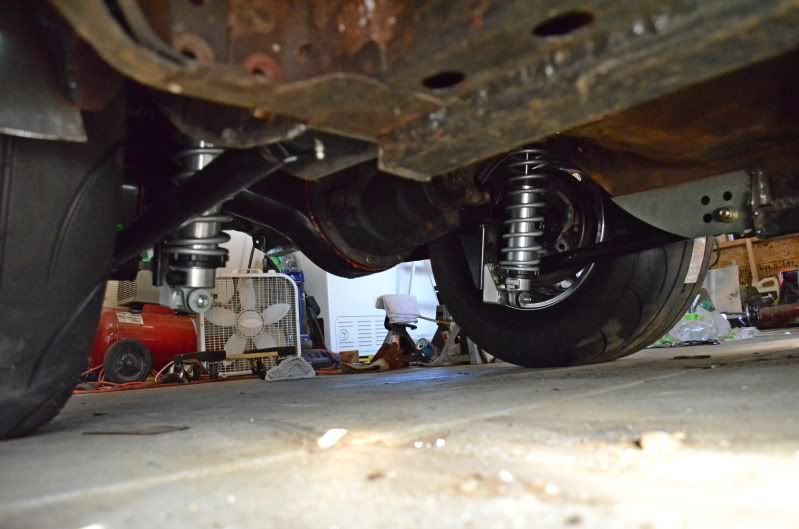
Here's the Strange shocks with 130lb QA1 springs that I'll be using.
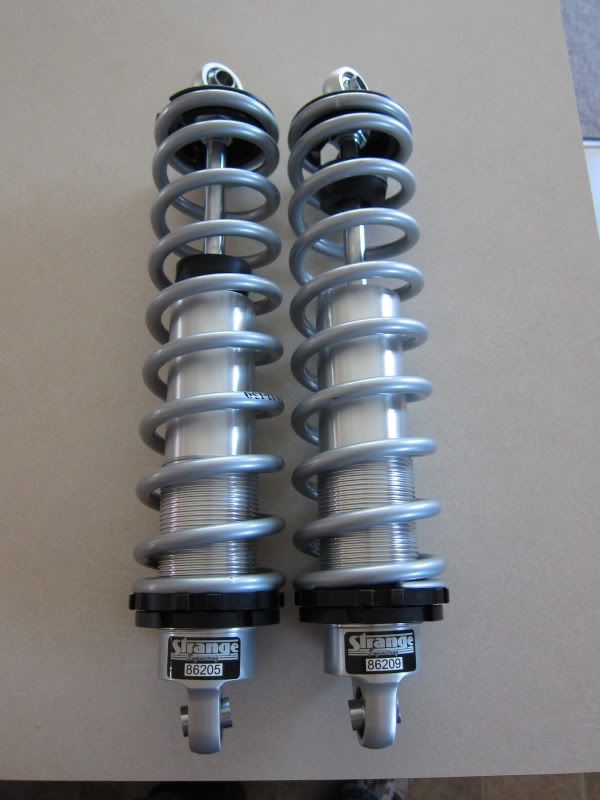
And here are the shocks with the bearings changed out for poly sleeves.
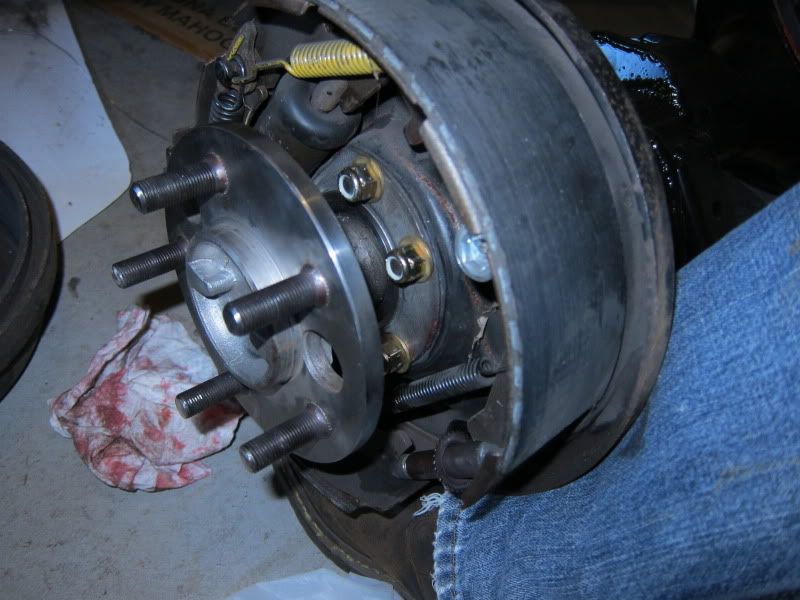
Had the shop TIG weld the studs so that I don't have any more worries with the studs spinning again. What a nightmare that was for a little bit!
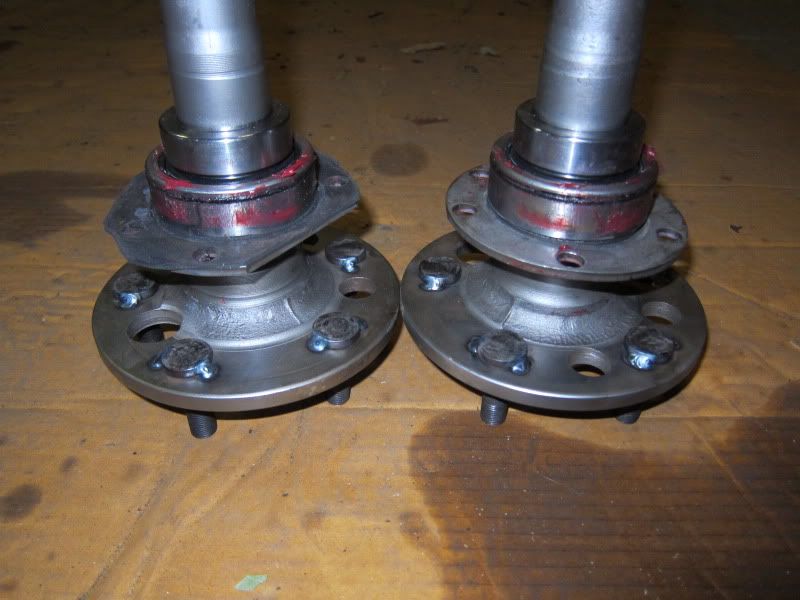
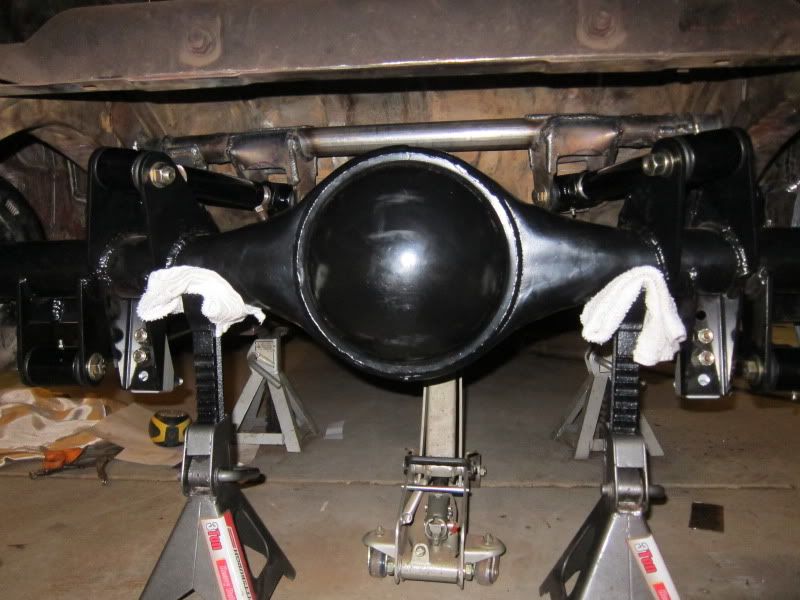
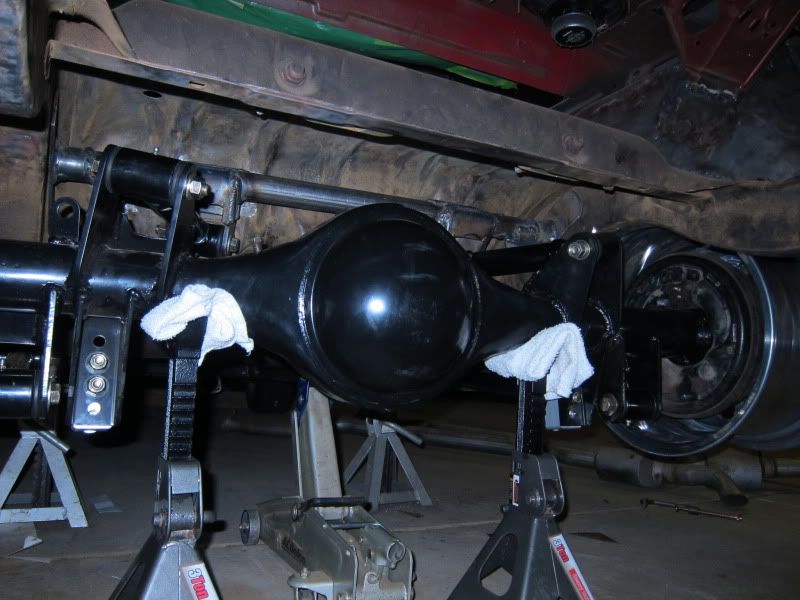
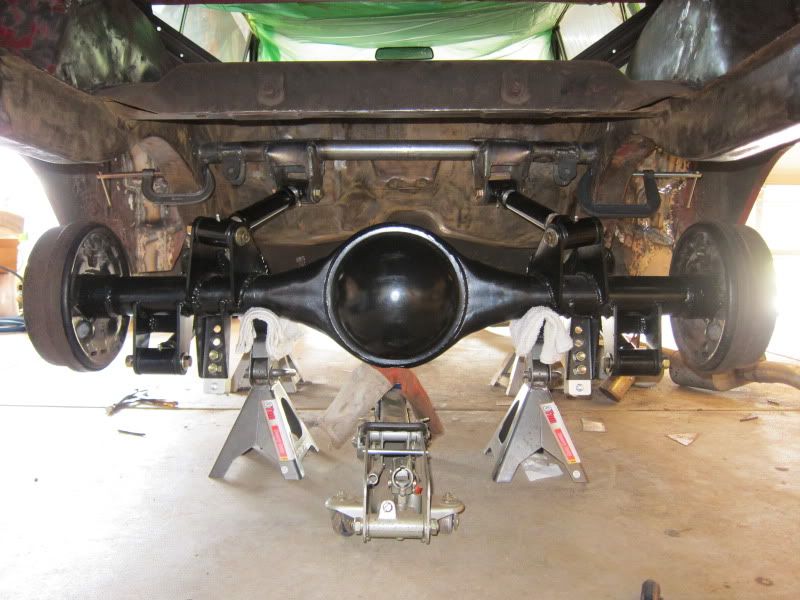
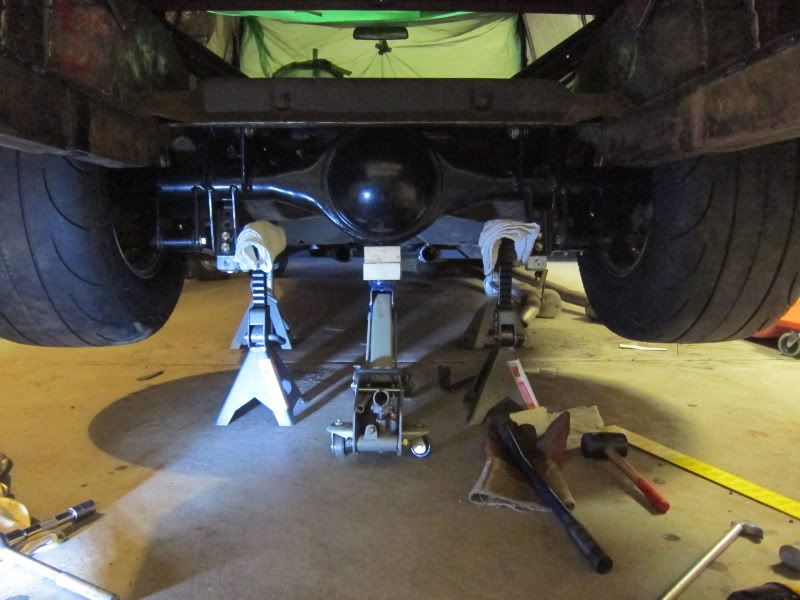
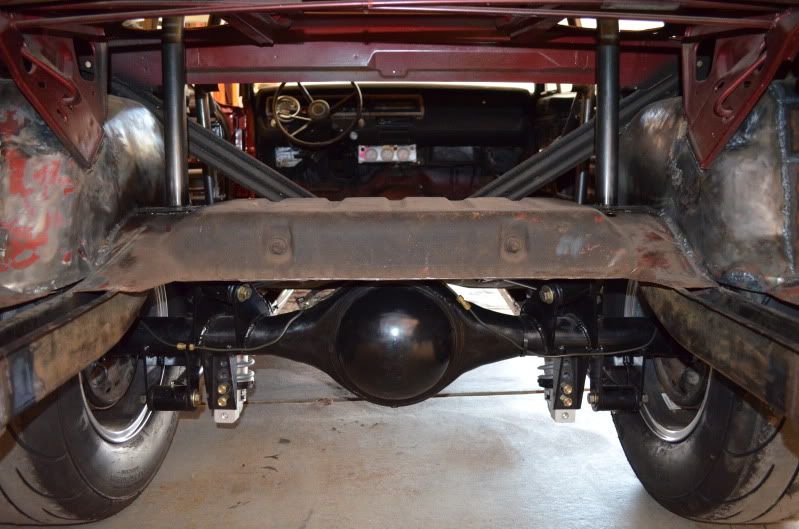
Got the axles back in and ready to go into the car.
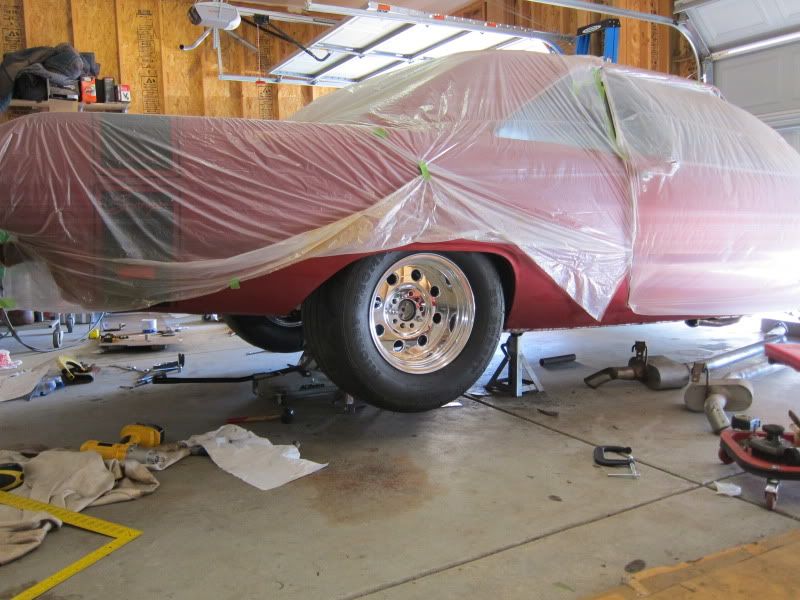
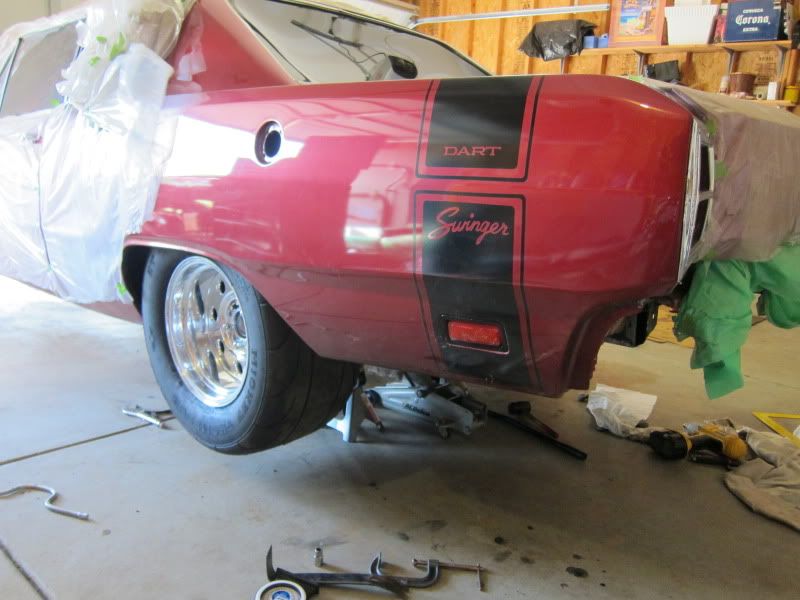
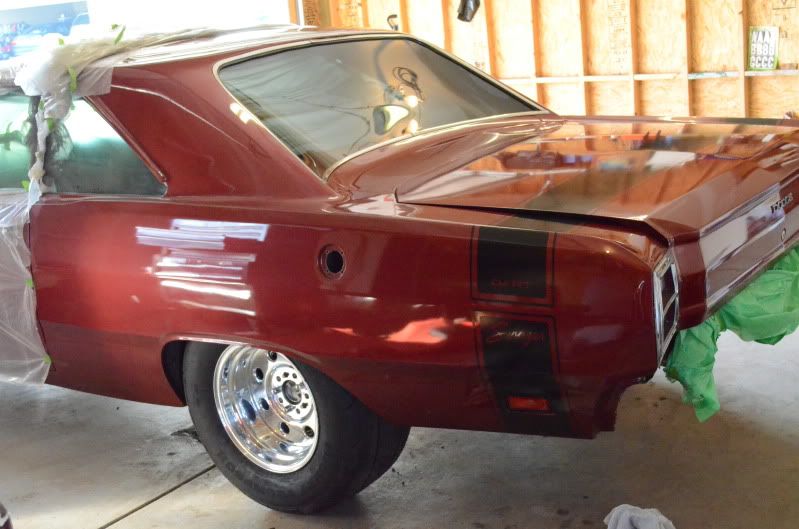
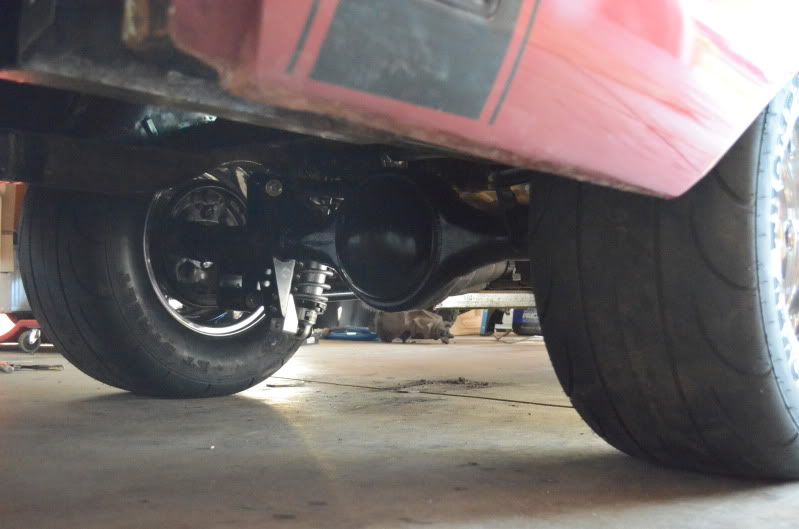
Starting to mock up the rear and see how everything is lining and fitting up. I was really worried at first that my backspacing was all wrong because it seemed like I had very little room between the frame and wheels and lots of room between the wheel and outer lip of the fender. But it was just an optical illusion. It's sitting just about right where it needs to be.

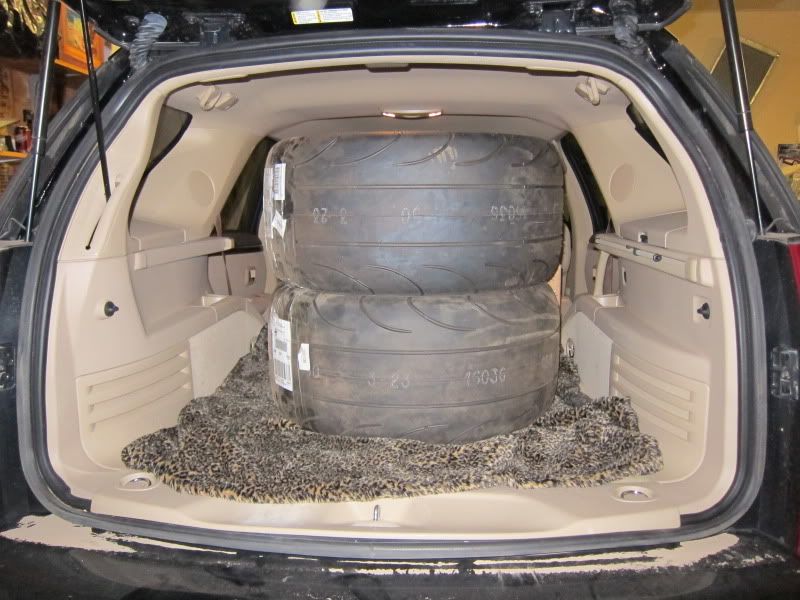
My wife was working late so I threw the tires and wheels in her car so she could drop them off by the tire store so they got mounted while I was at work and I picked them up later. It's literally called "The Tire Store" lol. Supposedly there is only one guy there that can mount these type of tires and he does a pretty darn good job of it. Takes him a couple hours to "finnesse" the tires on as they told me.
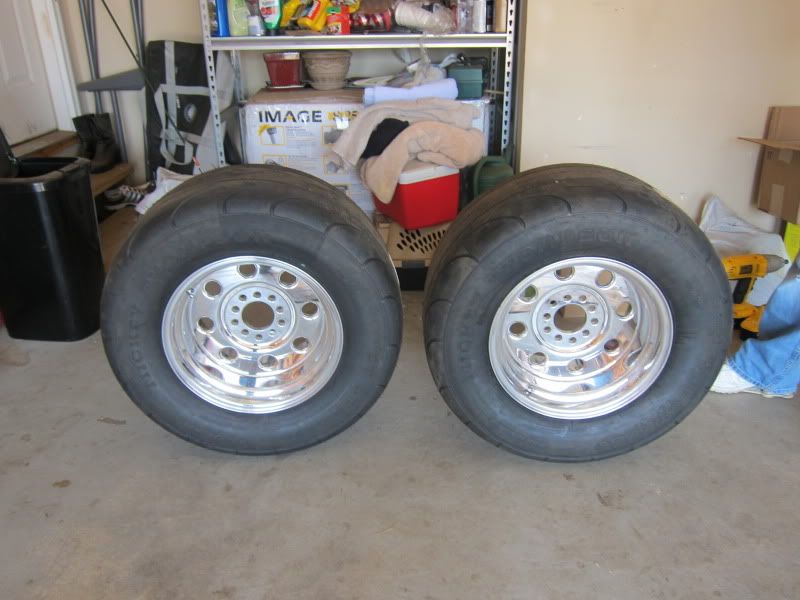
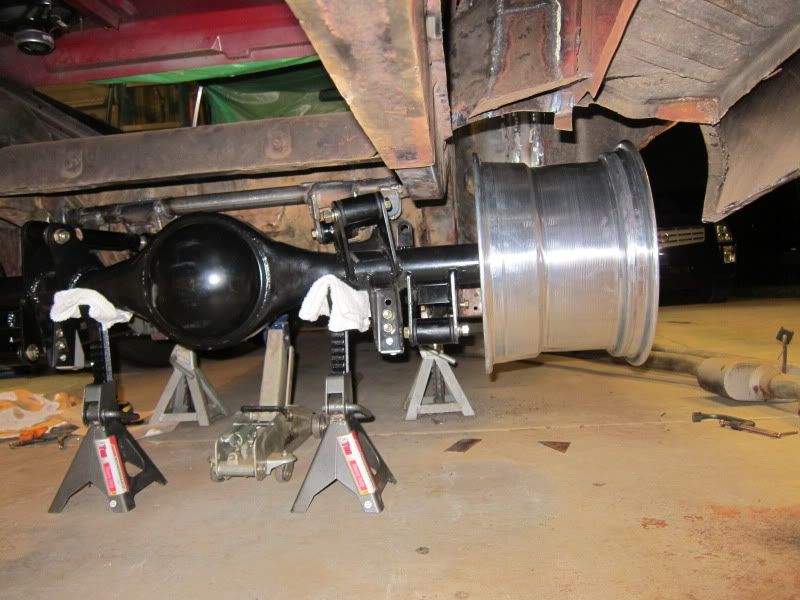
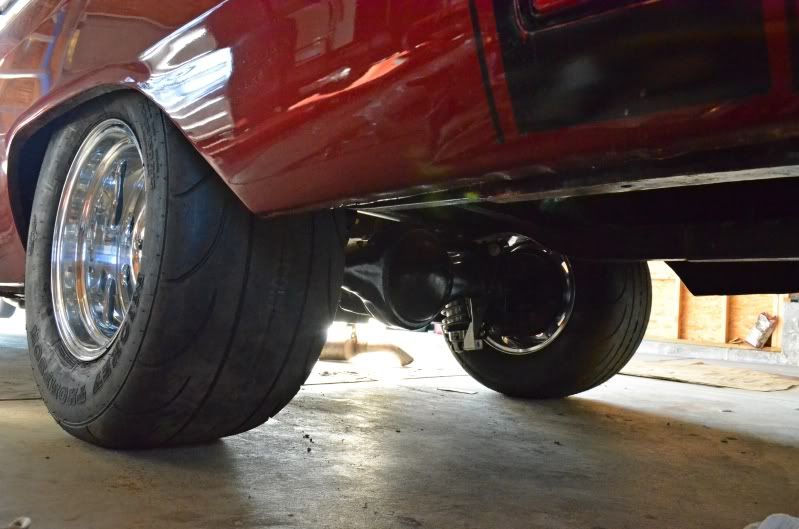
After lowering the axle almost all the way to the ground, I slid the tires in a bit, raised the axle, slid the tires in more, and repeated until I could get them on the studs.
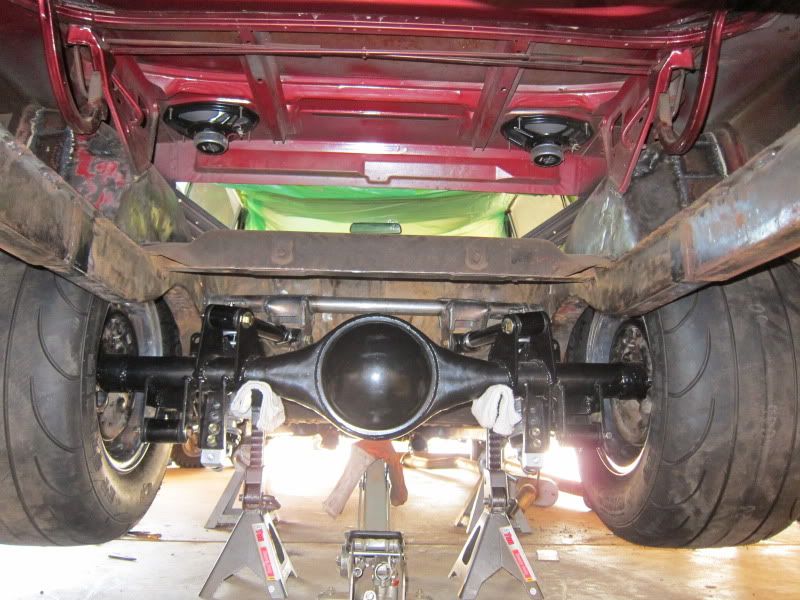
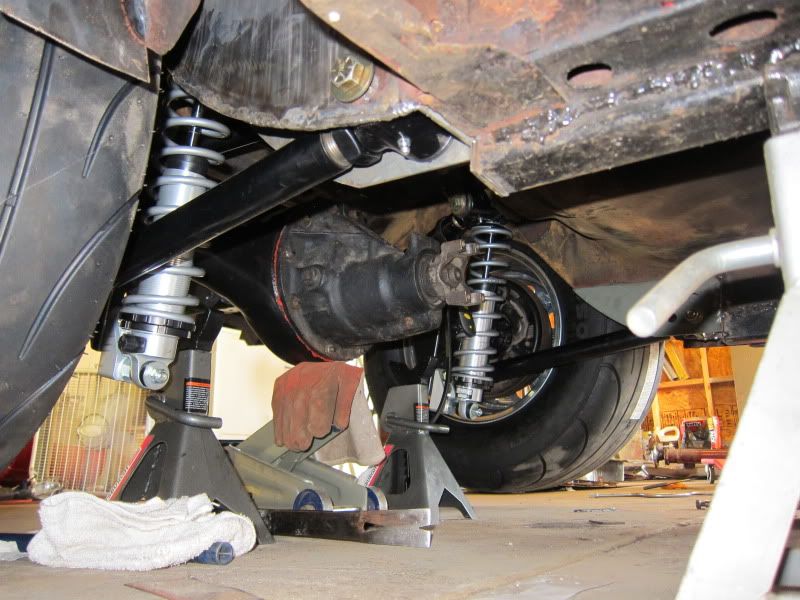
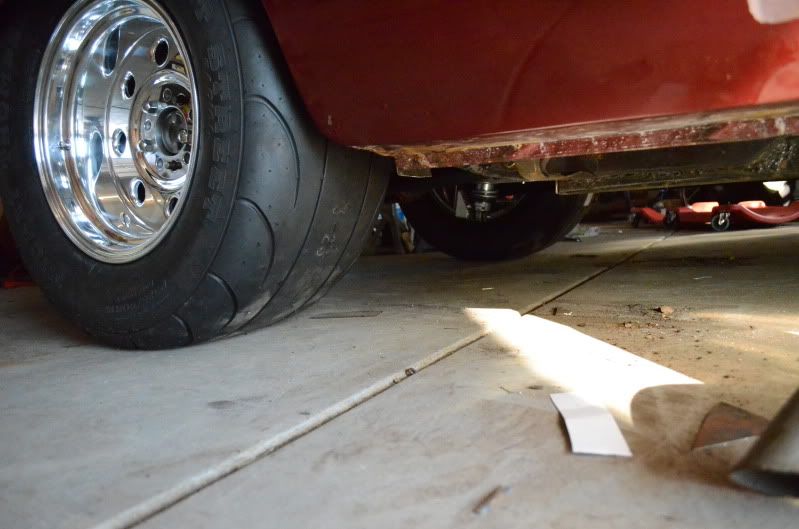
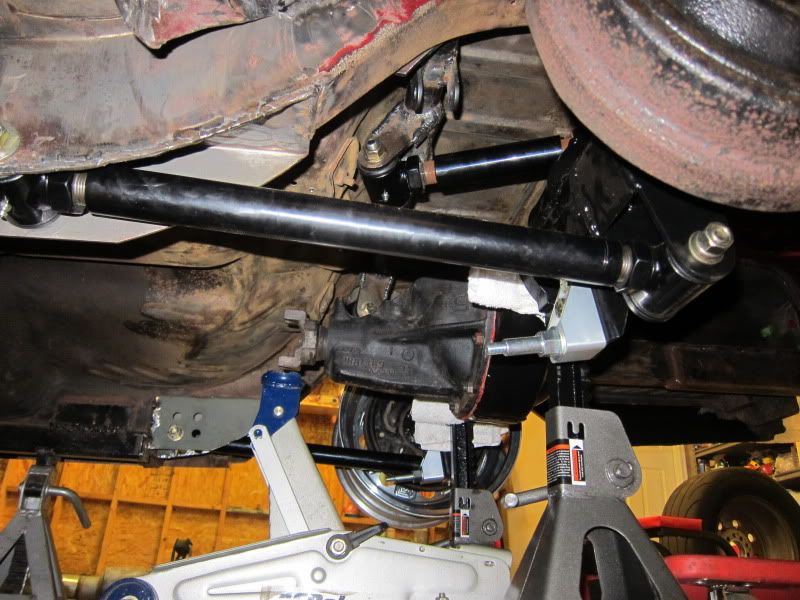
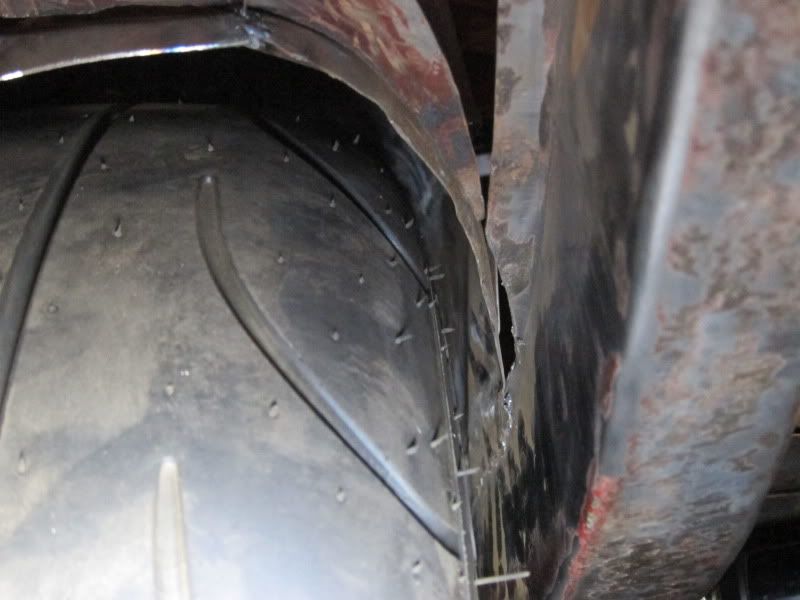
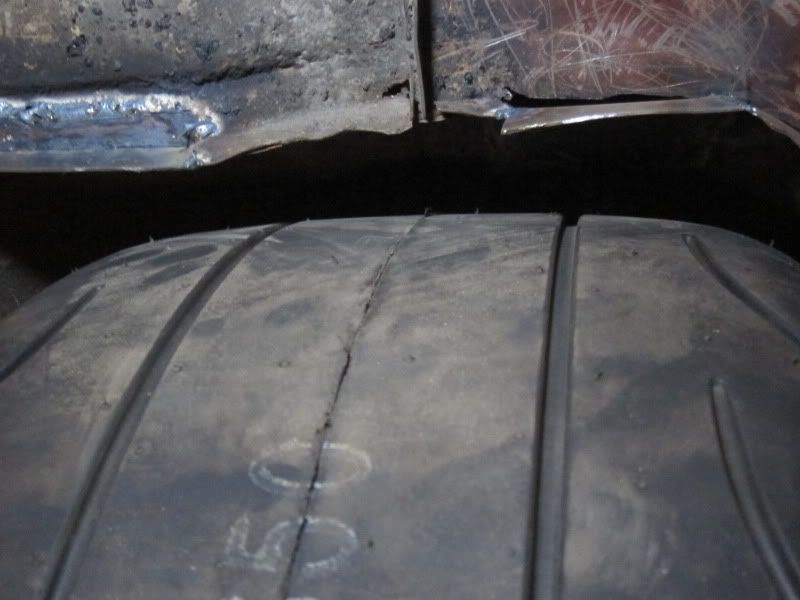
Now it was time to test how far everything could travel before something hit. I expected the tires to hit the wheel tubs first. WRONG! I actually bottomed the upper link bars into the gussets on the cross bar before my wheels ever hit the tubs. I can still trim the gussets to allow more travel, but I should never need that much travel on the rear suspension. Good news though is that the wheels can go a long way before bottoming out.
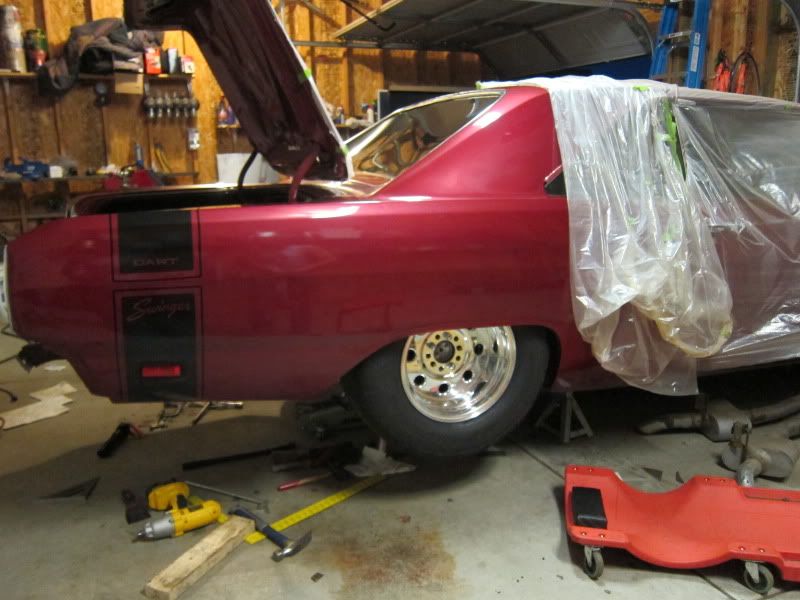
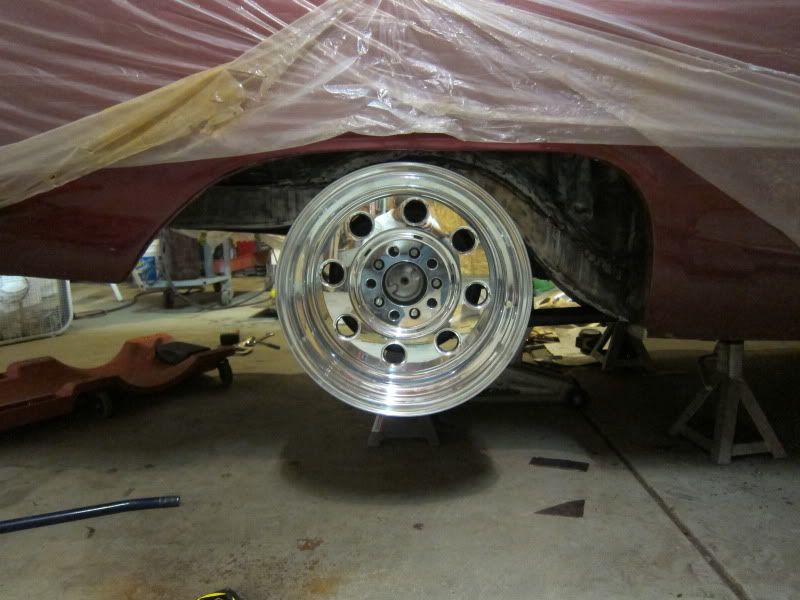
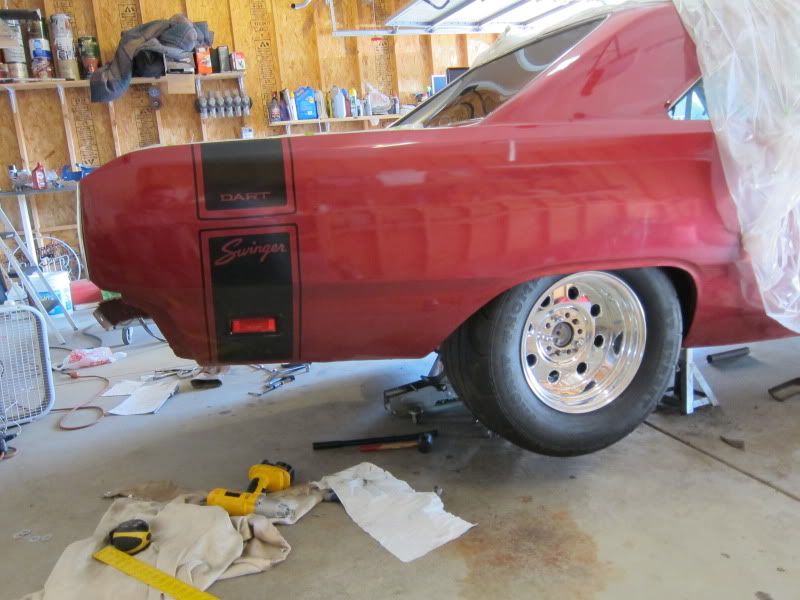
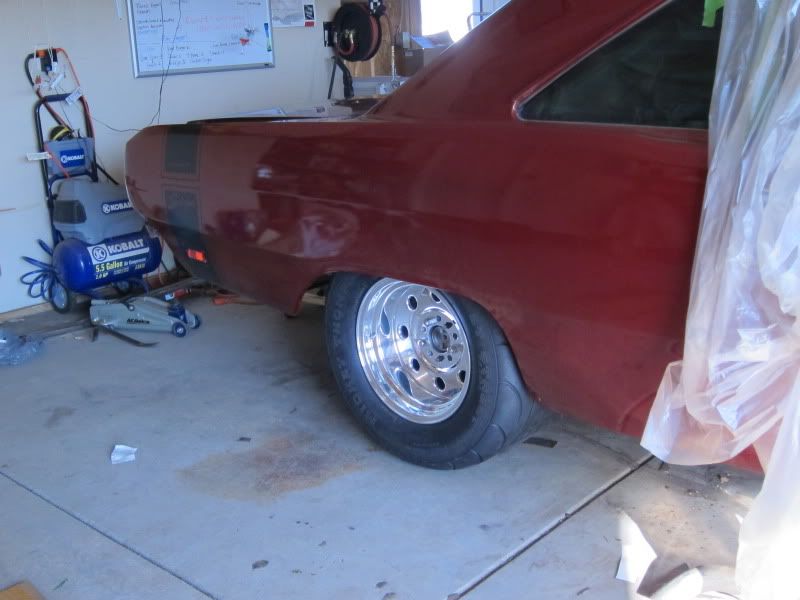
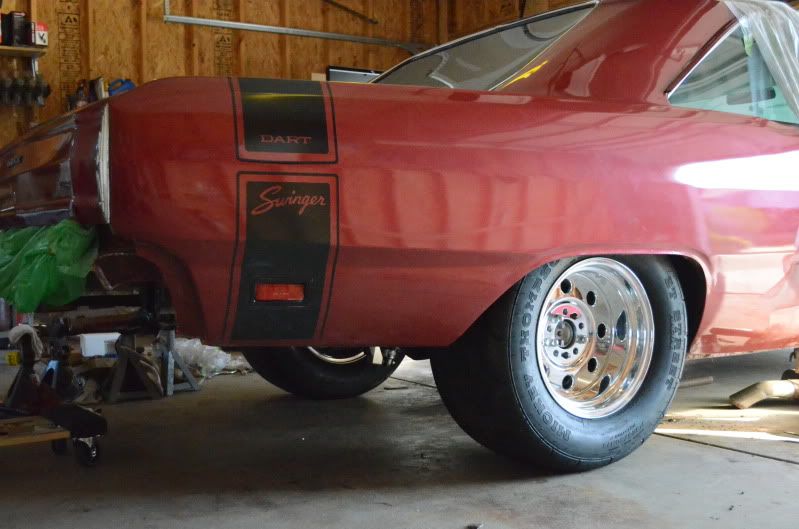
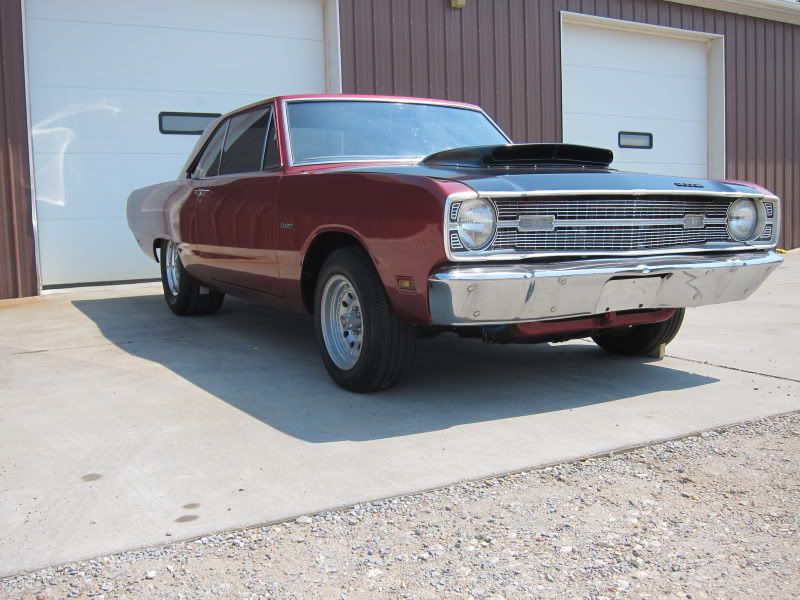
After fit check and everything looking clear to go, it was time to install the coilovers and let her rest on her own two wheels again for the first time since March. The stance came out EXACTLy where I wanted it. Not too high and not too low.
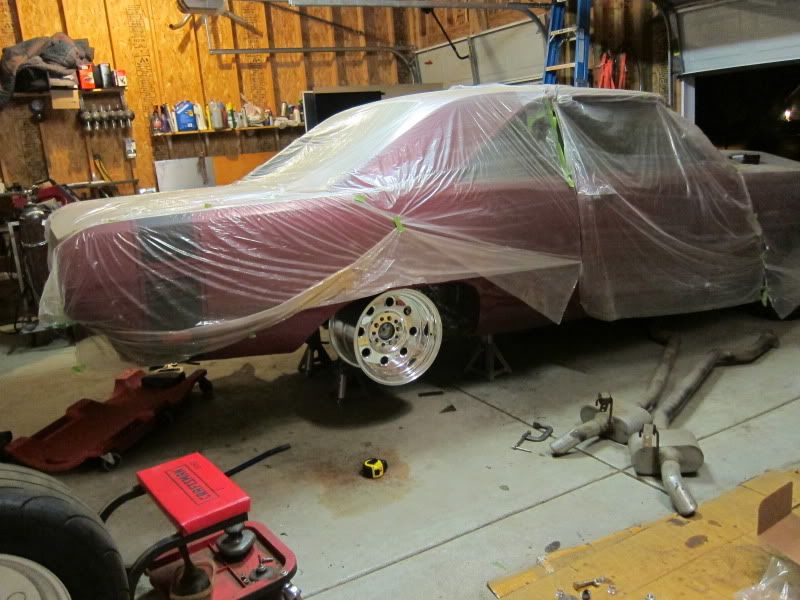
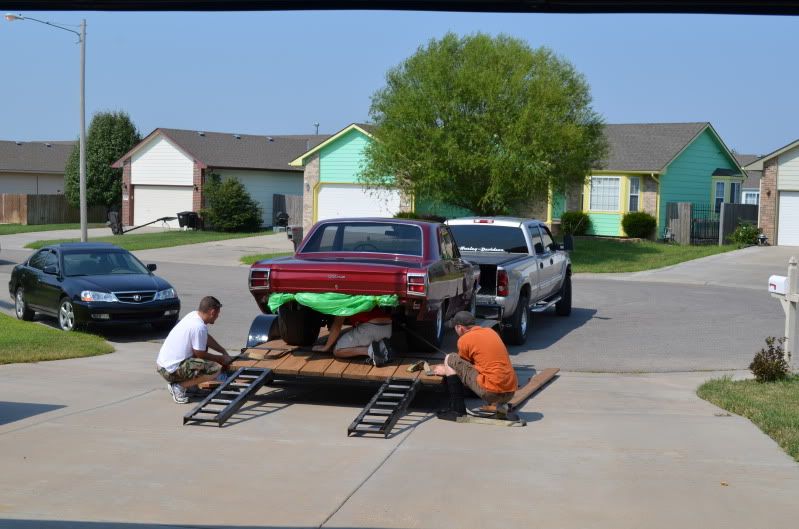
I had to book my place in the shop to get the cage done 2 months in advance and I got this car rolling only 2 days before I had to take it up there! Talk about cutting it close. So here we are loading it up for the haul and the first bit of daylight I've seen it in for a while now. After getting it out of the garage, I can't wait to get it done! Getting closer every day.
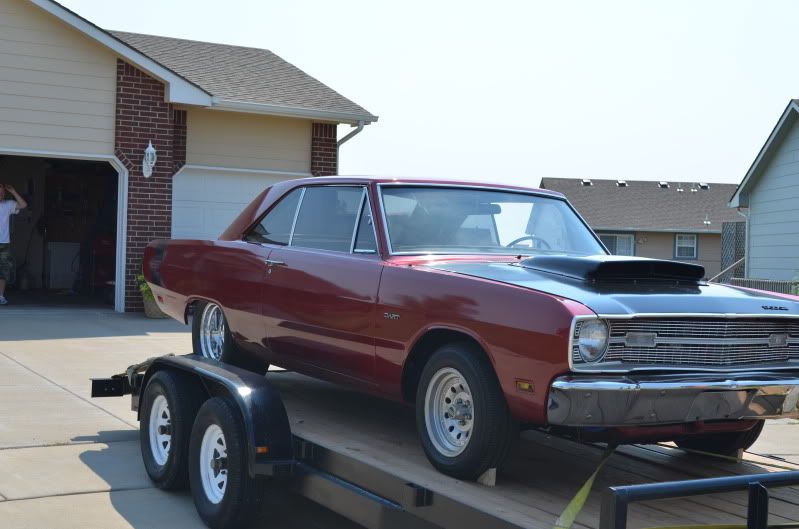
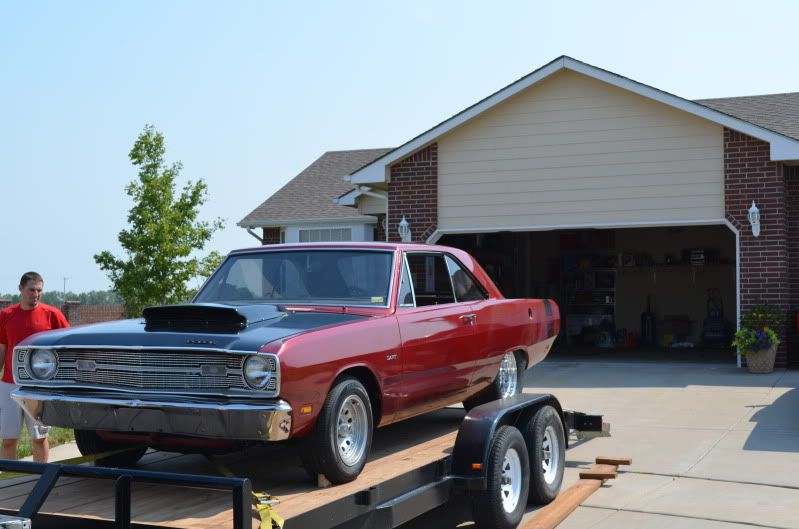

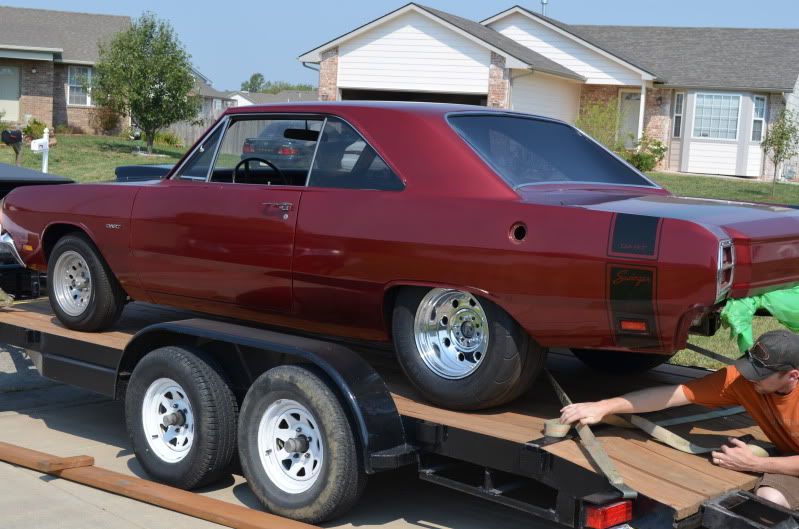
Arriving at the shop

And now she awaits the 6 point roll cage with dual swing outs and removable back brace. Should be done mid next week!
And here's a little open header video for you to enjoy. Rev up at the end. :finga:
[ame="http://www.youtube.com/watch?v=BjhxraQcv60"]Dodge Dart 416 Stroker Open Headers - YouTube[/ame]
Here's the Strange shocks with 130lb QA1 springs that I'll be using.
And here are the shocks with the bearings changed out for poly sleeves.
Had the shop TIG weld the studs so that I don't have any more worries with the studs spinning again. What a nightmare that was for a little bit!
Got the axles back in and ready to go into the car.
Starting to mock up the rear and see how everything is lining and fitting up. I was really worried at first that my backspacing was all wrong because it seemed like I had very little room between the frame and wheels and lots of room between the wheel and outer lip of the fender. But it was just an optical illusion. It's sitting just about right where it needs to be.
My wife was working late so I threw the tires and wheels in her car so she could drop them off by the tire store so they got mounted while I was at work and I picked them up later. It's literally called "The Tire Store" lol. Supposedly there is only one guy there that can mount these type of tires and he does a pretty darn good job of it. Takes him a couple hours to "finnesse" the tires on as they told me.
After lowering the axle almost all the way to the ground, I slid the tires in a bit, raised the axle, slid the tires in more, and repeated until I could get them on the studs.
Now it was time to test how far everything could travel before something hit. I expected the tires to hit the wheel tubs first. WRONG! I actually bottomed the upper link bars into the gussets on the cross bar before my wheels ever hit the tubs. I can still trim the gussets to allow more travel, but I should never need that much travel on the rear suspension. Good news though is that the wheels can go a long way before bottoming out.
After fit check and everything looking clear to go, it was time to install the coilovers and let her rest on her own two wheels again for the first time since March. The stance came out EXACTLy where I wanted it. Not too high and not too low.
I had to book my place in the shop to get the cage done 2 months in advance and I got this car rolling only 2 days before I had to take it up there! Talk about cutting it close. So here we are loading it up for the haul and the first bit of daylight I've seen it in for a while now. After getting it out of the garage, I can't wait to get it done! Getting closer every day.
Arriving at the shop
And now she awaits the 6 point roll cage with dual swing outs and removable back brace. Should be done mid next week!
And here's a little open header video for you to enjoy. Rev up at the end. :finga:
[ame="http://www.youtube.com/watch?v=BjhxraQcv60"]Dodge Dart 416 Stroker Open Headers - YouTube[/ame]
Mad Dart
Nothing to see Here!
Looks good Clint! You have done a lot of work in a short amount of time. Hats off to you!
Thanks Louis! I thought I was getting things done at a slow pace even though I am putting a lot of hours into this car. There's a lot of hours just staring at it too just wondering what to do next and wondering what the heck am I doing all this for. I have no reference as to how long builds similar to this really take. My goal is to have it running and driving by August 24th-26th which is the Blacktop Nationals here in Wichita. All I have left to do is to patch the rest of the floor, paint it, fat mat, paint the cage, paint the upper door panels and dash, get new shoulder harnesses, reinstall the interior, rebuild the trunk pan, weld in the inner lower quarter skin panels, mount the fuel cell, run all the lines, mount and wire the pump, get all the underside coated with POR 15, get a rust technicians frame repair done up front, repair one of the torsion bar mounts before it tears out of the frame, and convert to BBP disk brakes up front. Yep that's all! I didn't think it was going to be a big deal, but it sounds ambitious once I throw the whole to-do list out there. Sheesh I have a ways to go!
Sweet looking ride you got there.. Keep up all the great work ....rayer:
Thanks! The truck and trailer belongs to a friend of mine. I don't even have anything to tow the car myself. My daily driver beater 4 banger ranger can barely get out of it's own way. Sometimes, ya just gotta rely on the Chebby friends and their toys. :violent1:
383Duster
Well-Known Member
Nice looking Dart, you are doing great working out of a home garage....wish I was young again!
KRYPTONITE1972
Well-Known Member
Awesome Work man.. keep up the great work, Awesome looking car, One Question, why not 5/8 studs???? Stronger and Look better
Nice looking Dart, you are doing great working out of a home garage....wish I was young again!
I am fortunate to have the 3rd car space in the garage. It makes all the difference and the wife can still park her car inside while the Dart is in pieces. I would love to have a shop but that's kinda hard when you live in a cookie cutter neighborhood with a tiny yard like mine! I grew up in the country and hated it when I was younger. Now I long to be out toward the country with a few acres off of a paved road.
Awesome Work man.. keep up the great work, Awesome looking car, One Question, why not 5/8 studs???? Stronger and Look better
Thanks for the comment. I seriously wouldn't get by very well without help from this site!
These studs will be fine for what I'll be doing. I'm not running a high stall or trans brake, nor do I plan on doing any hard core racing. Mostly this will be a street car with occasional passes at the track. The studs will be covered by the domed nuts so visually it won't matter in this case what kind of stud I use.
SpeedracerX
Still on this side of the dirt member
That car is just totally mean looking... bad *** for sure... Your doing one heck of a job
KRYPTONITE1972
Well-Known Member
I am fortunate to have the 3rd car space in the garage. It makes all the difference and the wife can still park her car inside while the Dart is in pieces. I would love to have a shop but that's kinda hard when you live in a cookie cutter neighborhood with a tiny yard like mine! I grew up in the country and hated it when I was younger. Now I long to be out toward the country with a few acres off of a paved road.
Thanks for the comment. I seriously wouldn't get by very well without help from this site!
These studs will be fine for what I'll be doing. I'm not running a high stall or trans brake, nor do I plan on doing any hard core racing. Mostly this will be a street car with occasional passes at the track. The studs will be covered by the domed nuts so visually it won't matter in this case what kind of stud I use.
I understand, Wasn't sure what your plans were with it, 5/8 studs are such a easy upgrade to save alot of trouble, But with what your doing I think it will be fine, but Sweet car man, awesome Work,
rayer:skep419
No show, all go!
awesome!!!!!!!!!!!!!!!!!!!!!!!!!!!!!!!!!!!!!!!!!!!!!!!!!!!!!!!!!!!!!!!!!!!!!!!!!!!!!!!!!!!!!!!!!!!!!!!!!!!!!!!!!!!!!!
Cant wait to get the mini tub done on my dart
Cant wait to get the mini tub done on my dart
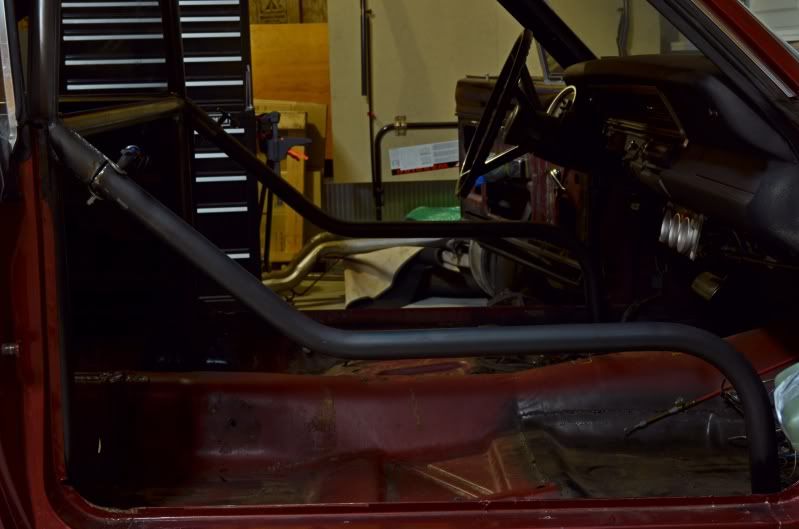
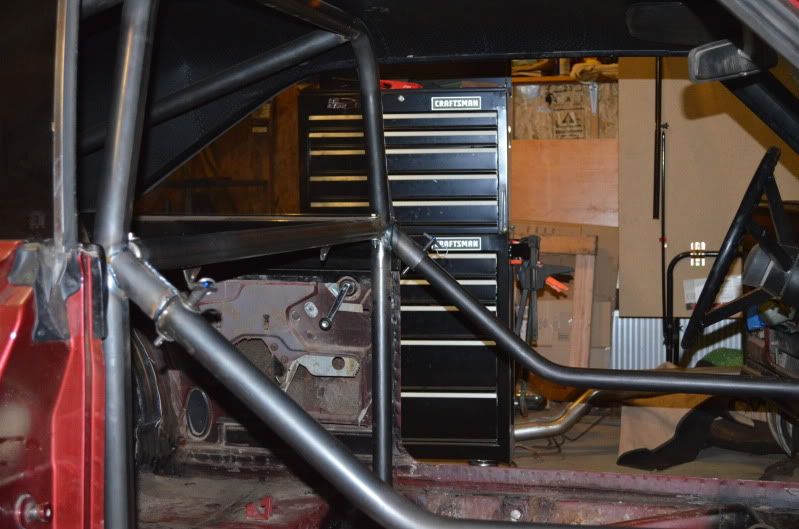
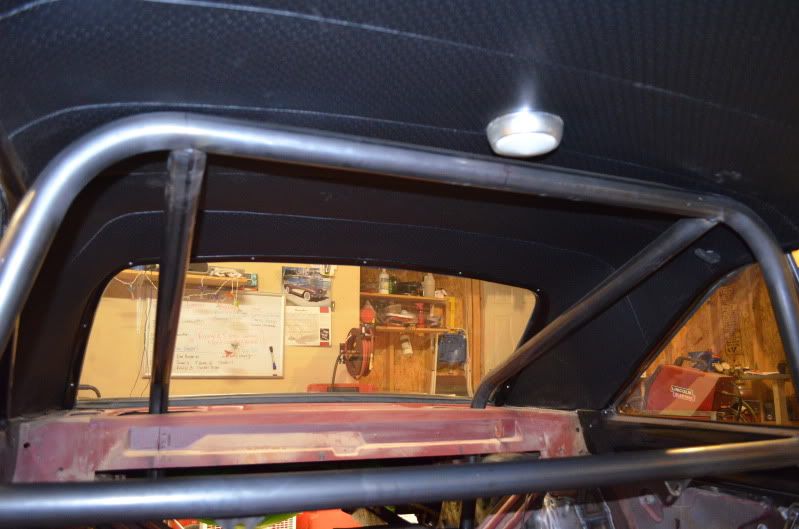
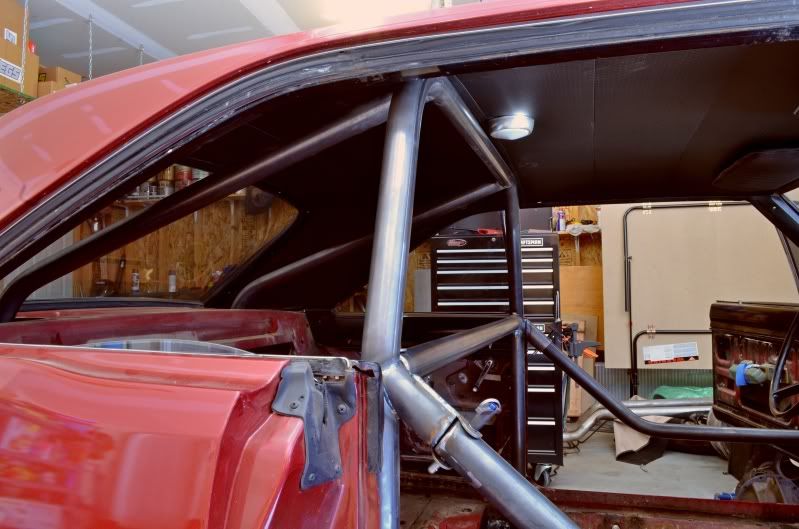
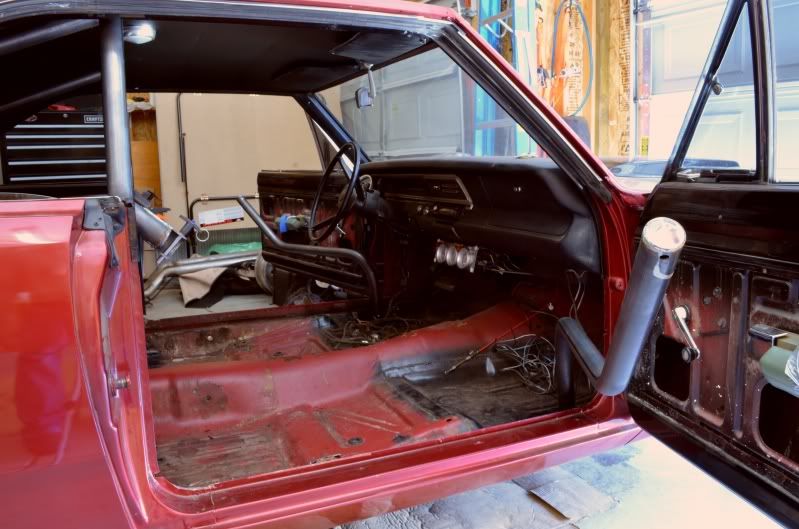
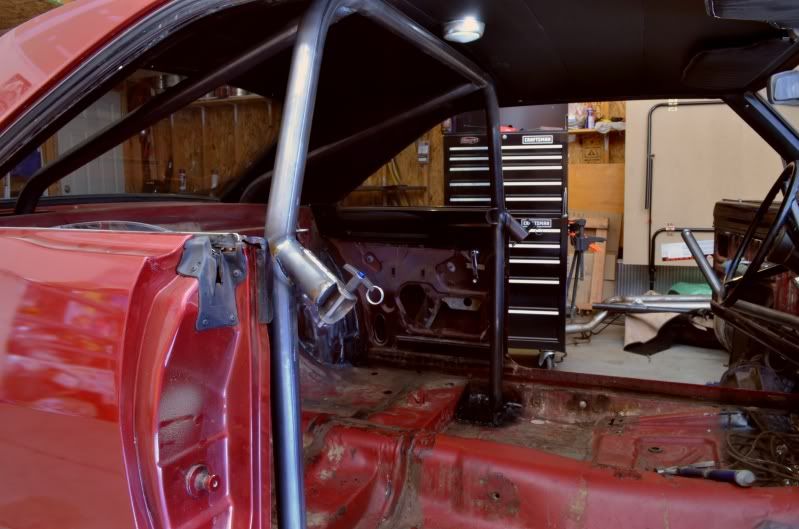
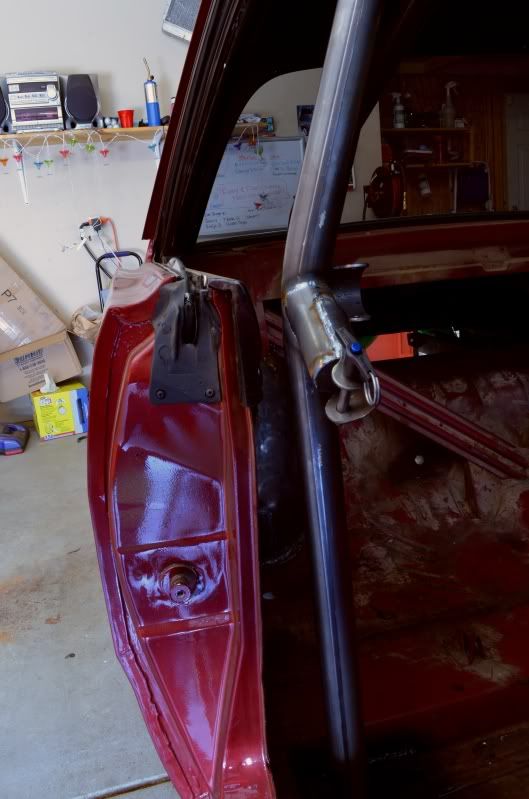
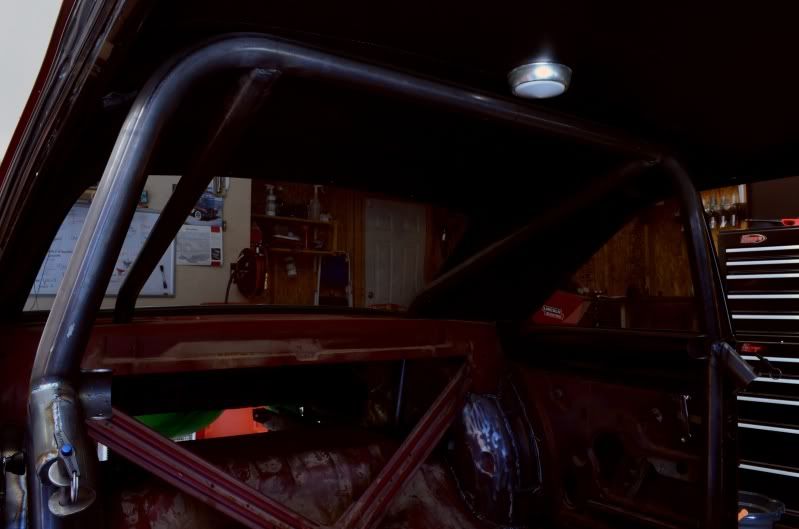
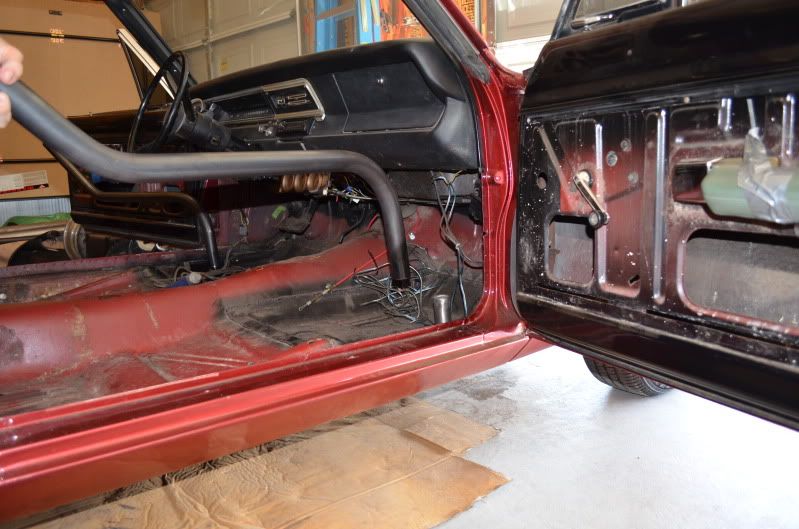
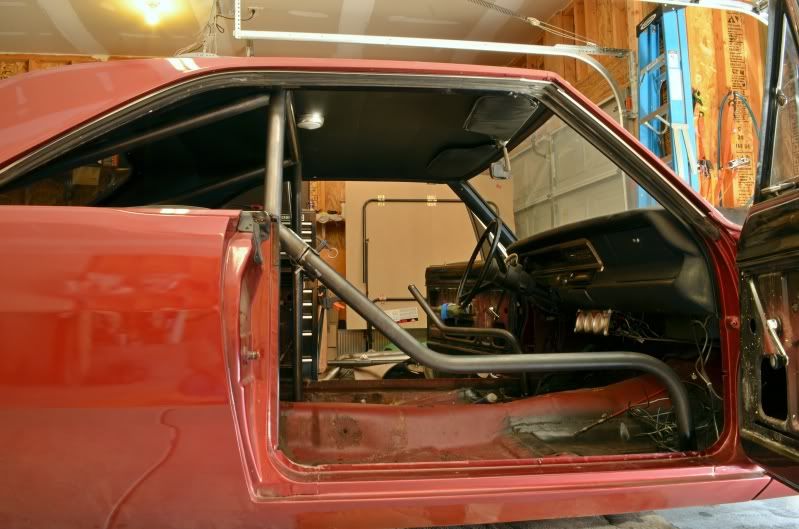
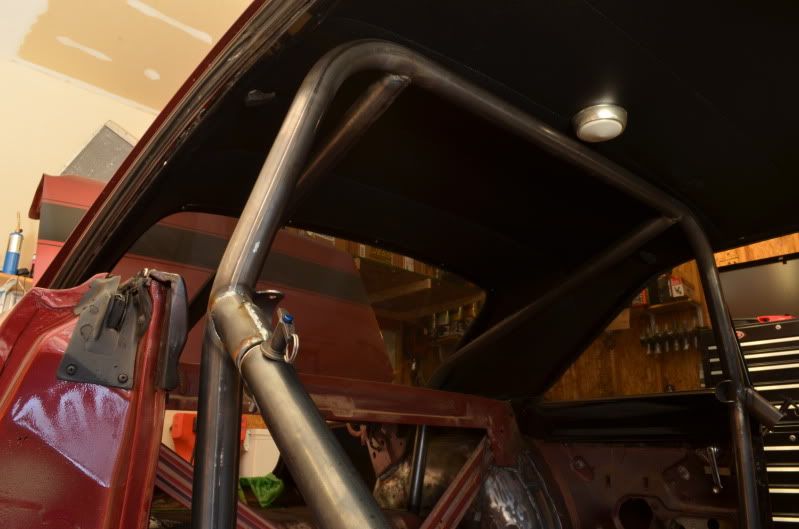
Here's a couple more pictures to update. The shop took WAY longer than expected and although the cage wasn't done exactly how I wanted it, I think it will work out ok in the end. Dual swing out (easily removable by just lifting the bar up off the base plate stub) and removeable back brace bar. Cage is tight to the body and the headliner too. The only thing that wasn't really to my specs was the rear bars. I had asked them to be higher up in the roofline but he said that the more bends they put in the bars, the less rigid it becomes. And I can understand that. I just wanted as much room for the back seat passengers as possible. Although, back seat passengers will probably not be a common thing. Here's what we have.
Rodzilla
Well-Known Member
Very nice work! Glad you replyed on my thread cause somehow I missed your build before. Good idea posting a link to your build in your sig.
Snake
Mopar Nut
Ya open headersssssssssssssssss that brings back memories.Nice job so far.Every car I do that is the 1 thing I always do open headers,even did it once 5 o clock in the morning.
LOL.... Yep the chevy boys are good for something.. thats ok one of my freind that i run with has a big old ford truck 4 door duallie that we call the boat . he runs my stuff every where for me. round trip from my house to his is 100 miles very good friend.. still very nice dart you have got.. By the way what are the spec on your 416???? thanks .Thanks! The truck and trailer belongs to a friend of mine. I don't even have anything to tow the car myself. My daily driver beater 4 banger ranger can barely get out of it's own way. Sometimes, ya just gotta rely on the Chebby friends and their toys. :violent1:
LOL.... Yep the chevy boys are good for something.. thats ok one of my freind that i run with has a big old ford truck 4 door duallie that we call the boat . he runs my stuff every where for me. round trip from my house to his is 100 miles very good friend.. still very nice dart you have got.. By the way what are the spec on your 416???? thanks .
All I can really tell you about the motor is what I was told about how it was built. Whether or not it is all true, I don't know since I wasn't there. As I was told: Eagle crank and rods, diamond flat top pistons, splayed 4 bolt mains, 50cc W2 heads flow bench tested at 321 cfm, Harland Sharp roller rockers, Victor Jr intake, with a Holley 950 HP up top, and TTi ceramic coated headers (which have already rusted
rotest. It ran pretty good before but it should run a lot better with the new fuel setup.nwdart
Well-Known Member
clintleg, first time seeing your build, moving rite along.awesome! making me feel guilty on my 69 dart build. seems easier to get the time in the winter for me. but I am still making progress ,will update my thread soon. keep up the good work, rich.
95teetee
Well-Known Member
man, that's a beautiful car- like everyone else has said, great work.
Nice Job and nice car--You know the best thing you could do when is all back together and tuned is to go take that 70 yr old you bought it from for a ride,You would probably make him a happy man!!!!! Pay it forward--Steve
mismy69swinger
Well-Known Member
Update!
Here's the Strange shocks with 130lb QA1 springs that I'll be using.
And here are the shocks with the bearings changed out for poly sleeves.
Had the shop TIG weld the studs so that I don't have any more worries with the studs spinning again. What a nightmare that was for a little bit!
Got the axles back in and ready to go into the car.
Starting to mock up the rear and see how everything is lining and fitting up. I was really worried at first that my backspacing was all wrong because it seemed like I had very little room between the frame and wheels and lots of room between the wheel and outer lip of the fender. But it was just an optical illusion. It's sitting just about right where it needs to be.
My wife was working late so I threw the tires and wheels in her car so she could drop them off by the tire store so they got mounted while I was at work and I picked them up later. It's literally called "The Tire Store" lol. Supposedly there is only one guy there that can mount these type of tires and he does a pretty darn good job of it. Takes him a couple hours to "finnesse" the tires on as they told me.
After lowering the axle almost all the way to the ground, I slid the tires in a bit, raised the axle, slid the tires in more, and repeated until I could get them on the studs.
Now it was time to test how far everything could travel before something hit. I expected the tires to hit the wheel tubs first. WRONG! I actually bottomed the upper link bars into the gussets on the cross bar before my wheels ever hit the tubs. I can still trim the gussets to allow more travel, but I should never need that much travel on the rear suspension. Good news though is that the wheels can go a long way before bottoming out.
After fit check and everything looking clear to go, it was time to install the coilovers and let her rest on her own two wheels again for the first time since March. The stance came out EXACTLy where I wanted it. Not too high and not too low.
I had to book my place in the shop to get the cage done 2 months in advance and I got this car rolling only 2 days before I had to take it up there! Talk about cutting it close. So here we are loading it up for the haul and the first bit of daylight I've seen it in for a while now. After getting it out of the garage, I can't wait to get it done! Getting closer every day.
Arriving at the shop
And now she awaits the 6 point roll cage with dual swing outs and removable back brace. Should be done mid next week!
And here's a little open header video for you to enjoy. Rev up at the end. :finga:
Dodge Dart 416 Stroker Open Headers - YouTube
stop it! stop it! STOP IT!!! your making me want to tub my car!!! I remember seeing this on ebay a long time ago man your doing a great job look killer!!
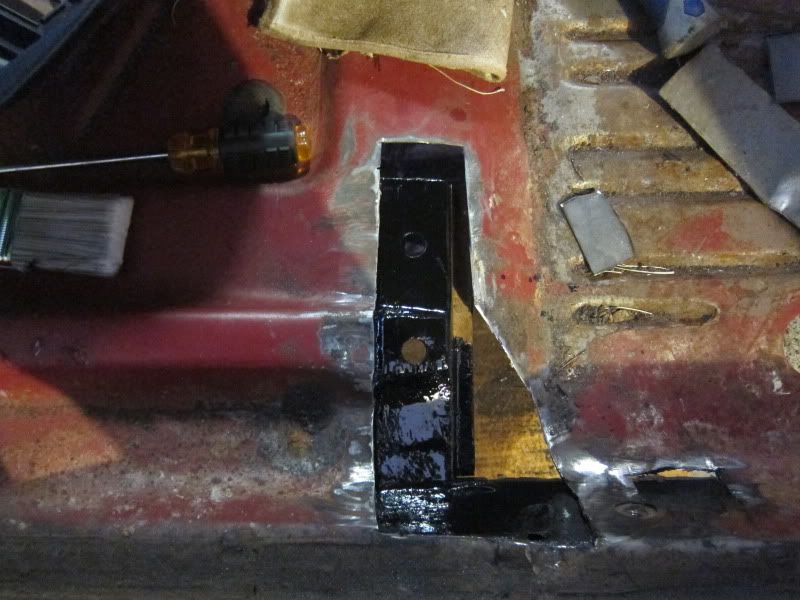
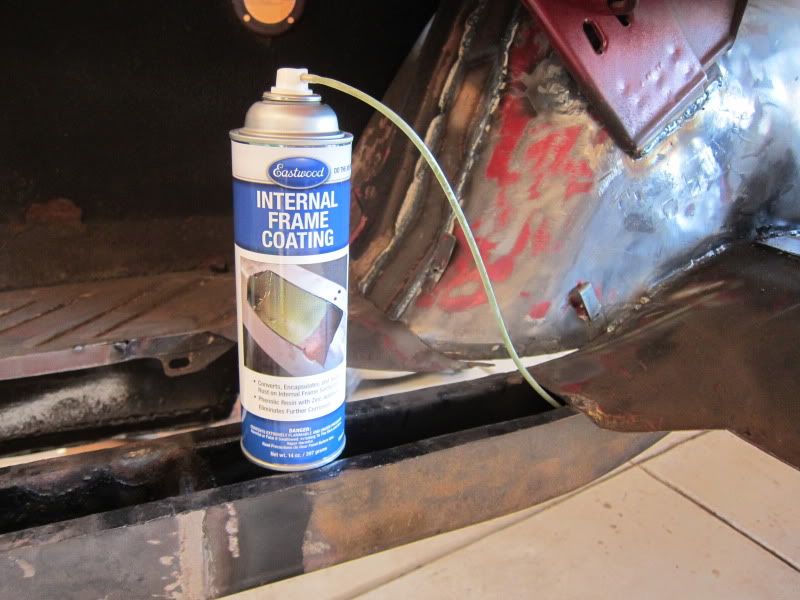
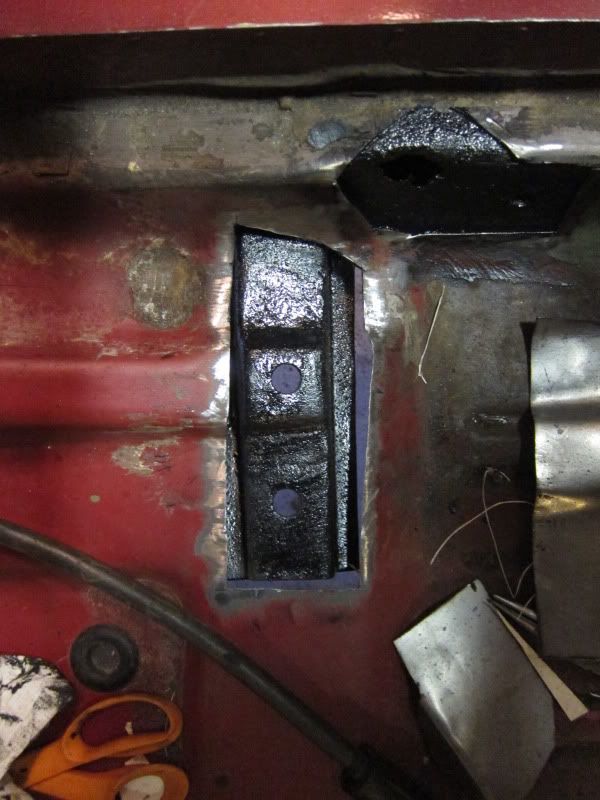
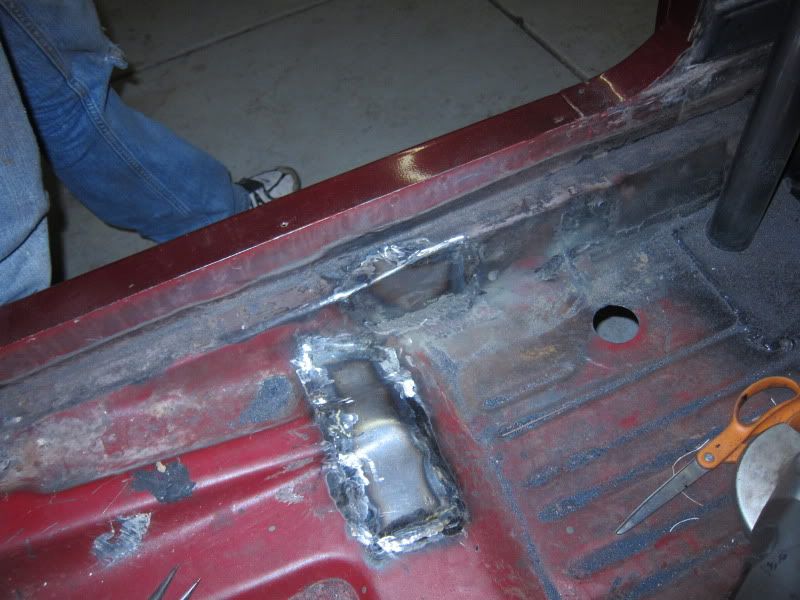
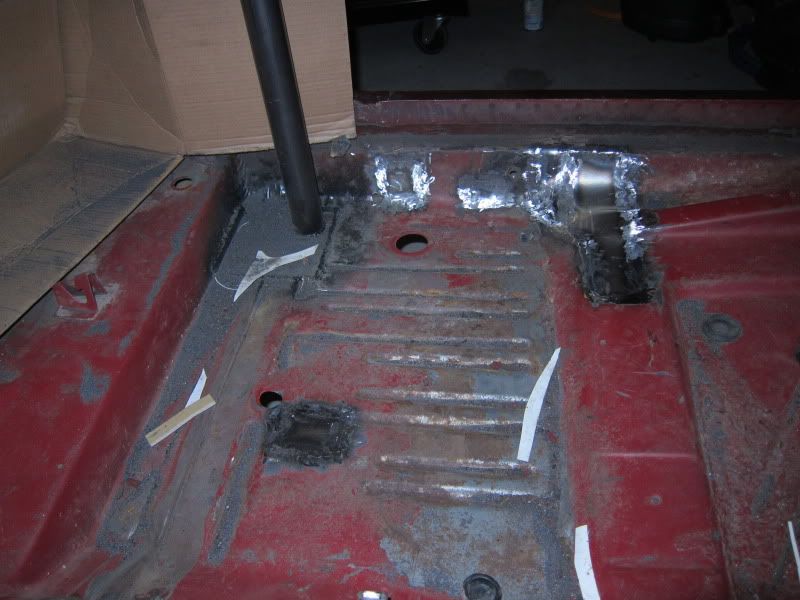
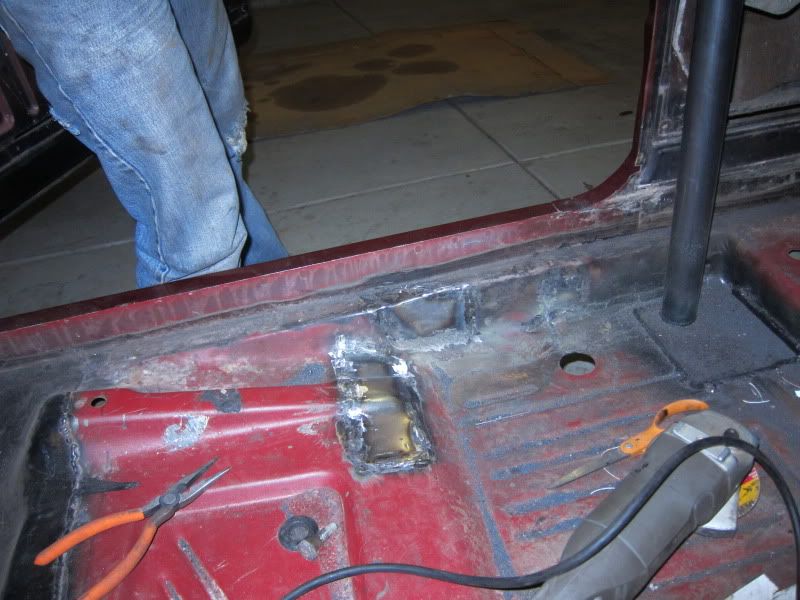
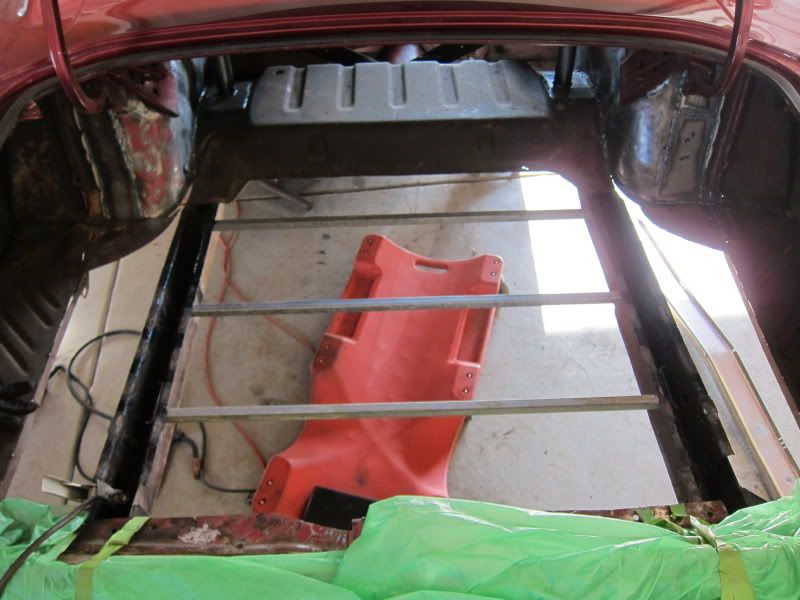
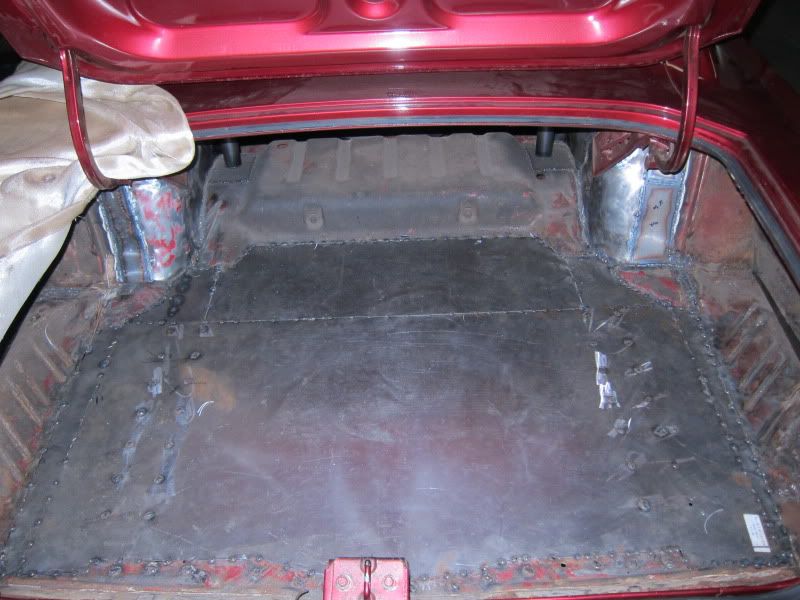
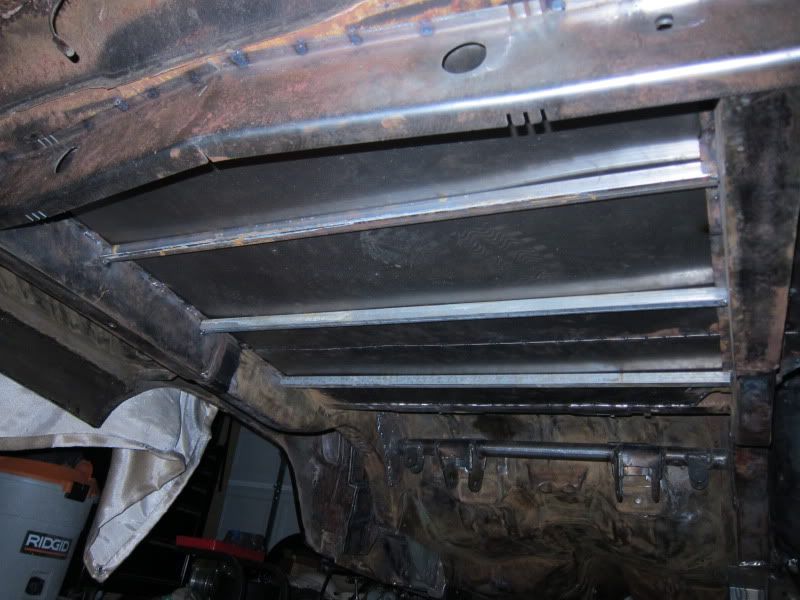
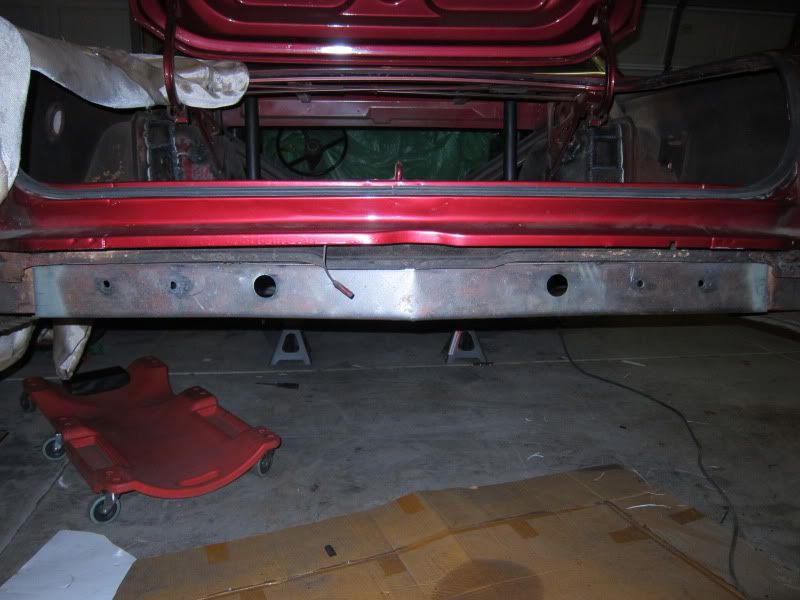
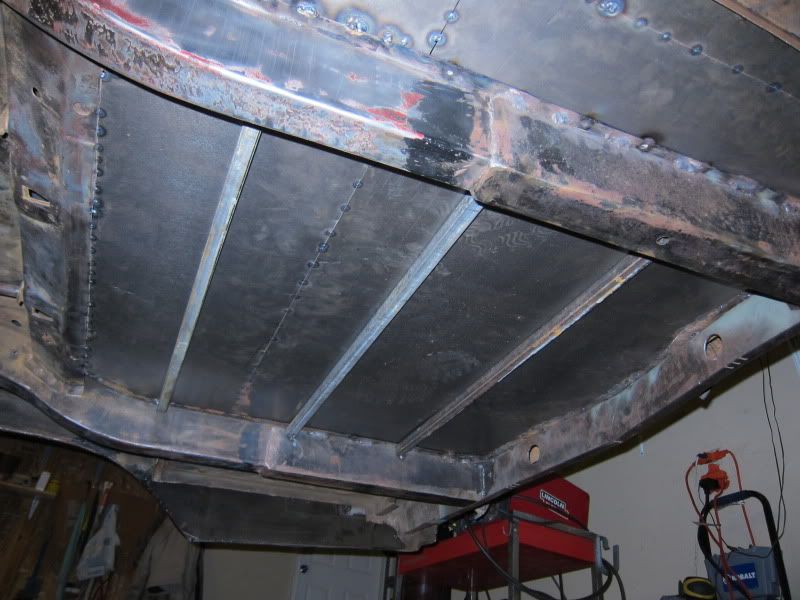
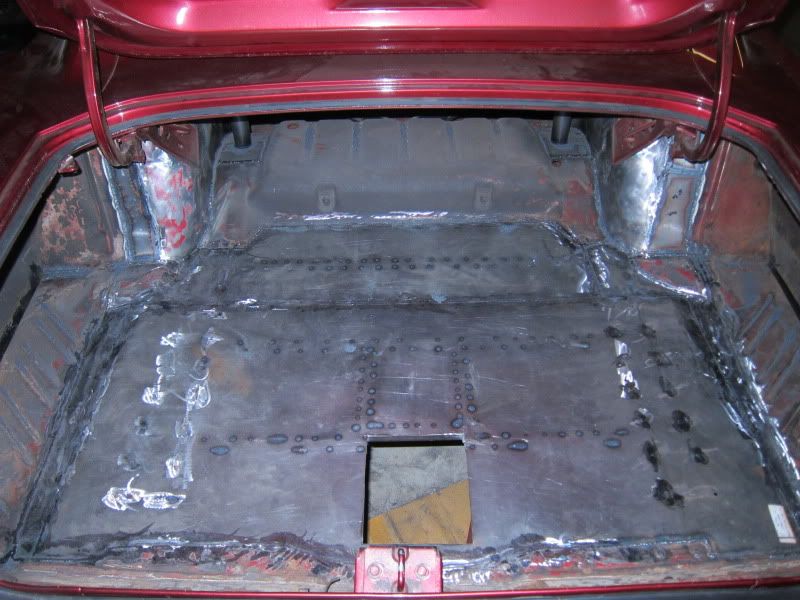
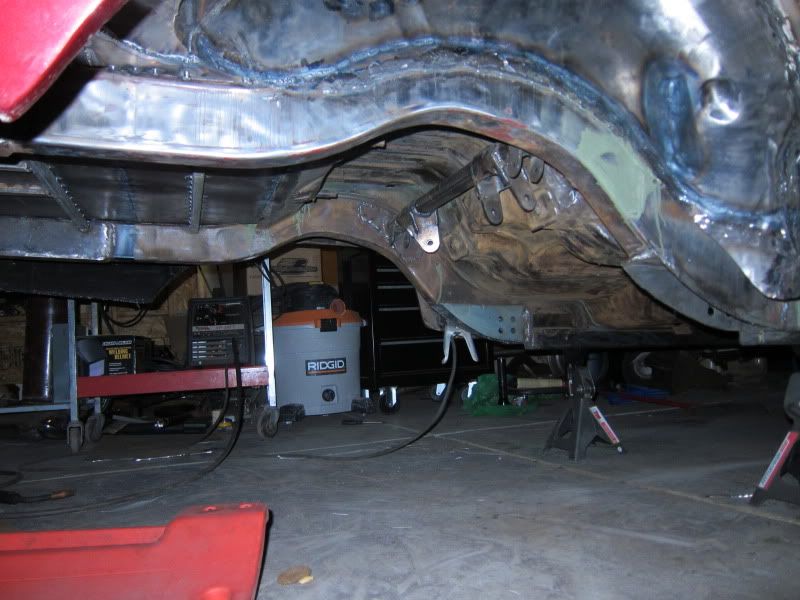
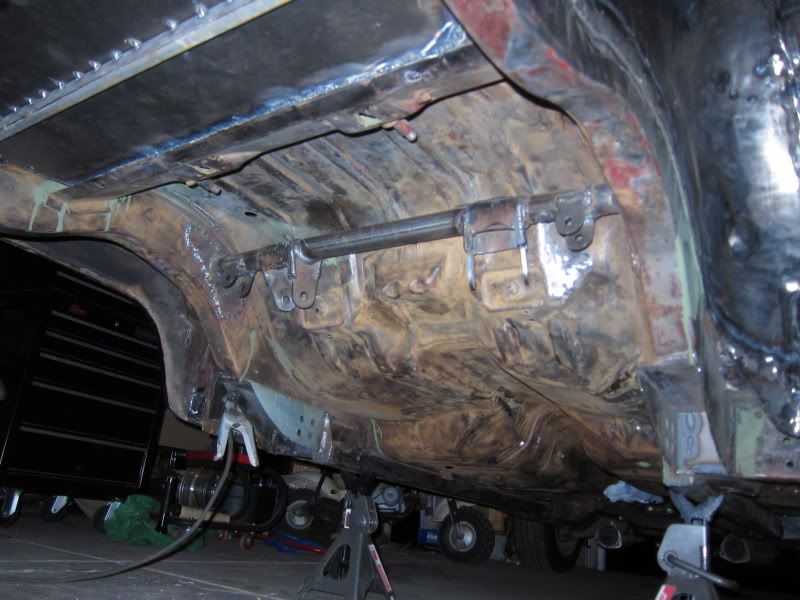
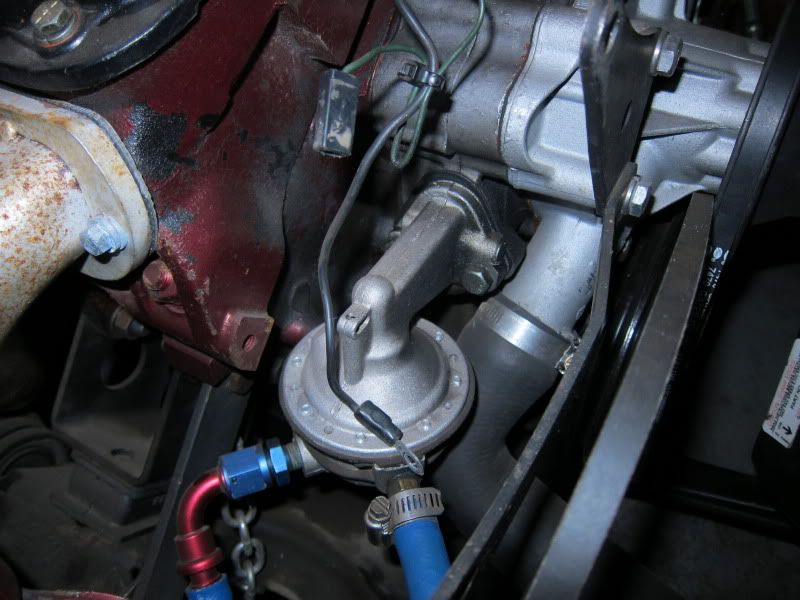
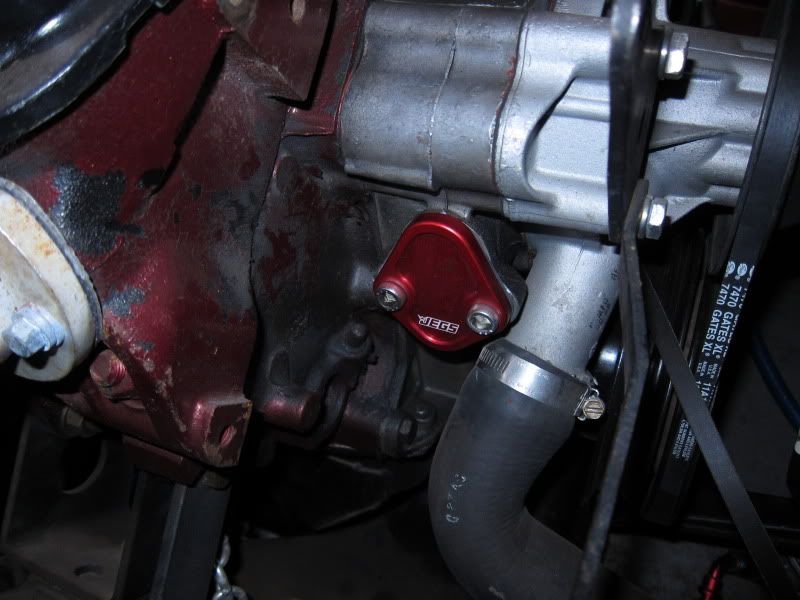
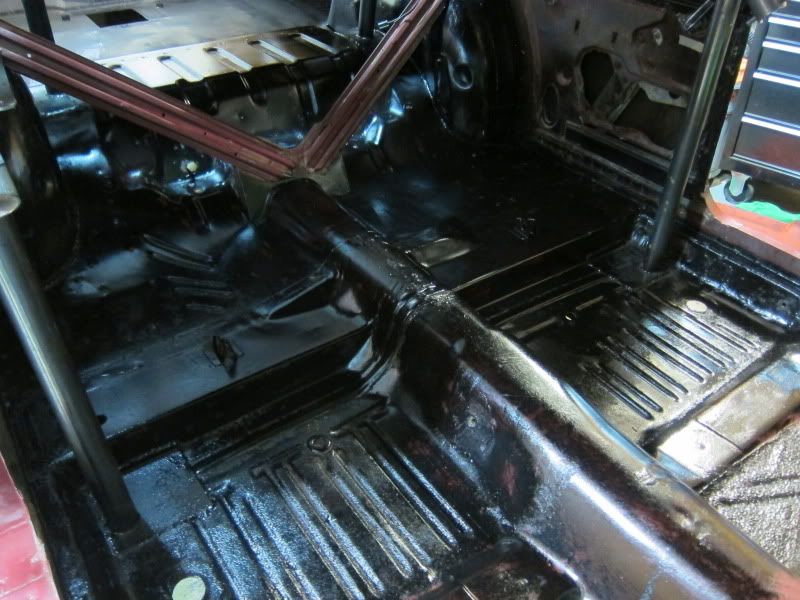
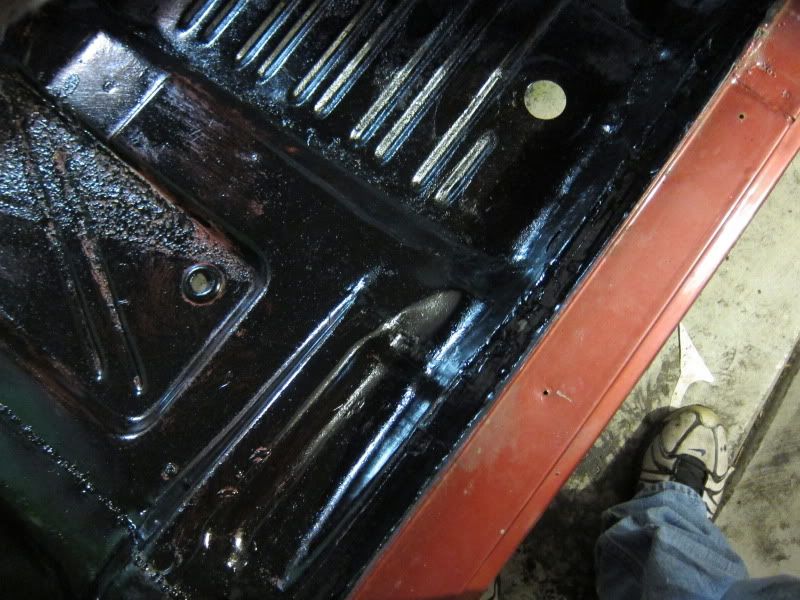
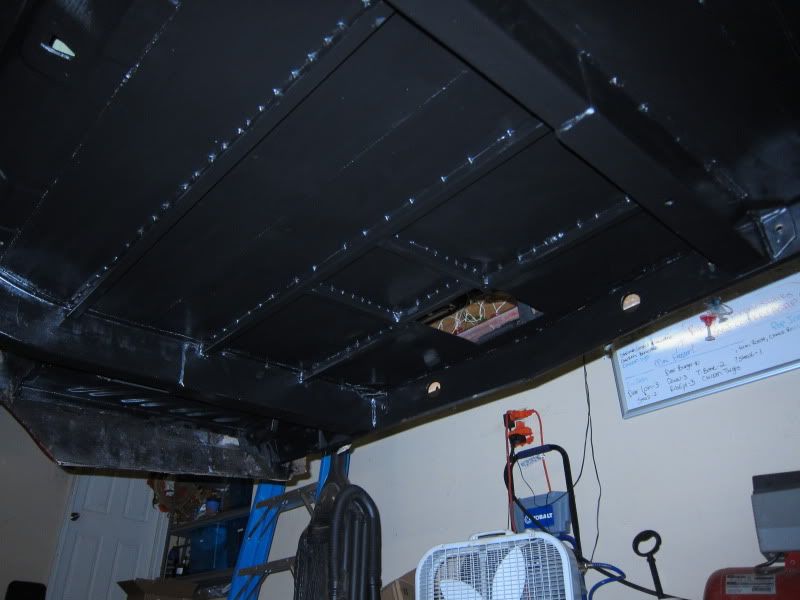
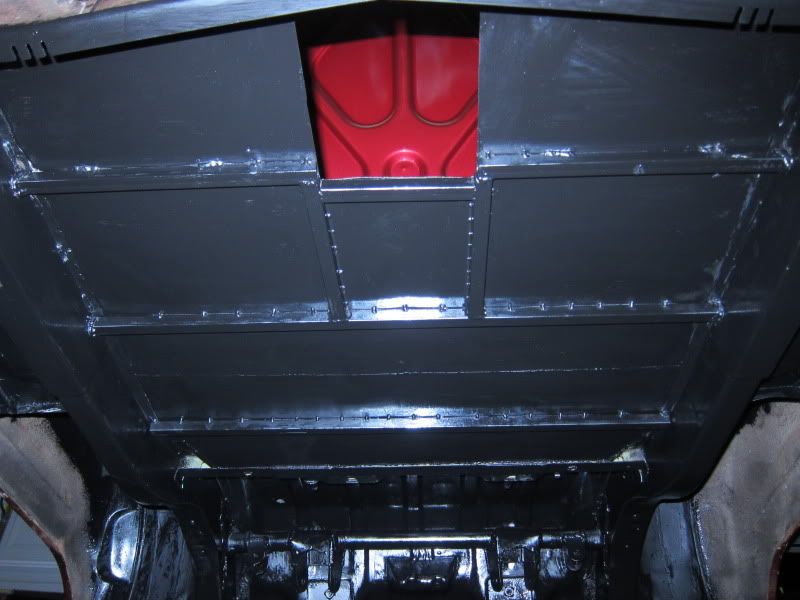
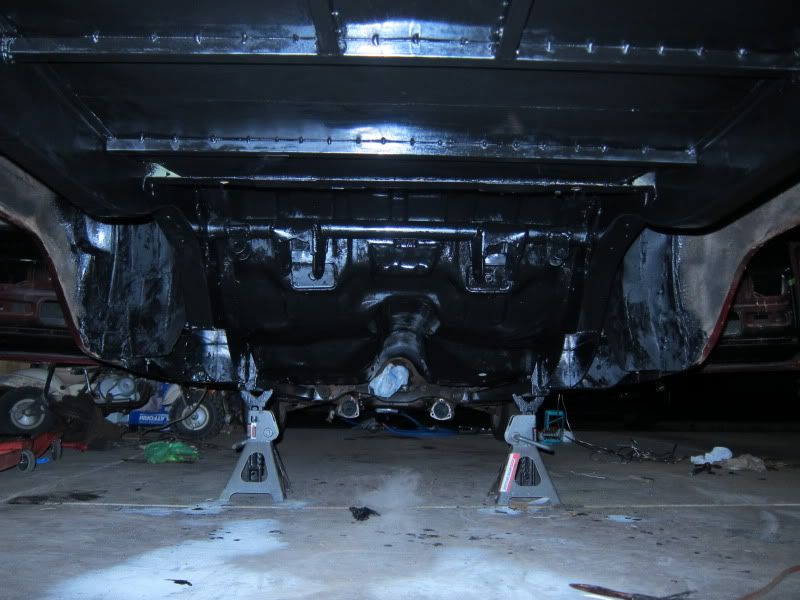
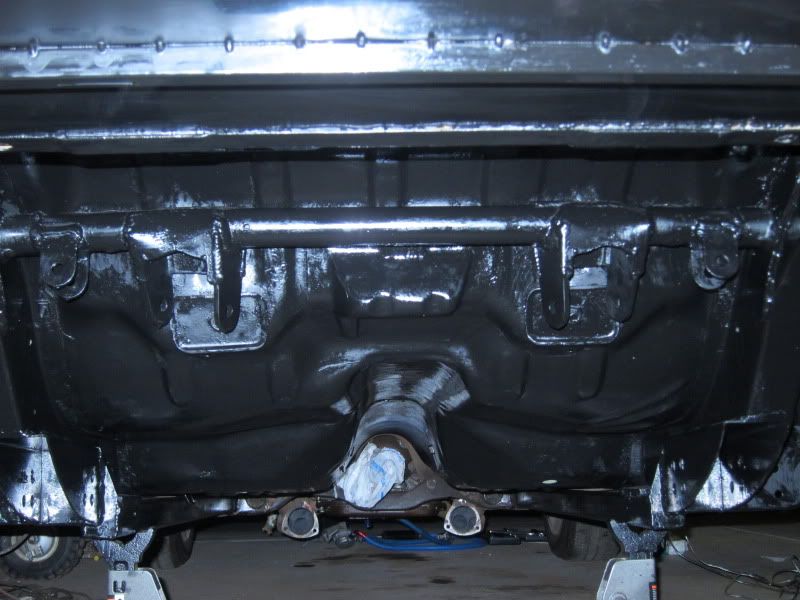
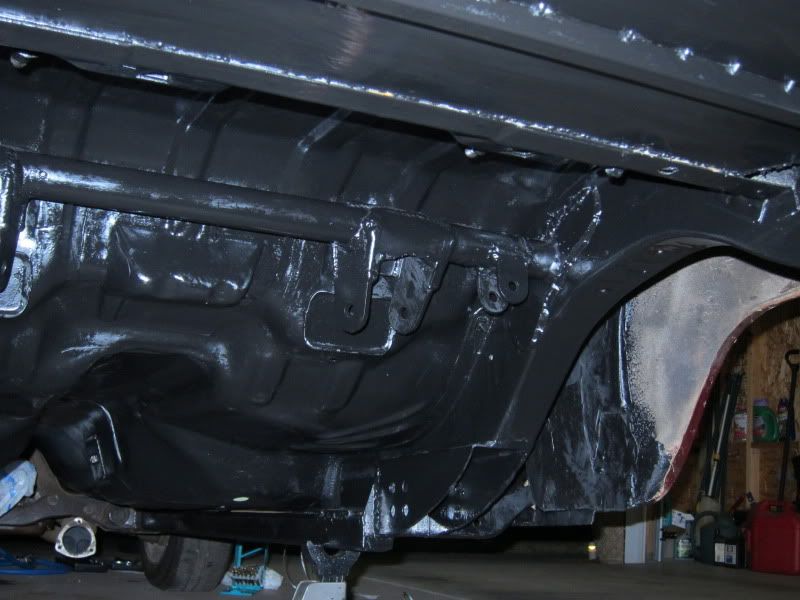
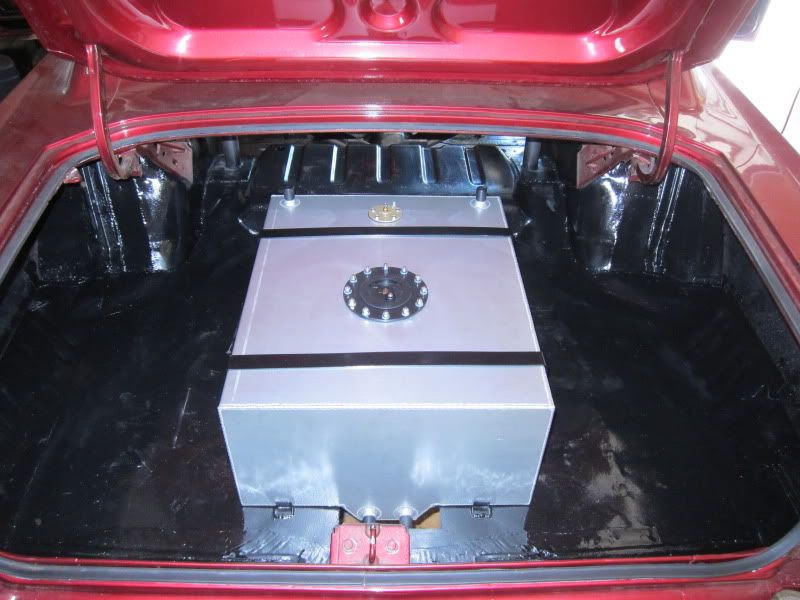
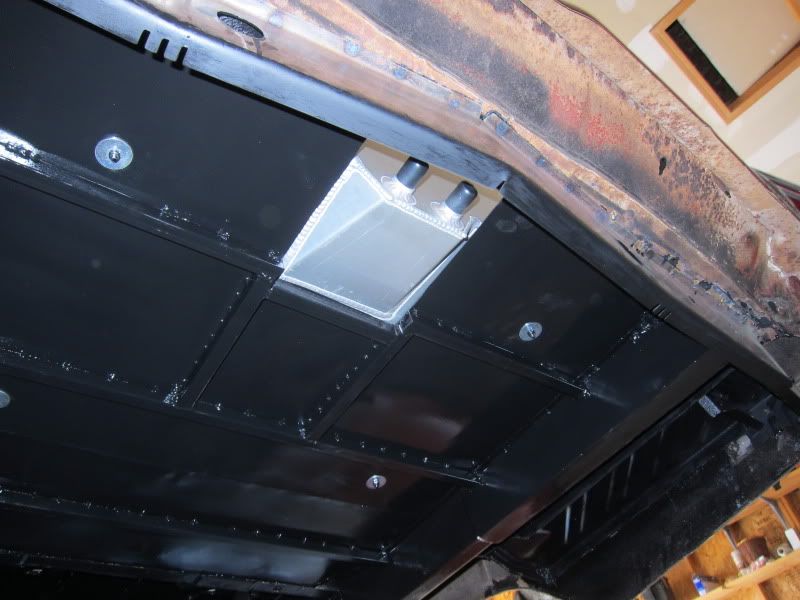
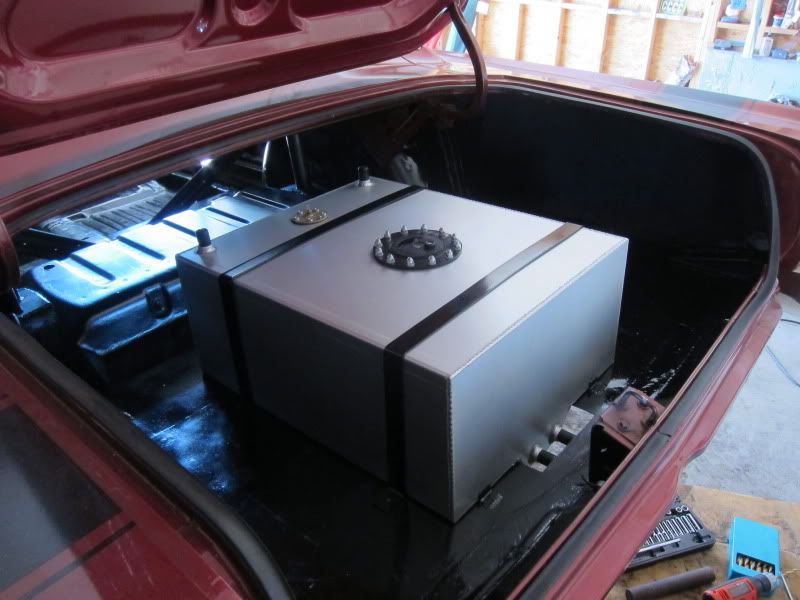
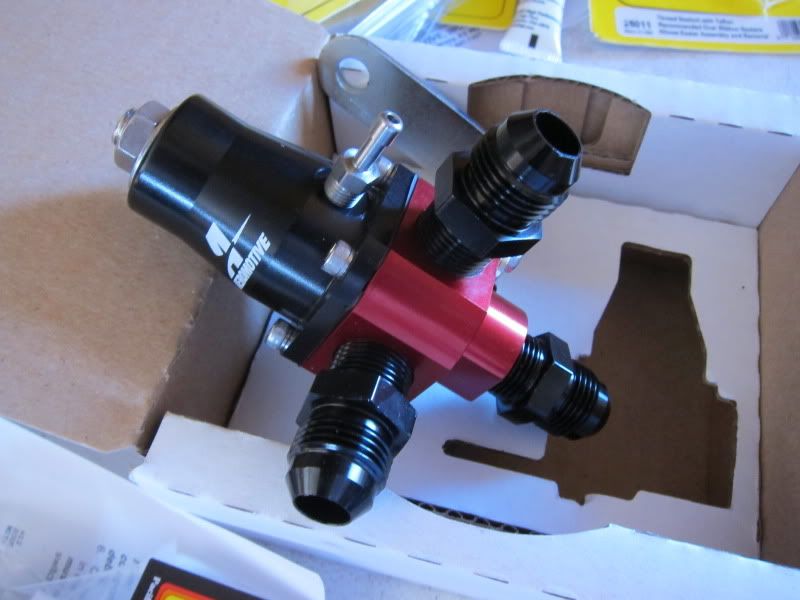
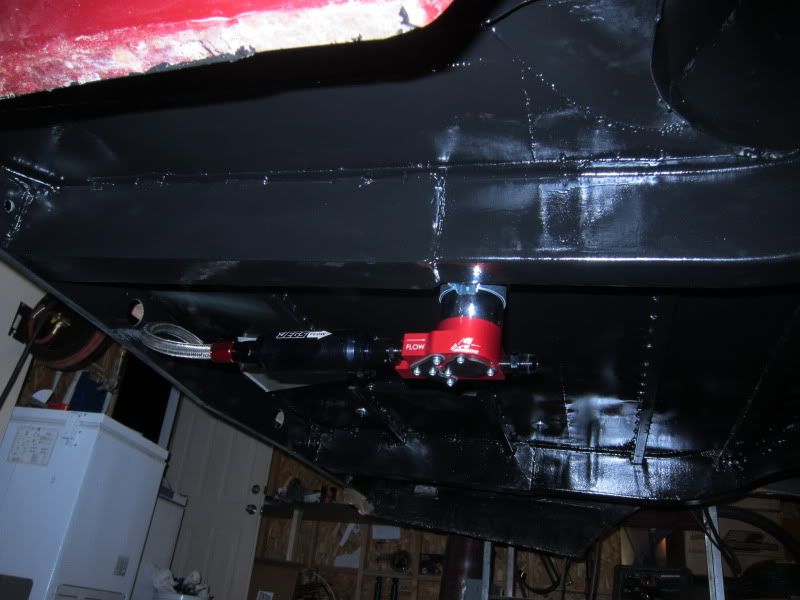
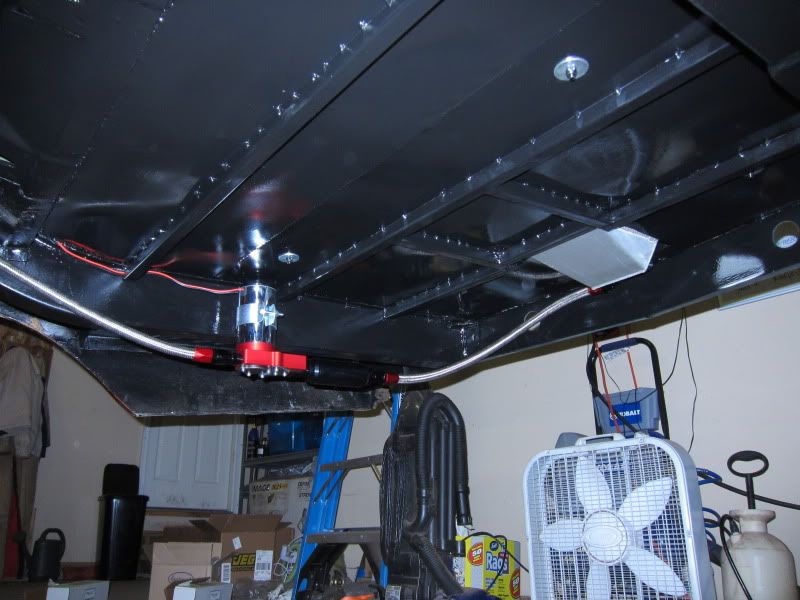
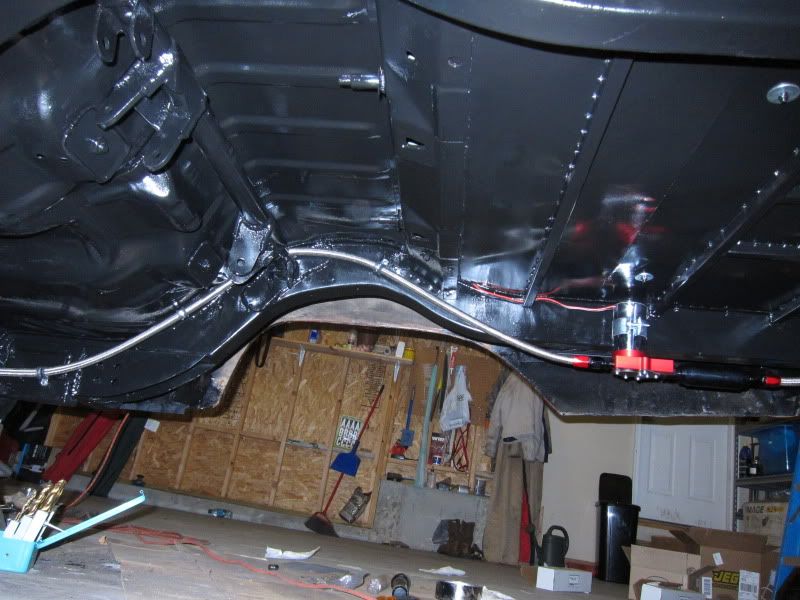
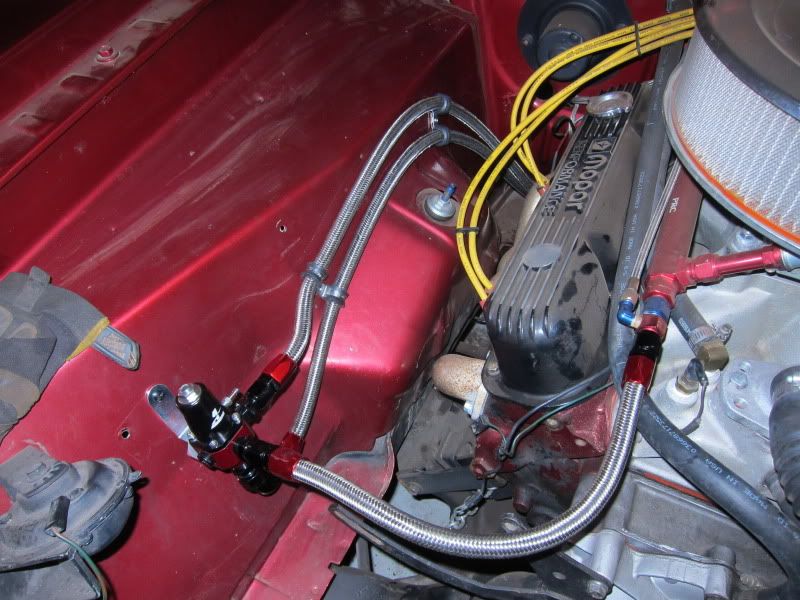
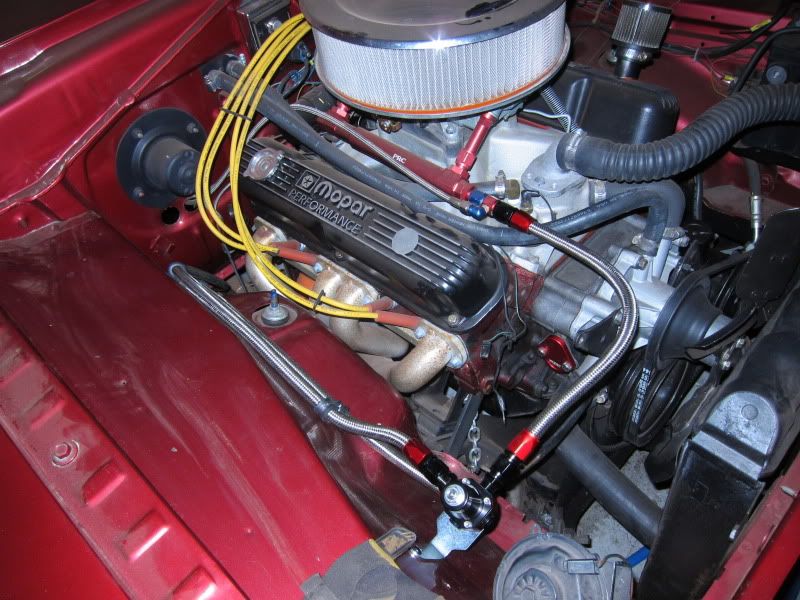
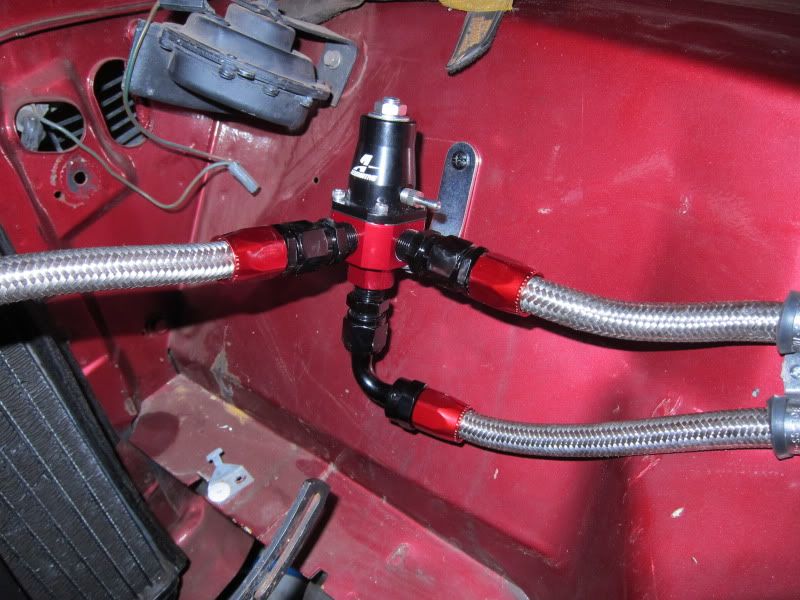
More updates. I haven't got all the updated pictures up but here's some. Got all the fuel lines, fuel pump, trunk pan, Por 15 under body, 20 gallon fuel cel (anodized inside and out), rear crossmember, etc all done. Car is driving condition now but having some issues. 1 being tire rubbing in corners because the car rolls so badly. The second is that the car is cutting out at higher RPM and haven't pinned down what the culprit is yet.


Mad Dart
Nothing to see Here!
Nice work! Is that a summit or Jets Fuel Cell 20 Gal?? I am going to do the same thing but maybe sink the tank down a couple inches further.
Nice work! Is that a summit or Jets Fuel Cell 20 Gal?? I am going to do the same thing but maybe sink the tank down a couple inches further.
It's a Jegs 20 gallon fuel cell with 0-90 ohm sending unit. I had it anodized inside and out since ethanol is the fuel I intend on running down the road. Otherwise I wouldn't have done it. I was gonna sit mine down a couple inches too, but then just decided that it was more work than I thought it would be worth just to drop it a little bit. Also figured no one would really care but me and it will still function the same.
FomocoReformed
Well-Known Member
Man that was some nasty rust and rot!!! Can't believe the so called "body shop" would overlook that, hope he didn't pay too much. You're doing great work with it keep it up!
-


