1964 Dart Grüne Hölle Road Course/Track Day/AutoX Project

-

slant six

Do More With Less
Joined
Mar 16, 2011
Messages
1,156
Reaction score
1,031
Location
IRWIN
12/4/16

Hi Guys, This is the first Post about my Road Race / AutoX Project 1964 Dart GT Named Grüne Hölle.

I have Owned this car for almost a year and a Half.

It is an Honest Running and Driving Bone Stock Slant 6 car with who Knows how many Miles on it, as the Speedometer / Odometer does not work.

To The best of my knowledge the car has spent most of it's life in southern Georgia.

I bought it sight unseen in August 2015 and Took Delivery of it October 2015.

I hauled it Back To PA and was doing some small safety additions / repairs as well as cleaning the car up a bit. - This is what it looked Like when it arrived: - Car is worse than it looks in Pictures - it's a 50 Footer.
DSCN5066_zpsawknfxas.jpg


DSCN5069_zpsktogluun.jpg


DSCN5068_zps9a3babzi.jpg


DSCN5067_zpsofuzxcur.jpg


DSCN5065_zpsshvucy24.jpg


Currently it's 225 with a 3 on the tree and Runs and drives well.
I have been gathering parts for about a year and have just really gotten started on getting this car ready for the track.

As this will be a street and Track car, It will need to have all legal Lights wipers etc.. So I will have to figure out some creative ways to Lighten up the car.

It will also need to be water tight which right now it's anything but.
New front and rear Windshield gaskets as well as a new windshield have been ordered and plant to be installed after welding and Headliner are complete.

The Rear Window Channel was trashed, as well as the Trunk Floor extensions and many of the areas behind the bumper.

I Began some cutting and welding this past week.
 
More 12/4/16

Woah... Holes
DSCN7139_zpsjiu1vkap.jpg


DSCN7141_zps5skgcuap.jpg


DSCN7142_zpsnl5jxtft.jpg


DSCN7144_zpsput722xt.jpg


DSCN7143_zps4xuwjpmy.jpg


DSCN7146_zpsscvvfild.jpg


DSCN7147_zpsyoovgyeo.jpg


DSCN7149_zpsktlah2rh.jpg


DSCN7148_zpsie5pu03z.jpg


DSCN7151_zpsgdsmoaxb.jpg


DSCN7153_zpsbsg3hh7s.jpg


DSCN7152_zpscgpnvhwl.jpg


DSCN7154_zps3iuitzje.jpg


DSCN7155_zpsturixvow.jpg


DSCN7150_zpsgo83aklz.jpg


Some Progress.......
DSCN7156_zpsyykje98o.jpg


Lots of Welding and Grinding..
DSCN7157_zpsg40arcij.jpg


DSCN7158_zps203ztmvo.jpg


Ear Protection also works well for ignoring wife and kid.
DSCN7159_zpsv6vqfxrr.jpg
 
12/8/16

Hi Guys,

I have made some Progress:

Lots of Welding and Grinding to go, but the rear Window Channel Is Mostly Done, Just some more grinding and finish welding and smoothing - No More Holes back there which should be nice!

The big areas that i needed to cut out the rust are filled in with metal now, especially the L/R sides where the Rear Window Channel Meets the 1/4 Panel and the Trunk Area - Most of that was trash and Had to get cut out.


I began to work on the RF windshield channel / cowl area. I should be able to get it into shape by 2017!

Pics:

Both Rear Window Corners are Done:
DSCN7278_zps8aox885i.jpg


DSCN7276_zpstp9znodn.jpg


DSCN7272_zpsnytnwret.jpg


DSCN7271_zpsejmjbnlo.jpg


DSCN7273_zpsqrvpykfs.jpg


DSCN7275_zpsgedq47zl.jpg


THe Bottom Lip to the Trunk Area is Full of metal now - Still Lots of Grinding and smoothing to do.
DSCN7270_zpsy9om1fmj.jpg


Starting to Work on the RF Cowl / Windshield Metal:
DSCN7261_zpskpn41dkg.jpg


THe More I Grind, the More holey the car gets :-0
DSCN7265_zpshzuf5mnr.jpg


DSCN7266_zpsq22qoejv.jpg


Adding Metal again to the Front:
DSCN7262_zpsbnyhmje4.jpg


DSCN7264_zpsyggnpnow.jpg


DSCN7263_zps8kcr6qye.jpg


Making Progress!
 
12/29/16:

Here's What I have accomplished since Last Post..
Rear Window Channel / Pinch weld area is all done with no more holes etc.
Finished with few coats of POR-15 in Satin Black.
Also Removed all of the Paint from the Sheet metal around the Trunk Lid. Plans include to Put a Tape Line under the top of the quarter Panel Seam and Paint This Area Semi Gloss Black..
DSCN7397_zps9t0jsllp.jpg


DSCN7390_zpsuxzb6vyu.jpg


DSCN7391_zpsj7y0ewlz.jpg


DSCN7392_zpslscer2qy.jpg


I didn't spend as much time making the inside of this area Look Good as when the Window / Gasket and Reveal Molding are installed no one will ever see it.
DSCN7393_zpsbinxlx67.jpg


DSCN7394_zpssnzsxkgq.jpg


The area Below the Taillight Buckets and Behind the Bumper trim moldings were gone - Will be rebuilding those from Scratch and burning in some steel - No Bondo for me.
DSCN7395_zpsqb7izqhs.jpg


DSCN7396_zpsplcnm8fg.jpg


Windshield Pinch Weld area is Rebuilt where needed, but when cleaning up I found an area under the lead where there was no steel and lots of holes in the cowl... so another Patch will go in there.
DSCN7398_zpsxhwcshvy.jpg


DSCN7399_zpstm8mx6u0.jpg


Plans include taking 2 bumpers to make one good one..The Bumper from the car is twisted and Bent alot - Foreground - The farm fresh one in the back is good for a paint job, but one corner has no steel in it... so I will cut a spot out of the bent one and weld it in the holey one.. The chrome is there but no steel behind it.
DSCN7400_zpsc3uj3gg8.jpg


That's it for now.
Future plans include a new headliner, sail panel boards, etc, before putting windshields back in.

Then Getting to the metal work in the Rear bumper area and Grafting 2 bumpers into one.


Greg
 
1/17/17:
This thing is getting Less Holey!


Stainless is Polished and New Reveal Clips and Screws replace the rotted Junk:
DSCN7410_zps172htxfx.jpg


DSCN7413_zps1wmw3umk.jpg


DSCN7412_zpszoktef2j.jpg


DSCN7411_zpsjew7pqh8.jpg


Less Holes around the LH Rear Tail Light Bucket and Moulding area:
DSCN7415_zpspt9lcz32.jpg


DSCN7418_zpsukqqzqbp.jpg


DSCN7419_zpsdhpafnip.jpg


DSCN7416_zpsfhr2rykk.jpg


DSCN7417_zpscudnhbi1.jpg


It's Not Restoration Quality but it's one piece and there will no longer be exhaust fumes pulled in the back of the car once it's done :)

Lots of holes left on this side:
DSCN7420_zps3bniomu1.jpg


DSCN7421_zpsnx6ofn4b.jpg


Bumper Bolts getting smoothed:
DSCN7422_zpskwmnnrqa.jpg


DSCN7424_zpsestzpefe.jpg


DSCN7425_zpsndlx7flf.jpg


DSCN7427_zpsc0prq5pb.jpg


DSCN7423_zps4nphilc5.jpg


DSCN7426_zpsgfkv0wuj.jpg


Next Weekend - Tackle the RH Tail Light Bucket.


Greg
 
1-30-17:

Most of the Metal Work is done at least for this Winter.

I still Have The Trunk Floor extensions to Cut out and fab and Weld in place, But I think I can wait until next winter or summer on those..

I Tidy'd up the Sheetmetal around the back and Sprayed it with some Semi-gloss Black.

We'll see if it looks okay once the Bumper is Painted and installed.

Soon I will get the Headliner in and glued then I can Put the Windows and Rest of the Trim and interior Back in.

Here are some Pics:

new Rear Trunk Look - Surround in Black with Gnarly 50 Year old 3 resprays of green on the trunk
DSCN7431_zpswlfu95nc.jpg


Taillight openings will look better when I get the Lights back in there.
DSCN7432_zps1tcx8wqc.jpg


DSCN7433_zpsuuj395mu.jpg


DSCN7434_zpsiupzskzq.jpg


DSCN7435_zpsgyn8jhyw.jpg


DSCN7438_zpsknw08uqk.jpg


DSCN7439_zpsayav6lpn.jpg


DSCN7440_zps1nsshazx.jpg


DSCN7441_zpsfnmyqsbv.jpg


Inside Shot of the Housings etc.. Not Pretty, but Gets the Job Done.
DSCN7443_zpsz9bcoacl.jpg


DSCN7444_zps42rpliqb.jpg


DSCN7445_zps4cjr821e.jpg


DSCN7446_zpsb44kcuf2.jpg


DSCN7447_zpssj6bo9qo.jpg


DSCN7448_zpsndjn5gmp.jpg


When I got this car, it was missing the Upper Quater Spear trim and clips on both sides.VW Bug clips can be made to work with some drilling and Rivet Mods as well as rivet trimming.
DSCN7437_zpsig4q6hxm.jpg


DSCN7436_zpsmd7zuh92.jpg


Lastly, the Inside of the Nasty parts Bumper was cleaned, Treated and Prepped for a coat of POR-15 Semi Gloss. Not too bad now.. Just need to get to the Top side with some black as well.
DSCN7442_zps019hl68v.jpg


Greg
 
3-12-17:

Here are Some pictures - Most of the Winter Work is Done For Now.. Still waiting on a few parts.


Pictures:
Side Profile Still Looks relatively stock...
DSCN7490_zpsvypfmvau.jpg


Nos Valence Painted in Satin Black Cleans up the Front and gets rid of the Smashed up trash that was there before :-o
DSCN7482_zpsolmuzb4i.jpg


DSCN7484_zpsemuqqypz.jpg


Indicators Are now in the Headlamp Bulbs and The Old Indicator Holes in the Valence will serve as Possible Brake Cooling Ducts or Air Inlets for the Engine.
DSCN7483_zpslu5dvjbu.jpg


New Windshield and Gasket is installed - Old Lockstrip is reused for now - New one arriving soon.
DSCN7485_zps3pdjtzqd.jpg


While Windshield was out many dash components were polished and rebuilt. It's nice to have working and readable needles in your gauges again.
DSCN7486_zpsvtvjyrd1.jpg


Rear Window installed / Stainless Trim Buffed to Shine!
DSCN7487_zps99hmmubl.jpg


Rear Bumper Painted and Installed.
DSCN7488_zps9uaj1vti.jpg


DSCN7489_zpsbjw7ncyj.jpg


I will be watering the Money Tree again for the Suspension and Brake Work To begin!
Greg
 
2/26/18:

Not much to update yet.

Rear suspension has been bought.

Saving some more $ before install.
Making a list... checking it 2x......for front suspenion items.

Suspension components alone will cost 2x what i paid for car... hmmmm...


For now check out the 4 year old helper pics..
Getting ready for a nice spring drive tonight.

39609830715_cc45f64bc6_c.jpg
20180226_160054 by Hyperpack, on Flickr


39795290334_27eedceefb_c.jpg
20180226_160057 by Hyperpack, on Flickr


39609832015_b691e2329b_c.jpg
20180226_160053 by Hyperpack, on Flickr

40462993182_9032b524d3_c.jpg
20180226_160051 by Hyperpack, on Flickr

Greg
 
4/23/18:
Well I ordered the Eaton TruTrac LSD for Grüne Hölle.

I had previously acquired the 3.91 Cogs as well as the 489 Case Rear. A bit of Pressing and cleaning and it will be ready to setup etc.

New Trutrac.
27790801798_7a9d0dbce3_c.jpg


40948757164_7f004f9b4e_c.jpg


489 Case to be cleaned and receive Bearings etc.
27790801208_3a9e86d210_c.jpg


Rub a dub dub
40948756364_a8a57085c5_c.jpg


Nothing like a fresh set of bearings and seals for a project like this!
27790800698_2fd8b1a88d_c.jpg


Greg
 
5/6/18:
This morning I put the carrier in the freezer and the ring gear in the oven to get the parts together...
New center section coming along.

41029642985_4afc6f8719_c.jpg


Greg
 
12/30/18:

Did a bit of prep on some grimy junkyard spindles off of an '80 volare.

Hit them with die grinder then sand blast, then metal prep for POR15.


Also got a bunch of front end parts, handling parts, and stuff to convert to big bolt pattern / disc brakes.

Greg
31593720087_98d2e54a9b_c.jpg
 
12/31/18:

Got some Christmas gifts for Grüne Hölle...
- Pro forged inner and outer tie rod ends.. 11/16.
- Tie rod sleeves 11/16"
- 16:1 manual box
- PST fat 1.03" torsion bars
- new lower control arm bushings


I plan to try to get the rear susp. and front susp. in sometime soon. I also have other parts that I have been compiling for this project such as rear suspension, upper control arms, volare master cylinder, adjustable prop valve, I think I have strut rods as well.

Things to still get:
- Lower ball joints (forgot to order them with the rest of the front parts)
- FFI front sway bar
- FFI idler arm retrofit kit
- Pitman arm (who makes a good reputable one for 64 dart?)
- USCT level 2 stiffening kit.

Will be putting on mopar slider calipers with small rotors and big bolt rear drums for now.. they are leftovers from when Ruster got wilwoods.

I will be $aving $ome more ca$h for wilwoods or dr diff or something else down the road.

Greg
 
1/6/19:

Getting the front end prepped for some new parts.


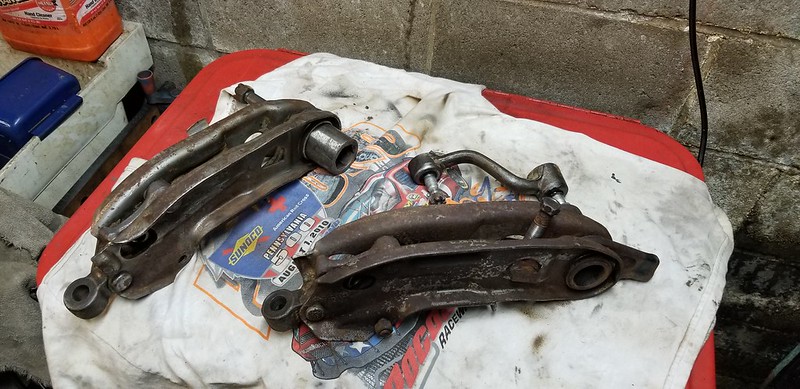
Got all the orig. 9" drums spindles, stamped uca's, wishy and squishy torsion bars, oe bushings, strut rods steering box etc. are coming off.

Only parts to be reused after a good cleaning are the cam bolts, lower control arms, and the center link.

Pictorial:
46584853332_ba58e74718_c.jpg


46584850842_a31711cf7f_c.jpg


46584850372_0d4db867da_c.jpg


Even with good tools and a hammer i had to cut this bar out.. on the work bench heatin n beatin was easier.
45722469285_b717d1083b_c.jpg


39672161473_f641800115_c.jpg
 
1/7/19:

Got some more parts cleaned.


And hafta start organising some of the new bits too :)
45931724544_81eff9fbe1_c.jpg


Greg
 
1/12/19:

The sway bar I ordered is not here yet, and it is needed to mock up the front end for tabs to be welded to the LCA's.
So in the mean time I was looking at the car and figured that the K frame is all bare except the engine. So i built a fixture to support the engine from the top, and dropped the k frame out to degrease / clean/ paint it.


Pictures:
New pitman arm is ready as well as the centerlink.
31776556567_35647be754_c.jpg


FJM spindles with proforged lower ball joints ready for the car. Ma MoPar slider calipers for now.
Rest of the LCA AND UCA hardware is blasted and painted too.
39753046273_3c4e45cb42_c.jpg


Engine support fixture uses top of shock towers and ratchet strap to hold the slant when K Frame is removed.
32843031648_2dc06c6691_c.jpg


Look! No K frame :D
31776556637_e039e641ac_c.jpg


Greg
 
1/14/19:

Got The K Frame Painted.

Maybe I throw one more coat on there.

45831912365_34618489b3_c.jpg


Greg
 
I have a very nice grill for your car if you're ever in need of one, & it's in real nice shape. I'll get a pic & price (cheap) for you if you're interested. I saw the Pa. tag on the car, as I'm in S.E Pa, but no idea where Irwin is.
 
I have a very nice grill for your car if you're ever in need of one, & it's in real nice shape. I'll get a pic & price (cheap) for you if you're interested. I saw the Pa. tag on the car, as I'm in S.E Pa, but no idea where Irwin is.

Thanks, But as you will see that has already been sorted out.
Greg
 
1/20/19:

Well I got all of the K Frame Painted and installed.

Got the new 16:1 Steering Box installed, along with new Pittman arm, 11/16 Tie Rods and Adjuster Sleeves.

Got the Upper arms, strut rods installed too.

Lower arms are in place for mock up but will need to be removed for paint after the sway bar comes in and gets mocked up and tabs welded in place.


I also mocked up one spindle and rotor, Threw the 17x8 Mustang wheel on with a 245-45-17 Tire on it.
Was hitting the Grease Zerk on Full drop as well as the tie-rod end the entire time.

I was able to bolt the wheel on and determined that a 1/2" wheel spacer along with some quality 3" long wheel studs will help things out here.
Pictorial:


New UCA, Steering Bits and Front Strut Rod. LCA is there for mock up - to be finished soon.
46766690552_ebea00d8e1_c.jpg


31877803197_c487290b68_c.jpg


Hits the Zerk :-(
45904214755_0620c0b430_c.jpg


Hits the Tie rod End too! :-(
32943388598_86f752e8d5_c.jpg


That's 1/4" of space and the wheel is hitting. I hope to get a 1/2" spacer to kick the wheel out toward the edge of the fender some more to clear these things.
Also a set of 3" long studs will help here! :)
46819181241_49096a491c_c.jpg


These cars look so much better with a tire filling the wheel well.
45904216325_f1cfb939aa_c.jpg


Transformation at ride height: I think the mock up is going well - Time to fit the sway bar!
32943388668_9b5d27f56a_c.jpg


Cheers!

Greg
 
1/27/19:

I got the Sway Bar mocked up and the mounts mocked and then welded to the LCA's
The Steering column I now rebuilt and refreshed with new seals and paint, etc,

I found that my 1/2" wheel spacers were not wide enough so I went to 3/4" Spacers.

I started to paint the LCA's with some POR15.


39933079263_16d402b70d_c.jpg


46845896872_7d0a133772_c.jpg


Greg
 
1/28/19:

I got the other side of the LCA's Painted, the pics will show some more of the speedway sway bar tab mated to ~2" of round tubing.

Also are some pics of the refreshed steering column.

Greg

Top / Front of LCA's - you can see the Sway bar tab and tubing connecting it to the LCA.
33037166768_0e8ab570bd_c.jpg


45998028685_49d1b5425e_c.jpg


Grody Steering column refreshed and rebuilt - still a 3 speed for now so I need the tubes an levers inside there.
46860310872_5366db577e_c.jpg


45998026435_b376d9a86c_c.jpg


45998026265_c6a3496da2_c.jpg


31971392747_4f40f2113f_c.jpg
 
2/3/19:

I found out that the Hydraulic pump on the lift isn't happy below 10˚F But on Friday it was back up to 20˚F so I got to work and today it was 50˚F.


I got all of the suspension installed and checked clearances etc. A bit of fender trimming was needed in front of the tires. I got the steering column reinstalled.

Now the car is back down with weight on all four tires. Even in the corner Jounce test There is a noticeable difference in the Stock 64 Slant bars vs the new 1.03" bars.... WOW. It seems to sit a bit high for my liking but I can always unwind the the T bars when Needed after the car starts to settle the suspension.
Next week's project will be getting the FJM master cylinder rebuilt along with the Factory Prop / Dist. Block. and an adjustable Prop Valve for the rear Bias. Got some brake lines and fittings ordered for that job.


Pictorial:
Crusty Rotors and Calipers that were saved from Ruster before it got wilwoods, these brake parts are like a cat, cause I think they lived on 8 cars before this one.
46062331555_bbe31746e8_c.jpg


40011496053_3ed14f41d3_c.jpg


40011495933_ca0d39600b_c.jpg


Thanks for the Hand me down Shocks Lou!
46975749041_39da8b22e3_c.jpg


46251346534_3aca284a0d_c.jpg


Steering Column Back in.
32034533707_4d8e5d80a8_c.jpg


32034533887_e96ae00823_c.jpg


New Stance: (probably has to settle the suspension)
46975747681_652d2940c5_c.jpg


32034533227_8a6f5c1340_c.jpg


Greg
 
4/25/19:

I got to do some work over the weekend.

I was able to put a rough alignment on the car (I say rough because even though all of the specs on my gauge are what I want it's pulling Right)

I think I had a faulty Master Cylinder - Replaced that with a new one - Got that installed and bled.

I drove the car for about an hour over the weekend. It can handle corners now and is flat, It feels good. One of the edlebrock shocks is rattling, and if sounds like the suspension is going to fall apart. (might have to get hotchkiss or bilstiens) I have a new Radiator for the car as the original one is now leaking.

Pics of home alignment:
40731385123_aaec05667d_c.jpg


40731385203_4c0d66fb9d_c.jpg


47644664862_5cefb58eb1_c.jpg


32754549587_9b5eab3f16_c.jpg


Hope to start jamming on the rear suspension / axle install or the upgreade to 833 or t5!

Greg
 
-
Back
Top