1964 Dart Grüne Hölle Road Course/Track Day/AutoX Project

-
5/5/19:

I started Prepping the 68-9 B Body 8.75 Housing for it's new home in the 64 Dart.

It was a part that I got at one of the mason dixon races years ago in preparation for this project.
I started to get all of the rust and grease off the outside and I also put new spring perches on 1/2" further to the inside from the B body location.


I measured the original Perch Angles and tried to replicate the dimensions and then tacked them for now.
I also stared working on installing a new radiator.


Housing before any Grinding:
32793468287_310393a601_c.jpg


47683904662_3029511b4b_c.jpg


After getting the perches off and the rust ground down a bit:
47736971401_eda116023a_c.jpg


Getting the new Perches on in the A Body spots:
46867255725_d38bc4833a_c.jpg


32840087187_5105a81e90_c.jpg


47731369312_f8309de098_c.jpg


Getting closer to getting that Rear suspension in!

Greg
 
5/14/19:

Got quite a bit of small things done over the weekend and last night.

- The stock Radiator was leaking and going bad so I got an aluminum crossflow rad to put in the car.
It required a bit of hacking / cutting of the factory core support and also on the rad itself to get it into the car to work correctly.

I had to order some of that HotRod Slinky type stainless radiator tube to set up the angles for the lower hose, and I used -16 AN with some adapters for the upper hose.

Lou stopped up to the Pittsburgh area for a few days of slanted camaraderie and helped with fiddly bits on the car like laying down some spray paint on the areas where I had cut and drilled the original structure.

The rad is now in and I just have to let the sealer setup, tighten a few bolts and AN connectors, then fill it with some Coolant.


Pics Below:
47062804974_dd35c854a5_c.jpg


(old F Body Overflow can is just temporary - the Early A Engine compartment is too small for it to fit anywhere yet. (maybe I can pack it up under the fender like a modern car.)
47062804994_3c3f923c70_c.jpg


47800156762_18c146c007_c.jpg


good shot of the core cutting - I might have to paint the front of the rad black - I can't stand to see all that shiny AL behind the grille and valance and hood which will be blacked out.
47852287471_dd33639dc5_c.jpg


For now stock fan Remains - electric one will be in there soon after I get an alternator that will support it. Battery will also be going to the trunk.
Top Hose - I decided to go -16 rather than play with all of the fiddly bits of rubber hose.
47062804584_f05da37922_c.jpg

Greg
 
5/16/19:

The Rad is all in and pieced are getting prepped, blasted and painted.

I mocked it up the other day and filled will coolant and started the car.. It has 2 small leaks where I welded the -16AN bung to the 2.2 style straight thermostat housing... so I pulled that off and reworded and painted it tonight.

Got it all back together and went for a drive - no leaks!

I am trying a get a bit more sinister look from the front end as well... so everything will be semigloss.. and the 64 Dart grille was a but smashed and trashy so It's a wall hanger and the 63 grille will get a coat of semigloss and get put in it's place.

Pictorial:
Rad and one side tank of that rad are painted and give the factory blackout look behind the grille.
40899578613_0c9810ea58_c.jpg


47866229551_dfa498d746_c.jpg


33988903228_eb2c821257_c.jpg


33988903218_893840bcbd_c.jpg


Swap meet '63 Grille eagerly awaits it's turn to be installed on the car.
47076717734_088467a360_c.jpg


Up Next: Grille install, New Prop Valve fiddling, Baer Rotors, EBC Pads, then maybe the Rear End Install / mockup.

Greg
 
5/17/19:

Got to stop at the garage today before dinner. Installed some new modern horns. The O.E. ones were filled with so much sand and dirt that they did not really honk anymore.
I love the sound of those original '64 horns but they didn't work and are over a pound per horn. So modern replacements were ordered and installed. Nice and light too.

I was able to install the grille as well.

Here is a shot of the recycled F body overflow can. It is tucked up under the RF fender. Helps to get some of the weight onto the right side.
47813979502_987f18a09f_c.jpg


Painted 63 grille installed in the 64.
47819706822_8b99058836_c.jpg


33994740338_aacdb41008_c.jpg


Greg
 
7/6/19:

Today I began to work on installing the RMS Street Lynx Rear suspension.

I had to remove the the Old Stuff:
48217431431_c96c8b9b14_c.jpg


48217431291_5eb5ac9d67_c.jpg


Before I dropped the leaf springs I wanted to check my positioning and welding of the perches and the tire clearance. This is a B body rear Going into the A Body Frame. so it should push the wheels and tires out quite nicely with no spacers needed.

48217476992_b32ecc942b_c.jpg


48217431516_2c77804ce2_c.jpg


Clearance was good on right, but was making contact on left, so I need to center the rear end better when I weld up the link attachments or do a bit of trimming, or both.

Right Has clearance..
48217477917_ef4dd95809_c.jpg


Left not so much...
48217432866_fa0a55e0ea_c.jpg


New Rear Stance..
48217432551_146ed0bb90_c.jpg


48217433076_28bc5f028e_c.jpg


More work on it today!

Greg
 
7/7/19:


I got the Top Bar for the street lynx welded in. It needed an 1/8" Plate on one side to close the gap between the rails.
Welding works better when there are not gaps between the pieces that you are burning in. :)

Hopefully tomorrow I can continue on with the mock up and begin to set up the links, center the axle in the car, locate the mounting tabs for the top links on the rear axle, and then finish weld and paint the housing.

Have to get the driveshaft shortened as well as setup the axles. - I am cleaning, painting and getting new bearings and inner / outer seals.


Pics:
48225974817_bc9eab5167_c.jpg


48225974617_c6455277d9_c.jpg


Greg
 
7/9/19:

Made some more progress yesterday..

- Got the housing situated and placed in car at 13 3/4" Shock Travel, 1° pinion angle up and centered in the frame rails. (as per RMS Instructions)
- Set the upper links on the housing, tacked in place.
- Got the spring perches and link attaching points fully welded to the housing.
- Polished the inner and outer axle seal surfaces on the lathe.
- Cleaned / prepped the axle flanges for paint.
- Pressed in 3" long wheel studs.
- Took the Driveshaft to be shortened 2.25" to use with the 8.75" Rear end, also Dropped off my 3.91 Chunk at the same shop to have the Gear setup in it.. I was having a heck of a time with those gears so I will pay the pros to get those set up, that chunk has ant eaton truetrac in it so it should be nice when it's installed with a real Engine and trans.

Pics of work:

Axle work:
48237699217_a38f9f66b4_c.jpg


48237613196_209e494615_c.jpg


48237613096_5784d40543_c.jpg


48237698757_4f6047898b_c.jpg


Links Installed in car:
48237699772_0c83317734_c.jpg


48237613666_9826d51fe8_c.jpg


This trans jack sure comes in handy when doing this job...
48237699427_4f85762e6e_c.jpg


Getting closer to Paint and Prep: - Its fully welded now.
48237698632_d2a5cd9568_c.jpg


48237612556_2cb61280d9_c.jpg
 
Good job, car's looking great. Never realized how those gas tanks were supported on the earlier year Darts.
 
Good job, car's looking great. Never realized how those gas tanks were supported on the earlier year Darts.
Thank you,
There's more to come.
Yes single strap on '62-'67 Maybe I am not sure when they swapped over to the dual strap running the wheelbase direction.
 
7/21/19:

Got More Stuff done Today.

Rear end in installed and Just Waiting for a driveshaft before road testing.
48340797946_900a324519_c.jpg


48340797961_cf3acc8268_c.jpg


After Lowering the car to the ride height I want I found that there might be some rubbing in the upper rear wheel well. Will find out for sure after road test. It seems that the O.E Ford Bullitt 17"x 8" come in different offsets, so I might swap them from another car and see if that takes care of the rubbing.


Also Did the Baer 10.98" Rotor Install and EBC YellowStuff Pads.
48340797981_a9b4821fc2_c.jpg


Had a new Proportioning valve that I bought a while ago. Installed that and bled everything down.
It's possible that I might get a 4 speed in there before the end of the summer. Need to pull the interior for that job, as I need to swap in the Transmission Hump / Tunnel to utilize the A833 Trans. While that is going on (whenever that is) I also have a Battery Relocate kit and frame connectors to go in (weld in) as well.


Also got a set of proper Deutchland Grüne Hölle plates. Will need to fab up a mount for the front one soon.

Greg
 
7/25/19:

Getting closer.... waiting on driveshaft shop now.

I found out that there are 2 flavors of factory ford issued bullitt wheels. Some iterations have +45mm offset ~ 6 3/8" backspace, while others have about +32mm backspace ~ 5 3/4" backspace.

Fortunately I have 2 sets of each. The +45's are perfect for the rear of the car with the b body rear end. The +32 offset work well up front with 3/4" spacers.. If I want to run the +45 offset then I have to add more spacer in the front as well as source longer 4" lug studs.

Also ground more of the steering stop nub on the a body lower ball joints with f body spindles.
48376118117_81d814026f_c.jpg


Began working on the Firm feel idler arm retrofit.
The oe stuff has just plastic and rubber inside there.. thats all.. I was surprised by the construction

48376117987_97a5eb548b_c.jpg


48376117447_1acb5ca0da_c.jpg


48376117972_369b7d94c4_c.jpg


48376117447_1acb5ca0da_c.jpg


48376117227_638a3495cf_c.jpg


Old arm shell gets outer bushings pressed into the arm housing... all metal.. adjustable..torrington bearings... greasable.

48375979531_cfe5bd3590_c.jpg


Finished product... hope to install tonite.
48375979096_b11ba1377b_c.jpg


48375978971_da38bb4d23_c.jpg


Greg
 
7/26/19:

Got the Idler arm installed, tightened and greased. no movement whatsoever compared to the O.E. plastic and rubber parts.


48381254307_511fe8c55c_c.jpg


48381254387_c163e3c62c_c.jpg


Will have to go the the +45 Wheels in the rear for sure to prevent rubbing in the upper wheel wells.

So I am going to order the longest 1/2" - 20 Wheel studs that I can find and then Press them in the rotors so I can run 4 of the same wheels around the car.


Greg
 
8/3/19:

I got the Driveshaft Back, It was made 2 1/4" shorter to compensate going from a 7.25" Rear to the 8.75" Rear. Got it installed and lowered the car. The muffler was rubbing the driveshaft.. so I got a muffler hanger to pull the muffler away from the the driveshaft by about 1/2" or so.

I took it for a ride with the ride height set where the coil over adjusters for the springs don't compress the spring at all. I like the look of this ride height, but when more people and cargo was added it was scraping the tires inside the wheelhouse on some bumps.

To fix that I simply put 3 turns of spring compression into the coilovers. (raises Ride height)

Still no 4 or 5 speed transmission in there, just the 3 on the tree for now. also just running with a 3.23 open rear carrier. I have a 3.91 Carrier with an eaton Truetrac for the car when I go to the 5 speed, and get an engine that makes some power.

I bought frame connectors as well as torque boxes for the car. Those will probably get welded in when I get to swapping the trans as no matter what Trans I go to use I have to do some sort of cutting to make it work, and the carpet and other inside bits will be out of the car.

I also Fabbed up a Front License Plate mount for my European Plate. It bolts to the original bumper Mounting point in the front of the car.


Glamour Shots:
- As of right now It has the +45mm offset's wheel in the rear and the +32mm offset wheels up front - they are shaped a bit different and a different color.. hope to get 4 matching wheels on there soon.
48448894947_f2ace760f3_c.jpg


48450083272_d458ff1821_c.jpg


48450815581_1331e4fb7d_c.jpg


48449298236_bb0557258b_c.jpg


48448761581_25c15be0bf_c.jpg
 
8/6/19:

Got a spare tire mounted up.

245-45-17's do fit in the well... I thought maybe they were going to be too big or the well size on the 67-69 cars is smaller than 63-66 models.. either way its good to have a spare for it.

48476693416_3bd79b8137_c.jpg


48476838317_55ee94e4d5_c.jpg


Future plans include fixing the pesky fuel filler tube...The design from the factory allows fuel to spill on hard right turns with 1/2 tank or more of gas. :-(
48476838367_9f2c17b166_c.jpg


Here are some more arts glamour shots.. and other stuff.
Kid draws picture of your car... makes you feel all warm and fuzzy inside.. like you have 32° total ignition timing:
48477066947_a36f23c33c_c.jpg


My Dart in front of my grandma's house - Reminds my uncle and dad of 1964-1969 when my dad had a green 64 dart in front of the same house:
48477066697_3d4cfc00c1_c.jpg


48476918611_db4719b766_c.jpg


48476918091_85dea779f8_c.jpg


48477066042_0af5cd4cd3_c.jpg


Dad's 64 Dart: It is the same color as the Grüne Hölle car. Dart GT, Slant 6 4 Speed.
48477361747_a2146676a0_c.jpg


48477213161_c6837e1c37_z.jpg


Some artsy Pics:
I go by this building sometimes on the way to parents and friend's and I love the Font of the Sign. It's totally something like I might see in a magazine ad from the 50's or 60's or something.
48476861181_e50a6e33de_c.jpg


48476866691_2b87ab6ac7_c.jpg


Greg
 
9-9-19:

Nothing Real to report here.

Just went to a local Mopar show then 120 Mile country road loop with the family last night. :)

48704872773_78ae6a7d9c_c.jpg


48705370997_a9e1d99553_c.jpg


Greg
 
5/2/20:

After getting fished with some Other Projects on the Lift, Wife's Exhaust on the Ford escape, and the Jeep XJ Front end rebuild, It was time to get back to working on Grüne Hölle again.

I wanted to get a 4 or 5 speed installed by the end of last summer but that never happened.. I did however enjoy taking the car on local trips and drove it to Hershey PA for the AACA swap meet ( we will have swap meets and races again right?)

So now I am getting back to this car! Starting with installing the Frame Connectors, I got the Right one done today.. Hope to het the left one done tomorrow.

Pics:
Lay out the Areas to grind down to metal ... and scrape lots of undercoat off.
49847195808_58bda3c7e1_c.jpg


49848032462_7a0135fb51_c.jpg


After a few hours of layout, fussing, grinding, scraping and welding with the car's weight on the tires.
49847195743_cb101b58f4_c.jpg


Fully welded
49847195423_ee8b0b3a0c_c.jpg


49847195628_565437f8de_c.jpg


Solid!
49848032142_ae44ee9d78_c.jpg


All the stuff that I scraped off.. There's more to scrape.
49848032157_d70c1f5bee_c.jpg


Greg
 
5/3/20:

I got the Left Side Frame Connector all burned in, and cleaned / Scraped a bunch more rust proofing as well.


I also blew out a bunch of mouse nests and sand out of the frame rails. I had aleady hosed the frame rails out once or twice, but there's still stuff in there!
49852153413_75717f5080_c.jpg


This car spent most of it's life in southern Georgia until 2015. I guess there is a lot of sand down in those parts near the gulf coast. Cars around here just have rust in the the frame rails usually, so to find so much sand and so little rot is refreshing.

Metal Prep after scraping a bunch of rust proof / sound deadener.
49852989637_ece6de4c15_c.jpg


Dry Fit - Lots of wee little bits of trimming to get the gaps close.
49852690001_727b1dcffc_c.jpg


Had to Cut a Window in this side for the parking brake cable to pass through.
49852152933_76532e37e4_c.jpg


All Burned in. It seemed that this side welded better.. Maybe I prepped the metal better, had tighter gaps or had a lot of practice in Overhead Mig yesterday?
49852988997_b144197c1c_c.jpg


49852988947_2aa1dbf2b8_c.jpg


Both sides, Front and Rear tied together and tied to the floor.
49852988962_aa4e98dc5b_c.jpg


Torque Box(es) get installed next, Then Swapping 3speed for a 5 Speed.

Greg
 
5/8/20:

I was able to get the 2 Torque Boxes Welded in the Right side of the car.
Hope to get the Left Side Over the weekend.

49871996182_5c282b5bb2_c.jpg


49871996187_679020b4fe_c.jpg


On some parts the welds ran really nicely.
49871684376_1003e21c99_c.jpg


49871154418_ff90206b3a_c.jpg


49871154268_c480bcae8e_c.jpg


Right Rear Box:
49871995522_a45fd9ea54_c.jpg


49871995472_c92aed4826_c.jpg


Helper kept taking the welding helmet.
49871154103_927c68ee15_c.jpg


I will keep on keepin' on!


Greg
 
5/10/20:

I got All the Underfloor Welding Done! YAY.
4 Torque Boxes are in, and the Connectors are all done too.

Just need to reattach the brake line and fuel line to frame and connect the E brake together, Then Paint, But I hope to do that after I begin to fit the T5 to the trans tunnel.. err the trans tunnel to the T5.


Pics:
Boxes in 4 corners.
49875820796_c6ce7abf21_c.jpg


49875820826_0277a56340_c.jpg


Greg
 
5/11/20:

I got some small things done Sunday and today.

I pulled some Aluminum and Stainless off and decided to Buff ( I have been randomly doing this since I got the car.) This trim level of early 60's car has alot Of britework, some of which I have kept, some of which I got rid of.

I decided to Buff up the R. Rear Stone Chip guard, and both of the rocker spears.
AL / Stainless before:
49884912386_a4bc057540_c.jpg


49885221452_da655ef560_c.jpg


49884912401_ce7fe8350d_c.jpg


Chip Guard done, Spear to be polished.
49884387698_bbcb9573d1_c.jpg


Spear before..
49884387923_29f951ef7f_c.jpg


Spear During Polishing..
49885220852_79d1ffa4b5_c.jpg


Chip Guard After:
49884912141_29a331ab3d_c.jpg


49884388103_577ec6530b_c.jpg


Polished Parts Back on car:
49884911181_c016a4e6b4_c.jpg


49884911306_526c78e36b_c.jpg


THe Bottom of the RF Fender has had previous patch work, there is some filler and fairly well shaped piece of metal there, It had become un-attached from the bottom of the fender, so I decided place some small welds to help hold things together:
49884387023_58cdbdd04a_c.jpg


49885220227_d0be46d7db_c.jpg


I also decided to put an original pentastar back on the RH lower Fender, It was a quirky thing that lots of MoPars had from the factory in the Mid 60's to Mid 70's.
The Original Holes for the emblem were there, just covered with body filler, so I drilled out the filler and added the new emblem on.

49884911186_cd28714ddc_c.jpg


Also Got the Brake line, Fuel Line re installed, and the the E Brake Cable Routed.
Windows that I cut for the Ebrake cable and tension adjustment fit into the newly installed frame connector.
49884387428_42201df0cb_c.jpg


49885220647_0fb19c0c93_c.jpg


Cable Routes to Left Rear through a break out window that the manufacturer includes.
49884911556_c98272f691_c.jpg


Fuel line fits nicely inside the Frame Connector.
49885220462_80a96ed718_c.jpg


49884387103_9d7742fdfc_c.jpg


This steel clip was attached to the floor and kept the fuel line from vibrating and oscillating around, I was able to reuse it, just welded it to the frame connector.
49885220517_e83697ab0b_c.jpg


@Matman / Badvert... Here is that drain Hole... It's the middle small hole in this picture. It sits at the lowest point when that box in installed.. so no drilling for drains needed :)
49884387493_0eac8e9684_c.jpg


I hope to begin pulling out the 3 speed in a day or 2!

Greg
 
5/19/20:

Preparing for the T5 Swap...

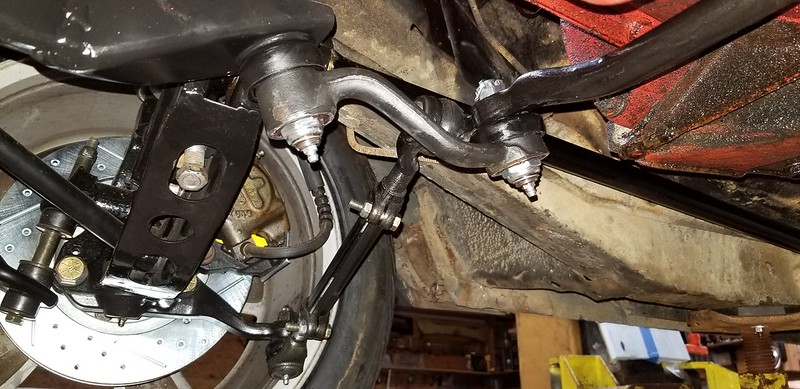
I have not yet gotten to cutting any floors or raising any crossmembers yet, Will be getting to that soon.

I got the 3 speed out and was eyeing up the viability of the parts needed to do the swap. I have 2 t5's and 2 conversion bell housings to choose from; One was From the Slant 6 Bellhousing Group Buy back in ~2005 which I was not a part of, but I acquired one from someone that abandoned their Transmission swap project.

I had a nice flywheel made about 10 years ago at Wilcap - this is the time to use it.. It was made for the '68 Up Slant 6 Crank Hub Register which is ~2.165"Ø and the engine / Crank currently in the car is a Small Hub Crank ...Production years 1960-67 which has a Hub of ~1.870"Ø.

If it were just some sort of stockish build I would get the correct flywheel and be done.. but that's not the case so I designed up some Adapter Rings and am getting those made now.

Picture of the progress:
Bye Bye old Sandy, Greasy Non Synchro 1st Gear 3 Speed!
49910568973_ee87e34a68_c.jpg


Who Knows maybe this car was in a flood? there is tons of sand on top of the trans and stuck to all the greasy Stuff under here!
49911089156_bbd9e58fce_c.jpg


49911088976_819eac43cb_c.jpg


49911385607_bc90bd0159_c.jpg


Lots of sand, Grease and undercoating to scrape off in the tunnel before cutting / grinding / welding.
49910568833_74a03cdfae_c.jpg


Scrapin, we be Scrapin, Mon!
49910568748_795c1c8b9b_c.jpg


Get It light by taking all the sand out!
49911385427_93bfa0d86f_c.jpg


Time for class... er world class t5 that is.. I was taking notes.
49911385412_1ee0c62daa_c.jpg


I was able to purchase a complete T5 with most of the necessary parts from another die hard slant 6 fellow. Since he did alot of the work and engineering this does make things easier for me... He also had Desirable parts in the swap that are just bespoke or no longer made.. such as the Mcloeod 9" Pressure plate. Back in 2000-2004 it was easier to get parts like this from McLeod.
Here is the Pressure Plate when I got it.. Good parts, but it needed refreshed.
49826870057_3f3aff1f8a_c.jpg


49826552691_d175d299aa_c.jpg


49826869517_1e17d165c0_c.jpg


It also Had a Nice 9" Dual Friction Disc with the t5 Splines in the Center Hub. Kevlar Pucks on one side and Organic Facing on the other.
I sent Both the Disc and Pressure Plate to Falcon Clutch Falcon Clutch Specialist in Deer Park NY.
I talked to them on the phone and Told them I wanted the Pressure Ring Blanchard Ground and Rebuilt with the same exact spring pressures as it had When I sent it to them.. I also had them Reface the 9" clutch disc the same way that it was made from McLeod.. One side with pucks and the other side full organic..
Here's how it came back: (New Parts on Right Side !)
49911385312_19ce427c1e_c.jpg


Here's the Flywheel.. Sort of a Fidazna'ish Slant 6 Flywheel.
49911088406_ef2e3c98cc_c.jpg


I got a 28 Spline Yoke, And once the T5 is in the Car I can measure for a driveshaft too.
49911088411_209a05315b_c.jpg


Again, I was able to buy some parts from a successful t5 slant 6 swap that was removed from a car??!? So I dont have to make a trans crossmember, but this one is thin.. so I think I will weld up some metal to beef it up.. Its made of light gauge metal for some reason.
49910568438_91e71e7575_c.jpg


Lastly, I have some measuring and futzing Around with the Input Bearing and associated adapters.
Parts on order to make this all work.. Also might have to fire up the lathe!.
49911088436_8852dd51c5_c.jpg


Cheers! Greg
 
5/21/20:

Major Progress Today! Began to Fit the T5 to the Chassis.. Feels Like a Major Milestone.
The Flywheel Adapter Rings are complete and I can pick them up at the machine shop tomorrow.

Did some Cutting to Test Fit the Trans in the car.. Will get to raising the top of the cross member tomorrow or over the weekend.

During the Test Fit I found that the Trans will not seat as the Pilot Bearing Adapter is a Bit too tall ~ 1.01" So the Gap on the Transmission Face was slightly Less than 3/8" - I figure if I take ~ 7/16" off that adapter on the lathe so it sits further down in the engine will be just about right, 'specially when stuff starts getting hot in the bell housing.


Pics..
Futz'ed around with the Bell housing and Dial Indicator for a while... First Time I did one of those that way... Really Should go back and fix my other stick cars and indicate the Bell on them too. When I was younger I did not know or was never taught that you cant properly just slam random Bell housings and engine blocks together.
49921541286_edf6f258ea_c.jpg


Marking the Cut Lines... Time to get the scissors out.
49921022478_04f0c898a2_c.jpg


Window to my soul.
49921841782_827d77bba0_c.jpg


49921841702_c7f90477db_c.jpg


49921841692_8f1cc3a8ef_c.jpg


Mind the Gap... The trans wont push in any further.. gotta get that fixed.
49921022258_3638a1d83b_c.jpg


Up against the bearing.
49921841502_77269f09ab_c.jpg


The thing fits well until you want to get a proper driveshaft / u joint angle.
49921022223_31337d17e0_c.jpg


Cheers!

Greg
 
5/24/20:

Got the T5 fully mocked and the crossmember cut. I have a few more spots to clearance the transmission tunnel so that I can raise the trans enough to begin taking measurements for a driveshaft and also to check Driveshaft angles.

I was able to take ~7/16" out of my pilot bearing adapter to get the trans to fully seat onto the bell housing.

I also got the Flywheel adapter Rings (I had 2 Made) and the ID was .010" small so I trimmed the ID Bigger on the lathe, and the OD is a nice Press Fit.


Pics:

Goin' under the Knife:
49931288322_3ab6118ed6_c.jpg


49930468613_ed6bea2ff6_c.jpg


Complete!
49930468593_42d450c914_c.jpg


49930468513_6da61bd547_c.jpg


Flywheel Adapter Rings arrived! - Adapts a Large Register Flywheel to a small register crank.
49931287457_c0b161c068_c.jpg


Installed.. Press Fit so it doesn't go any where ;-)
49930980316_1d60bc806c_c.jpg


49931287692_59058645fa_c.jpg


49930468028_3b213750c1_c.jpg


All the Parts Getting installed on the crank now.
49930467793_1c1ed07979_c.jpg


49930979621_6824124bc2_c.jpg


More Hacking through the floor.
49930467388_61101a070f_c.jpg


Man, that body Saw sure is handy to have when you want to make delicate precision sheet metal incisions..
49930979201_b644002542_c.jpg


Marked the Cut Line.. No turning back now... Break out the Cut off Wheel!
49930467083_0e43d86b02_c.jpg


49930979161_e1b10b8f37_c.jpg


Through the Crossmember.
49930979026_8bd7579fe4_c.jpg


Done!
49931286487_0b88cfb894_c.jpg


This will become the upper crossmember, I am not making some new piece, just welding this one back in up higher.
49930466788_81b4cb3d4a_c.jpg


Shorter Pilot Bearing adapter works. Also have room to press bearing back a bit further if needed.
49931286477_93b7b21900_c.jpg


Some Parts where the T5 still hits the tunnel... The Chrysler trans's were a lot more sculpted in this area..
49931286217_b56026e73e_c.jpg


49930978426_175e910947_c.jpg
 
5/24/20 continued:

49930466223_2a1a8bc9f7_c.jpg


49931285387_698820f6bc_c.jpg


Woo Hoo! 5 speed sticking up from below!
49930465818_06c46cf04e_c.jpg


49930465483_8e08f409e7_c.jpg


A couple more clearance checks...
49931285017_1166683187_c.jpg


49930977441_d8714a746e_c.jpg


'Till Next Time!

Greg
 
5/28/20:

Sorted out the lower Cross member below the transmission.

I had a lower trans cross member for a mopar with a t5 swap from an old friend, Sam Powell.
49910568438_91e71e7575_c.jpg


That part ended up not fitting due to it being for a different Body style 67-76 A Body Mopar..
So I began to modify the original trans cross member out of this car that was used with the 3 speed.

I got to cutting and modding, Fabbing and Welding.

My original Idea Sort of worked, but it located the Trans up too high in the car.
49943965066_7b879a0c30_c.jpg


This was an easy mod, Cut come clearance windows on the front and rear of the cross member and then weld up the 2 large holes that ma mopar had for the access to the trans bolts, and put small slots there..... but it was not to work :-(
49943965111_06e744f198_c.jpg


49943964936_bee348c449_c.jpg


Simple and worked well in theory ( in my mind) but not in real life on the car.
49944257417_9825353cdd_c.jpg


49944502681_9a625846e0_c.jpg


So that not so messy part had to morph into this betwixt beauty of mangled wire welding metal:
49943364488_0e15702e60_c.jpg


I basically had to cut and lower the lower attachment point of mount ~5/8". So I cut some metal strips and installed the lowering kit.
49943873461_b3535a3d0c_c.jpg


Finsihed rresult holds the trans in place without too much fiddling to get things all together.
49943364378_495400b86e_c.jpg


49943364283_500179bbcc_c.jpg


49944164352_5d17c3e840_c.jpg


49943364078_76cf9bc3fd_c.jpg


Next, Clutch fork fitting, Driveshaft getting, then Upper cross member making.

Stay tuned!

Greg
 
-
Back
Top