1972 Daddy Daughter Duster

-
There is also a Sunday cruise at draft picks, on N Aurora road just west of RT.59 12:00 to 3pm haven't been there yet so not sure if it's any good.
Hi Mike,
I've heard about the draft picks cruise, but haven't made it there yet either. Gonna try get back to Braconis tomorrow after work for a slice. Typically a smaller low key event. But nice just the same. Maybe see you there?

Take care,
Pat
 
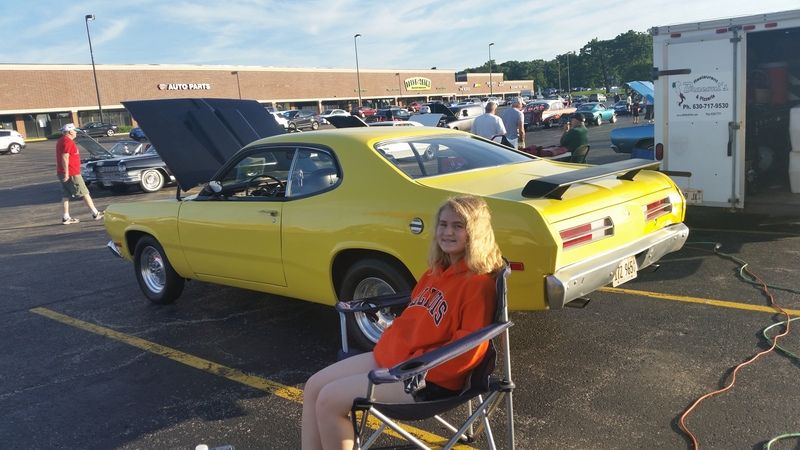
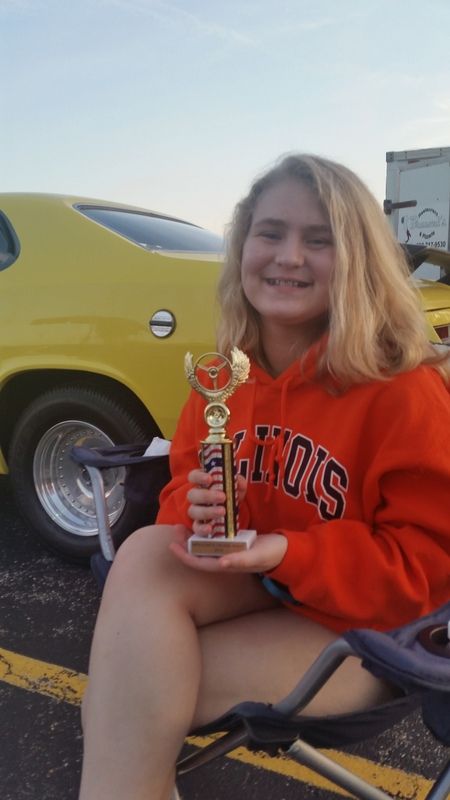
My daughter and I hit a local cruise night when I got home from work one night last week last week. Spur of the moment, had a great time. And to top it off she won a trophy with her Duster. Totally unexpected! You couldn't have pried that thing away from her all the way home LOL!

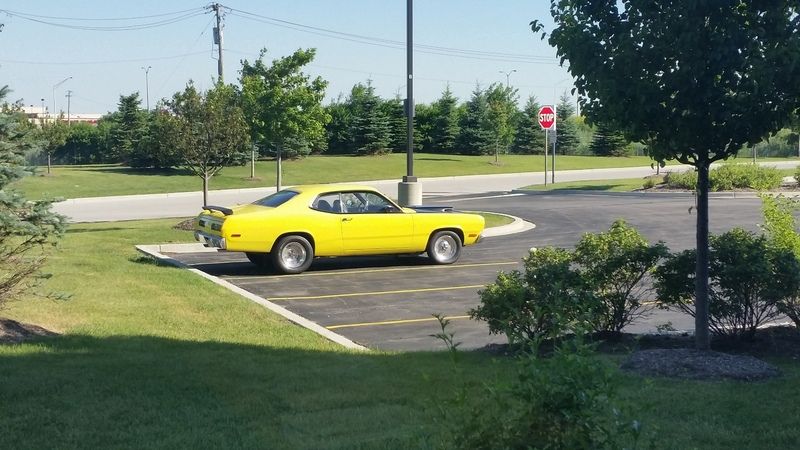
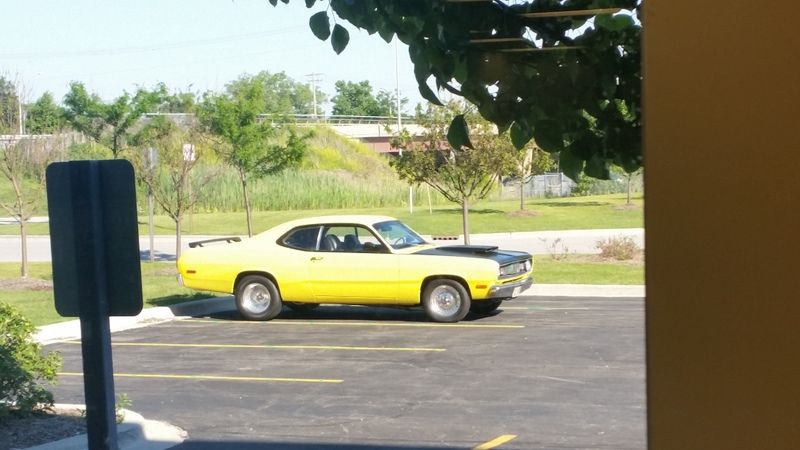
I closed shop and snapped a few pics from my office window after the crew left for the day. Then swung by the house to pic up my daughter.


My little Gear Head Angel!


The proud girl! Just doesn't get any better than that.


Take Care Folks,
Pat
 
Well, finally got back in the garage this morning to knock out a few more tasks, i.e. pesky rear main seal leak and harmonic balance. next weekend I'll get the tranny out and fix a leaking front seal, and anything else that I can.

hb%202%206%2017_zpsgbxdgeam.jpg


HB%206%2017_zps6nrcvivo.jpg


rear%20main%20b%2017_zpsj3u7qdfr.jpg
 
Kudos to your daughter on the trophy. Did they add points for the big smile?....should have.

We all hate those pesky leaks. Just replaced the ever so slightly dripping rear main on the silver Duster last month. I tried a seal Mancini sells that has two thin rubber "o ring" style seals on each side. So far, so good.
 
Update:

Mostly a "Daddy" project now that both girls have jobs for the summer. Though they'll help out when they're able.

They both had to work, so here's how I spent Father's Day Morning..... Actually everything came out pretty smoothly considering I did it solo. Took about 2 1/2 hours. Though I must admit, the transmission sure seems a whole lot heavier than they did when I was a kid dropping them in the driveway with a floor jack and blocks of wood! LOL Will definitely try to find someone to give me hand getting the tranny back in when the time comes!!!

Resized_20170618_114943_zpsdsflbepq.jpg


Guess what I forgot to do...?

Resized_20170618_114958_zpsfelxyvyy.jpg


Here's a hint! LOL

Resized_20170618_115358_zpscfiglanb.jpg


Resized_20170618_114927_zpstr9bs9fz.jpg


Not good.... :-(
Resized_20170618_115815_zps9j97lrte.jpg
 
Last edited:
Just a quick update on our build. While the girls haven't been as involved due to school, friends and having their driver's licenses :O ! They are now asking when/if they can take the Duster to school! Been slow going but we've made a bit of progress. I replace the front pump seal, gasket and bushing along with the rear seal in the 727. And got it and new 3500 Converter back in the car thanks to the help of an old HS Gearhead Buddy on mine. (Damn near killed ourselves getting it in! LOL) Got the new rear main seal on the 340. Just need to get the oil pump, windage tray and oil pan bolted back in place.

This past weekend I got sick of idly looking at the car while waiting for warmer weather to arrive so I decided to bring the work inside. Pulled out the roached tail light assemblies to repair and refurbish them. So actually felt a little bit productive!

Be well folks,
Pat
20170823_180857_resized.jpg
20180225_144949_resized.jpg
20180225_145346_resized.jpg

The old seals weren't actually sealing anything!

20180225_144956_resized.jpg
20180225_151013_resized.jpg
 
Last edited:
One of the housings was somehow melted/warped?

20180225_144349_resized.jpg
20180225_144356_resized.jpg


But a little time with my heat gun and putty knife got it pretty close enough for my purposes.


20180225_144759_resized.jpg


Cleaned them up a bit and ready to proceed with the repairs (Broken mounting tabs, loose sockets etc) the some fresh paint. ;)

20180225_155835_resized.jpg
 
Last edited:
Note broken tabs and melted/misshaped housing on right side.
Housing before.jpg


Heated the melted housing with a heat gun and pushed out with spoon to shape. Not perfect but good enough for my Hooptie!

20180310_095448_resized.jpg


Housing After.jpg


Used POR15 Epoxy Puddy and JB Weld to form new tabs. I could've ground the finish smoother but just aren't that concerned about it for our application.

20180310_090620_resized.jpg


20180312_214013_resized.jpg


Overall, pretty pleased with the finished, low-buck, results.
 
Hit the inside of the housings with rattle can "Chrome" and it really brightened them up. Should definitely throw a bit more light than before.
20180225_144949_resized.jpg


20180316_221829_resized.jpg


The girls and I opted for Semi-Gloss black to tie then in with the black Go-Wing and future black striping kit.

20180316_223201_resized.jpg
20180316_221903_resized.jpg


TL B4.jpg

Before

TL After.jpg

After

20180318_101645_resized.jpg
 
Hey Folks,

Just another update on the the project. Both girls are officially high school seniors now (hard to frigging believe!) and working to earn/save some money for college. So it's pretty much a Daddy project LOL!

Made some progress in the past few months:
Got the transmission back in the car and replaced the transmission and motor mounts.
20170923_095422_resized.jpg

Put the oil pump, windage tray and pan back in.
20180603_154504_resized.jpg
20180603_155245_resized.jpg
20180610_143922_resized.jpg


Clean up the filter adapter and got it in before bolting the headers back in.
20180617_091443_resized.jpg

Kicked off Father's Day in the garage by getting the headers bolted up.
20180617_104004_resized.jpg
20180617_104026_resized.jpg


Will be getting the pulleys, fan, radiator back in this weekend. Then need to recheck/torque all the fasteners to make sure I didn't miss anything. (In my haste..Failed to tighten the filter adapter last time and spewed oil upon start up LOL!) and hope to fire it up by the end of the month. Fingers are crossed the a) it starts, b) it doesn't leak and c) the transmission works!

Happy that the car is getting close to running again.

Be well,
Pat
 
Just adding a little update to the thread. The girls are 18 now and will be heading off to college in the spring. So it'll be pretty much a Daddy/Mommy project moving forward. LOL!

For the first time ever the Duster is leak free! Crazy to no see oil and transmission fluid spots on the garage floor. The trans ran great all summer and I absolutely love the new 3500 series torque converter.

After our last spirited drive, "The Boss" told me the car is running better than ever, and I had to "get some f'ing brakes on this thing!" So, obviously I had no choice but to heed her command.

Been eyeballing this Wilwood 11023 kit for awhile and finally pulled the trigger. Will be running new lines front to back, new master cylinder and rebuild rear drums.

Pat
20181126_174917-jpg.jpg
20181126_175009-jpg.jpg
20181220_105540-jpg.jpg
 
Starting to dig into the project after Christmas. Thanks to some input from fellow FABO members I was able to procure most of the necessary components for the job. Pulled off the front drums, de-greased and took off the rust from the Spindles, CA's etc. Then hit them with a few coats of POR15. Nothing show quality here, just protecting parts.

20181229_114707_resized-jpg.jpg
20181229_123625_resized-jpg.jpg
20181229_140415-jpg.jpg
20181230_130740-jpg.jpg

20190105_152212_resized-jpg.jpg
 
Got the adapter brackets mounted onto the drum spindles. Other than drilling out a threaded bolt hole to 1/2 inch (pointing to in in pic 1) and using a floor jack to load the suspension in order to line up the holes for the steering linkage, no fuss no muss.

Drill out this hole with 1/2" bit
20190120_115737-jpg.jpg


Use floor jack to line up holes for steering linkage
20190120_111216_resized-jpg.jpg
20190120_111311_resized-jpg.jpg


Studs in hubs
20190120_123640-jpg.jpg


Used the rim to hold the hubs in place so I could get the 70lbs torque required.
20190120_124225-jpg.jpg


20190120_111216-jpg.jpg
 
Assembled the hub/rotor assemblies .
20190120_131420-jpg.jpg

Packed the bearings and pressed in the seals.
20190120_130413-jpg.jpg

20190120_130418_resized-jpg.jpg


Assembled hub
20190120_132259-jpg.jpg


Assembly on the spindle.
20190120_134735-jpg.jpg


I must say, this has been one of the simplest, straightforward mods I've done so far. My first impressions are very favorable !

The hardest thing of the whole installation was torquing the Torx head bolts to spec. Two trips the the store and 4 trashed T40 bits later, I got it done. LOL!
 
Got the hub assemblies torqued to spec and Loctited. Froze my a$$ off in the garage but got the calipers mounted. Test fit the Centerlines which fit with room to spare.

20190127_143926-jpg.jpg
20190127_144117-jpg.jpg
20190127_144050-jpg.jpg
 
Gonna remove the old MC and Brake Lines front to back this weekend. Will update with more pics and trials/tribulations and things progress.

20190114_172739_resized-jpg.jpg
20190115_180303_resized-jpg.jpg
 
Steel wooled the surface rust and threw a coat of POR15 on the tank just because. Will need to pulled it out when I repair the rusted spare tire well.


20190113_114919_resized.jpg
20190113_130846(0)_resized.jpg
 
I have been feeling motivated these last few months. Mainly because I'm feeling like a lot of the repairs I've been putting off have, or are getting done. While we're never really done with our cars, I'm seeing the light!

Be well folks
Pat
 
-
Back
Top