You are using an out of date browser. It may not display this or other websites correctly.
You should upgrade or use an alternative browser.
You should upgrade or use an alternative browser.
69 Cuda resto
- Thread starter afbill
- Start date
-
afbill
FABO World Ambassador
I wasn't going too fast....30 mph...maybe. I got multiple surrounds from different people. In the future I may try to repair some of the other ones and see if any members want them. I'll road test mine first and see how well they hold up. Frankly I can't remember who I got them from and, stupid me, I emptied my PM box a while back. If the grilles don't hold up I'll try the Fusor.
4404spd
Well-Known Member
If you want to melt them back together the best way I found to do it is a Weller soldering gun with the flat paddle attachment that comes with the kit. I have repaired a lot of bumper cover this way and the hold up well.
afbill
FABO World Ambassador
When we were removing the aft end of the right side rocker we found that the aft floor pan is rotted out under the forward floor pan. OH well, just more repair work.
View attachment IMG_0577.jpg
I also threw on a fender just to dream for a bit
View attachment IMG_0581.jpg
View attachment IMG_0582.jpg
Hopefully we'll have the right side rockers on this week end and we can start removing the floor. The government furlough, if it happens, has been reduced to 14 days so that's 8 less days to work on the car.....damn.
afbill
FABO World Ambassador
We got the right side rockers and wheelhouse welded in and pulled the front floor pan. I also got some sheetmetal and drew up a template to start repairing the front of the rear floor pan.
View attachment DSC01119.jpg
View attachment DSC01120.jpg
View attachment DSC01121.jpg
View attachment DSC01122.jpg
View attachment DSC01123.jpg
View attachment DSC01124.jpg
View attachment DSC01125.jpg
View attachment DSC01119.jpg
View attachment DSC01120.jpg
View attachment DSC01121.jpg
View attachment DSC01122.jpg
View attachment DSC01123.jpg
View attachment DSC01124.jpg
View attachment DSC01125.jpg
340sFastback
Well-Known Member
Good progress. Looks like you are getting a lot of welding experience....
afbill
FABO World Ambassador
Yes, yes we are getting a lot of welding experience. The last couple of days I've been putting my fab skills (ahemm) to work. I starten fabing the patch panels for the rear floor pan. Since we lack the ability to make compound, complex bends the panels are going to be made in multiple pieces and welded together. I started by making a paper template and cutting out the piece, benbing it to shape and then building other pieces and welding them together. I started by trying to form the patch to the existing rear floor but when I matched it to the new front floor it didn't line up. I decided that the important thing was that the patch matches the new floor so I used the new front floor as my template. I think what we'll end up doing is building the patch, welding it to the front floor and then installing it as a unit, cutting out the rear floor where the patch ends. if that makes any sense!!
View attachment IMG_0637.jpg
View attachment IMG_0638.jpg
View attachment IMG_0639.jpg
View attachment DSC01126.jpg
View attachment DSC01127.jpg
View attachment DSC01128.jpg
View attachment DSC01129.jpg
View attachment DSC01130.jpg
It still needs cleaned up a bit but it's not too bad.
View attachment IMG_0637.jpg
View attachment IMG_0638.jpg
View attachment IMG_0639.jpg
View attachment DSC01126.jpg
View attachment DSC01127.jpg
View attachment DSC01128.jpg
View attachment DSC01129.jpg
View attachment DSC01130.jpg
It still needs cleaned up a bit but it's not too bad.
afbill
FABO World Ambassador
This is why:
Putting in this stinking hardwood floor was a NIGHTMARE!!!! First I to replace a bunch of sub-floor, easy right? WRONG!! The **** was glued to the floor joists. Then Home Depot screws up the order for the flooring, then I realize I didn't order enough. How many boxes short was I, you ask? 14 fricking boxes!!!! Then the installation of the moulding and quarter round. CRIPES!!!!!!!!!!!!!!!
View attachment DSC01217.jpg
View attachment DSC01218.jpg
Well, the floor is done and, yes, yellow dog hair and cherry floors go great together. Any whooooooo, I finally made over to my mom and dads today and did a little painting on some pieces parts. My dad has been working on trunk pieces and the front cross member which I, of course, forgot to take pics of. I'll get some this week. The cross member looks great, take my word for it..HA!
View attachment DSC01138.jpg
View attachment DSC01139.jpg
View attachment DSC01140.jpg
View attachment DSC01142.jpg
View attachment DSC01143.jpg
View attachment DSC01144.jpg
I think the paint gun was one of the best investments we've made on this project!!
afbill
FABO World Ambassador
little by little we are getting some "small" stuff done. I finished the one side of the rear floor patch, my dad welded in braces for the front cross member and PORed it. Also, a few weeks ago he realized that the back of th car had moved and the trunk lid wouldn't close any more. No, we didn't know to put bracing in. Any way, he decided to go ahead and tack in the rear valence to hold the rear in place. A little back assward but it'll work. He aslo welded in the trunk latch fixture and the bumper brackets.
View attachment IMG_0722.jpg
Since we don't have the means to make complex bends (****, we have a hell of a time making a straight bend) I have to piece together the panels were the complex bends are. Still, no too bad. It'll work.
View attachment IMG_0723.jpg
View attachment IMG_0725.jpg
View attachment IMG_0726.jpg
View attachment IMG_0727.jpg
View attachment IMG_0728.jpg
View attachment IMG_0729.jpg
Furlogh Friday starts on July 12th. WWWOOHOOOOOO, 11 fridays off in a row (except for travelling, though)!!!!
340sFastback
Well-Known Member
Good progress.
4spdragtop
Well-Known Member
Awesome work Bill! Lets see pics of the grills when ya get them together.
afbill
FABO World Ambassador
The grilles are gonna be a while. I'm gonna send the chrome pieces off to be, well, chromed.
afbill
FABO World Ambassador
I finished the rear floor pan patch panel this weekend. It's 8 seperate pieces welded together. It turned out pretty good. It'll be under the front floor pan so cosmetics weren't a priority.
View attachment IMG_0773.jpg
View attachment IMG_0774.jpg
View attachment IMG_0775.jpg
I got a new piece of glass for my sand blaster so I can start stripping the seat braces and hopefully within the next few weeks we can get the floor pan in. Moving right along!!
View attachment IMG_0773.jpg
View attachment IMG_0774.jpg
View attachment IMG_0775.jpg
I got a new piece of glass for my sand blaster so I can start stripping the seat braces and hopefully within the next few weeks we can get the floor pan in. Moving right along!!
Ma Snart
Well-Known Member
340sFastback
Well-Known Member
Great work!
afbill
FABO World Ambassador
Furlough Friday!!!! Got the torque boxes replaced today.
Front torque boxes in
View attachment IMG_0800.jpg
View attachment IMG_0801.jpg
Rear torque boxes removed
View attachment IMG_0802.jpg
View attachment IMG_0803.jpg
Rear torque boxes installed
View attachment IMG_0804.jpg
View attachment IMG_0805.jpg
Sammie and Nana could care less
View attachment IMG_0806.jpg
Got a birthday party to go to Sunday afternoon but I'm hoping to get over in the morning and start the prep for installing the patch panel. Last week my dad also got the left side of the car, behind the quarter, sandblasted so it's ready for primer. After I get the patch panel in it'll be time for another paint day.
I'm so glad I read this. First of all, kudos for what is clearly an intense undertaking. Secondly, you've made my project seem so much easier by comparison and have greatly elevated my appreciation for my car's sheet metal!!
PS: I got the furlough joke. A couple of our guys were out today as well.

PS: I got the furlough joke. A couple of our guys were out today as well.
afbill
FABO World Ambassador
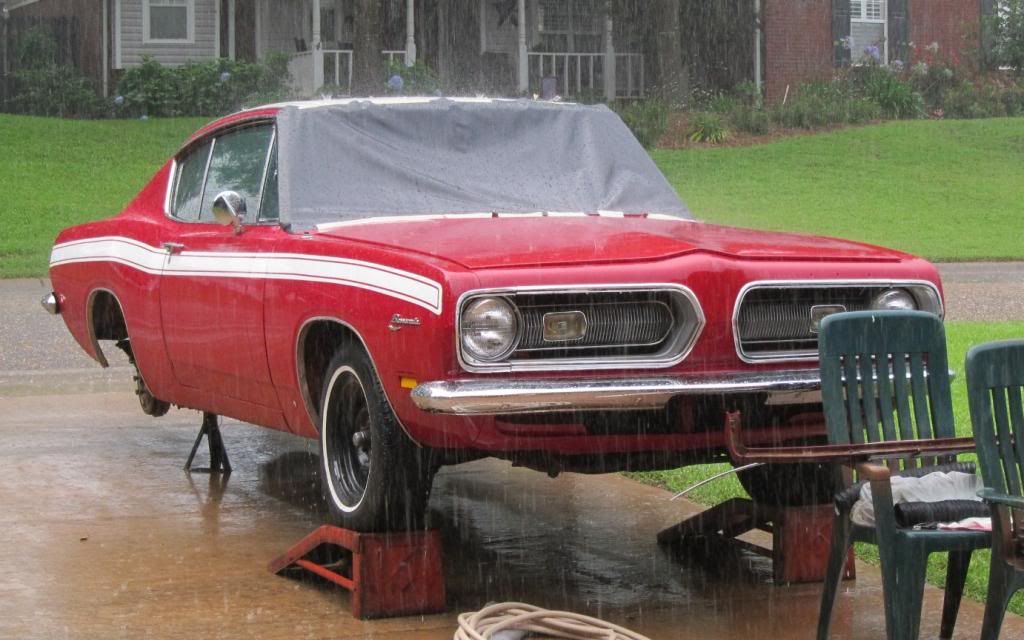
T&T, thanks. Your car does look good. I will say though, I thought we had it bad doing our car in a crowded two car garage. I guess it COULD be worse, we could be working on it in the driveway, in the rain. Good luck brother.
Ma Snart
Well-Known Member
Thumbs up to both of you fish fixers!
Ma Snart
Ma Snart
afbill
FABO World Ambassador
I got the rear floor pan patch welded in and my dad is finishing up the A pillar patches.
got 'er welded in and sanded
View attachment IMG_0863.jpg
right A pillar patch
View attachment IMG_0864.jpg
left A pillar patch
View attachment IMG_0865.jpg
threw on some primer for corrosion control
View attachment IMG_0866.jpg
trial fit of the floor pan. Everything looks pretty good. It'll take a bit of clamping to get it down onto the front cross member better everything is straight and square!
View attachment IMG_0867.jpg
Sick_Six225
72 Dodge Dart Swinger
Looks good brother, I like to look at everyones projects to see that its possible to rebuild a nice car. again looking good brother cant wait to see more!
340sFastback
Well-Known Member
You can use #8 self tapping sheet metal screws to pull that floor pan to the cross member nice and tight. Take one out at a time and weld the holes shut.
afbill
FABO World Ambassador
We finished welding the floor pan in this weekend. We also split the pan down the middle to make it easier to press down onto the cross member and the rear floor pan. It worked out well.
View attachment IMG_0895.jpg
View attachment IMG_0896.jpg
View attachment IMG_0897.jpg
View attachment IMG_0898.jpg
View attachment IMG_0899.jpg
Now onto prepping the sides for some primer so we can start the quarter patches!
View attachment IMG_0895.jpg
View attachment IMG_0896.jpg
View attachment IMG_0897.jpg
View attachment IMG_0898.jpg
View attachment IMG_0899.jpg
Now onto prepping the sides for some primer so we can start the quarter patches!
afbill
FABO World Ambassador
went ahead and primed behind the quarters and threw on a little color where the quarter windows go.
View attachment IMG_0905.jpg
View attachment IMG_0907.jpg
Started stripping the front end also.
View attachment IMG_0908.jpg
We also started fitting the quarter window mechs. That was fun.
Next is to get the quarter patches welded on. Amazing what we've been able to do.
View attachment IMG_0905.jpg
View attachment IMG_0907.jpg
Started stripping the front end also.
View attachment IMG_0908.jpg
We also started fitting the quarter window mechs. That was fun.
Next is to get the quarter patches welded on. Amazing what we've been able to do.
afbill
FABO World Ambassador
we got the left side quarter patch spot welded on today. Hey....the left side looks like a car!!!
Got the left side prepped and installed the window regulator
View attachment IMG_0927.jpg
Got everything cut and clamped in place
View attachment IMG_0928.jpg
spot welded across the top in a few places
View attachment IMG_0930.jpg
welding is getting better
View attachment IMG_0931.jpg
I took this week off so I should be able to get quite a bit done. Hopefully I can get this side welded and at least start the other side.
-
Similar threads
- Replies
- 9
- Views
- 330


