72 duster Build progress

-
sorry i havent updated in a few days guys, been busy working on the duster and running around town getting supplies and helped my dad do a tune up on his truck (original plugs .....2 of them snapped the threads off in the head) but we got them all out and got that done.

as for the duster, most of what I have done I did a few days ago.

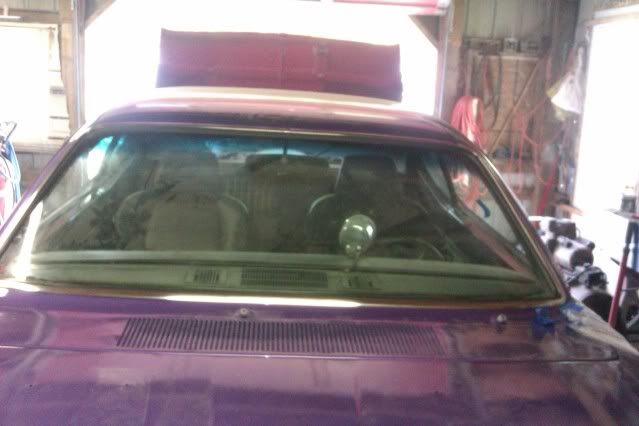
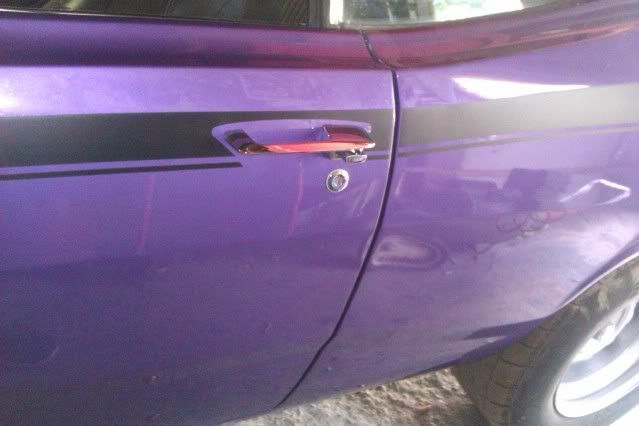
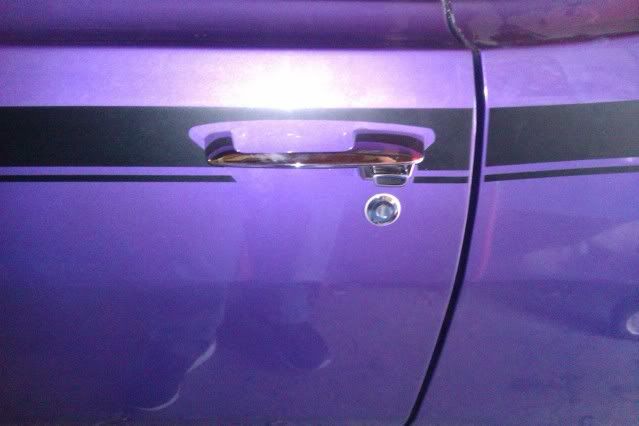
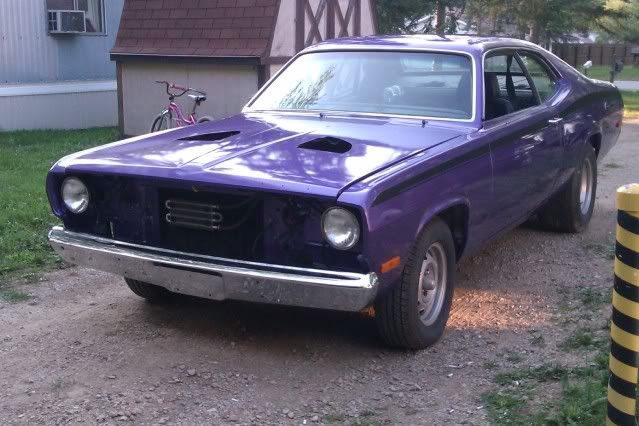
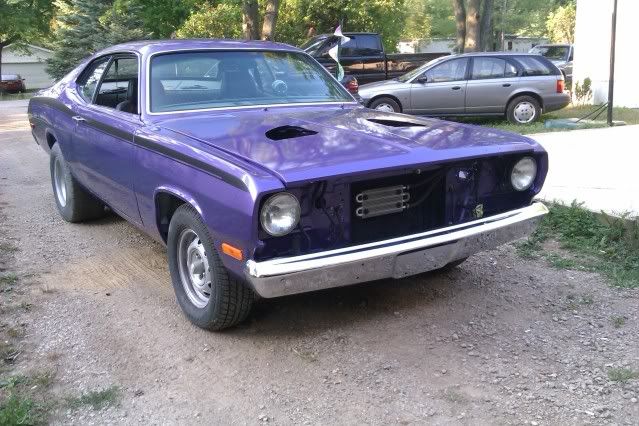
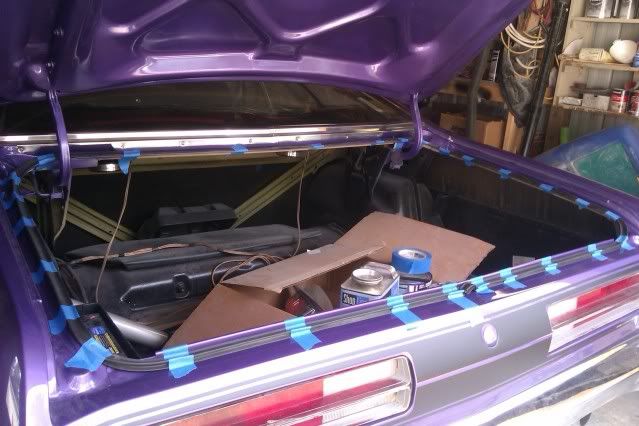
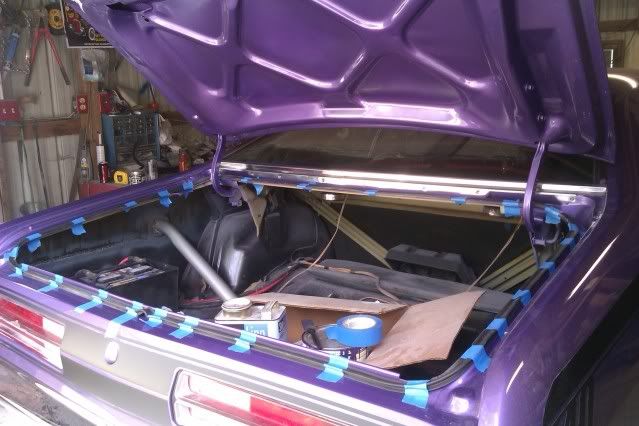
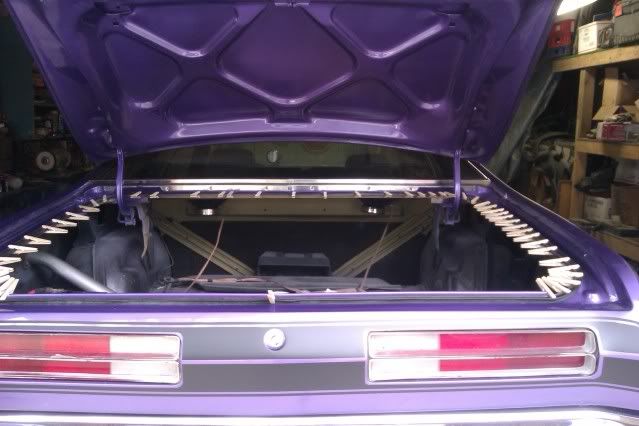
I got all of the trim hammered and dollied out,wet sanded,buffed and polished,and installed. windshield trim all installed,trunk lock polished up and installed,door locks polished up and installed,installed new door handles and gaskets installed,finished installing my new door seals (trimmed them up and installed the end cap seals),installed all the new rubber bumpers on everything,installed the new trunk seal,installed the new hood to cowl seal.

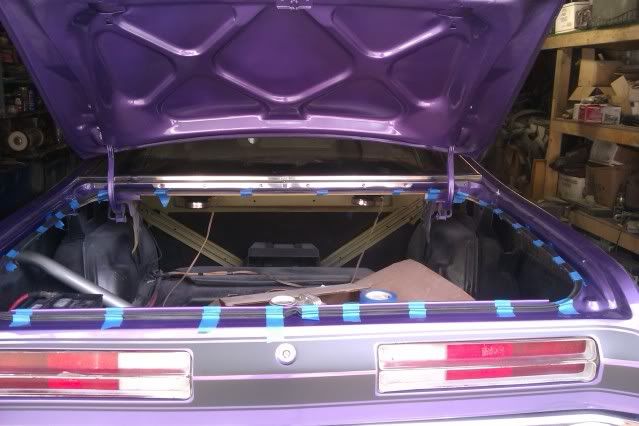
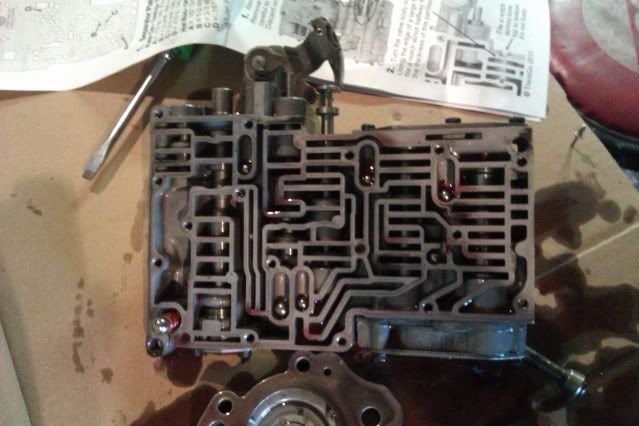
and as we speak I have the car on jack stands, I dropped the trans pan,dropped the valve body and I am currently installing my new transgo tf2 shift kit and also installing the new shift shaft and tv shaft seals while I am in there. once thats all back together I am going to install the new lokar stainless braided kick down cable kit that I have had sitting in a box for over a year now waiting for me to put it on lol. AND while I am down there I might also run all my new 3/8" aluminum fuel line I picked up for it a month or so ago.

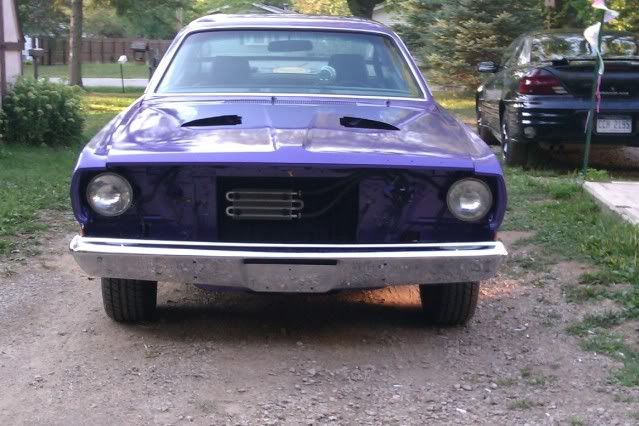
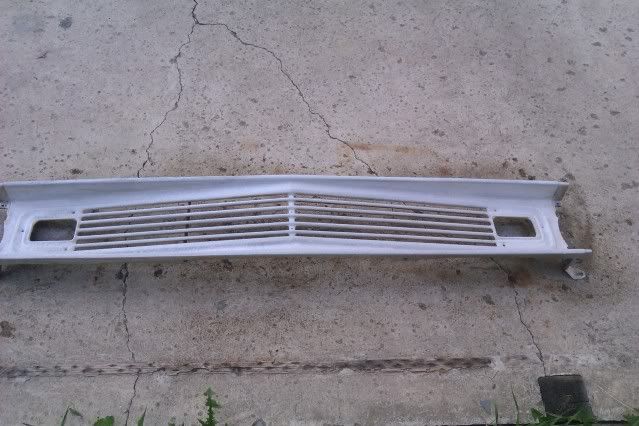
OH and I started stripping my grill, been using the oven cleaner trick to melt away the anodizing on the grill,got one head light bezel done and sanded and polished already and it looks good, still need to finish the other one and the grill, but a good days worth of elbow grease should get it taken care of. once I get all the polishing done Ill move on to masking it all off and painting it.

lots to do still, mostly minor stuff though. so far the transmission work is going pretty good other than I hate getting covered in trans fluid in 90 degree heat outside. lol.

OH, and I washed the car day before yesterday because the dust was building up on it pretty good lol.

heres some pictures of some of the stuff I have done the last few days.

IMAG0740.jpg


IMAG0739.jpg


IMAG0741.jpg


IMAG0742.jpg


IMAG0743.jpg


IMAG0744.jpg


IMAG0746.jpg


IMAG0745.jpg


IMAG0759.jpg


IMAG0760.jpg


IMAG0761.jpg


IMAG0762.jpg


IMAG0748.jpg


IMAG0747.jpg


IMAG0749.jpg


IMAG0751.jpg


IMAG0752.jpg


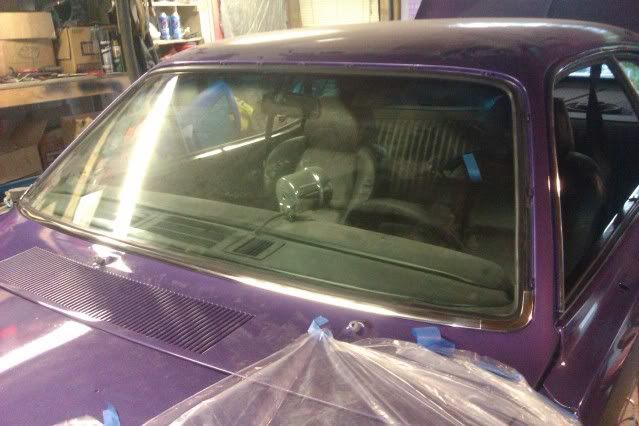
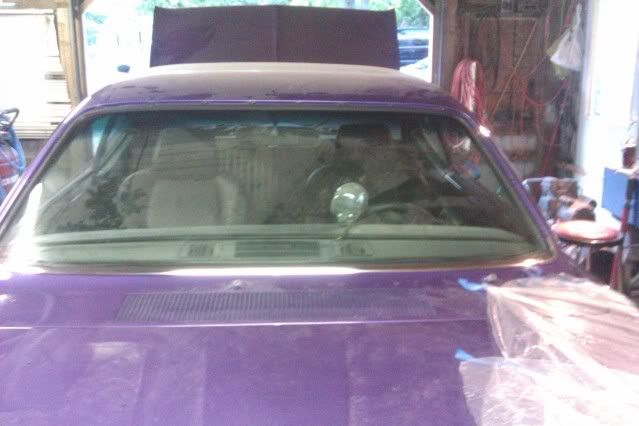
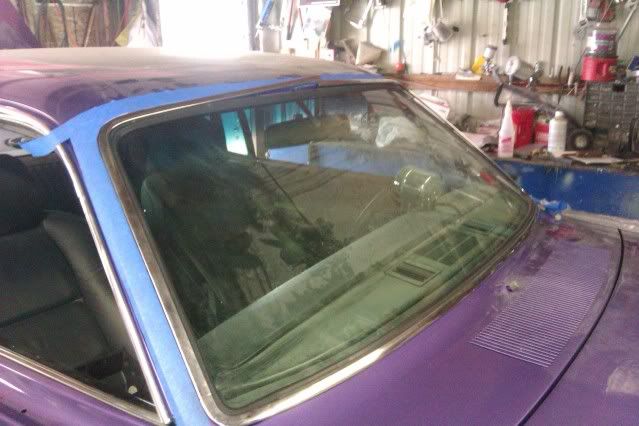
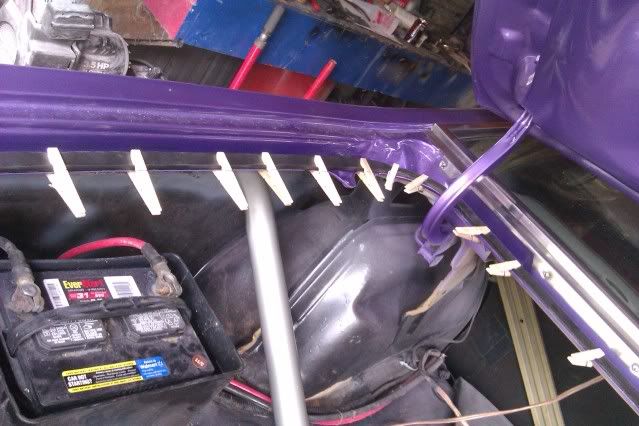
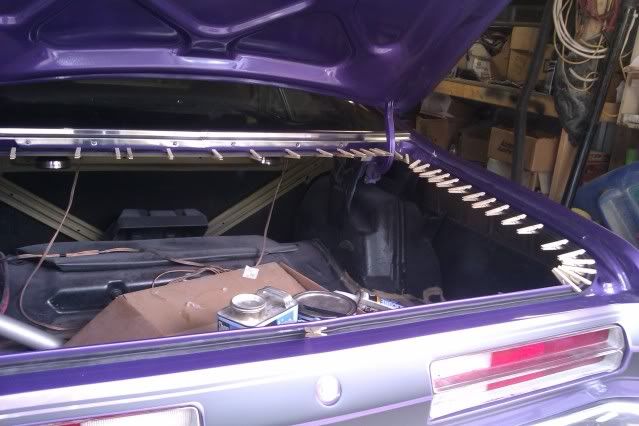
close pins were to hold it in place while the glue dried.
IMAG0753.jpg


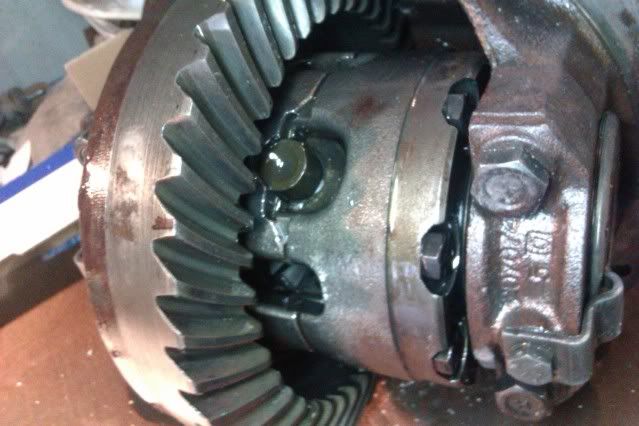
working on the valve body
IMAG0764.jpg


stay tuned guys, more updates to come!
 
Looking good Jerrod. I get great tips that I can apply to my Duster every time I check your updates, e.g. your method of refurbish the trim, and little tricks like using clothes pins to hold the rubber trim in place..doh!

I may be picking your brain when I get around to touching up some problem areas on my car.

Pat
 
Sweet ride, "that close" to being done! Glad you kept posting updates- lots of us lurking and waiting!
 
Thanks bill

Looking good Jerrod. I get great tips that I can apply to my Duster every time I check your updates, e.g. your method of refurbish the trim, and little tricks like using clothes pins to hold the rubber trim in place..doh!

I may be picking your brain when I get around to touching up some problem areas on my car.

Pat
pat, not a problem, whenever you have any questions about something on your car....feel free to ask and I'll be glad to help just as you did for me.

Sweet ride, "that close" to being done! Glad you kept posting updates- lots of us lurking and waiting!

Thank you, I encourage the "lurkers" to speak up once and awhile, good toknowmwhomis following my build and what they think.

And yup, it's getting there....down to finishing up odds and ends for the most part now !.
 
The transgo tf-2 kit is installed!......everything went pretty smooth.

Still need to put trans fluid in and hook up the new lobar kick down set up before I can take it around the block and check it out but I'll have to do that later in the week sometime because I'm spending time with the family tomorrow......then when I get back to work on it,I think I will install all the new fuel line while the car is already on jack stands. But....sometime in the next few days I will have some more updates for you guys. Also ,sometime this week I will most likely finish up restoring the grill,tail lights and get the stuff to finish the paint work... So look forward to updates on that stuff as well. Stay tuned guys!
 
Love it! Can not wait till mine is painted. It is still having body work being done for the second month, hoping to have it by September.
 
Thanks!.

You will get it done before you know it, you don't want to rush the process or it will show in the final product.

I know first hand that it feels never ending during body work but all you can do is hang in there. Seems like not long ago I was just b!t*hing about the body work and paint prep .....and now here I am bolting on finishing touches. It's a good feeling to have the worste of the work behind you. Soon enough you will feel the same thing. Keep up the good work.
 
That's something I know to watch out for. Right now, I'm on the painfully slow body-work stage. Sucks because there's no instant gratification of being "done". I can imagine that once bodywork and paint are done, it becomes easy to fall into the "hurry up and put it together" trap and cutting corners. One thing is certain in this hobby, patience is key. :)
 
Yeah , cutting corners might save you a little time but if your going to spend all the time and money working on a project than you may as well do it right and put the effort into it. I was always told your paint is only as good as the body work.....if you slack on body work your paint will look shabby......it's like perfume on a pig.....it might smell pretty but it looks like a pig still lol.

So on the duster, as grueling and as drawn out of a process as it was, I spent ALOT of time dialing the body in how I wanted it and I'm glad it did because it came out looking great.

I can't tell you how many times I heard people crack jokes about it not being finished until 2017 and such cause it seemed like I was always doing body work, and how everyone that came to see the car would say "your not done yet", or " what did you do., it looks the same as last time" to everyone else, they couldn't see the progress, they just seen I was still sanding away lol......heck there were even times I felt I wasn't gaining much ground. But not until you get it in primer do you really start to see the fruits of your labor and feel like things are coming together.

Anyone who has watched overhauling and thinks a resto can be done in a week and is easy to do needs a smack in the face by reality haha, it has NOT been an easy road to travel.....but it's been an accomplishment so far, that's for sure.
 
In the middle of pulling the axles and center section out so I can inspect everything and reseal it up and service the fluid (was leaking at the center section) and I found the part numbers for my leaf springs and ran them on the internet and they are MANCINI - (A-Body) Extra Heavy Duty Leaf Spring Set (part number MRE19811982 )

a few people mentioned they liked the stance of my duster so i figured I would post up the info incase anyone was interested in getting the same set up.

alright,going to get back at it....will be posting updates soon.
 
haha, not quite.

still need to get trans fluid,oil change,rear end fluid,paint materials to paint my bumper filler panel,hood latch support,mirrors,spoiler and scoops,need to get the materials to build a rear speaker tray,need rear tires,need a plymouth emblem for the hood,need to finish polishing up the grill,need exhaust tips.......thats about it except for some odds and ends.

just pulled the rear axles and center section because it had a leak at the pig and because when I drove it I hear a growling noise i didnt like. and upon inspection it appears the previous owner didnt reinstall an adjustment tab to set the preload on the axles. so the axles were just floating around a 1/4" side to side and not riding all the way inside of the bearing races. So now i need to try to see if i can find someone that has that adjustment tab that i can get from them.

still working on it though.....its all coming along slow but sure.
 
I already knew it had 4.56 gears.....but check out what I found upon opening the ole girl up!

IMAG0776.jpg
 
Kay I give up cause I don't have an 8 3/4 rear, what am I supposed to see. Somethin good or somethin bad. LOL sorry educate me :)
 
Looking mean Jerrod! Have you been keeping tabs on what you've spent to date, including the initial cost of the car?
 
Yup.....more than I'd like to have. But a lot of it I have done budget minded.....selling old parts to fund new parts,doing almost all the work myself,restoring parts versus buying new parts,getting good deals from Craigslist,friends,members here on fabo.

Anyone who said the hobby is cheap lies.....but I've gone about it as sparingly as I could at least.

Originally bought the car for $500. And have probably sold around $1500.00 worth of parts off it and parts that came with it over the 3 years I have owned it.....so right there's a good chunk of savings.
 
Thank ya, I knew the previous owner gad the rearend gone through and I knew it was 4.56 gears and I knew it laid 2 black marks lil but I did not know exactly what setup was in the rear so I was eager to pull it and inspect it all being that it had a leak and what not.... And I was pleased at what I found
 
Thank ya, I knew the previous owner gad the rearend gone through and I knew it was 4.56 gears and I knew it laid 2 black marks lil but I did not know exactly what setup was in the rear so I was eager to pull it and inspect it all being that it had a leak and what not.... And I was pleased at what I found

Hopefully I'll luck out like that when I eventually chase down a suregrip 742 for my Duster (fingers crossed).

Looking forward to the time when you finally get to "test" that chunk out! :burnout:
 
-
Back
Top