'74 swinger project

-
Well, normally I don't back to back post but for clarity...

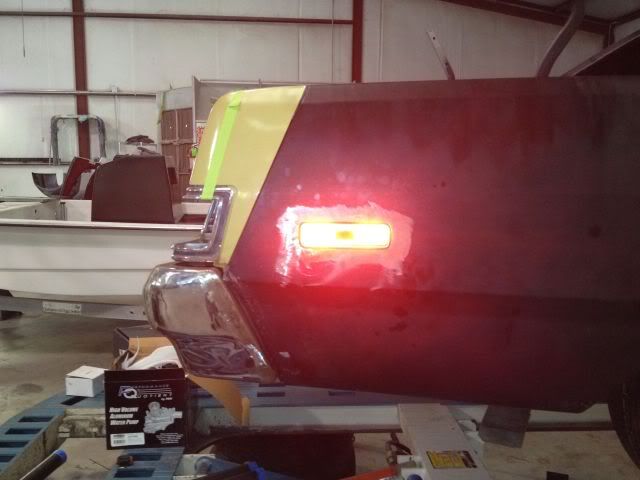
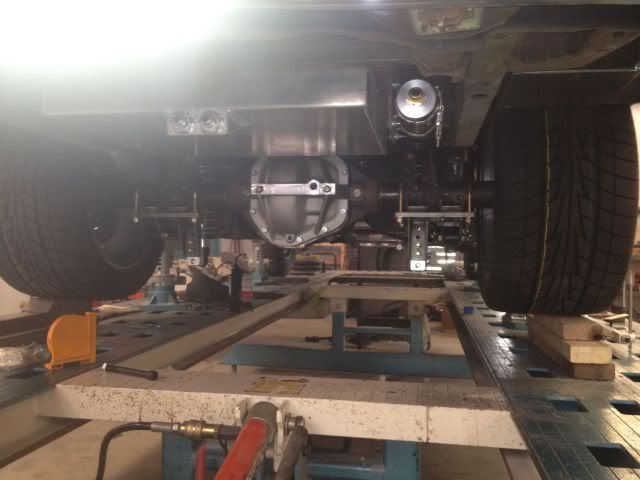
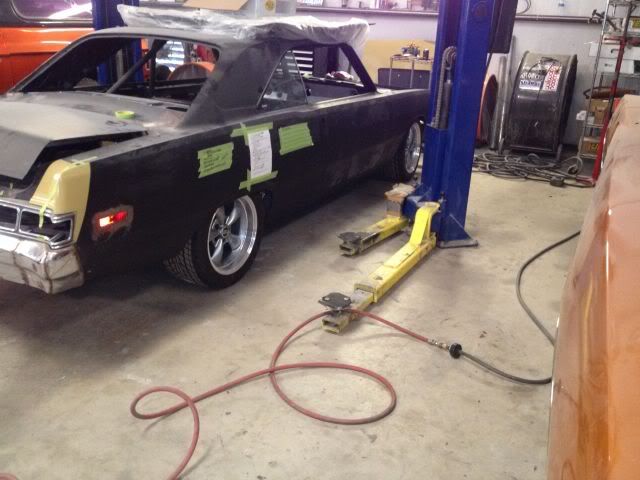
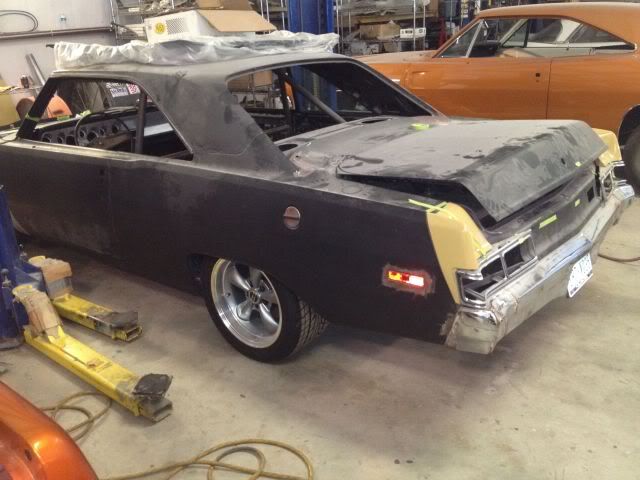
Got off the phone with American Muscle, sent em a pic of the Anthracite rims, they said, Yup, that ain't right, what would you like to do ?

Since I'm not anywhere near the car I asked if I could make a decision when I got home as these, at least for now, are being used to mock up the diff. They had no issues with that and gave me the option to either swap em for the Black ones if I don't like the look or keep em and get a break when I order the fronts.

It was nice to get good customer service, that seems to be rare these days. No push back or avoiding the issue. They owned it and are going to make it right by me.

That's good for a few :thumblef::thumblef::thumblef::thumblef:
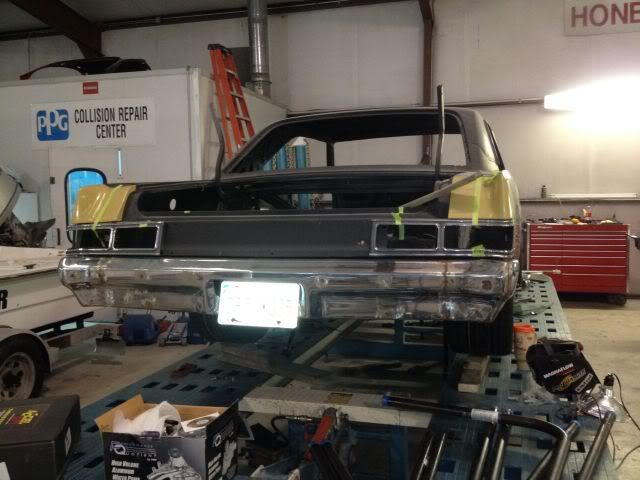
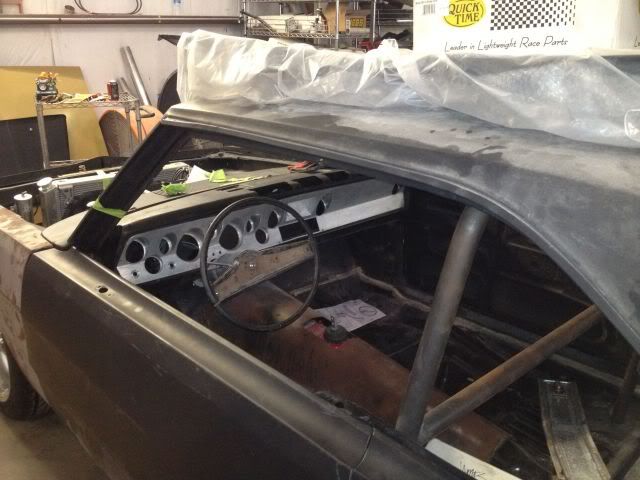
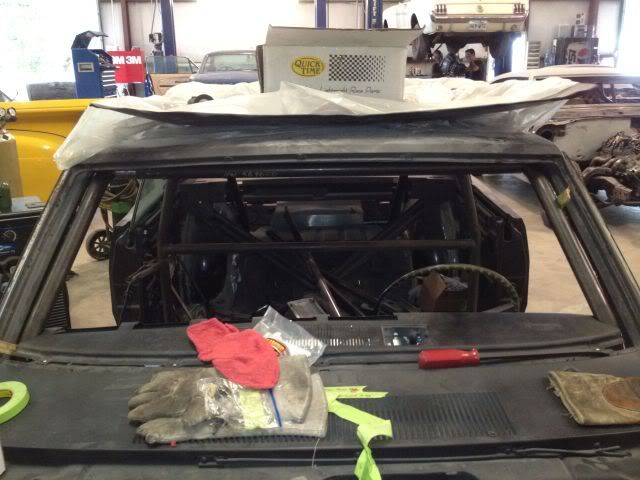
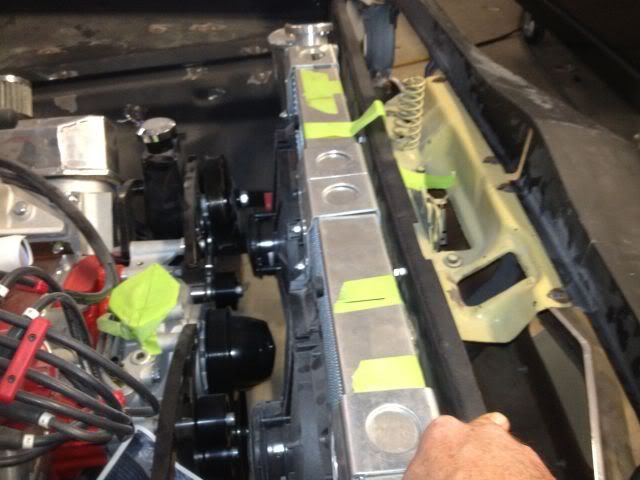
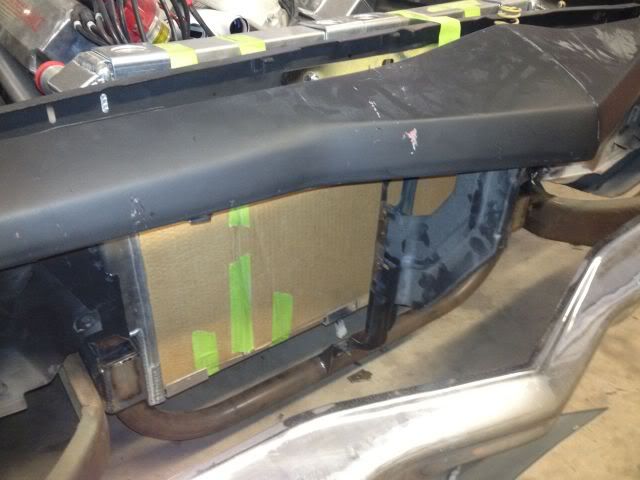
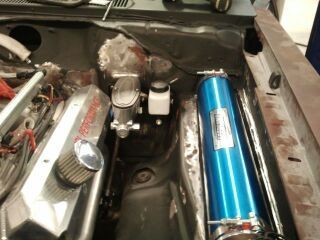
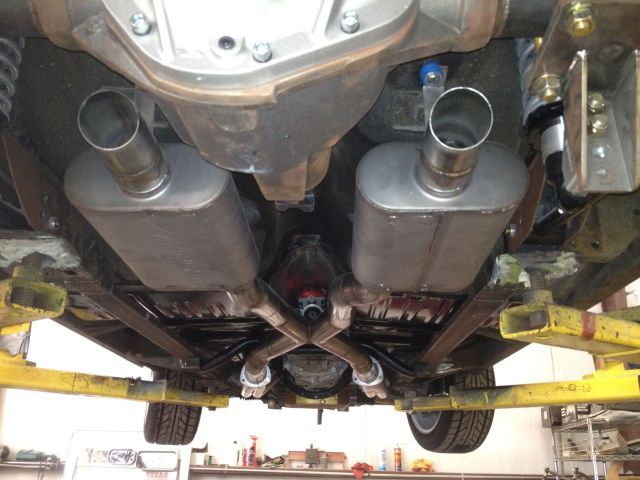
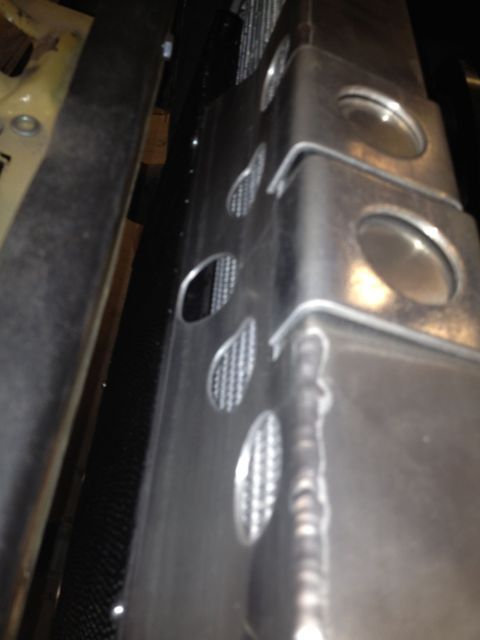
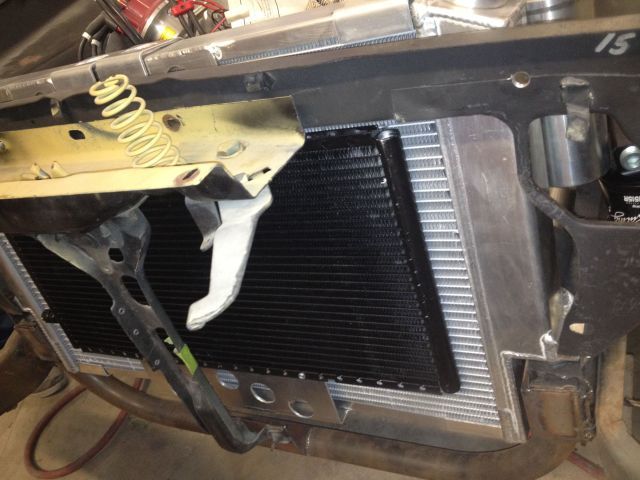
 
Thats what I'm thinking. I talked to my paint guy today and asked him if he could shoot some samples while I'm away to see what it looks like. He said he'd look thru leftovers and try and paint up a few samples on some scrap sheet metal to look at.

I'm stoked on this build right now, me being out of the way means things are getting done, I cant keep changing my mind and the workflow.

Hoping I get home and can get started on plumbing and electrical mock up, this I CAN do :) One of these days I'll get to learning how to weld decently to save some$, right now it would resemble post-modern art and have the structural integrity of a match stick house in a hurricane.
 
Well,other than epic jet lag, managed to get home somewhat sane. Stuff that got done while I was gone...

Bumper sectioned to bring it tight to the body, eliminate bumperettes and mounting holes. It's tight and raised enough now that the trim that used to be between the tail light housings and bumper is removed, also sunk the marker lights in flush to the rear 1/4

IMG_0566.jpg


IMG_0568.jpg


Moser M60 diff waiting on axles, should be here today, then this can get finished up and installed.

IMG_0567.jpg


Mocking in BeCool radiator, will probably fabricate fan housing out of AL once everything has been test fit.

IMG_0572.jpg


Waiting on transmission to arrive then plan on finishing up floor mods and starting on cage.
 
IMG_0573.jpg


Rear is in , fuel pump mounted! (crappy cell pic, sorry :banghead: )

I am working with Mark @ Peak Dashes to get a slightly modified version of the A10 dash worked up, that will be freakin awesome.

Might just have it a full roller end of next week, trying hard to get it started up by end of May then teardown again for the rest of the bodywork.

May have figured out a clean way to get exhaust (3") all the way to the back even with the 4-link and Dana in the way, hopefully try that out in about two weeks.

Not much else to update, at the mercy of UPS to get more crap here.
 
Minor updates...

Seats arrived (need to get pics)

Should have NO oiling issues...

3qt accumulator with auto valve (35-40 PSI), remote filter mount, oil cooler with thermostat to not send oil to cooler until it's warmed up, helps control condensation, and keep temps in line during long summer cruises:

IMG_0575.jpg


And...finally...my T56 Magnum shipped from American Powertrain, this means I can get this in, mocked up with the engine, get driveshaft made and design exhaust :cheers::cheers: starting Friday!!
 
Goin to be a nice one my opinion those wheels look better then black ones on a Burgundy car where did you get the gauge cluster or did you make it your self?
 
Got the gauge cluster here: http://www.classicdash.com/shopping.../71-76/Scamp-/and/71-72/Demon/Drilled-Panels/ but will be putting it up for sale soon since CashA10 is making the RMD style again :)

And yeah, the more I see those rims on there the more they are growing on me, as soon as I get a front fender back on will size up for the fronts, hoping to get 245/45-17 up there. Thankfully I have access to a few different combos to try out before I commit to the purchase
 
Grumble..rejh*&*#frakkin parts on back order :(

Transmission arrived :cheers: but...

Bellhousing and flywheel are being drop shipped, no arrival time given, would have been nice to know that in advance as well as parts of the clutch (cover and floater between discs) and upper part of the hydraulics are on back order. :banghead: til 5/11.

Meh....also learned that no matter what is published, cage kits aren't all they are cracked up to be. Gotta do some big tweaks to the A pillar bars, the fitment SUCKS!, way off the body line and damn near in my face. Didn't even bother with pics I was so pissed. One of those times where an attempt to try and save $$ isn;t gonna work out. Time to order some tubing and fix. At least the kit bits can be used in other places.

Upside, alternator, P/S pump and bracket kit are here and complete. 140A one wire, Saginaw pump (both black powder coated) and the March Ultra for 440 also in black powder coat.

Well, back to making shopping list for fuel and oil lines (cha-ching! dammit)
 
In for mockup :) :cheers::cheers::cheers:

f0dab0e2.jpg


186a7aa6.jpg


b20f03e1.jpg


Grrrr, this will be a fun call tomorrow. Ordered a serpentine conversion from Jegs (one of the March setups, the one for a single belt), It was shipped direct and they sent the wrong damn one, the one for just PS and Alt, two belt, just found out today when I went to check out the mockup, hand't been out of the boxes till this afternoon (drop shipped) Dammit dammit dammit :banghead::banghead:

3b81b7b5.jpg
 
Soo...going back to the car tonight...damn, the master cyl is tight to the valve cover. WOndering what would happen if I had custom braided flex lines made to goto the prop valve so when I needed to take off the valve cover for adjustments eventually I could just move the master cyl over to the fender. This way I dont have to re-bleed the brakes every time I do this.

Good, bad, different ?? Looking for thoughts here, would still have hard lines out of the prop valve as usual
 
That is one hell of a car you are building, looks like you are working with an unlimited budget.

For myself, I am working on a 73 Dart Swinger that been at the body shop for about a year now.......well it is almost done. I have a total of about 17K in mine, probably be 18K by the time its done. I tought that was a lot of money and the way the econemy is I would probably take a loss if I tried to sell it (lots of low ballers around who don't have clue what it cost to restore a car).

You can see mine in the galley section (link below):

http://www.forabodiesonly.com/mopar/vbpicgallery.php?do=view&g=5800
 
Like how yours is coming out! About the budget, oh, yeah, there is a limit, just (thankfully) haven't hit it yet. Saved for long time, cleared all of my debt except mortgage and have been putting aside a specific percentage of pay to an account for this. I have this feeling I'll be driving it without pretty paint for a bit after all the fab work etc is done.
 
This is an amazing Build. Nice to see so much Love put into a '74. Of course I'm Prejudiced ;-)
 
Well, been just a bit of time since I updated, finally making progress again!


Cage and dash fitting

IMG_0673.jpg

IMG_0677.jpg

IMG_0678.jpg


Need to get the bars from the A-pillar to front frame rails done and finish weld a lot of stuff, apply seam sealer, make shifter boot. Still need to fab up the top crossmember for the trans…always something to do :)

General Stance

IMG_0676.jpg

IMG_0674.jpg

IMG_0671.jpg


Radiator fitting and lower core support

IMG_0668.jpg

IMG_0667.jpg


Exhaust Clearance, will get a pic of the setup in a day or two, was off the lift

IMG_0670.jpg


Will be mocking in VIntage Air next week and beginning to get fuel and oil line plumbing figured out then it's onto wiring mockup.

Also looking to build a cold air box on the passenger side front, feeding from right behind the turn signal, thru custom aluminum housing (filter like this http://www.knfilters.com/search/product.aspx?Prod=33-2079, pending measurements) top feed out to 4" airpipe over passenger side valve cover to tophat assembly, hopefully can get it sorted out, then I can run a stock, flat hood

One way or another I'm gonna drive this car by October…paint or no paint

Thinking about using either 2011 Inferno Red (code RH) or 2012 Deep Cherry (code RP). Need to go wander a dealer lot Sunday when they are closed to avoid an accidental homicide when they won't leave me alone and see how close in person they are to what I see in the minds eye. Figure using a factory color will make it easy to touch up if needed.

Opinions welcome on this...
 
Looking at this one. Since they are local to me, I'm going to get a mockup unit on load for space checking

[ame]http://vintageair.com/2012catalog/2012%20VintageAir%20Catalog%20Final%20WEB%20(Page%2040).pdf[/ame]
 
Did you have to do anything with your master cylinder with the Alter-K-tion? I did the same brakes as you and with disks and calipers on the rear and bleed the brakes and can't get a firm petal on the brakes. I was told I need to go to a larger cylinder bore in the master cylinder, just not sure which one........
 
Haven't gotten the lines plumbed in yet so hopefully I don't have any issues. I'm using a 7/8" bore manual master (http://wilwood.com/MasterCylinders/MasterCylinderList.aspx?minorname=Aluminum Tandem Master Cylinder) along with this prop valve (http://wilwood.com/MasterCylinders/MasterCylinderProd.aspx?itemno=260-11179). Am shooting for the next two weeks or so to get the plumbing mockup done, will be running fluid thru it to make sure there are no horrible leaks before paint. Will update you once I get there.
 
More progress finally

Got creative with the oil filter relocate, cut thru the inner fender, changing it will be a breeze :), time to move the overflow tank...

Top:
IMG_0698.jpg

Bottom:
IMG_0705.jpg


Recessed the accumulator into the inner fender, the charge valve is easily accessible underneath, also got the clutch slave mounted

8896b95c.jpg


Exhaust in:
IMG_0703.jpg


When it comes out after mockup will smooth all the welds off, should look like one piece.

This also happened to be be in the shop this afternoon, hemi, 4 spd, rack and pinion steering conversion, couldn't get a good view under it for more details but damn, the drivers header was just a bit to close to the primary pipe...

IMG_0702.jpg

IMG_0701.jpg

IMG_0700.jpg

IMG_0699.jpg


Next up, finish routing fuel and brake lines, mock in A/C (yup, this slipped on the timeline due to parts ordering fool dropping the ball big time) , hopefully by end of next week or someone gets hurt….:angry5:

Scrapped the airbox idea, no way the hood cleared, period, now it's into decision mode for that…dammit, more things to decide….:banghead:
 
More updates...

Better shot of installed accumulator
IMG_0713.jpg


Regulator mount fabbed
IMG_0711.jpg


Custom AL condenser support brackets
IMG_0709.jpg

IMG_0710.jpg


All the rest of the A/C stuff is getting installed tomorrow thru Friday.

Finally feels like progress is getting made. Gussets for the cage are almost done, seat mounts finished (will get pics in a few days). Plumbing is coming along, albeit slowly as I had to order more damn fittings $$.

Getting closer to electrical and <gulp> making paint decisions.
 
-
Back
Top