RPM
Superior Member
I was changing out my cluster on my Duster and thought I might as well make a small and simple tutorial out of it. For some of us this task is old hat, but for some one that has not done this yet this might help. This is the basics of it. There is some stuff that will take common sense.
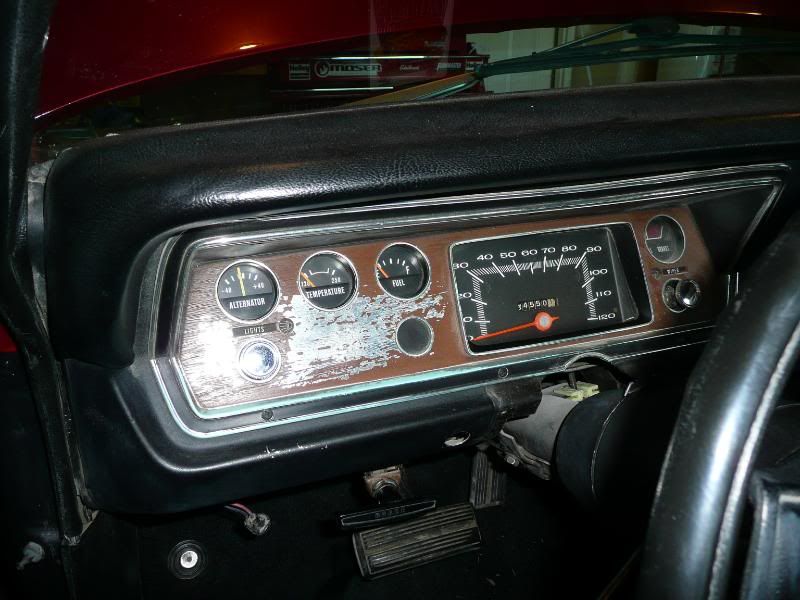
Ok to start off with I have a nasty peeling instrament cluster that I really needed to change out long ago. Guess the time was ripe so here we go.
There are six mounting screws that hold the cluster in place. There are 3 across the bottom and 3 in the top. Remove those. In the pic you will see the steering column has beed lowered for access.... see next step on that.
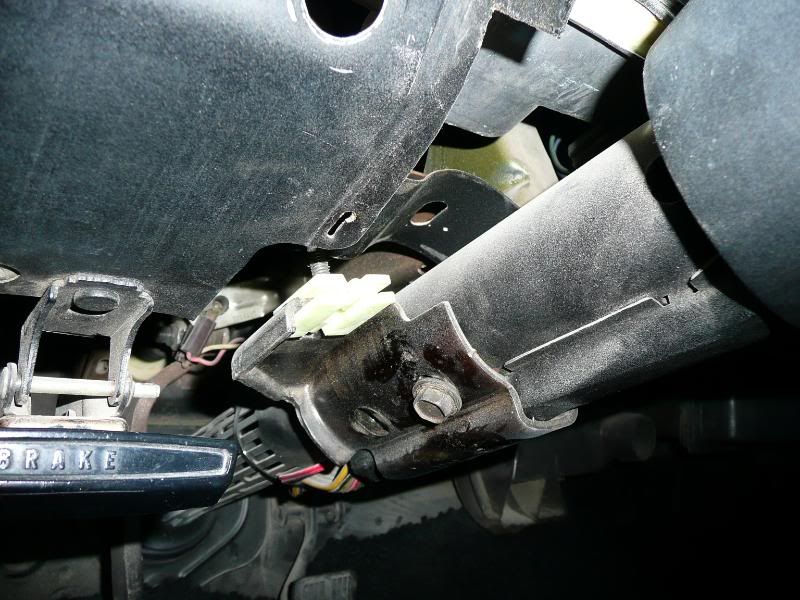
Ok to lower the steering column for access. Remove the plastic cover under the dash/column area. Be careful as this is usually a brittle peice that needs flexed to take it off. Remove the 4 screws and work carefully removing the column cover. Next you will look up under the dash at two bolts one on each side of the column. These have white plastic square like peices that a tooth washer and nut tighten up to. Loosen and remove the nuts on each side and the column will lower. This gains you access in pulling cluster out.
Now you have to be rubber man and find a way to get your hand under the dash and to the back of the cluster to where the speedo cable attaches. There is a small push clip fitting that attaches it to the cluster. This needs to be done before trying to pull cluster out as there is usually no slack in the speedo cable. Once cable is removed. Pull cluster forward as much as you can and tilt the top down. Now reach around to the back of the right side and pull the wiring harness from the Wiper control, then move more toward the middle and pull the round power harness out of the cluster. Now move to the lower left hand side and remove the harness that plugs into you light switch. Now you will need a socket wrench and remove the alternator wiring that are attached to the back of the alt. make note which side is pos and which side is neg. so you put the wiring back properly. The cluster is now loose. Wiggle it out. Ok.... I am just installing another cluster... but I will add this... If you needed to open the cluster up, or change a light switch or wiper switch you will need to know this. The light switch. On the back inner side of the switch there is a little button. Push this button and rotate and pull the light switch at the same time. The light switch knob will pull out and off. You will see a funny washer type device that the knob was hiding. You can use a large phillips screw driver and twist that washer out thus removing the switch. Reverse for installation. The wiper switch is a little different. Just Pull the wiper switch hard enough the switch lever will pop off. There is another little washer... you cant use a phillips screw driver on this. I suppose there is a special tool for it but I use a small flat blade screw driver. You will see the washer has little notches on it. Put the screw driver in the notch and tap the back of the screwdriver with a hammer until the washer starts spinning (lefty loosey righty tighty) then undo the washer by hand when loose. Out comes the switch from the back side. Reverse operation for install. I have a reall skinny pair of needle nose pliers that I can put straight down on the washer notches and twist them out real easy to.
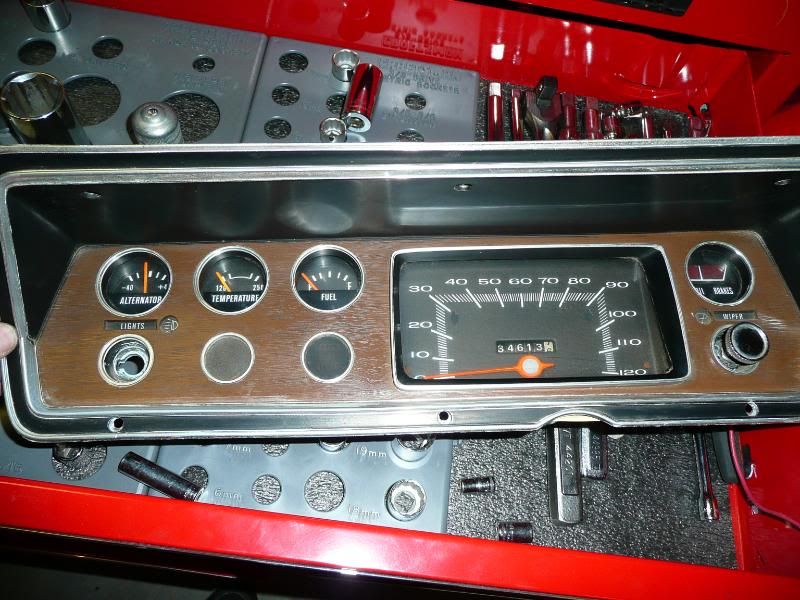
Here is the nicer cluster that is going in. I cleaned it up, but it can use a lttle touch up on the silver... thats another day....
Ok... did you check all the bulbs to make sure they were good ? Those little black twisty deals all over the back of the cluster housing contain bulbs. Twist them out and check bulb. Twist back in.
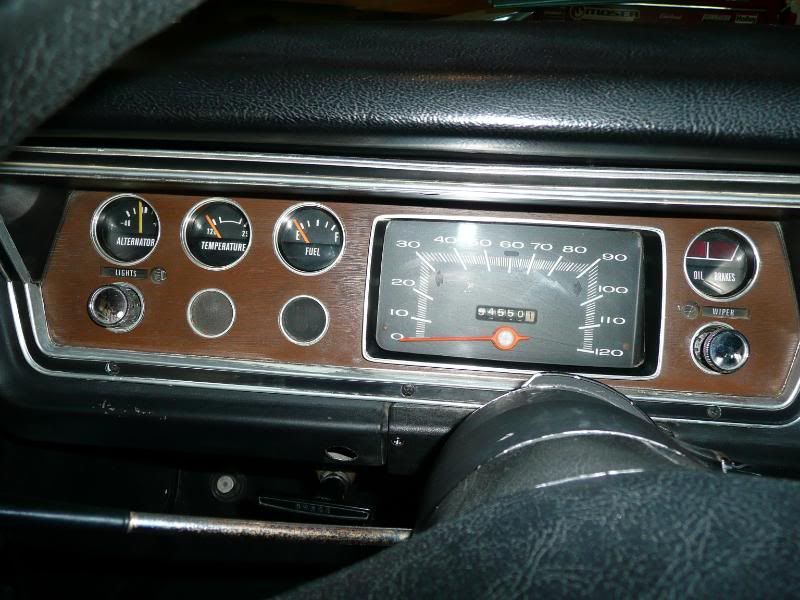
Install. Position cluster and tilt top towards you to get a little access to the back. Hook up alt guage wiring, power harness, light harness and wiper harness. You will have to wrestle with the cluster a little to get it back into position. Remember dont force anything. Once in place... become rubber man again and reach hand back behind to get speedo cable hooked back up. Push cable on speedo until it locks in place. Once wiring is all hooked up push cluster in place and screw back in. Get the two nuts and tooth washers to put column back up in place. Start each side and run them up the bolt and you will see column start to move back in place. Stop short though. With the column still slightly down place the column cover (dont attach) just place it. now tighten up column mount bolts putting column back in place. Install column cover harware. Check all functions... your done !
Hope this helps someone.
-RPM
Ok to start off with I have a nasty peeling instrament cluster that I really needed to change out long ago. Guess the time was ripe so here we go.
There are six mounting screws that hold the cluster in place. There are 3 across the bottom and 3 in the top. Remove those. In the pic you will see the steering column has beed lowered for access.... see next step on that.
Ok to lower the steering column for access. Remove the plastic cover under the dash/column area. Be careful as this is usually a brittle peice that needs flexed to take it off. Remove the 4 screws and work carefully removing the column cover. Next you will look up under the dash at two bolts one on each side of the column. These have white plastic square like peices that a tooth washer and nut tighten up to. Loosen and remove the nuts on each side and the column will lower. This gains you access in pulling cluster out.
Now you have to be rubber man and find a way to get your hand under the dash and to the back of the cluster to where the speedo cable attaches. There is a small push clip fitting that attaches it to the cluster. This needs to be done before trying to pull cluster out as there is usually no slack in the speedo cable. Once cable is removed. Pull cluster forward as much as you can and tilt the top down. Now reach around to the back of the right side and pull the wiring harness from the Wiper control, then move more toward the middle and pull the round power harness out of the cluster. Now move to the lower left hand side and remove the harness that plugs into you light switch. Now you will need a socket wrench and remove the alternator wiring that are attached to the back of the alt. make note which side is pos and which side is neg. so you put the wiring back properly. The cluster is now loose. Wiggle it out. Ok.... I am just installing another cluster... but I will add this... If you needed to open the cluster up, or change a light switch or wiper switch you will need to know this. The light switch. On the back inner side of the switch there is a little button. Push this button and rotate and pull the light switch at the same time. The light switch knob will pull out and off. You will see a funny washer type device that the knob was hiding. You can use a large phillips screw driver and twist that washer out thus removing the switch. Reverse for installation. The wiper switch is a little different. Just Pull the wiper switch hard enough the switch lever will pop off. There is another little washer... you cant use a phillips screw driver on this. I suppose there is a special tool for it but I use a small flat blade screw driver. You will see the washer has little notches on it. Put the screw driver in the notch and tap the back of the screwdriver with a hammer until the washer starts spinning (lefty loosey righty tighty) then undo the washer by hand when loose. Out comes the switch from the back side. Reverse operation for install. I have a reall skinny pair of needle nose pliers that I can put straight down on the washer notches and twist them out real easy to.
Here is the nicer cluster that is going in. I cleaned it up, but it can use a lttle touch up on the silver... thats another day....
Ok... did you check all the bulbs to make sure they were good ? Those little black twisty deals all over the back of the cluster housing contain bulbs. Twist them out and check bulb. Twist back in.
Install. Position cluster and tilt top towards you to get a little access to the back. Hook up alt guage wiring, power harness, light harness and wiper harness. You will have to wrestle with the cluster a little to get it back into position. Remember dont force anything. Once in place... become rubber man again and reach hand back behind to get speedo cable hooked back up. Push cable on speedo until it locks in place. Once wiring is all hooked up push cluster in place and screw back in. Get the two nuts and tooth washers to put column back up in place. Start each side and run them up the bolt and you will see column start to move back in place. Stop short though. With the column still slightly down place the column cover (dont attach) just place it. now tighten up column mount bolts putting column back in place. Install column cover harware. Check all functions... your done !
Hope this helps someone.
-RPM
")


