Dougs

-
Here's a reference pic for the steerring coupler and header bolts. note the coupler is ahead of the front #7 header bolt.

Headers.jpg


If yours isn't lined up like this and the bolt is further ahead, look at your engine brackets.
 
I wish that I'd seen this thread earlier. I had a similar situation with my son's Duster, but adifferent header brand (coated Hedman's). I solved the problem by using a left side motor mount pad from a D series truck (72-78). That pad is thicker and it raised the engine enough to give adequate clearance around the steering. works on 67-72 K members.
It's the engine compartment in my avatar.
 
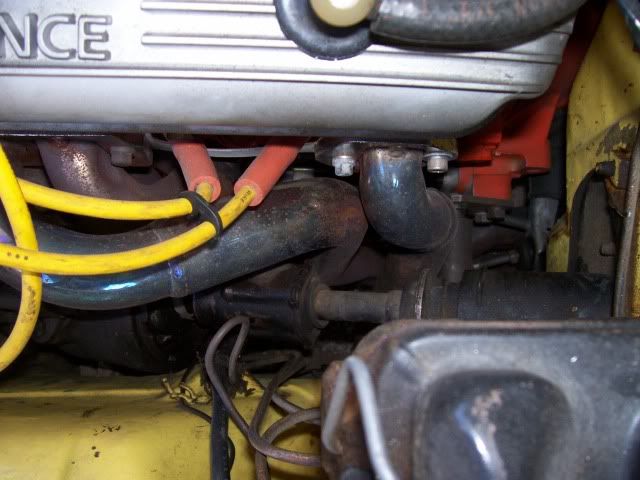
Crackedback, not sure if the brackets I have are B/E style? I'll attach a picture and maybe you can tell me? I'll also attach a picture of the engine, top view, the clearance on the pass side seems to be around 3", I can double check on Friday when head back to work on the car.

What I do know is back when I was fitting the engine/tranny I was too far to the rear on the X-member. When I switched the brackets around is when everything finally lined up. Let me add that before beating the header I tried loosening up the mounts and shifting the motor around to see if there was any give there.. and nothing. I also tried shimming the engine, but no matter what I tried, tube #1 still touched on the PS. There's another member on here who I spoke with who also fit the Dougs on his A body and he said he had the same fitment issues around the PS. No where else that I can tell do I see any clearance issues.

Other than the cosmetic ouch. What performance will I sacrifice from the carnage?

Thanks and wish I had heard from you earlier on.
 

Attachments

  • IMG_1428.jpg
    92.9 KB · Views: 824
  • IMG_1429.jpg
    108.1 KB · Views: 821
I had the exact same problem with my TTI. I bought thicker isolators from Summit Racing FOR BOTH SIDES and it cured the problem. The thin ones (just like yours) would not work.

These are the ones I bought and they worked perfect. You can't beat the price either.

http://www.summitracing.com/parts/PIO-A2469/

Gosh I hate that you had to do that to your headers.
 

Attachments

  • IMG_1428.jpg
    94.4 KB · Views: 831
Man I wish I had known about thicker isolators before I went hammertime. With as much adjustment as I tried before hand, I knew it had to be in the thickness of the mount itself.. ugh..

My only hope is after some steel work and re-coating the header, I won't notice the carnage as bad.. fingers crossed.

Another note: the hammering went in stages. I had the header on and off for fitment 7 times before i felt the clearance was enough.. Still sucks balls..
 
The header came back from ceramic coat today. Anxiously awaiting Sunday when I can install it. More pictures to come ..
 

Attachments

  • Screen shot 2011-04-15 at 7.05.27 PM.jpg
    28.5 KB · Views: 792
  • IMG_1439 copy.jpg
    78.2 KB · Views: 782
I have also used the truck mount inserts. It usually raises the motor just enough for decent header clearance. Not only are they taller they have a interlocking tab, so the motor won't jump around if the rubber breaks.
 
The interlocking tabs are on the 78 and later pads. They were factory equipment after that. Some after market mounts may have them for all years and the factory part # may have been superceded to the later type. later
 
I've got Doug's headers on my 340 72 non-power steering car with no problem. I did go with the small high torque starter and yes the 90 degree oil adapter is not needed. Whats required is a Fram PF43 short oil filter.
 
After completely installing the headers on both sides I found there to be little room on the passenger side and there is a new clearance issue on the torsion bar (drivers side). I called Dougs and they said its possible the welding on the jig at the plant could of been off. Still they refused to take the headers back because obviously I ruined these. So I then called Summit Racing and spoke to their customer support. Guess I got lucky cause the guy I spoke to is going to take the set I have back and charge me 10% restocking fee on a new set :)))))))

Here's a few pics I took today. You can see the new fitment issue around the torsion bar.
 

Attachments

  • IMG-20110418-00075.jpg
    89.6 KB · Views: 766
  • Sanford-20110418-00082.jpg
    86.9 KB · Views: 745
  • Sanford-20110418-00078.jpg
    87.5 KB · Views: 748
I called Dougs and they said its possible the welding on the jig at the plant could of been off.

That's not to professional for Dougs to make a statement like that.

So I then called Summit Racing and spoke to their customer support. Guess I got lucky cause the guy I spoke to is going to take the set I have back and charge me 10% restocking fee on a new set :)))))))

You are getting the taller motor mounts aren't you?
 
Whats nuts is I got the same response from both Pertronix/Dougs and Summit. I suppose anything is possible but the issue I'm having sure seems odd.

Thanks to you Marland, those taller motor mounts are already ordered!!

On a side note, it took me 45 minutes to pull the headers back out. Having an engine hoist really makes it easy. No need to pull the torsion bars out and no need to pull apart the steering column and no need to take the PS out.

Lets just call this whole thing a learning experience and a huge thanks to all the seasoned vets on this kick *** forum ;)
 
Got the new motor mounts today. Twice the beef. All I need now are my new set of headers..
 

Attachments

  • IMG-20110422-00118.jpg
    120.7 KB · Views: 690
  • IMG-20110422-00119.jpg
    80.9 KB · Views: 707
  • IMG-20110422-00120.jpg
    100.8 KB · Views: 688
  • IMG-20110422-00121 copy.jpg
    101.6 KB · Views: 696
Also, I checked the orientation of how I had the mounts installed before. To my surprise the mount studs were on the bottom hole of the brackets. Just like Marland said they should be.
 

Attachments

  • Sanford-20110422-00113.jpg
    85.4 KB · Views: 709
  • IMG-20110422-00114.jpg
    89.5 KB · Views: 698
Before you get the headers. Measure the engine location like the tti instructions say.

If you get that verified before thrashing with the headers, it may save you some time. Even after that it may take some slight shimming.

Loosing the steering box and move it as far to te the drivers side as possible as well.
 
I just went on the TTi home page but didn't see any instructions that had engine location settings. Is there a special site I need to check out? Thanks!
 
Ok never mind. Had to search around a bit:

67-76 "A"-body / 66-74 "B"-body / 70-74 "E"-body applications: From the center of the crankshaft to the top of the K-frame, the correct distance is 5-1/4”. The engine is also offset towards the passenger-side. Measure from the center of the crankshaft to each frame rail. The difference should be 2-1/2”.
 
Solracmopar, if you don't mind me asking, what date did you send these headers back to Summit Racing, and did you happen to get them out of the Talmadge, OH location? It probably depends on the state you live in.
 
Dartswinge, I sent the old headers back a couple weeks ago to Talmadge Ohio. The new set came from Georgia. The new headers were shaped much better and fit the contour of my engine on the drivers side. With the higher motor mounts there was plenty of clearance. My only issue was on the first header tube but a lil shimmy and now there's plenty of room. Best part is I didn't have to modify my headers 1 bit!
 
Glad you got it all worked out. Are you actually sayin Summit sent you more headers for free? That's some customer service to write home about.
 
-
Back
Top