show me a pic of your aftermarket instrument panel

-
did this with a 69 cuda cluster for my duster.

HPIM0064.jpg


michael

Michael,
Like what you have done.I did the same thin on my 65 dash. If you are interested in painting the words on your dash (heater,defrost,etc) you can get a white paint pen and very carefully color them in.

John
 
Here are pix of my OEM '72 cluster with an engine turned aluminum overlay. I put a similar strip across the bottow of the instrument panel & glove box door. Brightens up the black interior. 8)

Dash_small.JPG


DCsmall.JPG
 
I'll join the party with my re-arranged stock dash without a radio opening.
The bottom section is a faux carbon fiber, and I made a matching upper insert that I'm not sure of yet.

DASH6-vi.jpg

DASH7-vi.jpg

DASH8-vi.jpg
 
Here are pix of my OEM '72 cluster with an engine turned aluminum overlay. I put a similar strip across the bottow of the instrument panel & glove box door. Brightens up the black interior. 8)

That looks awesome 72 Demon! I love the look of the turned aluminum. Where did you get it (if you don't mind sharing) and how hard was it to cut/attach it?
 
I will add mine for $h!t$ and giggles, still haven't got around to totally installing it yet!

dash resize 2.jpg


dash resize 1.jpg
 
I'm putting in a mahogany strip on the bottom of the dash to match the door panels and steering wheel. It pays to keep in touch with the guys at the old mill!! Yesterday I got a stereo installed too just need a spot to put the front speakers...

Sorry for the hijack but where do youse (it's a Philly thing) guys put your speakers lets see some pics of those too
 
here is my rocky mountain A-11, soon to be polished. Full set of autometer pro - comp ultra lite guauges
 
what i meant to say:

here is my rocky mountain A-11, soon to be polished. Full set of autometer pro - comp ultra lite guauges

dart 374.jpg
 
i cant wait, i have one of those last dashes rocky mountain will make.its on the way
 
I bought the LEDS from rocky mountain dashes when i bought it. They are from painless

5/16" Dash Indicator Light - Green Part # 80205

5/16" Dash Indicator Light - Blue Part # 80206


I thought they were doing something to try and serve their customers better, but must be you did get ahold of them?
 
to be honest the only that i paid for was the gauges and the spray paint. i decided to try to create my own dash since i have two of them (original tucked away and this one which wasn't working) although it looks like others without spending much.
Autometer phantom II gauges- $601 from Jegs after $90 mail in rebate
Plexigalss- maybe $10
paint-$5
leds-$5

What exactly did you use for the textured background on the instrument panel? Is it textured wrinkled paint or a decal? Looks great! Might do something somilat but chrome the outer bezel and get some gauges with chrome on it then but the original light and wiper switches...
 
What did you use for the faux carbon fiber? Also how did you do the white faces on your guages? Did Redline redo them?

Randy
 
well i cut out the back of the dash and i made a plexiglass insert and used jb weld to hold in place and sprayed it with kryon gloss black. then i went over it with a clear coat and it only wrinkled the back of the dash and nothing else. i would get a wrinkle paint and experiment on a test piece to see how you like it.
 
That looks awesome 72 Demon! I love the look of the turned aluminum. Where did you get it (if you don't mind sharing)

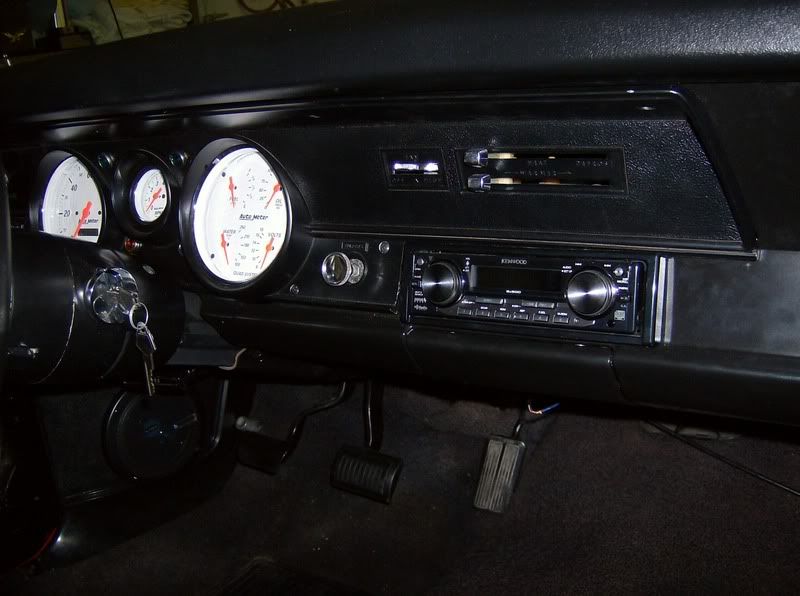
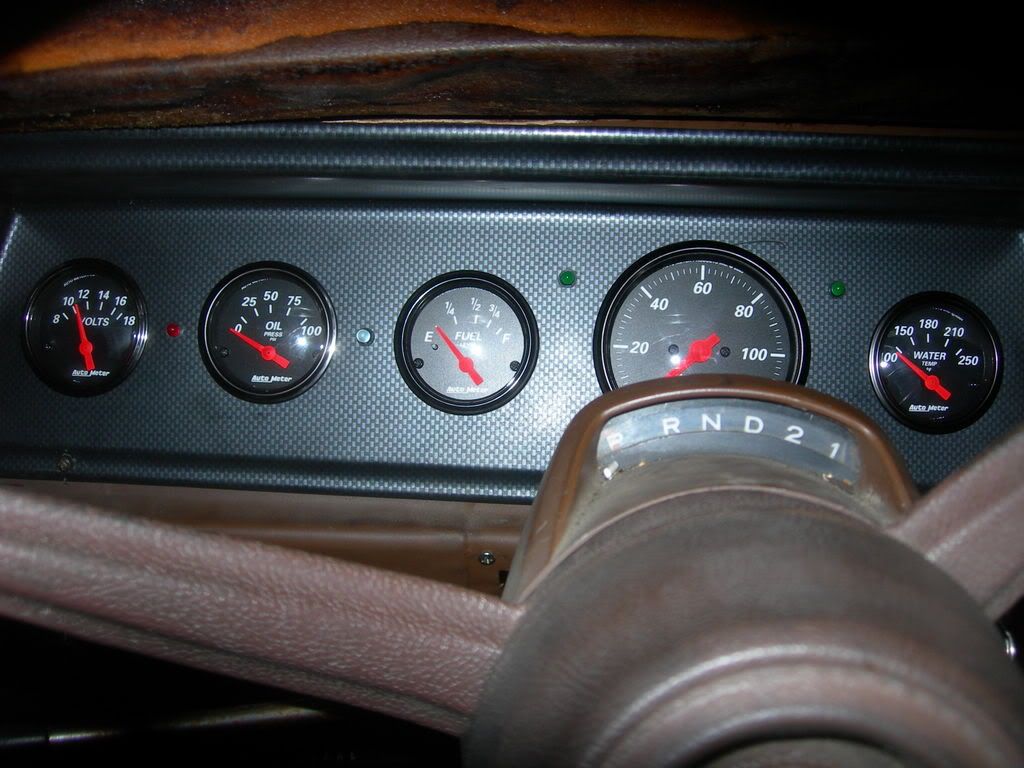
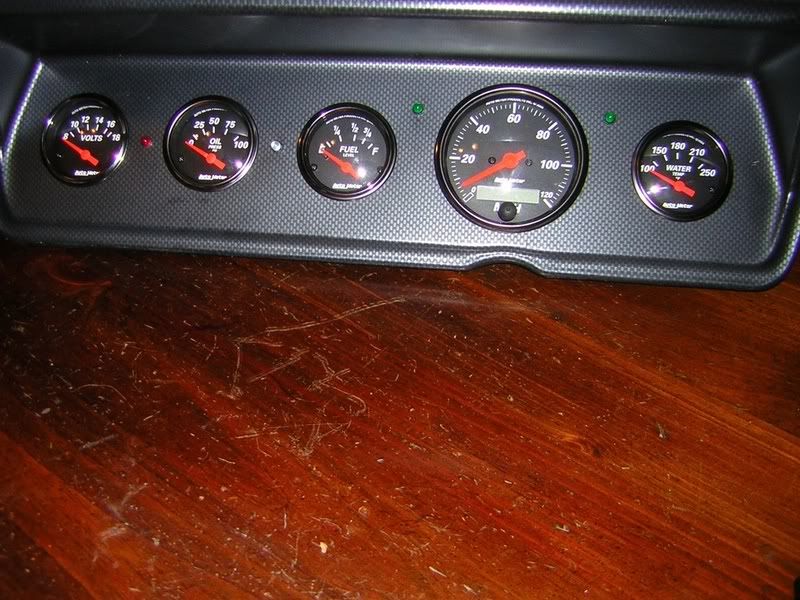
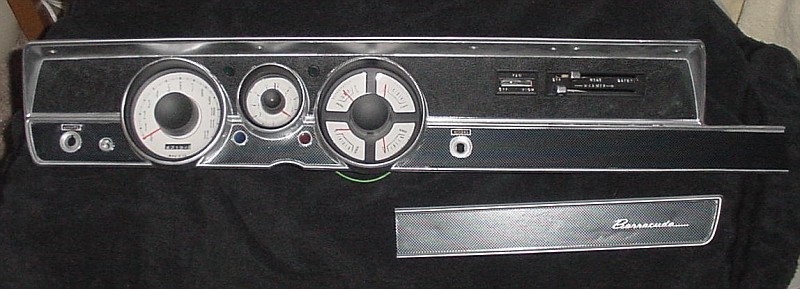
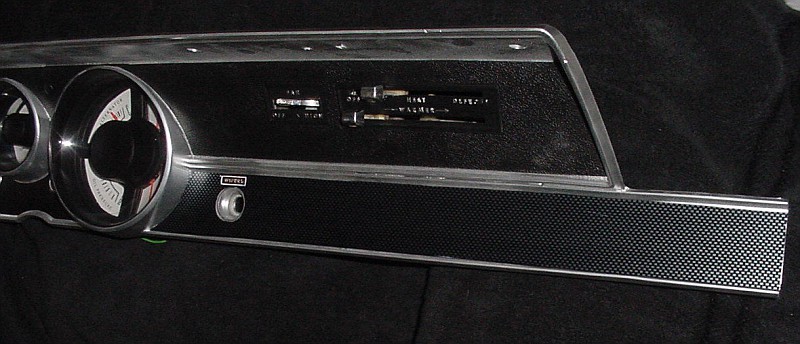
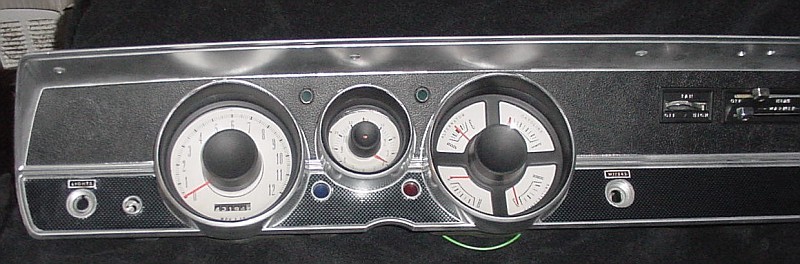
Thanks. I got the aluminum tape in a sheet from a do-it-yourself sign company on the internet. I can't find the receipt, so I can't tell you where I bought it. There's nothing on the sheet that hints at its origin. As I recall it was about $20 for the sheet. There is enough material to do four or five of these clusters. (I've done two.) The material is not very thick, but it will obliterate the faux wood grain that was cast into the plastic of the cluster housing. If you want real metal, go to Eastwood.

and how hard was it to cut/attach it?

It has it's own adhesive and backed with paper, though I was prepared to use rubber cement. Use a very sharp exacto knife and be careful not to pull the material off the backing while cutting. The hard part was making a template to use to cut the material. I used an old cluster core for mine. Don't start cutting material until the template is as perfect as you can make it. When installing, use a burnishing pen (I used a blunted wooden chopstick, no sharp edges) to push the material around the tight spots and work out any wrinkles that may develop. The process is sort of like putting on window tint with regard to the wrinkles.

In case you were wondering about the little square on the left of the speedometer, that is an illuminated rocker switch set in the "Fasten Seat Belt" light hole. It will control a pair of 333k candle power driving lamps.
 
thats nice... you should make them for us... we send them to you and you turn them out back to us
 
-
Back
Top