Slant 6 Turbo 68Dart Project

-
looking good man. fwiw i pretty much covered my stock radiator with my intercooler and haven't had any over heating problems yet. it does get warm when i get on it for a while but not anywhere that would be of concern. did you have to modify the grille?
 
looking good man. fwiw i pretty much covered my stock radiator with my intercooler and haven't had any over heating problems yet. it does get warm when i get on it for a while but not anywhere that would be of concern. did you have to modify the grille?

All I had to do was not mount the three center legs to the radiator support frame. I bent them at a 90* angle (all three) to clear the intercooler and what would be the piping spots. That was all I had to do. Everything else bolted up just as it should. Luckily I got more than half the radiator uncovered, and if you look through the intercooler and the rad, you can still make out the engine, so I assume it doesn't block too bad.

Also since the mounting and everything is done, I can actually unbolt the intercooler and slip it up out of the grill if need be. But this will give me an idea of it overheating or not. Easily reversible then I find somewhere else to mount it.

Right now, without driving it yet, it sits at 185ish in town, 190 on the freeway and sometimes really close to 200 if it's 90 degrees outside and I'm pushing the speed limit on the freeway. So we'll see if it changes.
 
Dad dropped by again to get help with these "new fangled electronic devices" and wanted to talk more about the turbo setup. "It's just not gonna work Dave, I don't care what people say. I tried it with a twin supercharger setup on a Hemi Firepower for a boat, and it just didn't work, the only way to make it work is to put a carburetor, then the turbo, then the intake" you'll find this setup just won't work. Caburetor venturis are not designed to operate under pressure, you should just put a throttle body and 2 injectors on it and then it would work. Carburetors won't ever work for turbo like that"

I know he's just going to have to see it working before I ever hear the end of it... :happy1::glasses7:

In other news, the U-pipe, and the last of the exhaust flanges showed up today from Jegs. Also my other piece for my turbo hat popped up. This is going to be a cool build, and I think if my math is correct, I'm at $530 for everything so far.

WIth the next purchase I make of the 255 fuel pump, a holley boost sensitive regulator, a wideband bosch sensor and gauge, fuel line, downpipe material and a reducer to go from the 2.5" cold side tubing to the 2" turbocharger outlet, and some kind of 3" filter, I'm looking at a cart cost of $425

SO BASICALLY:
I met the $1k goal, but there will be some brass fittings I'll need to purchase likely, and then the actual work that needs to be done by a welder since I lack the tools to do that.

And then I can assemble a list of things I have to do from there: Not in any order.

- Drain oil, install filter sandwich with oil gauge line, and feed line, then mount wix on top.
- Install fitting on oil pan for turbo drain OR on rocker cover if the turbo winds up being higher than expected, then replace oil.
- Reassemble Hangar 18 carb when it gets here and clean it up
- Install new 18* limited dizzy when all parts are in place
- Install other valve cover with new gaskets
- Remove manifolds, reinstall decked blue exhaust manifold
- Remove intake manifold and repaint while it's off. Adapt Holley 350 to base.
- Have welder assemble aluminum for carburetor hat
- Have "J" pipe made when nearing completion likely unless I can measure out precisely where it goes
- Have dump pipes made from wastegate to meet downpipe
- Cut radiator support for piping. Two simple rectangular shaped cutouts on each side to allow a 90* connector to enter the engine bay.
- Cut and flange the rest of the piping to fit
- Install return, and fuel pump on frame rail, run fuel line to engine bay, install regulator on back firewall near valve cover
- Boost reference everything that needs to be boost referenced.
- Some other stuff I'm probably forgetting
 
Just ordered $25 worth of aircraft AN fittings. These things are expensive, but if they're good enough for the military, they're good enough for the Dart I guess.

Once they arrive I'll be punching a hole in the oil pan (after drainging all the oil) then running the -10an line up and zip tie it against the fender for now with a cap on it, then install the oil feed plate, with the attached -4an line, and a oil pressure sender in place for a future oil pressure gauge to be installed without draining the oil again.

I want to get the dashboard setup as well, I'll be making a nice mahogany bezel to mount a boost, temp, AFR, and oil psi gauge to - all in 2 1/16". It'll cover the old temp gauge, and the OIL light on each side, and the brake light. It doesn't work anyway, and when I'm done it'll all look like it belonged in the car to begin with hopefully. The rest of the dash will get a similar mahogany treatment. Just a nice thin piece I'll plane out of ribbon grained mahogany.
 
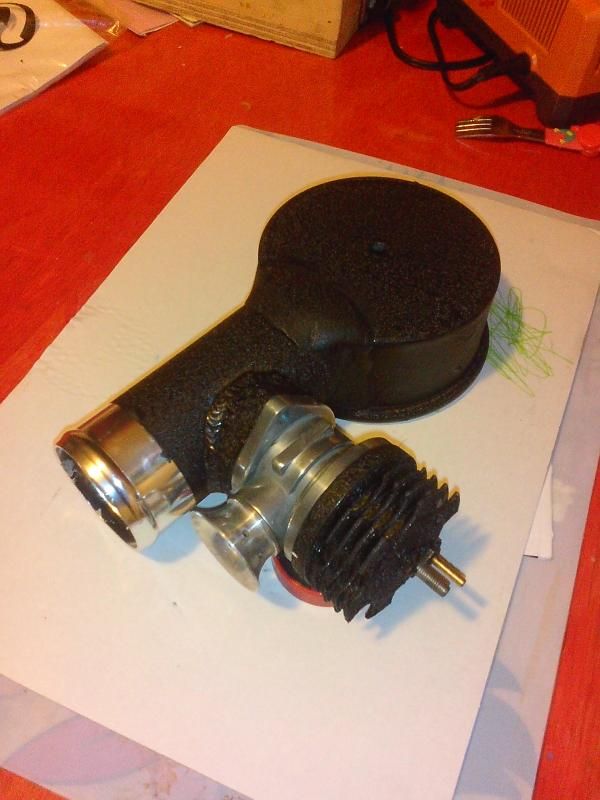
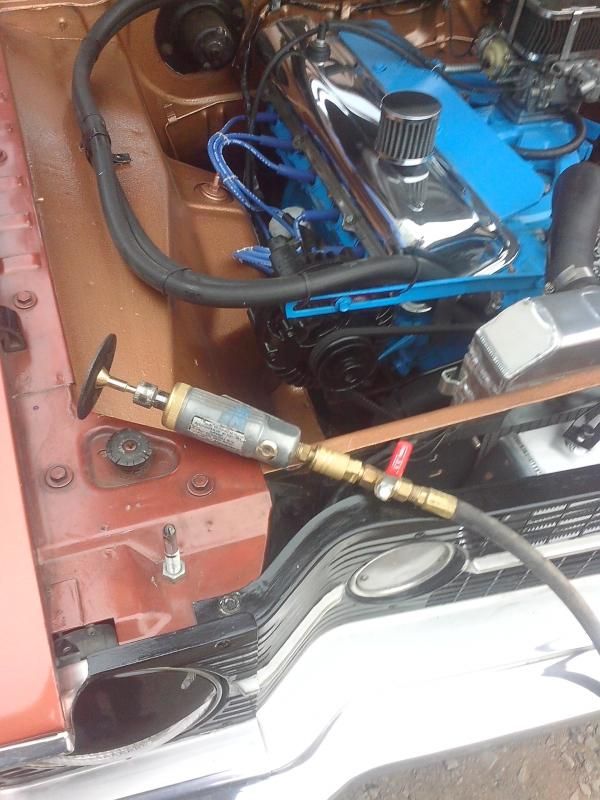
Well, here's something hopefully someone can chime in on. I have my U pipe in hand, and can already see why people jack the battery to the trunk when they do turbos - it's in the freaking way...

http://s43.photobucket.com/user/serj22/media/Turbo 225/IMG_20140824_182749_zpsc48252e2.jpg.html

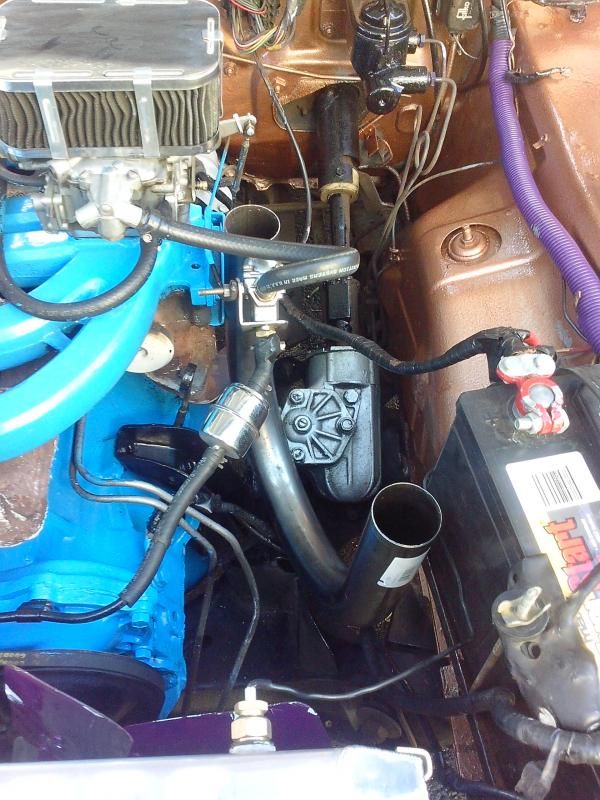
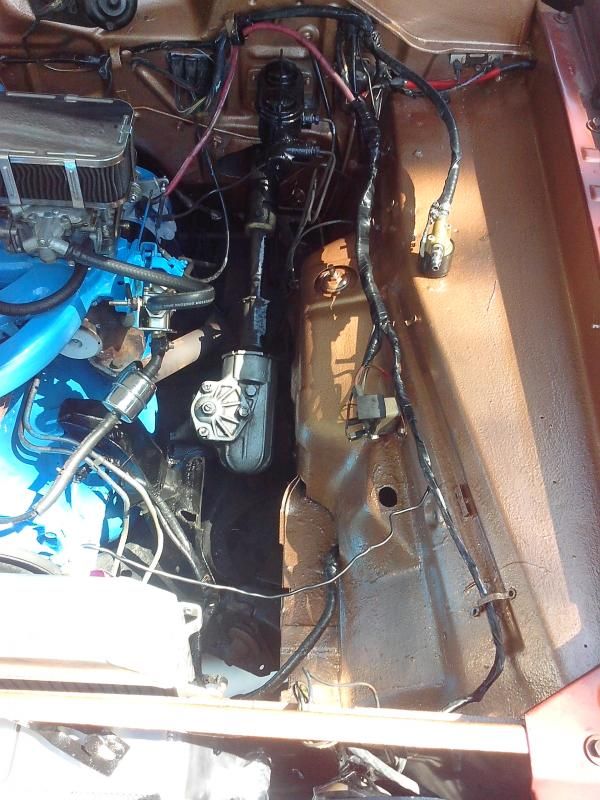
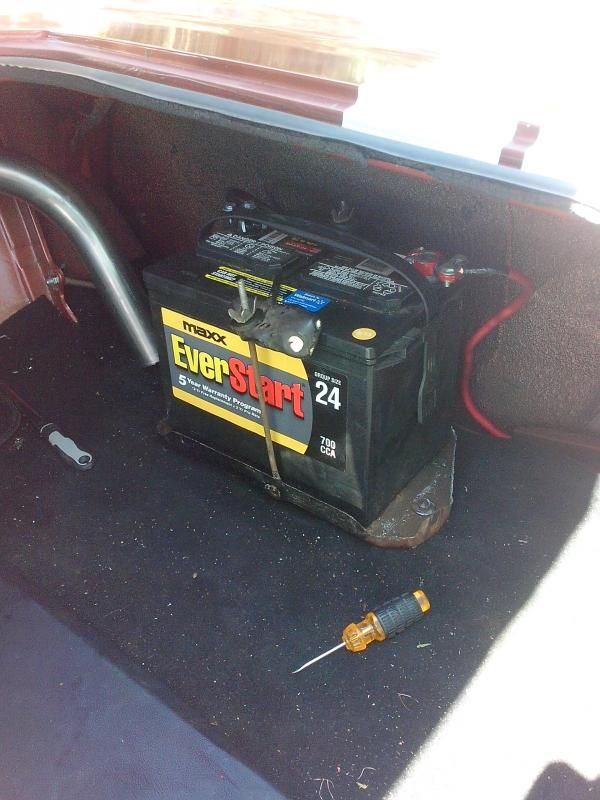
Problem is - I want to leave the battery where it is - so I don't have to put a totally rad WW2 ammo box in the trunk for the battery to sit in. I really do like it where it is. And I know this can be done by leaving it there. So rather than having it front high, my new idea is to have it low, and centered. Basically the idea is to have the body floating right over the top of the steering box. There will be about 2" of clearance between them. I can raise the turbo itself higher, but I am worried about the leverage it will create on the bottom of the exhaust manifold.

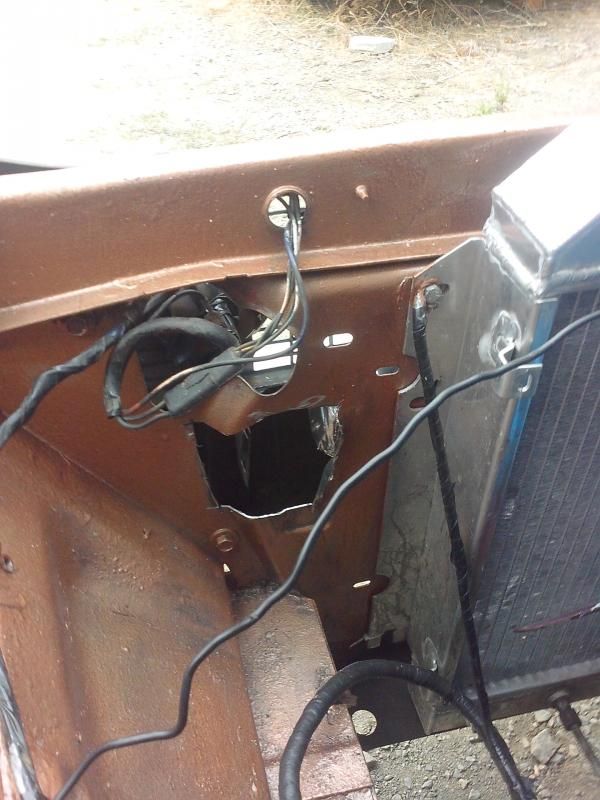
This is an example of where it will go.

http://s43.photobucket.com/user/serj22/media/Turbo 225/IMG_20140824_184146_zpsd1e04994.jpg.html

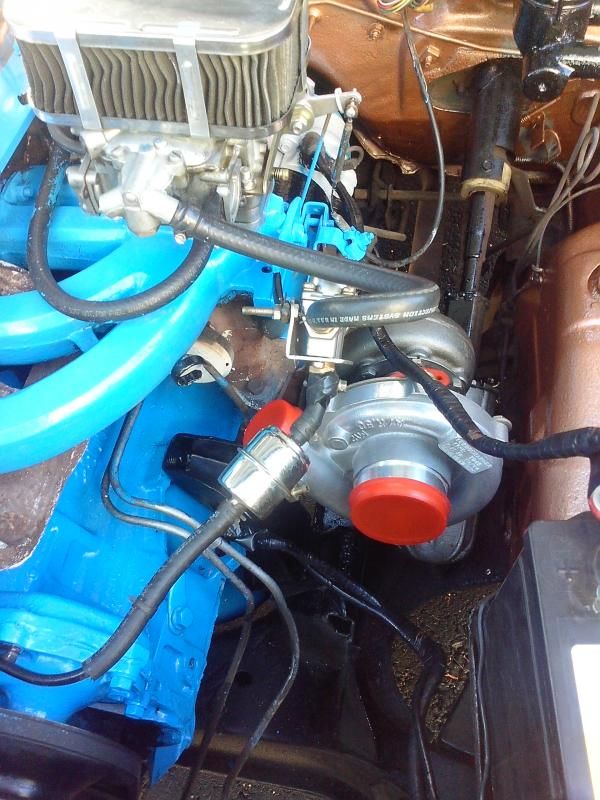
It's resting on the steering box right now - but obviously it won't be and I will be dialing the oulet to face the other way to go to a 90* bend, towards the sky, then duck under the battery tray and then 90* into the intercooler. Then from intercooler, just pretty much like everyone else has up above the alternator bracket and into the carb.

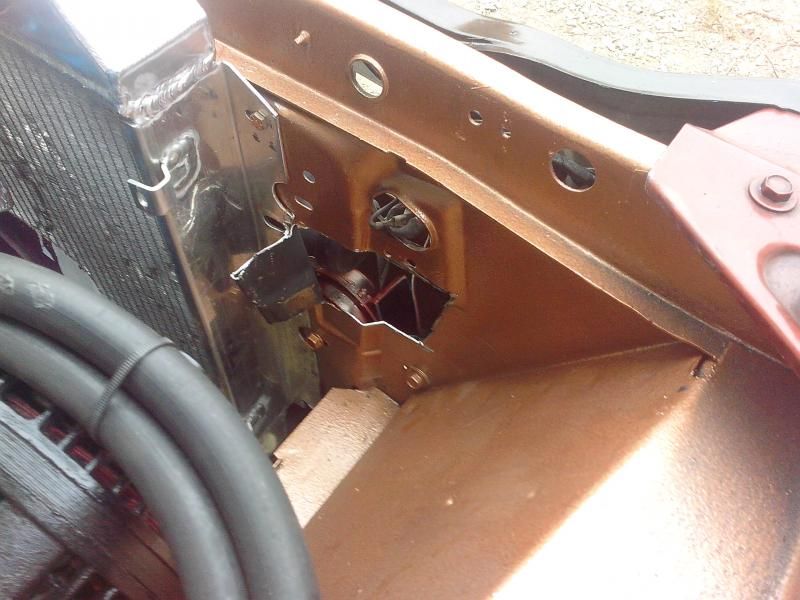
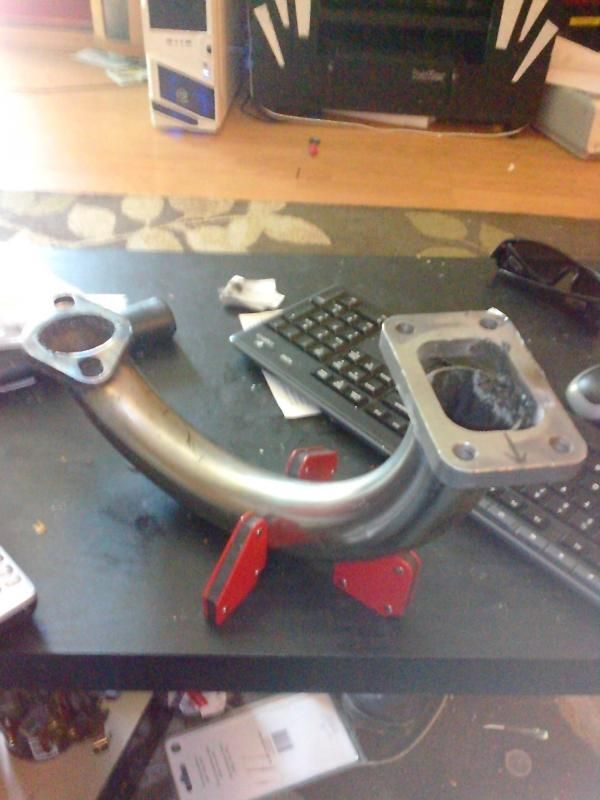
SO this is my idea - scrapping the lengthened J pipe -

http://s43.photobucket.com/user/serj22/media/Turbo 225/IMG_20140824_184522_zps79472636.jpg.html

Just that (well the exhaust flange is angled a bit realistically, but you get the idea) - 1 1/2" apart and with the slightest U under it - basically the shortest thing allowing them to join, and possibly raising the turbo itself slightly by about 5". The throttle cable will still clear everything, and I'll be able to use the existing throttle and kickdown. The other awesome fact of this is the downpipe modification/ addition will be very short and will meet the original exhaust pretty spot-on, and leave the bung towards the firewall so that the wire can travel straight vertical - and into the cabin.

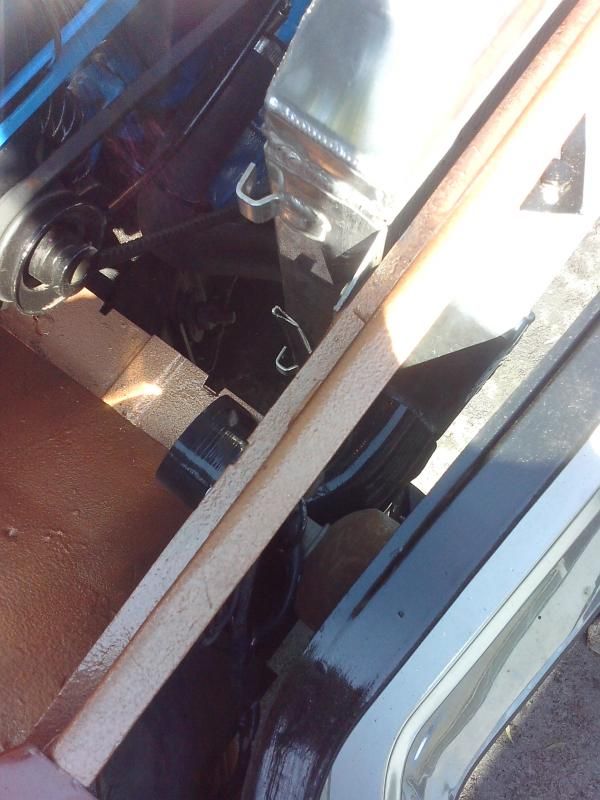
This also leaves HUGE amounts of room to run pretty much whatever intake piping I want, which will likely sweep up, and straight forward to keep it out of the muck if I accidentally drive through a lake.

The 5" rise on the U will allow my to tie the turbo to the same bolts that attach the intake and exhaust together by making a simple little bracket.

My question though - was I was originally going to go forward, and tie the turbo to where the A/C or power steering pump would go with a bracket off the block - which I assumed would support the weight.

My new idea allows it to mount to both manifolds, and utilize the same exhaust hanger bolted to the bellhousing near the back of the motor to hold the downpipe up. Will this be sufficient to support it and/or prevent cracking of the exhaust hopefully?

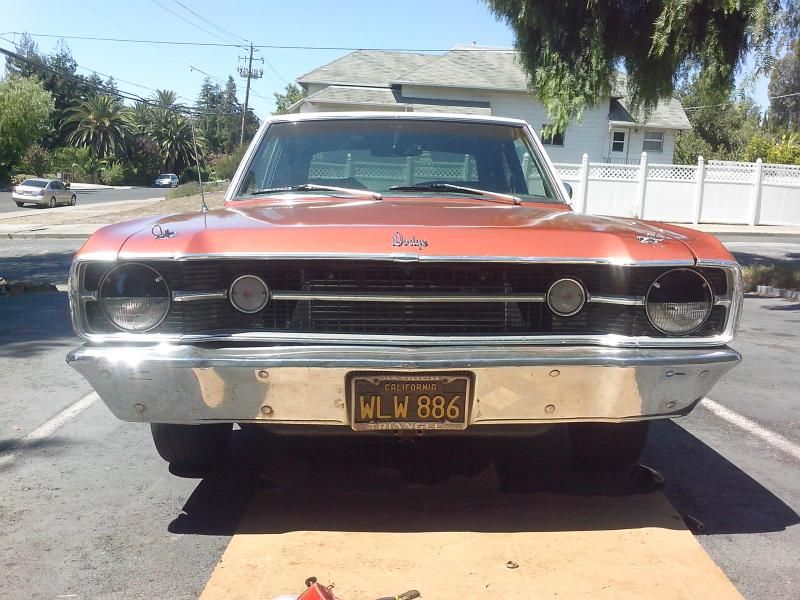
Also - intercooler update - took the car on freeway at 70 cruised for 20 mins, and only hit 190-195* so the intercooler is not blocking much. I'm assuming the car gets more airflow under the bumper and through the small slit above the license plate. One of the caps flew off the intercooler - looks like duct-tape for the time being.

It's invisible in certain lighting, but visible when you're right up next to the car.

 
so looking at the pics it might work. you would have to make sure you are maintaining at least a 45* angle from the bottom of the turbo for the oil drain. you might need to scrap the u pipe you have and get one with a much tighter radius. find the thickest one you can in the tightest radius and you should be good to go. cut it to size and weld on the flanges. should be pretty simple. as for leaving it hanging off the manifolds, i dont think that is such a good idea. you can make some kinda bracket to support the weight of the turbo off of the motor mount. or even the motor mount and the transmission to engine support.
 
RE: "So I don't have to put a totally rad WW2 ammo box in the trunk for the battery to sit in."

What makes you think it has to be in a box just because it's in the trunk? It's not in a box now, is it?

What is wrong with this? See photo of my '72 Valiant trunk, or this, if you are somehow uncomfortable with a bare battery in the trunk:$15.00... Summit Racing Part Number:SUM-G1210 at http://www.summitracing.com/parts/sum-g1210/overview/

The gods of weight distribution will applaud you...:cheers:

It cleans up your underhhood area nicely, I think.
 

Attachments

  • 100_2854.jpg
    52.3 KB · Views: 687
True it cleans up, but reason for it being in a box is I've had batteries explode near me before and I wouldn't want it to do so, or leak, or do anything harmful for any reason less than a foot away from my children in the backseat when they go driving with me. Plus if I ever do it I really want it sitting in an ammo box.


But in all seriousness, if I do move it to the trunk, what gauge is appropriate? Say 2, or 4? 4 is cheaper for sure. Then it just gets grounded against the body, and i reground the engine block to the body as well, instead of the battery? The swap is tempting I think... I just would like a box for it - even a cheap one like you mentioned.
 
But in all seriousness, if I do move it to the trunk, what gauge is appropriate? Say 2, or 4? 4 is cheaper for sure. Then it just gets grounded against the body, and i reground the engine block to the body as well, instead of the battery? The swap is tempting I think... I just would like a box for it - even a cheap one like you mentioned.

yup. i ran 4 gauge and it seems to be working pretty well. ground everything.
 
yup. i ran 4 gauge and it seems to be working pretty well. ground everything.

You simply cannot have too many grounds. I ran #2 welding cable from the negative post on the battery(s) to the rear subframe, and one from the engine block to the front subframe. The two subframes are welded together by a subframe connector, but additional connectors are used from the subframes to the body, itself.
 
Well, battery is going in the trunk tomorrow. It is just proven time and again to be in the way. I went to an exhaust shop today to work out ways of doing this. Very nice guy, and gave me a lot of ideas.

I'm very proud of this next part because I've never made anything like this (being a carpenter) so I am super excited about how it turned out. This is my Aluminum carburetor hat I made.

I spent a grand total of $25 for parts.

$10 for the carburetor "cover" intended for Holleys with no manual choke peripherals. $15 for the 2.5" section of pipe with a BOV flange already welded on intended to be clamped to more intercooler piping.


I drilled a 2 1/4" hole in the side of the cap, and then took it to the belt sander and laid it on its face to widen it to as close to 2 1/2" as I could get without interfering with the nice folded bell on the bottom which will help seal the cap to the carb.


I ground the other pipe on the belt sander to match the curve of the cap and angle it down slightly so it is naturally pointed slightly down to help with clearance. I also crushed the end that meets the cap in a wood clamp to keep it from being too high above the cap.


I couldn't find a welder with aluminum welding skills near my shop, so I asked my buddy JB to handle it. I smacked the whole assembly around, threw it on the floor, tossed it in the air and let it hit the street. No dents, no cracks, nothing but some scuffs, and the epoxy held solid. I sanded the epoxy to a nicer shape, taped off where the piping will clamp, and the bolt hole, and flange for BOV, and painted it with the same wrinkle black flame proof VHT I used for the valve cover. I found the trick is to spray the part, then chuck it in the over on some aluminum foil at 200 degrees. It wrinkles evenly all over at that point.

I THINK it looks great.


IMG_20140825_2036061_zpsdd23e175.jpg


Also now no need for adapters to the intake, or $100 - $300 carb hats. And being as the hat itself is 2 1/2" tall total, I believe this may be a better solution than a low profile hat. I'll add a splitter when the carb gets here, so that it delivers air directly to the two barrels, and does not deaden against the rest of the useless carb top. It will also allow room for my vent tube extension as well.
 
i dunno about jb weld in that kinda situation. it may hold for a little while it may not. heat and pressure to crazy stuff. did you flare the inside of the pipe to meet the inside of the hat for some kind of mechanical lock?
 
i dunno about jb weld in that kinda situation. it may hold for a little while it may not. heat and pressure to crazy stuff. did you flare the inside of the pipe to meet the inside of the hat for some kind of mechanical lock?

The outside of the 2 1/2" pipe i flared out slightly, and bent the edges of the cap hole in - once it was in the cap, it will not pull back out. Also, I used this stuff to hold a spoiler on a car where the bolt mounts broke off. It never moved for three years and there were no bolts in it.

I am just hoping for the best, and it is also a really tight lock, and also applied to the back, and in between. I just used this stuff most recently to make a column shifter on a 1947 Cadillac steering column only shift 3 times instead of 4 by making less grooves in the cam lock, so that piece gets smacked around consistently and it has held up like a dream. It's in a boat.

I personally think that if clamps on vinyl tubing with flares hold boost, this will. But I may be wrong and it comes apart, at which case I either try again (with $25 worth of parts) or get a spectre.
 
"Well, battery is going in the trunk tomorrow. It is just proven time and again to be in the way. I went to an exhaust shop today to work out ways of doing this."

Congrats on a wise decision and special congrats on the carb hat job; it is unique, eye-catching and will work well, I am sure. Nice work!!!:cheers:
 
Thanks Bill.
Well, sure enough I put the battery in just like I wanted. I ran 4gauge all the way back, and grounded the battery against the wheel well, then grounded the motor to the radiator frame support, and fender for now. I'll run more later.

I hooked everything back up, and started it. No issues. I re-used the battery tray itself for now and drilled 4 new holes in it in all corners and bolted it down, then the battery is mounted to that just as it was in the engine bay.

Good thing I used to do 12v audio installs so I knew exactly how to handle this. $60 worth of wire though, that's 20feet of red, and 2 feet of brown 4g.


Took about 4 hours. That included finding the wire and going to hardware store for materials to bolt the tray down - Napa wound up having the wire in the end.
 
looks good. make sure you secure the wire well and make sure its not going to rub on anything. it will be bad news if it grounds out. did it years ago with an amp.
 
looks good. make sure you secure the wire well and make sure its not going to rub on anything. it will be bad news if it grounds out. did it years ago with an amp.

Yup, everything's grommeted and hopefully rub proof. I zip tied everything like I owned stock in zip ties if you know what I mean, and used some nice sealer to hold everything down. I'm debating putting a big fuse that came with the kit by the battery so if it does ground out, it won't weld itself to the body. I've had that happen before too with an amp...
 
I got my 350 in the mail today, and the electronic dizzy with the volvo boost diaphragm attached. I sat and played with both and took them apart. Liking it already. Most of the Hangar 18 mods are done to the 350 already. I need to cut more of the choke tower off since the hat angles in a different direction. Dude was nice enough to send some more power valves with it, so I want to try and make a boost referenced power valve, and just finish the carb off. I also have to file away some of the marks on the shelf where the carb hat hits. They extend out about 1/16" in 3 places. Nothing too hard - maybe 20 minutes of shaving it down.


Otherwise the carb hat fits - just doesn't sit all the way down yet because of those marks, and even if it did - the vent tube extension included isn't quite going to work. It pushes too high up, and off to the side. I'll have to make one that snakes a little bit and winds up centered in the tube, and possibly go out a little further.


I don't think it's going to work right that far from center. Not a hard fix though. Just make a new one.

I also finished cutting my J pipe following similarly to pishta and rustyplymouth's build. Mine I believe extends a little further forward. Should work good. Notching the engine mount a bit for fit. Then I'm building a triangle out of steel (best I can describe it) to hold the weight onto where the pump bracket would be. My turbo flange will wind up on the same plane as that bracket mount (kinda). Measured - mocked, measered over and over to come up with the shape.


ALso I'm just going to buy a welder. I found a few I liked and my union offers free classes that I should take, so... may as well, and everyone I talk to about assembling it doesn't like how i want to do everything, and that doesn't fly well with me. One guy said the only way to do it was to shove the turbo back into the firewall and run the exhaust about 1/2" away from all the wiring - good idea... :wack:

I'm sure it works, but it's not what I want. And the cost for assembling it and them buying pipe is WAAAAAAAY over budget. I will be spending less money to learn and do myself.
 
i like the crinkle paint job on the vc and the carb hat/bov. looks pretty sharp. i recall reading about that volvo diaphragm. is there a part number on it by chance? the vent tube extension will work. just bend it down a little farther and throw a little flare on the end. doesnt have to be in the center but it is preferred. for the j-pipe, make sure you mock everything up before you weld any of it. i spend a good half hour shaping and welding the turbo flange side of the first j-pipe i made just to sit the turbo on it when i was done and laugh my *** off because the exhaust coming out of the back of the turbo pointed straight at my intake. not saying you are dumb like me but take your time and double check everything. are you going with electric fans? im pretty sure my jpipe is shorter then yours and i have barely enough room to fit the filter on there, also interfered with my mechanical fan.
 
Sadly Jr, I've been wiping it down with alcohol and other degreasers and can not find a part number, but when I take it off to check everything out hopefully i find one. My J pipe is a 12" diameter so it directs it way further out, and will direct the intake side just past the side of the radiator. The intake piping will likely touch it on the side, but I'll figure that out hopefully.

Good to know that the extension will work, but it wouldn't be difficult to make another and I do have a flaring tool.

My other thought was to flare the exhaust pipe bend on the manifold side and slip the exhaust flange on, so that you can spin the bend before it's tightened, if that makes sense? But would likely be difficult. I only plan to tack and move, till I am happy. With mine so far forward I get to utilize a lot of room to setup the wastegate. I also am using a supersix manifold so it's still hugging the block. The downpipe will direct right at the fender if I went straight back - so it will do a angle inboard, then go straight down (angled slightly) and over the J pipe and back. Basically trying to keep as much heat away from wiring as I can. The intercooler is literally only making a 90* with a single elbow connector and it will be right below the turbo, so only about 12" of piping will be seperating them.

Basically mine goes out farther and the turbo will be taking the place of the battery, if you get the idea, so the intake and fan will never bother eachother. I'm going to make a large bracket off the block to support it and hopefully all is well. If I have to I'll make a hanging bracket with the lifting points on the head that will sweep in a "J" and then connect to the turbo bracket as well.

One other thing I thought about - maybe you'd know Jr or bill, is if I could use that small hole intended for a built in wastegate on the exhaust impeller housing? That way I make my downpipe with a 3" pipe, welded to a 1" pipe that branched off a little to attach the wastegate, and then reattached to the downpipe further down. Basically - could i not run it off the J pipe and instead run it out of the housing hole designed for internal use, it is before the impeller.
 
did they guy happen to tell you what kind of volvo it came off of?

the flare on the exhaust could work but would probably wind up being more trouble than its worth. my turbo wound up right where my battery was. but you have a bigger engine bay so you may/should be fine.

im gonna assume by the wastegate question that you are running an external wastegate? im thinking it could work. i would measure the opening in the turbo housing and the measurement on the wastegate. if the turbo opening is smaller then i wouldnt even bother. ive personally never seen that setup. not sure if there would be a reason for it but it may be worth a shot. if it were me i would put it in the j-pipe though. somewhere around the bottom of the bend and in line with the flow of the exhaust.

[ame="http://s125.photobucket.com/user/weesers1/media/jpipe_zps0d771e8d.png.html"]jpipe_zps0d771e8d.png Photo by weesers1 | Photobucket@@AMEPARAM@@http://i125.photobucket.com/albums/p79/weesers1/jpipe_zps0d771e8d.p@@AMEPARAM@@125.photobucket.com/albums/p79/weesers1/jpipe_zps0d771e8d.p[/ame]
 
One other thing I thought about - maybe you'd know Jr or bill, is if I could use that small hole intended for a built in wastegate on the exhaust impeller housing? That way I make my downpipe with a 3" pipe, welded to a 1" pipe that branched off a little to attach the wastegate, and then reattached to the downpipe further down. Basically - could i not run it off the J pipe and instead run it out of the housing hole designed for internal use, it is before the impeller.

I am not ignoring the question, but can't answer it because I don't understand the part about the turbo you're using having had a built-in wastegate. You are not using a GN Buick turbocharger, I think, and they are the only turbos I am aware of that have a built-in wastegate, though there are others, I am sure.

The turbo on my car is a 4-bolt flange 66mm Turbonetics (T-4?) and requires an external wastegate, and beyond that, I know nothing. Sorry for being NO HELP...:sad7:
 
i know one modern turbo has a built in waste gate. srt4 or subaru or something... i can't remember
 
I am not ignoring the question, but can't answer it because I don't understand the part about the turbo you're using having had a built-in wastegate. You are not using a GN Buick turbocharger, I think, and they are the only turbos I am aware of that have a built-in wastegate, though there are others, I am sure.

The turbo on my car is a 4-bolt flange 66mm Turbonetics (T-4?) and requires an external wastegate, and beyond that, I know nothing. Sorry for being NO HELP...:sad7:

Here's what I'm referring to, this hole; the flange i currently have blocks it off though.

http://s43.photobucket.com/user/serj22/media/Turbo 225/IMG_20140828_064158_zps103eacca.jpg.html

It is based on a T04e which is the gran national (sort of). It doesn't have a built "on" wastegate, but it has provisions for one in the form of a hole in the back which was controlled by a diaphragm right on the outlet of the turbo that would control a plunger to vent it into the down-pipe after the pressure is reached. This one has a flange but the hole is blocked off so it is unused. I was thinking of mounting a 1" pipe parallel to the 3" down, off the same flange - and then have the wastegate downline vent back to the downpipe.

But either way, I like Rusty's idea better, of just branching off the bottom, maybe with a cool U bend back -would look neat.

Cut day was today. Felt really bad cutting into the huntress, but she will appreciate it in the long run.

http://s43.photobucket.com/user/serj22/media/Turbo 225/IMG_20140828_072002_zpsa33f54ca.jpg.html

http://s43.photobucket.com/user/serj22/media/Turbo 225/IMG_20140828_074242_zpsac54e44d.jpg.html

The passenger side i cut out, but once I bent the flange off, there was no way to get my cutting wheel on it like the other side to remove it, so unfortunately for now it stays... ugh. It will probably get used to mount something. Both sides my 90* elbows pass through flawlessly and with plenty of clearance. I will put some kind of seam on all of it just in case - so it won't cut the vinyl.


http://s43.photobucket.com/user/serj22/media/Turbo 225/IMG_20140828_074532_zpsc160aca2.jpg.html

Also in that picture you can see where I moved and hid the horns - right under the hole behind the grill.

http://s43.photobucket.com/user/serj22/media/Turbo 225/IMG_20140828_125259_zpsdeec0e5f.jpg.html

90* pass through excellently.

Then I got myself a welder and tacked the J pipe together after I dropped the exhaust pipe down, and then brought it in to weld the rest. Can you tell I have no idea what the **** I'm doing? I did give it a good effort, and over time I'll get better I'm sure. (also I did not weld it on my coffee table - I just am displaying it there)

http://s43.photobucket.com/user/serj22/media/Turbo 225/IMG_20140828_142922_zpsdab435cd.jpg.html

Rather than follow how Rusty did his and bend flanges off the pipe to meet the square, I am simply going to use two 1/8" steel bars, that will sit next to the pipe with a slight radius, and will come back to form the basis for my bracket. 2 birds - 1 stone kinda thing.
 
lookin good. i taught myself how to weld over the years. the trick is getting the heat just hot enough so it doesnt just burn holes and the wire speed fast enough to maintain an arc. start the arc and move the puddle out in little circles.

i remember coming across these when i was gathering parts. might work for what you wanted to do.
[ame="http://www.ebay.com/itm/T3-T3-T4-5-Bolts-Turbo-Downpipe-FLANGE-2-5-Mild-Steel-w-Wastegate-Hole-/181509738754?pt=Motors_Car_Truck_Parts_Accessories&hash=item2a42d2d102&vxp=mtr"]T3 T3 T4 5 Bolts Turbo Downpipe Flange 2 5" Mild Steel w Wastegate Hole | eBay[/ame]

i was seriously contemplating one of these but didnt like that the exhaust would have to make a 90* turn to bleed off the pressure.
[ame="http://www.ebay.com/itm/T3-FLANGE-CAST-IRON-TURBO-CHARGER-EXHAUST-MANIFOLD-ADAPTER-38MM-WASTEGATE-PORT-/161292772065?pt=Motors_Car_Truck_Parts_Accessories&hash=item258dcc62e1&vxp=mtr"]T3 Flange Cast Iron Turbo Charger Exhaust Manifold Adapter 38mm Wastegate Port | eBay[/ame]

just a couple ideas.
 
-
Back
Top