Slant 6 Turbo 68Dart Project

-
The first flange I can make out of the one I have - just drill a hole in it. The second I did see before, and I didn't like it either, especially since it causes the wastegate exit to go straight up in the air or straight down...

Eventually I'll figure the weld thing out, but for now I'm trying to get good penetration and then kick the pieces with a hammer to make sure the don't come apart, and so far so good. I'll just sand off the gobs and you know ---- no one will know... Also at this point my $1,000 budget I'm probably scrapping and will now try and aim for less than $1500.
 
the budget is hard. i got it done for less then $1k. not by much and not much to show for it performance wise. granted i could probably beat a 318 with ease with the setup i had together i was looking for more. i think im well on my way. the fuel pump and regulator put me over the top. still in it for less then $1200 for now. thinking about an msd 6al 2 for spark control. im pretty sure i could get more out of it with some advanced timing while its spooling. it also has a rev limiter and a 2 step so i could build boost on the line. that would be another $250. so $1500 is probably gonna be where i wind up before the next/bigger turbo.
 
That's exactly how I'm feeling now. I'm still only into it $600, but if you notice, none of us really factor in the fittings, going to stores, buying tools you didn't have that you need now... etc. All that little junk adds up. The actual parts - I'm thinking $800 can be done.

One of the things I had not thought about is that right now i use a regular (originally points) distributor with a pertronix fire 1 or something like that - conversion that I did when I first bought the car. It uses a stock coil, and the ballast.

The new dizzy I have is pretty obviously electronic, but I don't know that i can just plug it in the same as the pertronix is? Or am I missing something else in line that drives it? Right now it has two wires that leave the dizzy and go to the coil. I'm assuming the new one those two wires go to the same place. It has a yellow and black wire if I remember correctly with a harness clip that looks similar to the one that connects the parking lights to their circuit.

Inside the dizzy, it has what looks like a water wheel, and a contact that comes close to touching the wheel in 6 points - different from the pickup system on my pertronix setup. I'm also curious how I'll find a rotor for it since i don't know what year it's from, are they all the same?

Do I need an ECU or some other junk?
 
Do I need an ECU or some other junk?

Maybe it's because the car I have was designed as a "never on the street, race-only" project, but having driveability and mileage as totally-insignificant considerations greatly simplifies the picture. To wit:

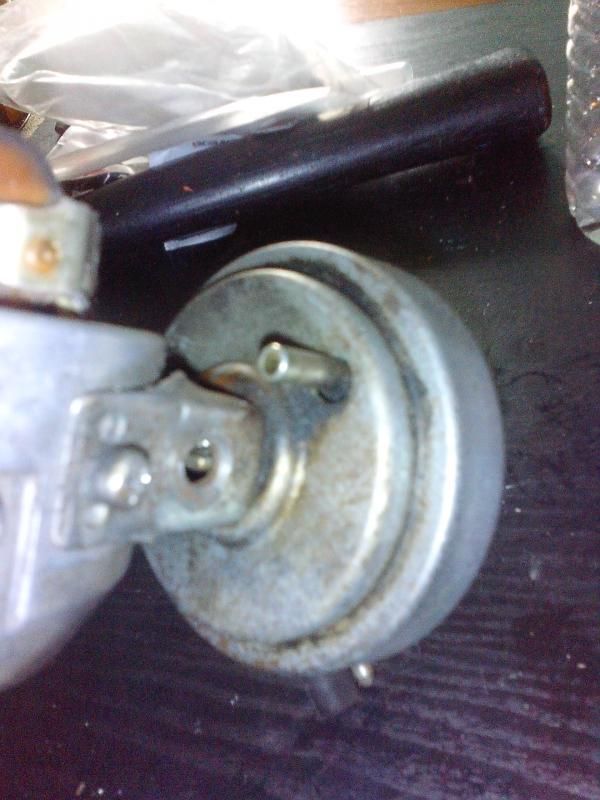
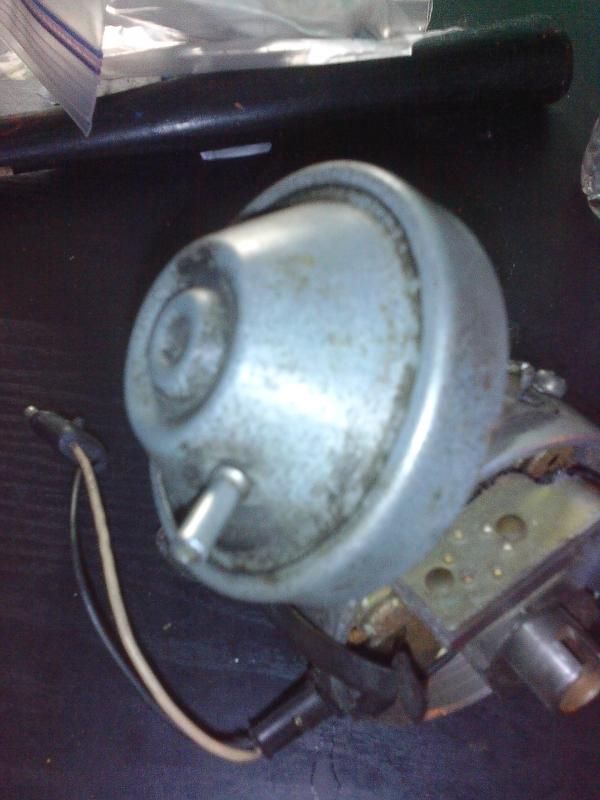
My ignition system, which seems to work very satisfactorily for my purposes, consists of a bone-stock, electronic, "lean burn" distributor which came from a 1980, or so, Dodge truck. It has NO centrifugal advance mechanism and NO vacuum advance mechanism. No chance of accidentally getting any more than the 18-degrees of advance I have dialed in at the crank pulley/dampener. Insurance...

It starts fine (no kickback) and runs fine insofar as driveability on the road goes and exhibits no run-on symptoms when the key is turned off. Fine for a race car; fuel mileage is unbelievably bad.

This thing goes thru gasoline, on the highway, like a dual-quad 440 stroker with 4.56 gears. No kidding.


But, it's just a race car, so who cares? I am sure not having a vacuum advance unit is the culprit here.

The ignition module is an MSD 6-AL digital,but not the programmable kind. I use an MSD Blaster II coil.

That's it!

Slant sixes that are turbocharged seem not to need to spin very fast to make lots of useable power, just employ lots of boost. Neither the engine in Ryan Peterson's 500hp '66 Valiant, 225 or Tom Wolfe's similarly-powerful 225 '70 Dart need much more than 5,000 rpm, max to generate this kind of power. Ryan's car goes 127 mph in the quarter (with a heavy 727 transmission,) while Tom's much heavier Dart has run 120mph quarter-miles, into a fifteen-mph headwind.

But, they each need over 25-pounds of boost to make that estimated 500 hp.

With forged pistons and rods, a forged crank, and O-Rings around the bores, that combination can live as long as it gets high-octane fuel, but a street driven car on pump gas, with stock internals needs boost controlled to probably ten pounds and careful attention to total spark advance.... never exceeding 18 degrees under boost, if it's going to last very long.

But ten pounds of boost can turn an 18-second a-body into a high-13-second ride, capable of going toe-to-toe with a stock 340 car. That can be a fun, reasonably-expensive, a-body!

I wish I'd known that when I swapped a '71 340 into my '64 Valiant, back in 1972...
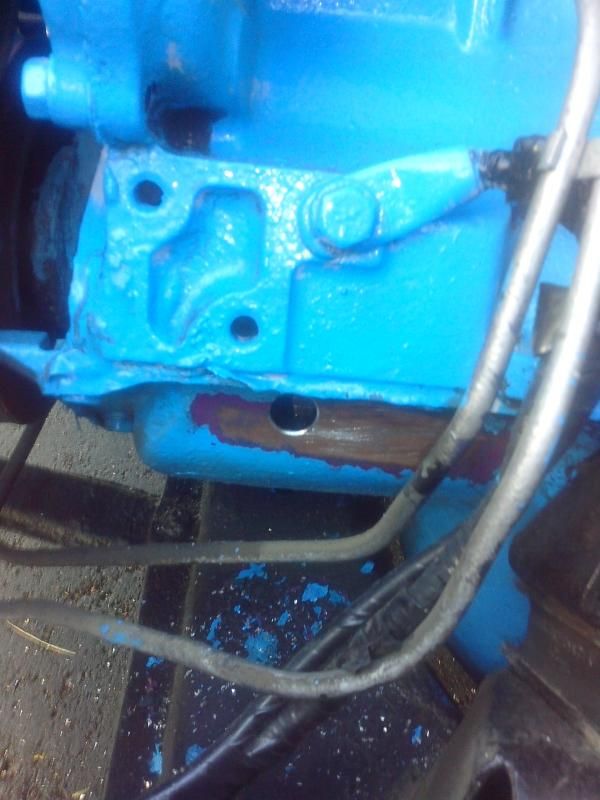
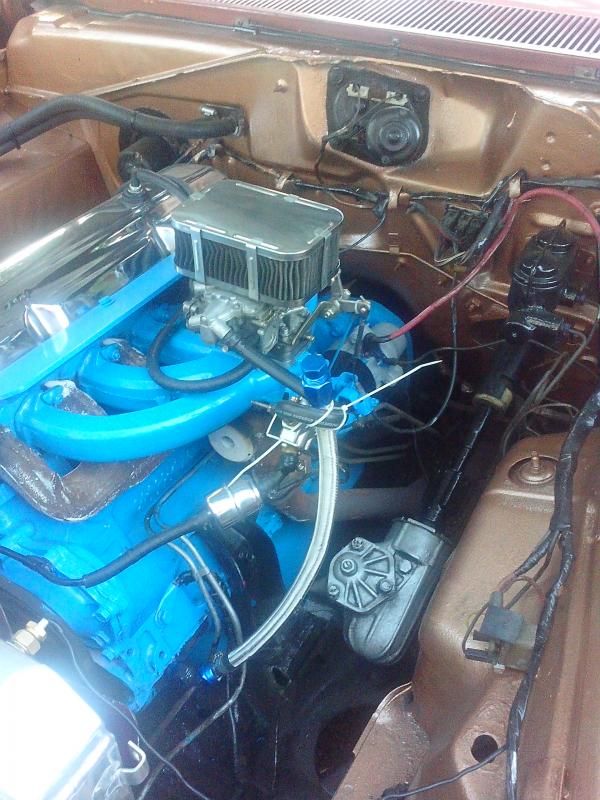
See pics.
 

Attachments

  • image02.jpg
    61.7 KB · Views: 582
  • image03.jpg
    55.9 KB · Views: 588
Bill, always insightful.

I'm just glad there are people like you who have done this so that I can steal - er... learn about setups.

I am mainly focusing on driving. I guess that's what's a little different about my car vs. every other boosted slant 6 I seem to see. This car is intended to be enjoyed everyday - and while I would like to take it to the track sometimes, I intend to drive it a lot.

I bought my Dart with 78k miles, and yesterday I hit 99k in less than 2 years. I can not wait for that odometer to roll for the first time. I drive all through town getting thumbs up and not having ever come up with a better "thank you" I simply wave or give a thumbs up back. People are always very interested in my car, till I meet a dodge guy. "I had a Dart, it was a 2 door though... had a 7,000 cubic inch hemispherical motor though, it was fast as ****; what you got in this?"

"just a slant 6"

Depending on the person, that is either a conversation ender, or better. Some old lady stopped next to me at a stoplight and yelled "does that have the slant in it?" yup "****ing sweet!" So it's always fun regardless.

Nevertheless people are always surprised when I say it's my daily driver, or that I drive it everyday. I figure my parents used something like this to go to work, so I can too.

I just want to have more fun, and up the power a little. I want to be able to pass a prius on the freeway without flooring it, and go up a hill. I want to be able to eventually take it to a race for fun, but ultimately this build is focused on - how to make it consistent.

So that's why I ask what other parts I am missing, because I don't want to assume I am correct, drop the new distributor in, put the wires on the coil, and go - because that may be the worst thing to do (if it were). I am very used to modifying cars by purchasing a "kit" so to speak and installing it with dedicated instructions and then having an expected result. So this whole turbocharging without bolt-ons (or turbocharging at all)is new water for me. I also just wanted to have a turbo car sometime in my life, and this is definitly the car to have it.

The distributor i have is the electronic one. Not sure from what year. It has been limited to 18 degrees total. There's a unit attached that will advance under vacuum, and then retard (I believe up to 5*) under boost. I have a 28 x 7 x 3" intercooler core running front and center, and will be using premium fuel. I'm going to start tuning the car around 5lbs of boost, stabilize, and move to 6, stabilize, 7, and possibly 8 will be my "safety limit" but we'll see how it operates and go from there. I'm sure even under 8lbs this car will move just awesome.

Whatever conditions need to be met to ensure reliability - I want to meet so to speak. If that involves getting a different ignition module or what have you - I just need to figure that out. I also don't want something that could possibly change the timing on me and advance when I don't want it to. That would be bad.
 
yea man those fitting add up fast. i already had all the tools. bought most of my parts online. no place around here could even come close to the prices i was finding on ebay.

if you could get a pic of the inside of the dizzy that would help with identification. sounds like its a standard electronic though. you will need a mopar electronic ignition box or you could do the hei conversion. of the two the hei is better. could always go msd but they are expensive.

5psi is a good starting point. i got my car running without doing anything to my distributor and took it out and flogged it. it was running lean but i stayed in it anyway up to 5k. 30+ degrees of timing and year old regular gas and it didnt melt down. pulled pretty hard with that much timing. so by that alone i would say 5psi is a safe place to be when you are not really sure about what is going on just yet.
 
true. pepboys here just put in a "performance" section geared towards 350s... but they carry AN fittings. their max size was only -8, and I am using 10 to drain oil. They also wanted $10/piece. Ebay had what I wanted for $6/piece with free shipping. I guess it matters how much of a hurry you're in. Pics of the dizy in a little bit.
 
Well, girlfirends' family invited me, her, and the kids to a camping trip in Lodi. It was a fun couple days so that's why I didn't get back with pics. Was kind of a last minute thing and had to go buy a new tent and other camping stuff. lol.

IMG_20140830_205353_zps92f8e244.jpg


But back to the build, eh? I have a couple shots of the dizzy for you Rusty, I'll try and get a hold of the original owner to see if he knew what it came off of. As far as I know, he did the conversion himself.

IMG_20140829_091520_zpsc531f13d.jpg


IMG_20140829_091510_zps55843fd2.jpg


IMG_20140829_091500_zps68ba5fca.jpg


Since I only have a ballast, and then a pertronix unit, and that's it - I'm trying to figure out what else I need for the distributor to function correctly.

I've been doing more work on the J-pipe. I'm cutting small slots out of it and welding them back together after crushing it to make a complex curve. I moved the t3 flange outward more, so it makes contact with the steering box, and am gradually bending it in 1" sections till it clears both the steering box, and engine mount by floating up and out of the way. It'll make more sense when I'm done. I'm trying to avoid cutting it, and by doing so am adding a lot of hours of work on top of it.
 
Well, I've done a lot of research, and it looks like there's an orange, black, and blue box that I see a lot of "opinions on" mainly "don't get an orange box, you don't need it" or get a blue, or get a black, or orange boxes suck, but everyone seems to agree that HEI is functional, so why not go with that. I gotta change something anyway, so why not make it functional.

I'm trying to cobble over the needed parts from slant6.org, but of course there are a lot of options and nothing simple. I'm thinking since I already have the electronic dizzy, I just need to get a better coil, and the HEI module, and run my wiring, and I'm good to go? Or am I missing something?
 
that is the gist of it. high energy coil and the module are the important parts. a heat sink for the module is a must as well. they will burn out quickly if not. might wanna think about running a relay too. i tied mine to get power from the post on the alternator and used the stock ignition power source to trip my relay. you have the right distributor. should be able to just order a rotor from anything that came with the electronic ignition stock. i believe they are all the same. may be the same as the points pieces too.
 
If you wan't to learn more about welding, get on U tube and search Welding Tips and Tricks, this guy does some pretty good how to videos.
 
I only now figured out the whole "if there's slag, you drag" thing and my welds are already turning out better. My pipe looks like it was recovered from the Titanic, but it is very sturdy. I bolted the turbo to it, and held it upright by the exhaust flange to see what kind of weight I'm putting on the exhaust manifold.... It's incredibly heavy (turbo). Good thing I added my little provision to bolt it to the block, but I still want to research some kind of soft mount to help support it on the fender wall, but that's future thinking.


Obviously the old exhaust pipe is in the way in this shot, but it gives an idea of how far over my turbo sits in this build. It points the intake side of the turbo just past the radiator when it is actually bolted to the manifold. The downpipe also clears both the steering box and engine mount, and I unplugged cylinder 5's spark plug and ran it open like that to give the engine a good rock, it has enough clearance to handle a really good misfire, so we'll see how it holds up in the future.


For the wastegate I kept it simple. It will lean towards the motor slightly. I was really hoping it would rest dead on the engine mount, because then I could "strap" the wastegate to it to hold the assembly up, but the angle was off. Instead I bent a piece of 1" wide steel to help support the turbo slightly with the pipe and take some strain off the flange, and will also double as a surface to through-bolt and mount to the block somehow. Basically i have no idea how it will attach yet, but I made the surface for myself to use in the future.

I cut a 1" hole on my drillpress, then bent the sides out and sanded them down to make a kind of "flat" angled surface, then welded my wastegate flange to it. I will have to use studs on the wastegate in this setup, but that's not an issue, and it will still seal just fine. This also alows a relatively short run to the downpipe - and it is angled to start the flange pointed up away from the steering box on the outlet side.


It looks bad, but works fine. I'm actually pretty happy with myself for learning something new, even though I suck at it.


And a mockup of the whole "manifold" to see what kind of weight I'm dealing with. It's not bad I think. The wastegate is just sitting still with some pins in it to display where it sits. I think it looks alright. It will also get some exhaust wrap on top of it so it should look pretty bangin' actually. Still lots more to do... :glasses7:
 
getting there. looks pretty good. i wouldnt mount anything that goes from the motor to the body of the car, that is just going to promote vibration that will break the pipe/manifold. gotta tie into the motor somehow.
 
oh and make sure you get any kind of loose slag out of that pipe before you fire it up. it doesnt take much to destroy a turbine.
 
Yeah I figured mounting motor stuff to the fender would be unwise and cause cracking, just gotta put some thought into how to support all this weight.

I did come across a bunch of loose slag and junk, and some wire that initially shot through the seam before it arced. But I got rid of all that. I'll have to hit it with some high pressure air and maybe feed the sand blaster nozzle into it to kick off whatever's left.
 
Has anyone ever used this? :
http://www.jegs.com/i/Dynomax/289/53090/10002/-1?parentProductId=2853338

I'm thinking of that for coming directly off the exhaust downpipe flange, that way I can tack everything together, and my thought is I can put a spot weld on each individual rung to keep the pipe in my desired shape... but maybe it doesn't work like that. Then I'd just wrap it with header tape, and then put a 3" to 2" reducer on the end and clamp it to the old exhaust till I figure out a real exhaust system for the rest of the car. I'm thinking ultimately side exits.

Reason for flex stuff is I want to try and find a shape to come back across the J manifold and go out the back without interrupting anything or leaving the exhaust too high in the engine bay for a long distance.

Today I'm also likely going to install the oil drain fitting, and the dump line. I'm thinking about 1" below the top of the pan, directly in line with the turbo should do it. Being -10an I'm assuming it will have no problem bailing oil. Not going to be 45* though.


i used it to save money. works well. holds the shape on its own pretty well too. i also used some smaller stuff a while ago that i ran from my headers to the sides of the car. holds up pretty good.


the bend that i have in it is the limit of the flexibility. depending on what you are looking to clear you may be better off going to an exhaust shop and having them bend something up for ya.
 
That's exactly what I'm looking to do because individual exhaust bends in 3" cost a lot more than I was expecting. Were you able to find a 3" flex, or settled for something else? WHen they picture the 2" it looks like you could wrap it around a pole if you wanted, but I'm guessing that's not realistic.
 
i have 3" flex on now. it doesnt bend well as you can see in the picture. got it at advanced autoparts, it was an exhaust repair kit. came with two clamps and 18" or so of the flex pipe. the 2 1/4" pipe i had on with the headers was much more flexible. the brand may make the difference but i doubt it.
 
I just picked up some 2 3/4" from oreilly's. Same deal, about $6.50 and it came with two clamps and the flex. Their prices on pipe is pretty decent but only if you need a straight bend or some pretty ugly 90* stuff. I may just have the flex, a 45*, and straight and call the exhaust done. We'll see. But this allows me to at least start the downpipe, and work out how i want the wastegate pipe as well.
 
sounds like a solid start. that pic of the 45* and the flex is my complete exhaust. im not gonna say its quiet but it is less then open headers. the turbo sounds amazing too. love that sound.
 
Punched the pan, just like I planned. I opted to do it on the car, and as such I was incredibly careful. It took about 2 hours, to just make the hole, and install the part. I probably would have had an easier time if the fitting was smaller.

But...

I put a small hole in the pan, enough to slide a piece of stainless steel wire in there, then I turned the motor to see if I made contact with anything. Sure enough, it does make contact, but not till about 3" inward. My fitting is only going in 1/2" total, so it should be clear. At that point there was no turning back and I curled that sucker in with a 9" nail. What I did not expect was the piece I bent in to break, so I fished that out... and was left with an undersized hole. Went to my step drill, coated the whole thing with grease, and went really.... really.... slow. It luckily shaved it pretty smooth and the fragments all wound up on the drill, which was relieving.

http://s43.photobucket.com/user/serj22/media/IMG_20140903_175621_zps33c4b816.jpg.html

The one thing I thought was - no one else on the interwebs described it as being this difficult, so perhaps I picked the wrong spot to make my drain - luckily for me, not a single person online photographed where they put the drain on their slant, so I was just hoping that logically, it would be here, beneath the turbo.

http://s43.photobucket.com/user/serj22/media/IMG_20140903_185557_zpsf8cd8c22.jpg.html

This is after I threaded in the fitting with JB on the threads, and all over the fitting itself - I do not want this to leak.

Drain line left long - and capped and tied up out of the way.

http://s43.photobucket.com/user/serj22/media/IMG_20140903_192432_zps36b85ecb.jpg.html

What a stressful part of the build. I would not recommend doing this with the pan on the car to anyone else. Too nerve-racking.
 
Punched the pan, just like I planned. What a stressful part of the build. I would not recommend doing this with the motor on the car to anyone else. Too nerve-racking.

Congratulations on successfully completing what is arguably, the trickiest, if not most difficult, part of this build.

I have done two of those, both in the car, and I am here to tell you, stressful is the key word.

The first one I did was the drain for my Vortech supercharger I have on my 360 Magnum in the '72 Valiant. The drain-setup is identical to a turbo. I had no room to swing a hammer for the punch, on the side of the pan, so I decided to think outside the box and punch the drain hole for the fitting, in the horizontal floor of the oil pan, pointing upward, near the front, where the floor of the pan is high; just barely lower than the pan rail. Well above the level of the oil in the sump. The supercharger, the source of the oil being drained, is high enough that the weight of the oil in the line coming out of the bottom of the blower, forces the oil through the upward-pointing fitting in the pan, and I have had no problems with this setup. Knock on wood...

The slant six/turbo drain-fitting placement is identical to the one you have just fabricated, but that hole was punched, too. I had a long, skinny, slowly increasing-in-diameter punch that increased from an eighth of an inch to just-smaller than the fitting size. The fitting cut its own threads, so the fit was tight.

I hope I never have to do that again...:banghead:
 
that is where i put mine. did it thread into the hole? i would be afraid it would rattle free.
 
-
Back
Top