Sorry not an A-body...My Charger Project

-

jaak

Well-Known Member
Joined
Apr 1, 2007
Messages
96
Reaction score
0
Location
Lexington Alabama
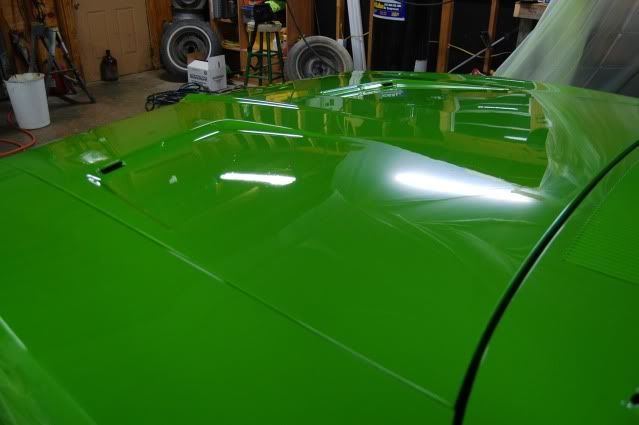
Hi all, hope you don't mind but I wanted to post some pics of my Dodge Charger project. Just wanted to say I love this site, I read here alot, although I haven't posted much yet, but I like this site better than any other mopar forum out there. I'll start off by telling you about my project and show some pics I have taken along the way, then try to keep up as I progress.
I bought my first Charger R/T almost 10 years ago, I started stripping it, to fix it up and it was rusty...very rusty, but was a complete car. Pretty much every thing from the doors back needed replacing. Well about 2 years later I found another Charger R/T that had a solid shell and not much else going for it, so I bought it and decided it would take both to build one. Well since buying the cars, I got married, had 2 girls, bought a house, then had a baby boy, so it gets worked on as time and money allows. Cool thing is over the last 8 years I have collected alot of parts along the way and since my latest job transfer I have more time to work on it so I have been seeing some progress lately. Another story I would like to share is my "body shop hell" story. A friend (so I thought) was gonna fix the body and paint it, well long story short he kept it 2 years and did nothing, so that was 2 years lost on the project, and has led me to decide to do the bodywork myself. The car had a little rust here and there, but no major rot, just a patch needed here and there, a new trunk floor, and a left rear floor pan. The car has a non-numbers matching 440 that I rebuilt (stock) and a 727 TF that I also rebuilt. It has an 8.75 rear with 3.23 gears.

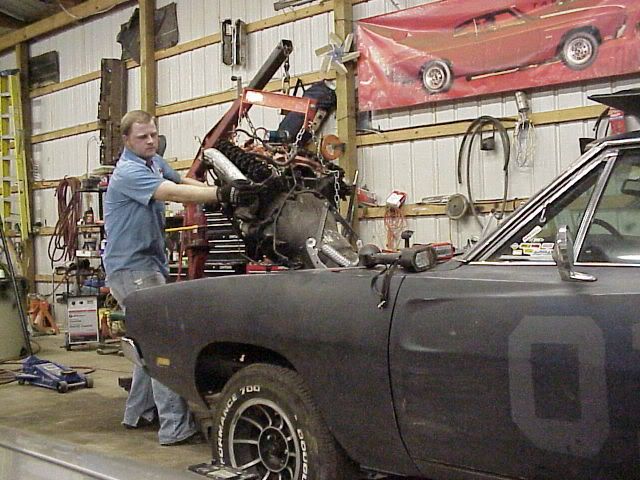
First Pic- the first charger I got... wound up parting it.
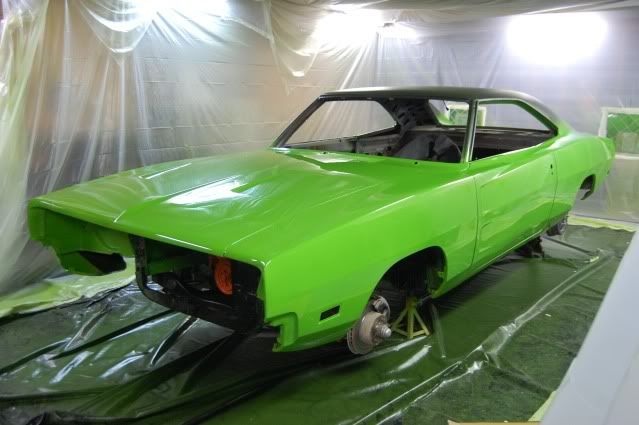
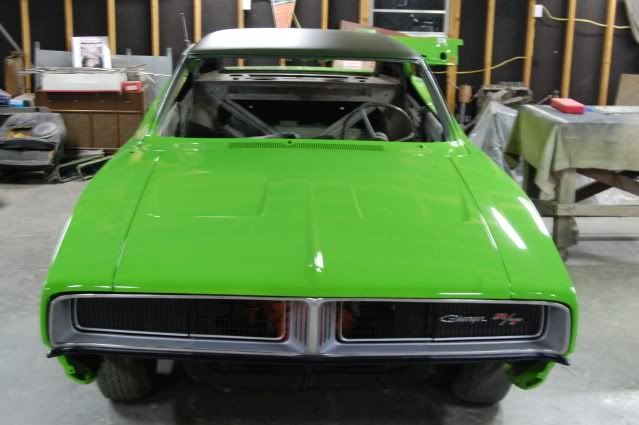
Pic #2- The second Charger
Pic #3- I took this pic after getting it back from 2 years of body shop hell,
he let it sit out a while, thats why all the surface rust.

tmpphpcl6ysl.jpg


tmpphplAT0vJ.jpg


Picture 1128.jpg
 
Since this is not a numbers matching car I plan on building a nice driver the way I want. Here is a photoshopped pic a member of DC.com made for me.. I named the project "Over-Charged", because its costing me, lol.

chargerproject rendering.jpg
 
After getting back from the shop, I started some rust repair like I said it wasn't a whole lot, just patches needed. The only pics I found is when I was replacing some metal on the top rear right quarter, with metal from my parts car.

Heres some pics after cutting and trimming, then it was welded into place. I also did the left rear floorpan, 3 places on the tailpanel, a couple of spots on the right quarter, and a couple of other spots.

Picture 1131.jpg


Picture 1132.jpg


Picture 1133.jpg


Picture 1134.jpg
 
After buying my house, I now had a 40 x 32 shop. Heres some pics at my house after doing a little body work.

Picture 1113.jpg


Picture 1107.jpg


Picture 1140.jpg


Picture 135.jpg
 
I do a little body work in spurts, I still need to finish. A few months ago I turned my attention to the suspension, here are some pics. Removing the suspension, cleaning, painting, etc. I repainted my rear end and replaced the leaf springs with mopar performance XHD, new shocks, rebuilt the rear drums, and replaced the front with later model discs.

more recent pics 001.jpg


more recent pics 006.jpg


enginebay1.jpg


jaak charger.jpg


go green69.jpg
 
In the above pics the green paint is J6 "go green" I used Nason BC/CC and everything painted black is Nason Acrylic enamel.

I will tell more and post some recent pics later (I gotta resize alot of them)
 
Very nice! Don't forget to rust proof the back side of the panels after you weld the patch in. I learned that one the hard way. Good things come to people that wait. I love J6, I am painting my Aspen the same.
 
Heres what it looks like as of tonight. It is now a roller again, with brakes installed and bled. Im gonna get serious with the body work and try to have it ready to paint by spring.

tmpphpc7qbn7.jpg
 
Looking nice so far. Keep up the good work. Sounds like it is going to be a lot of fun when you get it done. Good luck on your build.
 
I have been on vacation this week and have been busting it on the bodywork. I got my doors and hood stripped (using chemical stripper) and doing some body work on the doors. They are solid but had dings all down the bodyline. When spreading filler on body lines I do each side seperately and use different color hardeners so I can see what Im doing. I also have most of the filler work done on the car. The left rear quarter was the worst, although the car was pretty solid, it was covered in dings/dents. The driver rocker was rough too, I found an old repair, it had bondo about an inch thick in some places, I ground it all out, pulled the dent out, and filled it. I order some polyester primer online, (Evercoat's Slicksand) should be here any day, I can start the long priming/sanding process. I plan on spraying the poly, then blocking with 180-220, then repriming with 2K Urethane and blocking, and repeating until perfect. Heres some pics of my progress.

Jason

Doorstripping.jpg


doorwork.jpg


hoodstripped.jpg


phpo4YeMl_c2AM.jpg


qtrwork.jpg
 
Wow! I'm jealous!! Your car is looking great. I wish my '69 Charger was as far along as yours. Here is a picture of mine. And no, I did not paint the cheesy 01 on the door. The previous owner did that. I do plan on building it into a General Lee though.

Justin
"CornDog"

Picture173b.jpg


69charger143.jpg
 
Today I got the hood and doors primed with epoxy primer. I also started working on the right quarter, its not as bad as the left one, but still needs alot of work. Like I said in an earlier post the car was solid, just full of dings/dents, it looked like someone run up and down the sides with a pair of ball-pein hammers, lol. I didnt get the quarter finished yet, I had to call it a night. Man I cant wait to finish filler work, I hate it, not to mention my shop looks like a sandbox. Well anyways heres a few pics of todays progress.

Jason

hoodprimed.jpg


hoodprimed2.jpg


doorsprimed.jpg


RTqrtwork.jpg


Chgr010309.jpg
 
Wow! I'm jealous!! Your car is looking great. I wish my '69 Charger was as far along as yours. Here is a picture of mine. And no, I did not paint the cheesy 01 on the door. The previous owner did that. I do plan on building it into a General Lee though.

Justin
"CornDog"

Picture173b.jpg


69charger143.jpg

Nice looking Charger you got there CornDog, I like the pic you took of it out in the grass...I like the angle of the shot too! Keep us posted of your Charger progress.

Jason
 
:-D Finally an Update :-D

I have been working over alot, but was off today, I finally finished the mudwork on my quarters and got to spray on some polyester primer (Slicksand), on the back half of the car I was real pleased with how everything looked while the primer was wet, found a couple of dings I missed but nothing major. I am so stoked, I know this is no big deal to the pro bodymen out there, but doing this myself I took my time and was worried how it was gonna turn out....but the lines are razor sharp, I cant wait to start blocking it to get it even straighter.
Well anyways here are some pics.

Jason

jaakrt01.jpg


jaakrt02.jpg


jaakrt03.jpg


jaakrt04.jpg


BLSSP.jpg


TPSSP.jpg


php5u8B3Y_c2AM.jpg
 
Nice work! I was thinking of doing my own body work too. I have been practicing on the drivers door. It is taking me forever but seeing you and the nice job you did gives me some hope. Keep up the good work. It is looking nice.
 
Wow, I started this thread over 2 years ago, and haven't updated in a loooong time, sorry about that. Anyways I finally finished all the priming and blocking and Painted it myself in my garage (in a temp booth I put up). I did this a couple of months back. Right now Im working on wiring the car.

Later,
Jason

DSC_0141.jpg

DSC_0138-1.jpg

DSC_0144.jpg

DSC_0139.jpg

DSC_0150.jpg
 
-
Back
Top