The Brick, 1972 Dodge Dart Custom

-
Well, the family's planned move to the midwest has been stymied for another year - time to throw some time and effort at the Brick - here is what I am planning for the "pre-summer" in AZ....

So this week - installing new factory style transcooler lines going to the new rad instead of the aftermarket that was thrown on it before. This should eliminate the last of my Trans leak.....the new rebuild got rid of everything but the line leaks...:(

And coming as soon as the parts get here:

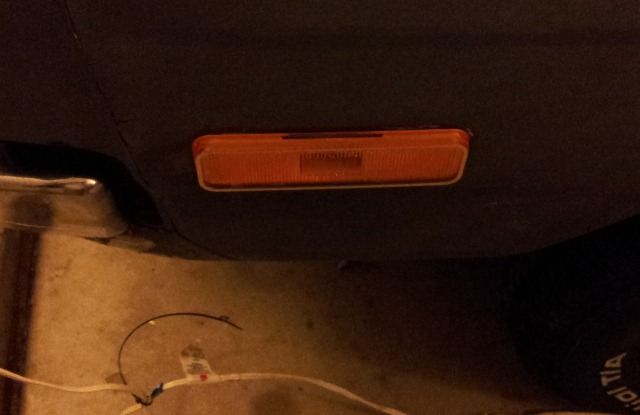
Exterior light shakedown - okay, so I (and the wife) have noticed that the exterior lights in the Brick are pretty dim.....so I will be going through all the lights and sockets, and making sure they are all up to snuff. Plus, just ordered some new side marker lights from Detroit Muscle. Hey, they might be knockoffs, but hey, better to have something that will hold the lights in place than the current tied off pigtails I have going on.

AC redo - yeah, in AZ, kind of need AC - not sure if I want to take it somewhere and have it gone through, or just grab one of those spiffy Classic Air compressor upgrades, and get that swapped out.

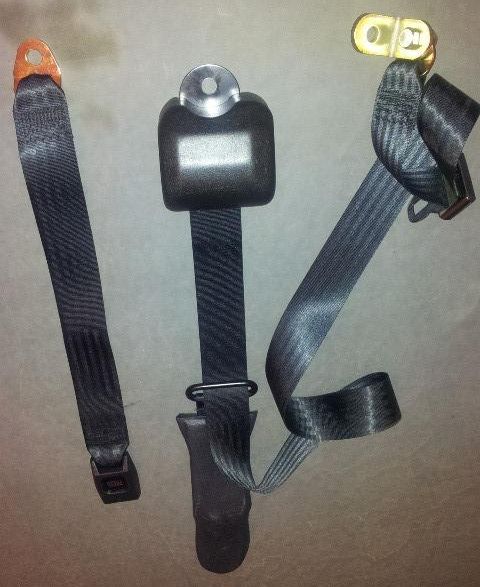
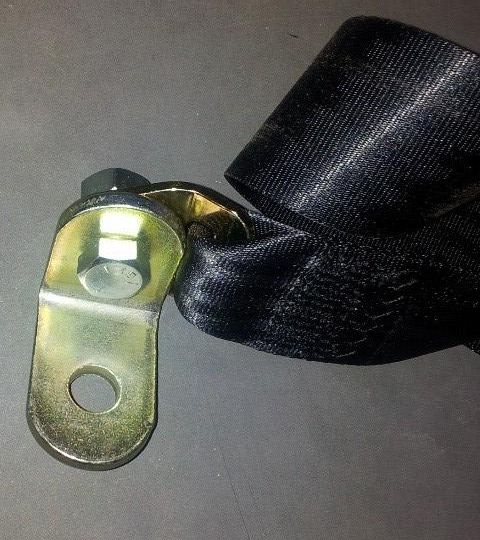
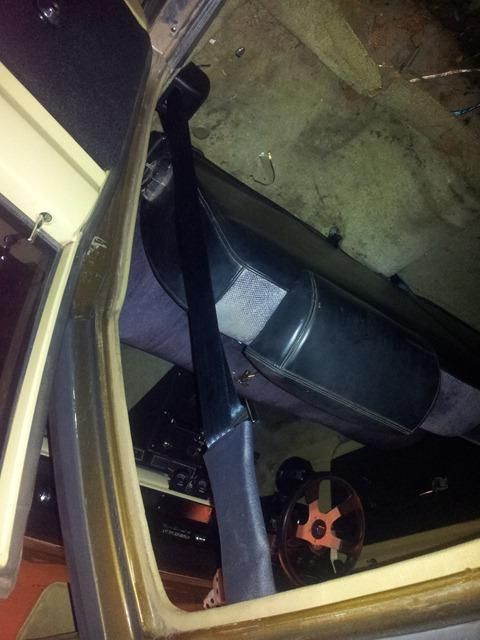
Interior finish - the seats are headed to the upholstery shop. Putting the stock style front and rear bench back in it and getting the headliner done. I will be putting down new carpet when I am swapping out the seats. And while I am doing this, updating the seatbelts with Wesco 3 points up from and retractables in the rear.

So here is last weekends efforts:

New 3 core rad installed - I added an overflow, just in case. So far, hasn't needed it, but it was cheap, $15 insurance for not soaking the driveway.

newrad.jpg
 
And here are pics of the seats, prior to being recovered.

front+bench.jpg


rear+bench.jpg


And the torn headliner

tornup+headliner.jpg


Not terrible, but not great either. Again, depending on how far I can push the wife, I will probably spring for new carpet too....:)
 
And I really want to get rid of this old AC line marked with the arrow in the image....

markingouttheoldacline.jpg


I am assuming that once I pick up that Classic Air Sanden conversion kit, I should be able to get a new line to make it look like this:

coldair.JPG
 
New trans lines are installed, but need the line to radiator adapters to finish it all off. Getting the lines off was a real nightmare. The brackets for the floor shifter were in the way, and I actually had to take a hacksaw to the lines to get them off. Almost 4 hours later, I was feeding the new lines in. The pre-bent lines were almost exact, but I did have to increase and decrease bends here or there to get them to install.

Should have those adapters tomorrow morning, and can finish this part off. Next is to start the wiring run downs (I have marker lights and interior lights not currently working). Looking forward to the new carpet install, along with freshly re-done seats and headliner next week. And then next payday, the Classic Air underhood upgrade kit gets bought.
 
I had the factory AC retrofitted to 134, but the compressor went out last summer....the lines had a slow leak anyway, so the new Classic Air setup should be pretty nice. Along with the seats (which were dropped off at the upholstery shop last Monday) I will be putting in sound deadener and new ACC carpets! My new seatbelts should be in soon too......Going to be going through some wiring this weekend with my 12v electrical guru friend on Saturday and get the lighting all redone.
 
Here's a pic of all the goodies I just picked up for the Brick.

I know I am probably going to catch hell from someone, but I am swapping all exterior bulbs for LEDs.

I got a paint gasket kit from Detroit Muscle, new front and rear marker light assemblies from Rocpar, an assortment of LED bulbs, electronic flashers, heater control valve, door hinge rebuild kits, and temperature gauge adapter kit to replace the backyard engineered adapter I made. Not pictured are the new ACC carpet, sound deadener, and Wesco seatbelts........going to be a good weekend.

20130425_235617.jpg
 
Well, had a surprise visit from my dad this past weekend, into this week, so no new work on the Brick, however all of the stuff that I have ordered thus far has arrived.....except the transmission cooler line adaptors for the radiator, so no driving it until they get here.

Oh well, this Saturday and Sunday should be really productive.
 
Well, now that my wife has seen a picture of johnparts's car in his thread here, I am going to look into a way to lower the car maybe 2 inches up front and 1 inch in the rear. Looking at PST 1 inch torsion bars and using the adjustment bolts to lower, and some Mancini 1 inch drop front brackets for the rear springs to get the back end down. Only thing is I will need to get the wheel and tire space checked on the rear end - using an F body 8.25 moved the mounting point out a bit, and I want to make sure whatever I put back there will not rub the fenders or springs. Looks like I should have a ton of room for some nice wide tires and rims, but want to check before I throw money at it......So this will be a project for completion later this year.
 
I decided not to waste any of the evening wonderful weather, and took advantage of the garage tonight...Installed the Wesco 3 point seatbelts and replaced all of the side marker lenses on the Brick

Here is the seatbelt rig. Notice the end of the belt has a L shaped bracket on it. To try to maintain belt geometry, I am using the L bracket to mount the end of the belt.

seatbelt1.jpg


Here you can see the mount. This is basically attached at the bolt hole for the retractor, moving the belt mount to the front of the retractor.
seatbelt2.jpg


The finished install - don't mind the dirty carpet - That is getting replaced soon.

seatbelt3.jpg


I wanted to do the seatbelts before replacing the carpets - for 1, these are easier to remove, as the T47 Torx bit headed bolt holding the stock retractor is now gone, and this will allow us (my friends and I) to be able to put the mounting bolts back in and use them as a guide to cutting the holes once the new carpet is installed.
 
And here is one of the side marker lights installed. They are pretty nice, high quality for "Made in Taiwan" parts. Inexpensive too.

sidemarker.jpg
 
Lighting all rewired and lined out on the Brick today - so much for the LED outside changes - going to just replace all the bulbs with standard bulbs and maybe grab up a set of Digitail lights for it. The light conversion went in really easily, and looks great - once I am able to back it out of the driveway to get some pictures, I will. Still no radiator trans cooler adapters......**bummer**.
 
Dude, been a while since I checked in on you. Making progress for sure. Keep it up
 
Well that is because I actually have my own garage to work in now. And my work hours changed - so I can sneak out there right after work and get some stuff done. SHould be picking up the newly recovered stock seats on Saturday!
 
Okay, short update for the new month - seats are back from the upholstery shop. These are the factory 4 door seats redone in Vinyl with cloth inserts. They were done by Anthony at Phoenix Finest in Tempe - $500, out the door.

I **REALLY** need to get that carpet and insulation installed and finally get the trans cooler lines finished off so he can do the headliner!

frontseat.jpg


934722_603937052964574_1165251995_n.jpg
 
Finally, got the right AN adapters to finish off the trans cooler line install. It looks clean, and so far, no leaky..... I did end up having to zip tie one of the lines down to the sway bar to keep it from pulled away from the belts. It doesn't touch, but wanted to make sure there was little or no chance for the line to contact the belt with the engine running. Tonight, the wife and I pull the front seat, and the old carpet and do the cleanup to get ready for tomorrow's adventure - insulation and new carpets. She has tomorrow off, kids are going to gradnma's to swim, and she and I are going to be dug into the interior.....here's hoping that I can get it all done. That way, next week, it can go to the upholstery shop and have the headliner done. Then we can start working on getting the old AC out and the new AC stuff in!

translines.jpg
 
Okay guys, Fathers Day Weekend update. Didn't get the carpet done - but that is okay, is was hotter than the sun today, so ended up chillin in the house with the wife and kids all day. About 830ish PM, the wife and I headed to the garage.

After pulling the other front seat, we started trying to put the recovered seats in.....OOPS - the floor shifter housing was in the way. We slid the tracks all the way back (just fine because I am 6'2" and need them all the way back anyways) and got them in, but had to remove the housing. It's all good because that is just an excuse to make finish my center console - adding cup holders to the passenger side (or at least want to) and this is a perfect excuse.

20130616_230140.jpg


So after removing the housing, we were able to get the seat put into place.

20130616_233651.jpg


And mounted the new rear seat belts, as well as the back seat, nice and snug and fits the way it should.

20130617_000748.jpg


I also stripped off the front hood and headlight bezel chrome trim. Wife wanted it gone, so it is off.

Had a great weekend, and got tons done. Going to take the car to the upholstery shop, and have the headliner, insulation, and carpet installed. Once that is done, then we can do mockup and finish that center console!

And HemiTM - I will sell the other seats back to you - for whatever I paid for them. Pm me when ready and we can work out the details.
 
Well, as always, life has taken a bite out of working on the car....school, working 10+hour days, 7 days a week, and having a family........the sacrifices to be made, right?

Well, 2 weeks ago, my buddy Chris came down and welded in the trim mounting holes from the vinyl trim and the badging on the side of the fenders. He did an awesome job of getting them filled in.

Just about time to restock on parts for my winter projects....Rear sway bar, headers and exhaust, plus doing a 1 inch all around drop on the car. Oh and finally going to get the sound barrier and the carpet installed and finally finishing off that center console....

Now If I can only find another 8 hours in a day, I would be great.
 
Well, it has been a while, but thought I would take advantage of the lovely AZ weather to get the carpet replaced on the Brick.

carpetinstall1.jpg


carpetinstall2.jpg


Here is the carpet pulled. not too bad. Most it needed was a quick vacuum, and we were ready to put down some sound liner

carpetinstall4.jpg


carpetinstall3.jpg


Really didn't get good pics while installing the liner. We used GTmat, and found it to be pretty easy to work with. I wish the little hand roller had been a bit bigger....

carpetinstall5.jpg


Here we got the carpet rolled out. I used Trim Parts carpets, and actually really liked them. We started at the back as we had to cut the carpet to go over the floor shifter. We used the pre-formed rear floorpan areas as a guide to install, and it rolled in nicely. The jute padding on all of the traffic areas was really nice and thick too.

carpetinstall6.jpg


Here is the whole floor rolled out and secured. I relocated the dimmer switch, as the speaker mounts on the kick panel interfered with it.

carpetinstall7.jpg


carpetinstall8.jpg


And here we with the seats, center console, and seat belts all reinstalled. Now, just have to replace a bad lead on the passenger rear tail light and drive the Brick to my upholstery guy. Headliner time.

I will also go under hood to take pics of the United Pacific headlight relay kit I installed a few weekends ago. I have been doing things, but only what I could get done in a few hours after work.....But with the holidays coming up, trying to pack in some extra work.
 
-
Back
Top