1971 Dodge Demon Hemi install

-

HemiMark

Well-Known Member
Joined
Jun 2, 2006
Messages
7,352
Reaction score
813
Location
Pittsburgh PA
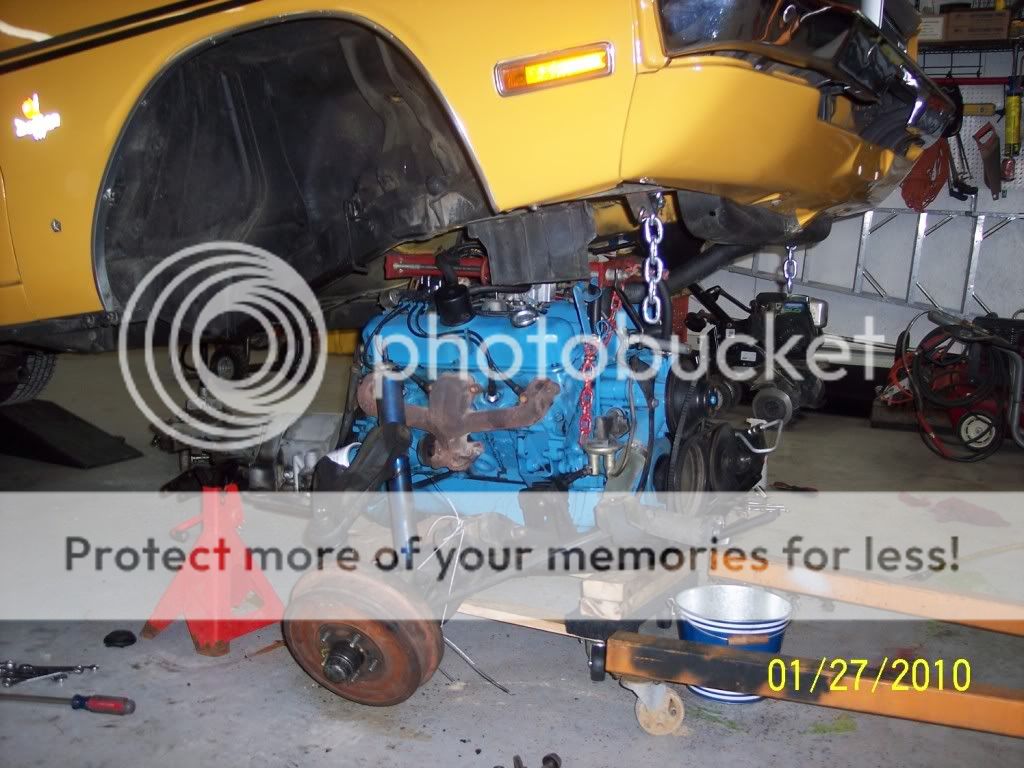
This 1971 Dodge Demon 318 auto car is slated for a transplant. A hemi transplant. My friend and member here, Jim (62BT409) is the owner of this Demon. HemiDenny, OldManMopar, my friend Don ([email protected] ) and yours truly will be installing a brand new 4Th? gen front suspension (HemiDenny makes them ) along with a new Hemi, trans and rear end. Before that can happen I will inlist the help of my buddy Don so that we can remove the drive train and front suspension in one piece!! We will then remove and replace the rear end with an 8 3/4 and try to get that power to the ground! (good luck)

100_2828.jpg
 
wow, that is going to be awesome, do mine next please!
 
100_2831.jpg


The first thing we did before we put it on the ramps and jack stands was to wrap the front of the hood just in case the hood would hit the rafters. It did not

100_2834.jpg


We started removing the alternator, fan, rad and steering column, exhaust and torsion bars. Pretty easy stuff.

100_2836.jpg


The key was hard wired at the column so it will need to be cut and then spliced back together. What's the cut black wire for???


100_2833.jpg
 
Looks like you are starting with an excellent Demon. Thats as clean a car as you can get.

Jim told me the Demon has 279,000 miles on it! It came apart very easy. although, I must tell you i sprayed every bolt with PB blaster for 2 days pryor to turning a wrench! It is a super clean CA car....
 
100_2835.jpg

We tried to catch the brake/trans fluid in the buckets and got a lot of it.....anti freeze and fluids were disposed of properly!

100_2838.jpg


Bolted on the engine hoist and put a little pressure on it.....not so much as to pick the car up off the jack stands but enough to hold engine, K-frame from moving away from frame when we remove the bolts.

A few side notes. Notice the hood is still on, PB blaster at the ready, polish fender guard taped to the R/F fender, classic Direct Connection fender guard on L/F and no beer...... its still early, lots of time for beer!!!!One more thing, third picture down from the top notice the classic 2 liter over flow bottle! I love it...
 
We remove the upper controll arms and then tied the lower control arms up so they wouldn't drag on the ground when we pull it out from under the car.

100_2842.jpg


Now with everything disconnected and triple checked we can unbolt the trans crossmember. I used a jack under the tail shaft just to make sure the engine, trans and k frame stay level.

100_2839.jpg
 
With the movers dolly in place (under K frame and bell housing) we started to remove the 4 remaining K member bolts and lower the engine down.

100_2840.jpg


100_2841.jpg


All the way down to the movers dolly............

100_2843.jpg


100_2844.jpg
 
100_2845.jpg


Now we remove the 2 rear bolts that hold on the front bumper and bolt a chain in its place. the chain is then hooked to the engine hoist so that the body can be lifted and the engine can be rolled out from underneath

100_2846.jpg


100_2847.jpg


100_2848.jpg


Remember to move the hoist in every couple of pumps on the hoist so that the chain doesn't scratch the rad support! It helps to have an extra set of eyes to watch the inner fenders so they don't get scratched!!!!

Up
100_2849.jpg


up
100_2850.jpg


UP

100_2851.jpg


Now its high enough to slide it out......
 
100_2854.jpg


100_2855.jpg


100_2857.jpg


100_2858.jpg


100_2859.jpg


100_2860.jpg


One last thing...... Jim is going to need a place to store the engine, trans, suspention and rear end and I have just the place to keep it.....

100_2493.jpg


100_2498.jpg


FOR SALE rebuilt Slant 6 with 904 - ALSO complete 73 up front disc brake set up! Thanks Jim! LOL :read2:
 
I have got to tell you......I am digging the coolant overflow jug lol
 
Beautiful photos and tutorial Mark! I'll bet you appreciate all of the
extra space your new garage has.

It's about time one of you guys documented this with step-by-step
and detailed photos.

Jim's going to have an awesome piece with that all-aluminum elephant
on board.

I too love the look of the butterscotch on the Demon.

Can't wait till next summer (only 12 weeks till May!).

Butterscotch looks just fantastic on A bodies..........
 
FOR SALE rebuilt Slant 6 with 904 - ALSO complete 73 up front disc brake set up! Thanks Jim! LOL :read2:

If your going to do that I would swap the disc brakes onto that k-frame and get rid of the drum brakes
 
Great thread first of all! That is a SWEET demon and the duster is a very nice car as well. I can't wait to see some more pictures of the hemi install. Keep up the good work! I had ten to one see this sort of thread as a political fuss festival thread. Matt
 
I thought the 2 liter overflow was stock?
Great info-
 
Great thread first of all! That is a SWEET demon and the duster is a very nice car as well. I can't wait to see some more pictures of the hemi install. Keep up the good work! I had ten to one see this sort of thread as a political fuss festival thread. Matt

Matt.... Thanks for looking, it is a cool Demon and will be sweeter when we start putting the Hemi in!

I'm not quite sure what you mean in the last sentence but I'm happy your here!
 
If your going to do that I would swap the disc brakes onto that k-frame and get rid of the drum brakes

I thought about doing that.............. but Jim was nice enough to give me the ralley wheels and tires which are small bolt pattern........ the disc brake set up is BBP...................
 
That's going to look good Mark! I hope Jim brings that up to the Butler,PA Mopar show this year.

John
 
-
Back
Top