1972 Duster Build with my Daughter

-
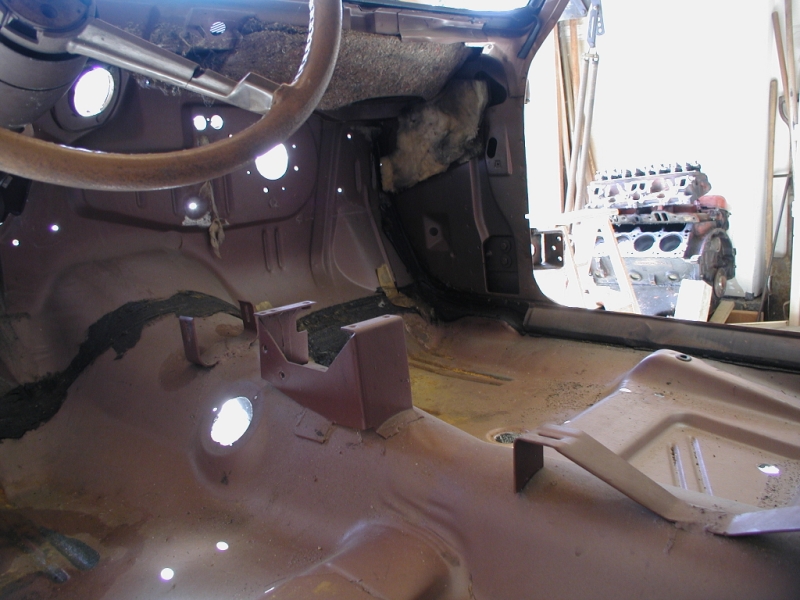
This is my original 67 Barracuda
2001-06-23_061.jpg


Alan

That is so counter intuitive. Weird. I stand corrected.
 
That is so counter intuitive. Weird. I stand corrected.

If you think about it it’s right. The connection to the car is through glue not fasteners. If you glue the insulation it would just separate and fall off.
 
Wiper linkage. One of the clips had a broken tab so I assumed they were brittle so after a lot of research I determined that the Dorman bushing where the replacement. Got them today so we started to investigate. First the original clips are NOT brittle. I pried the remaining 3 tab out and they where very pliable and did not break. I then started some measurements and experiments. The inner diameter looks dead on. There is a recess that should lock in the clip if you push it in far enough. One trick it is drill a bleed hole so it does not get vapor lock as you try to press it in but I have not got that far. The bigger problem is the outer diameter. The existing hole is too small and does not have the notch for the new bushing. Some have ground off the tab but the right way would be to grid a notch in the arm so the tab fits in. Its purpose is to keep the bushing from spinning on the outer diameter. The new bushing expects a 0.535" hole and the hole in the arm is 0.450. The existing OEM bushing has about a 0.015" clearance so the hole should be 0.535"+0.015" = 0.550" That says a 1/2" drill bit is still a bit small but I would guess the wallowing while trying to drill will hog it out a bit more than 0.500" but what you should use is a a 17/32" drill bit or reemer. Then a Dremel tool could grind out a notch for the tab.... I am at a crossroads. Because the clips are very flexible I am trying to convince myself that the originals will be fine......

DSC_0196.jpg
DSC_0197.jpg
DSC_0198.jpg
DSC_0199.jpg
DSC_0200.jpg
DSC_0201.jpg
DSC_0202.jpg
DSC_0203.jpg
 
Stopped by to pick up the transmission today then stopped next door to check out the 318. Saw it being bored 0.040" and it looks like she will have between 9.2 and 9.5:1 compression with a perfect 0.045 quench! Dave is planning to have it ready to be put under the Christmas tree. Bob at Glenray has the tanks straightened and was going to core the radiator this week.... The Ram Man shipped the power booster unit today.... I love it when a plan comes together.... and the bank account drains....

Only thing left is to take the seats to Baca in Tucson to have them redone after the first of the year.
 
An engine at the machine shop is a beautiful thing.... This is her being squared before boring.

47574537_1146156515559273_7417315658704093184_n.jpg
 
My modified hinges worked perfectly. They no longer squeak and pop when you close the hood. Glass beaded the crap out of them then packed them with grease. New jesus clips, as my dad called them, from RestoRick and just like new.

DSC_0196.jpg
DSC_0197.jpg


Next was a lot of tweaking and aligning to get the old girls panels installed for good. It took a bit but the door work perfectly and the gaps are not bad for not trying to get it perfect with filler.

DSC_0198.jpg
DSC_0199.jpg
DSC_0200.jpg
DSC_0201.jpg
DSC_0202.jpg
DSC_0203.jpg
DSC_0204.jpg
DSC_0205.jpg
 
A bit more 1000 grit and buffing on the door and quarter panel which caused an impulse that could not be resisted....

What do you think @Moparbrad? Far cry from what was sitting in Johns back yard a few month ago huh? I really gotta get that grille of yours from him!

DSC_0206.jpg
DSC_0207.jpg
47685388_2039632459405994_6153985542942883840_n.jpg
 
Last edited:
Man, that looks awesome! I'd rather have door gaps that may not be EXACTLY perfect, than edges built out with filler that might chip off with too much of a bump. That's a very forgiving color as far as gaps go anyway. The top, stripes, and hood are going to tie in perfect.
 
Very nice! Those wiper bushings do work well, but the later arms have a notch cut out from the factory and they push right in. On my 74 Duster anyway?
 
Jim, i was looking at your wiper linkage deal. I have a 69 cuda i am collecting up parts for to do a resto w my son. It has the same black clips as yours does. I hunted down a complete wiper linkage assembly and wiper arm pivots from a 67 for his 69. The 67 linkage setup was a 1 year only deal but will fit all the way up to 1976. It uses bronse bushings that are brazed into the linkages, with oiled up felt washers, and metal clips to hold it together. I believe they abandoned that for 1968 up cars to save on costs, as nylon plastic that snaps together is easier, faster, and cheaper on the assembly line. Plus it would work well enough to get the car out of warranty. You may want to concider that setup for the duster. Any 1967 A body would have this setup i described.
 
Jim, i was looking at your wiper linkage deal. I have a 69 cuda i am collecting up parts for to do a resto w my son. It has the same black clips as yours does. I hunted down a complete wiper linkage assembly and wiper arm pivots from a 67 for his 69. The 67 linkage setup was a 1 year only deal but will fit all the way up to 1976. It uses bronse bushings that are brazed into the linkages, with oiled up felt washers, and metal clips to hold it together. I believe they abandoned that for 1968 up cars to save on costs, as nylon plastic that snaps together is easier, faster, and cheaper on the assembly line. Plus it would work well enough to get the car out of warranty. You may want to concider that setup for the duster. Any 1967 A body would have this setup i described.

That would last forever! I am just leaving the originals in. If they did not break by prying the tabs back to get the one off they are not brittle at all. Under the dash was mostly gone so I am going to go with the one tab was broken by banging around under the dash years ago. And yes my '68 Coronet had the black plastic as well so you would be correct. It is interesting seeing how plastic was starting to make its transition into cars between '68 to '72. Then in '73 the interior got the plastic treatment and the rest is history :)
 
Yep, they would last forever lol. And cost more to manufacture, thats why the plastic bushings. Cheaper, faster, works the same. The average buyer couldent care less either. The bean counters at work. The differences in my 67 and my sons 69 both barracuda coupes are pretty dramatic when comparing the 2 cars. They even eliminated the lower belt line stainless on the tops of the doors and quarter windows on the 69, and went with a plastic bezel for the ignition switch in 69. The 69 grilles used a lot of plastic compared to 67, and 68. Headlight bezels were silver plastic and not chromed potmetal, no chrome inserts on the 69 hood either. Prob again cheaper to produce.
 
Just found something else... Pulled the wiper motor apart to restore and they are using plastic press on gears.... As all old plastic does under tension like that they split.... another head scratcher on what to do.... found a NOS for too much money and the aftermarket ones look cheap....
 
Have you tried evilbay for an NOS gear? If its a 2 speed wiper setup, theres new repops on evilbay.
 
Wiper motor day. I did get a 3 speed motor with the Dart but I decided to keep the factory 2 speed. These are plentiful and you can get new harnesses for them. The Coronet has a 3 speed and since I have driven it in the rain exactly 0 times in 2.5 years I don't see the point :) .

So sit back and lets restore a 2 speed motor... These are so simple... remove the screw holding the resistor to remove it then remove the 2 screw holding the armature can/magnets and pull the armature out of the housing. Be VERY careful with the springs for the brushes don't loose them. Next drill out the 6 rivets holding the cans together and then the 2 rivets holding the brush plate down. Pull the snap ring from the shaft and pull out the main gear from the rear clamshell. Note the order of the washers/wave washers.

DSC_0218.jpg


The washers go, thin next to the gear, insert in clamshell, thin against outer bushing in clamshell, wave washer then large washer. Lastly the snap ring.
DSC_0219.jpg


In the armature there are 2 identical washers that sandwich the wave washer.

DSC_0220.jpg


DSC_0221.jpg


DSC_0222.jpg


The part number tag was still on this one.

DSC_0223.jpg


Polish up the slip ring and scratch the groves in a bit deeper with a small screwdriver tip.

DSC_0226.jpg


Now the fun part. Old plastic that is pressed on a shaft WILL split after 50 years regardless.....

DSC_0227.jpg
 
So here is what I did... since I know glue/epoxy won't stick to this engineering plastic. The Chrysler engineers where nice enough to put a clamp shelf on the gear for us. You can see the crack in the gear on this side too.

DSC_0228.jpg


All fixed. Now it was time to spend a few hours in the garage with the bead blaster (best damn investment you can EVER make when restoring cars even the little $100 Harbor Freight one is great after you add lighting to it).

DSC_0224.jpg


Put the brush holder back on and snap it down with 1/8" x 3/16" or so rivets.

DSC_0229.jpg


Now slide the armature down and use 3 hands to hold the brushes back. Grease the bushing and wave washer wear surfaces.

DSC_0232.jpg


DSC_0233.jpg


Slide the idler gear on the post in the front clamshell. SAVE THE GREASE FROM THE GEARS... Plastic compatible grease is a complex topic. Assume the Chrysler engineers did all the homework for you and only grease the plastic with what they used.

Notice the lump in the main gear. Make sure you don't try to insert it with the stop cam facing the stop switch. Rotate it 180 degrees when you put it all together.

DSC_0234.jpg


DSC_0235.jpg


Install a skinny washer to the shaft and insert the gear in the rear clamshell.

DSC_0236.jpg


Next on goes the second skinny washer.

DSC_0237.jpg
 
Next goes the wave washer

DSC_0238.jpg


Then the big washer

DSC_0239.jpg


Install the snap ring, I like to get it started then use a socket to drive it home into the slot.

DSC_0240.jpg


Put the two clamshells together and install the resistor and part tag and your almost done. Mopar uses a lot of the odd size of 9/64" diameter pop rivets. The rear window frames use it as well so I need to get a few sized. These need to be about 1/2" long and the vent window frames need to be about 1" long. Another option could be to drill them out to the next normal size which I may do if I have a hard time finding them local.

DSC_0217.jpg


DSC_0218 (1).jpg


DSC_0219 (1).jpg


Time to celebrate!

DSC_0220 (1).jpg


We will have to see if the motor spins fast enough for this imbalance to matter. I don't think it will.
 
Last edited:
Awesome job. I restored a 67 prestolite Vspeed wiper motor. I use Aeroshell 22 synthetic grease on stuff like this. Its very stable in temp extremes and never loses viscocity in heat or cold. Doesnt stink either.
 
Have you tried evilbay for an NOS gear? If its a 2 speed wiper setup, theres new repops on evilbay.

Why yes you can... lube and screws included for $50.... My solution will work just fine for as little use it will get!
 
Why yes you can... lube and screws included for $50.... My solution will work just fine for as little use it will get!

Well crap, found one for $25 and free shipping.... it is already split as the rivets will be here at the end of the week.... sigh... I ordered it..... no will power.
 
-
Back
Top