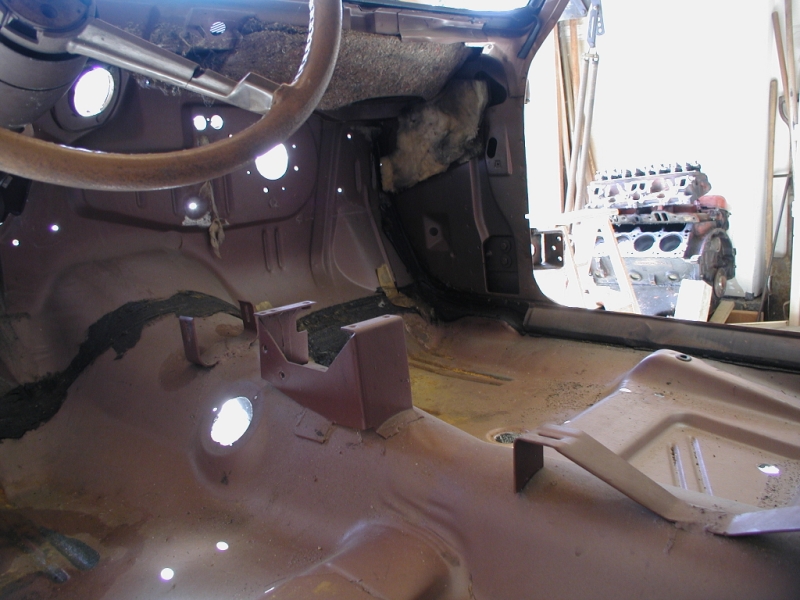
1972 Duster Build with my Daughter

-
Looking good! When it comes time to put that vinyl top on, don’t be tempted to use spray can glue. Get the good stuff you have to use in a gun, and ruin a Harbor Freight spray gun to do it. I let someone talk me into letting them do the vinyl top on a Challenger once, and he used 3M spray can glue. First time that I rolled the car out in the sun to start it up and let it run, that top wrinkled up like a raisin! I took it to a local trim shop that had done a conv top for me, and he was able to save it. Keep up the good work.
 
Looking good! When it comes time to put that vinyl top on, don’t be tempted to use spray can glue. Get the good stuff you have to use in a gun, and ruin a Harbor Freight spray gun to do it. I let someone talk me into letting them do the vinyl top on a Challenger once, and he used 3M spray can glue. First time that I rolled the car out in the sun to start it up and let it run, that top wrinkled up like a raisin! I took it to a local trim shop that had done a conv top for me, and he was able to save it. Keep up the good work.

Been there done that. The Coronet is on its second top because of that. My gallon of DAP Landau Top sprayable glue came today...
 
Thought the Classic Industries delivery today would finish up the doors. Not to be with the need to replace the track slider. I still have not found replacements but Steel Rubber has universal rubber backed flock that look like I can make what I need. It will be here next week.

I had to play with the new chrome trim on the door we had together!

View attachment 1715251845

I also went to the auto paint store and restocked on buffing supplies. She is done except for the hood and cowl!

View attachment 1715251846 View attachment 1715251847


Need some music like "Thunder Struck" in your video. LoL!
 
Spent the afternoon blasting lots of body parts including fuel lines, brake lines, break pedal and brackets, parking brake, kick down linkage from a Dart in Louisiana that was really rusty and a few other odds and ends. We did get them painted with Seymour's Stainless Steel paint before the sun went down and got them in the garage to keep warm over night. Tomorrow flush out the brake lines and fuel lines and they are ready for install.

DSC_0167.jpg
DSC_0168.jpg


The headliner conversion to the pre 72 type was backordered (I am hoping it is just Classic does not stock it and the company make them when ordered and it will come in a few weeks). But what did come is the new carpet and dash pad. I took advantage of the 30% off for Thanksgiving to make the pad at least affordable....

This bright blue interior is going to be groovy to say the least!

DSC_0169.jpg
DSC_0170.jpg
 
Yea you thought the hood and cowl were done. They sucked. I reworked them today and decided to use SPI epoxy primer as the black for durability. Had to mask off the ladder by hand (not as hard as you think because I had the previous paint job as a guide). The first shot was as it came (make sure you induce it for 4 hours for maximum UV durability. We decided to go for broke and add some flattener.... we like it. I hope when it drys the striping will clear up. I am not removing the masking until I am happy with the black tomorrow.

SPI epoxy primer out of the can
DSC_0172.jpg
DSC_0173.jpg


SPI epoxy primer with about 20% flattener added.
DSC_0174.jpg
DSC_0175.jpg
DSC_0176.jpg
 
With the Coronet I said no more stripes they are a pain in the a$$. Here we are again... still a pain in the a$$ but finally done. Ready for putting all together for real!

DSC_0177.jpg
DSC_0178.jpg
 
Came up empty on the window channel felts for the '72 Duster. I ordered some rubber backed mohair from Steel Rubber. A little contact cement and 2 pop rivets and it will be better than new!

Run channel mohair liner

DSC_0180.jpg
DSC_0181.jpg
 
Lets restore the window track runners with the Steel Rubber mohair. Grid off the rivets.

DSC_0182.jpg


Then punch them out with a punch and hammer. They are 1/8" x 1/8" if you care.

DSC_0183.jpg


Now clean them with grease and wax remover so the contact cement will stick

DSC_0184.jpg


Cut the mohair a little long and coat the backs with contact adhesive, I used left over DAP Landau Top cement.

DSC_0185.jpg


Coat the channels.

DSC_0186.jpg


Let it set 5 minutes, now fold a piece of paper in half then fold the mohair in half (glue out) and align it with the edge of the paper.

DSC_0187.jpg


Now you can slide it in the channel and only need to worry about one side not touching before it get it bottomed out in the channel.

DSC_0188.jpg


Use a paint stirring stick to press it down on the back of the channel and the side edge without the paper.

DSC_0189.jpg


Now pull it away from the paper and slide the paper out and stick down the other side.

DSC_0190.jpg


Now trim it to size with scissors

DSC_0191.jpg
 
Put the driver door together with the new regulator channel. I doubt if that window has worked that smoothly since it was new!

This cross bar is NOT symmetrical even though it fits both ways. Here is the wrong way.....

DSC_0182.jpg


Here is the right way :)

DSC_0183.jpg


New TopCat Wiskers.

DSC_0184.jpg


DSC_0185.jpg


Restored the door panel with Herb's Interior Paint. It worked great and absorbs into the vinyl. You can't tell it has been painted. It is coming loose in a few places but overall it is not bad for sitting in the Az sun for 20 years.

It worked so good I had to pull the passengers side back apart so I can do the same thing.

Lastly we installed the brake lines and fuel lines we restored over the last few weeks. Waiting for the RamMan's upgraded power booster assembly to arrive to finish up the brakes. With the daughter driving this the one thing I am going to upgrade is the brakes. RamMan says I will be amazed at the braking power this unit will produce....

DSC_0186.jpg


DSC_0187.jpg


DSC_0188.jpg
 
Big assembly day since winter is here and it never got above 55 degrees today not wanting to go out in the cold and wind.

Rebuild the throttle assembly. The grommet was crumbling so I got one from my kit. These are cheap Chinese parts but since this is not in the engine compartment nor in UV it should survive...

DSC_0182.jpg
DSC_0183.jpg
DSC_0184.jpg
DSC_0185.jpg
DSC_0186.jpg


Next we finished up the fuel lines and restored the axle frame bumpers and installed them. Glad the Dart is still here so I could get a few details that I did not take good enough photo of.....

DSC_0187.jpg


Also installed the parking brake up to the point of where the rear drum cables attach. We wired them up just so we could get the parts off the shelf.

DSC_0188.jpg
DSC_0189.jpg
DSC_0190.jpg
 
After that we got busy under the dash.. Figured out all the firewall insulation except that one piece. can any one help us!

DSC_0191.jpg
DSC_0192.jpg
DSC_0193.jpg
DSC_0194.jpg
DSC_0195.jpg
 
Looking great.
Is there a milestone date for her to take it for the first spin?

She wants to drive it to Show Low for the Cruising the Rim show June 1st. How far is that for you? Oh never mind 11 hours!
 
Last edited:
Pretty sure the padding above the kick panels should be black side out.

Also, at this rate this thing will be done before January 2019. lol
 
She wants to drive it to Show Low for the Cruising the Rim show June 1st. How far is that for you? Oh never mind 11 hours!
Yea, too far west for us.
So what's the done-done milestone? 4/26/19 would be good. It should give you plenty of time to work out the bugs.
Engineers need to be kept on some form of schedule or nothing would ever get done. :lol:
 
Pretty sure the padding above the kick panels should be black side out.

Also, at this rate this thing will be done before January 2019. lol

Yea but it won't fit that way. The one on the left has the notch for the dash to rear wiring harness channel.
 
Here’s a tip before you put the dash assembly in. You know where the dash frame bolts to the door jamb? Where the dash frame slides over the bolt screwed into the jamb? Right under that bolt, sand down the the bare metal and coat it with some silicone electrical grease. Do the same thing to the back side of the dash frame where the 2 will mate up when tightened. One side is plenty, but doing both sides wont hurt. Doing that will provide a solid ground path to the body for all dash components, and keep you from chasing electrical gremlins later.
 
Here’s a tip before you put the dash assembly in. You know where the dash frame bolts to the door jamb? Where the dash frame slides over the bolt screwed into the jamb? Right under that bolt, sand down the the bare metal and coat it with some silicone electrical grease. Do the same thing to the back side of the dash frame where the 2 will mate up when tightened. One side is plenty, but doing both sides wont hurt. Doing that will provide a solid ground path to the body for all dash components, and keep you from chasing electrical gremlins later.
This is my original 67 Barracuda
2001-06-23_061.jpg


Alan
Looks like OER got it right.
 
-
Back
Top