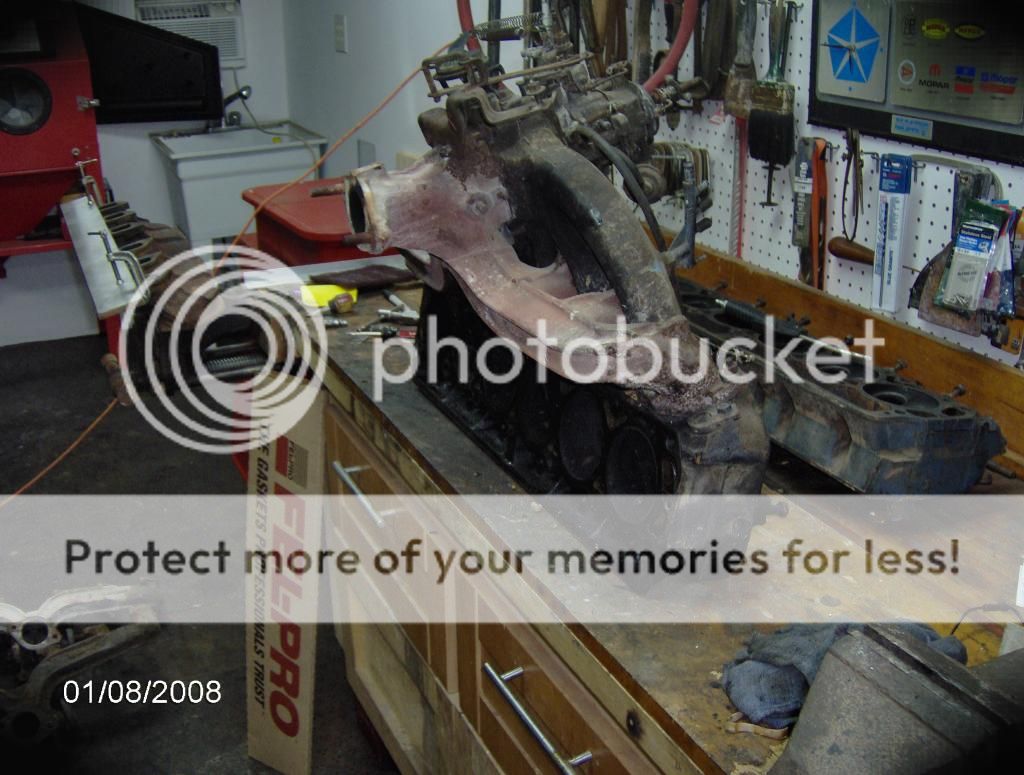
1983 hydraulic engine

-
Too be honest I am sorta looking forward/wanting to pull the head anyway, I want to learn/have hands on experience with making specific measurements that are needed to make modifications to these engines.

You said above ..........Compression is in deed normally tested on each cylinder one at a time, with that cylinder's piston at TDC...........

Did you mean to say a leak down test.

As far as I know a compression check is done with engine spinning over until highest reading on gauge is attained?

Yes you are correct, I should have said leak-down. Glad to see you are in 'hands-on learn' mode! It'll be interesting to hear what you find. I know that you want to minimize expense at this point and that is the path you are being helped along, but it may or may not work out for an engine that has rust under the valve cover on the springs, so be prepared for any outcome.
 
Just go back and read what I posted. This is really easy to determine. You have the tools (the compressed air). It's not difficult. You'll get it.
I plan to pull the head today, before doing so I thought it best that I run some REAL air into the cylinders. Again was not sure where it was leaking, sounded like exhaust though cause putting my head over to the drivers side it sounded like air was traveling down the pipe.

I ripped off what was left of the dangling muffler and put a piece of paper in front of the pipe, sure enough air was just pouring out the pipe.

This was on cylinder #2

I tried then cylinder #1 and as soon as I put the air to it the engine spun just a bit, this is the cylinder that I was able to get a reading of 30 pounds on at one point after fiddling with it and then back to a zero reading a bit later.

Again air is coming out the exhaust, not nearly as violently.

I believe this cylinder at this point is prob. holding some air/compression but again there is an issue with exhaust valve leaking.

Is it common that the exhaust valve typically leaks over the intake, is this because of the additional heat that the valve is faced with, does it have an affect on the valve, is it because there is a larger carbon buidup on this valve?

Curious to know why the exhaust valves are giving me the hard time?

Going to pull the head now.
 
Yes you are correct, I should have said leak-down. Glad to see you are in 'hands-on learn' mode! It'll be interesting to hear what you find. I know that you want to minimize expense at this point and that is the path you are being helped along, but it may or may not work out for an engine that has rust under the valve cover on the springs, so be prepared for any outcome.
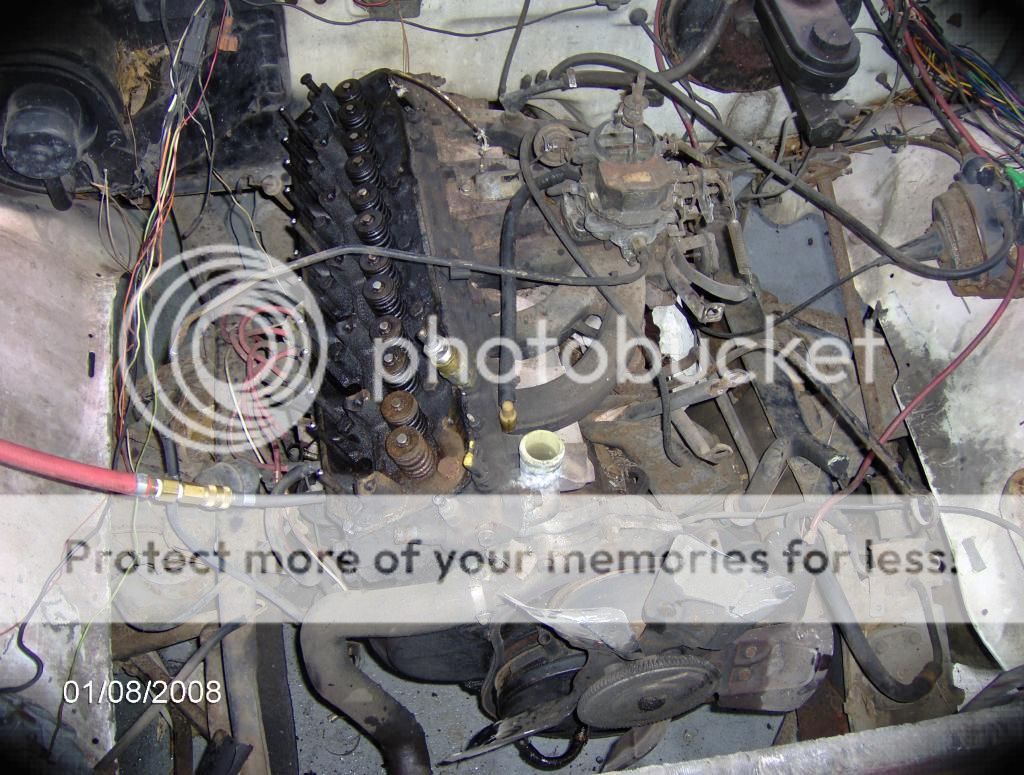
Its no problem, like I had mentioned I have a spare re-built head but even if I did not than having the head re-done is not an issue for me, if thats what it takes to get it running and get the hands on knowledge than again its no issue for me.

At some point after the engine is running I will prob. end up yanking it out of the truck and saving it for a future build. I would like to do a Turbo build, Id have to find a neat car to do it in but chances are it will be in another 4 W.D truck since trucks are what I am more into.
 
I have all the stuff out of the way and thought Id add a pict.

 
Here is where I am at # 2 chamber.

What grit lapping compound do you guys think I will need to fix this :)


I plan to remove the valve, I have been told that I can remove the valves and as long as I am either lapping them or having machine work done/new seats I do not have to worry about mixing them up.

At this point I see no damage to the valve seat, I am still hoping that I can put a spare valve in there, lap all of them and that will be enough to have it run decent again.

I see no damage at this point to the cylinder walls ( other than a light pitting at the very top of piston/cylinder travel ) but I need to do a closer inspection.
 
OK, you got a badly burned exhaust valve. You can get ANY old exhaust valve you got laying around (or a new one) and lap it in. I found the easierst way to quickly cut a valve is to insert valve in head and chuck an electric drill to the shank. usae a sharpy to mark valve seat and valve lip, apply lapping compound and spin valve at med speed while making short light contacts with the valve seat, sort of an up and down motion. Reverse the drill every few seconds. You just want to cut the crud on the seat with the valve angle. Once you see the sharpy uniforrmly scrubbed, you can remove all traces of lapping compound and reassemble springs. I use a steel wool pad to get surface crud off seat prior to all this. A new valve will have proper angle already on it. An old valve may have a cupped lip, not good. Use a good core or new valve, they are cheap, and a machine shop will cut a bare valve for about $1-2 a piece.
As for your variable compression readings, you cant measure a hydro tappet motor like this, you need to have them pumped solid from a previous running, warm. You lifters are soft with no fresh oil and you get an incorrect compression reading. Slants are very durable (besides burning valves I guess!) as stated, get it running warm with 4 quarts walmart oil, and add a quart of kerosene or motor flush. Run it for 15 minutes idle or whatever motor flush says WHILE slowly dribbling water into the carb at a high idle, the water will steam clean your combustion chambers, and then drain. Itll be nasty stuff. refill and change filter and you should be good to go for the next 500 miles, then repeat.
 
I didnt know really how to check the cylinders/pistons for broken/bad rings other than to disassemble/measure things which I dont want to get into on the bottom end.

I took the advice given to me and filled the cylinders with kerosine, waited, no drainage, the kerosine stayed within the top of the cylinder. Thats almost gotta mean no severe damage, that and inspecting each cylinder whilst turning over the engine every so often.

I took the opportunity of having the kerosine in the cylinders and cleaned everything up within reason. Vacuumed out all the loose particles from lifter galleys/cylinders and at this point I am hoping to be good to go with bottom half.

Someone had been into this thing before, permatex or some sort of gasket sealer on the head gasket.

Noticeable enough ridge at the top of the cylinder wall but I have felt worst. A couple of small areas at the top of the cylinders where I am guessing it sat for so long and condensation got into the cylinder causing a bit of rust/pitting but as far as I can see it is at the very top above compression ring.
 

Attachments

  • Picture 523.jpg
    47.7 KB · Views: 75
  • Picture 524.jpg
    61.5 KB · Views: 66
  • Picture 522.jpg
    55.3 KB · Views: 79
Dang that thing is cleaner than I expected. The small rust can be gotten out with some very mild abrasvie action. Ridge should be OK as long as not new bearings.

You can lap that burned valve in with with some #3 gravel....LOL!
 
OK, you got a badly burned exhaust valve. You can get ANY old exhaust valve you got laying around (or a new one) and lap it in. I found the easierst way to quickly cut a valve is to insert valve in head and chuck an electric drill to the shank. usae a sharpy to mark valve seat and valve lip, apply lapping compound and spin valve at med speed while making short light contacts with the valve seat, sort of an up and down motion. Reverse the drill every few seconds. You just want to cut the crud on the seat with the valve angle. Once you see the sharpy uniforrmly scrubbed, you can remove all traces of lapping compound and reassemble springs. I use a steel wool pad to get surface crud off seat prior to all this. A new valve will have proper angle already on it. An old valve may have a cupped lip, not good. Use a good core or new valve, they are cheap, and a machine shop will cut a bare valve for about $1-2 a piece.
As for your variable compression readings, you cant measure a hydro tappet motor like this, you need to have them pumped solid from a previous running, warm. You lifters are soft with no fresh oil and you get an incorrect compression reading. Slants are very durable (besides burning valves I guess!) as stated, get it running warm with 4 quarts walmart oil, and add a quart of kerosene or motor flush. Run it for 15 minutes idle or whatever motor flush says WHILE slowly dribbling water into the carb at a high idle, the water will steam clean your combustion chambers, and then drain. Itll be nasty stuff. refill and change filter and you should be good to go for the next 500 miles, then repeat.
Thank-you Pishta, can you tell me if dropping the lifters in oil and letting them sit will help to fill them and give me a more accurate reading doing my compression check.

I have little hope that the carb is going to get the truck started ( if it wasnt for bad luck :)) and Id like to have an idea of where I stand with compression when I put the head back on ( just to see what good I did before I get into re-building the carb)

If soaking the lifters would help how long is recommended?

Too be honest it did cross my mind that because the lifters had surely drained over the years that I would not get an accurate compression reading.
 
If you do take them out, I would soak them overnight in kero first to get rid of any varnish that wil cause them to stick; and then oil them. Work to get the kero completely out; taping thme upside down on a board for a while will do it. If you see a lot of gunk coming out, then re-do the kero 'til clean. In both cases, immerse the lifter completey in the liquid and take a pushrod and pump the lifter piston rapidly a lot to work the fluid into the lifters.

Make sure the lifters stay exactly in order; swapping any of them pretty much is a gurantee for wiping out one or more cam lobes. You can usually put in a new lifter on a used cam but never an unmatched used lilfter on a different lobe anywhere.
 
Thanks, good tips/advice.

Id also like to degree the cam ( possibly change out what I am assuming will be a terribly worn timing chain ) on this engine. Set it up for maximum low end torque.

Evidently from what I have read advancing the cam 4 degrees will help with all of this but I may be mistaken, I havent looked that hard into this yet, I do not know if this trick works with a stock cam assuming there is a stock cam in there.

Who knows what previous owner did to this engine.....the more I look at things the more I do not believe it was an original Super six set-up, I think previous owner added that, also looking at the deck clearance I notice that the pistons are not down in the hole an un-godly amount like Ive heard that they typically are so maybe the deck surface has been altered.

Anyway I will need the lifters pumped up so that I can degree the cam I am guessing, maybe I am way off in my understanding. Again need to spend more time on this.
 
-
Back
Top