dodgedifferent2 67 dart progress

-

dodgedifferent2

Well-Known Member
Joined
Aug 8, 2008
Messages
3,133
Reaction score
992
Location
southwestern, Ontario
i have been holding out for awhile. Mainly doing research and tinkering on the dart.
SO i will make a mad dash at posting the progress from the beginning.

Hold on to your underoos cause this will go fast for awhile till i am caught up to where i am :)


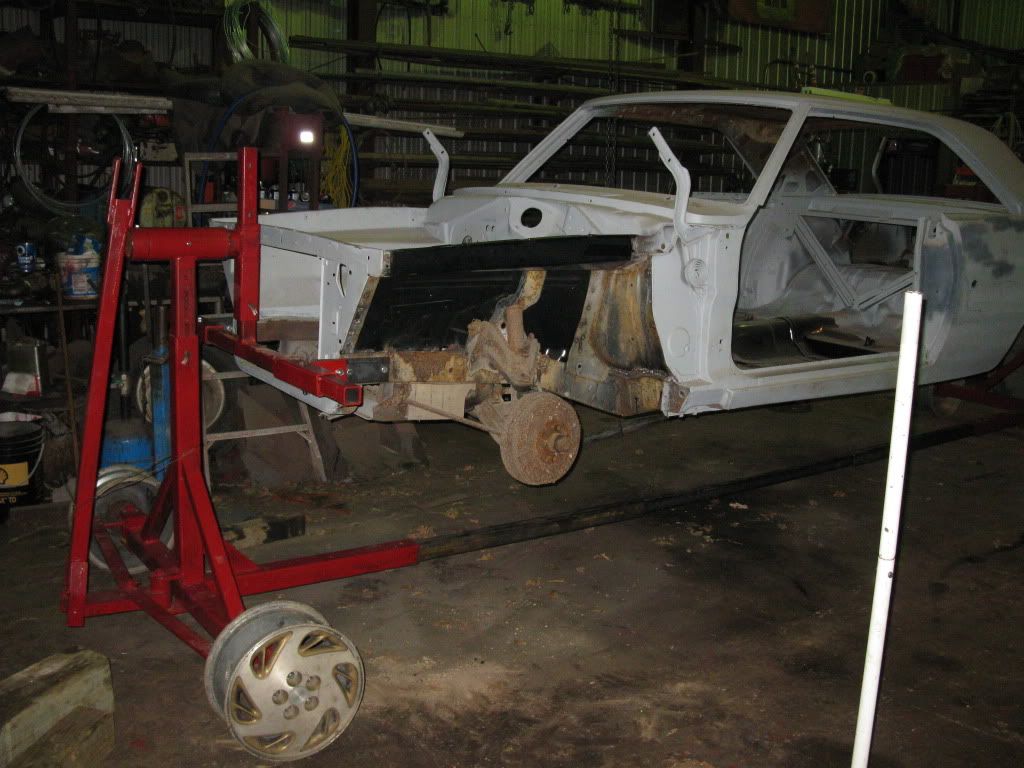
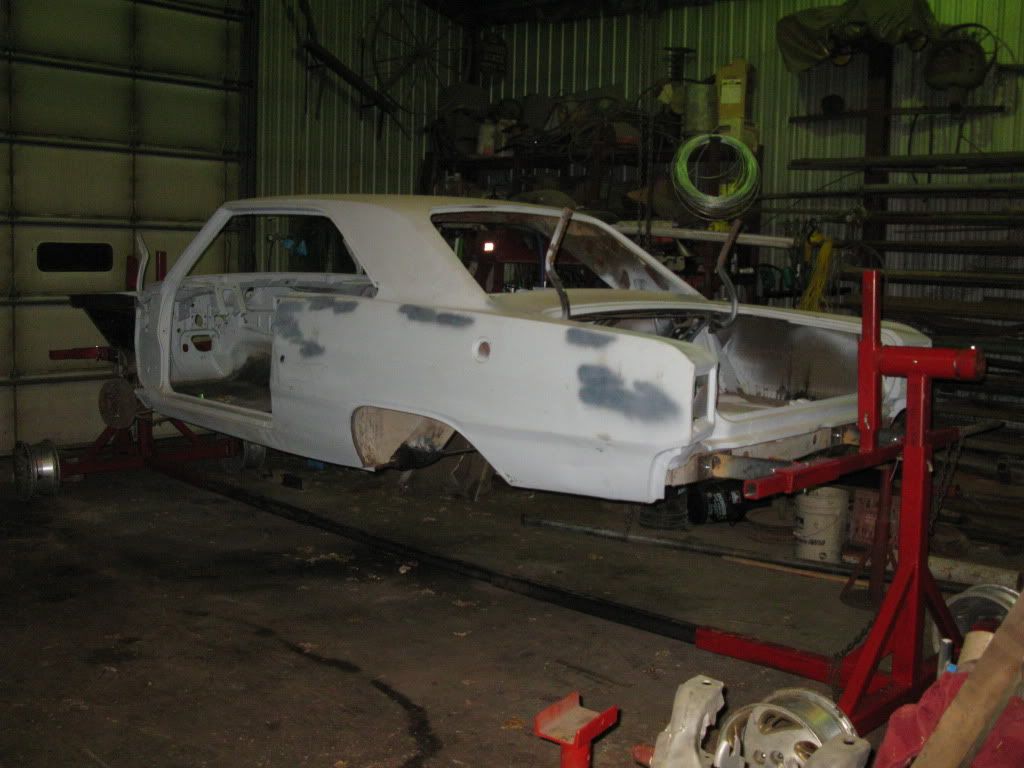
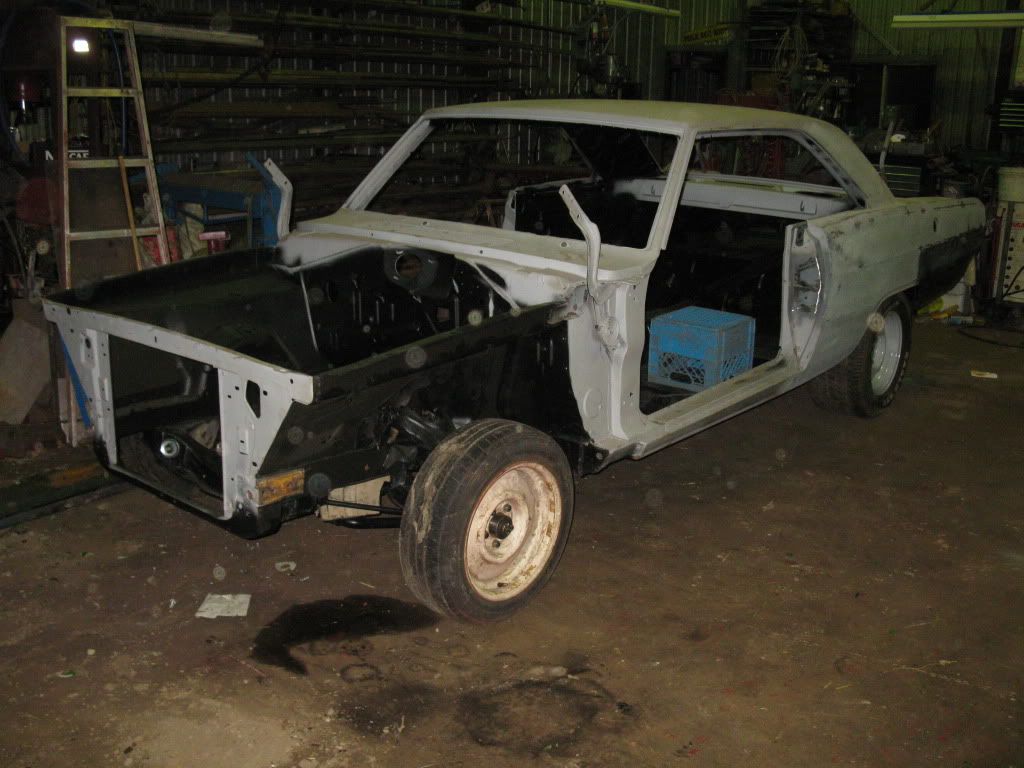
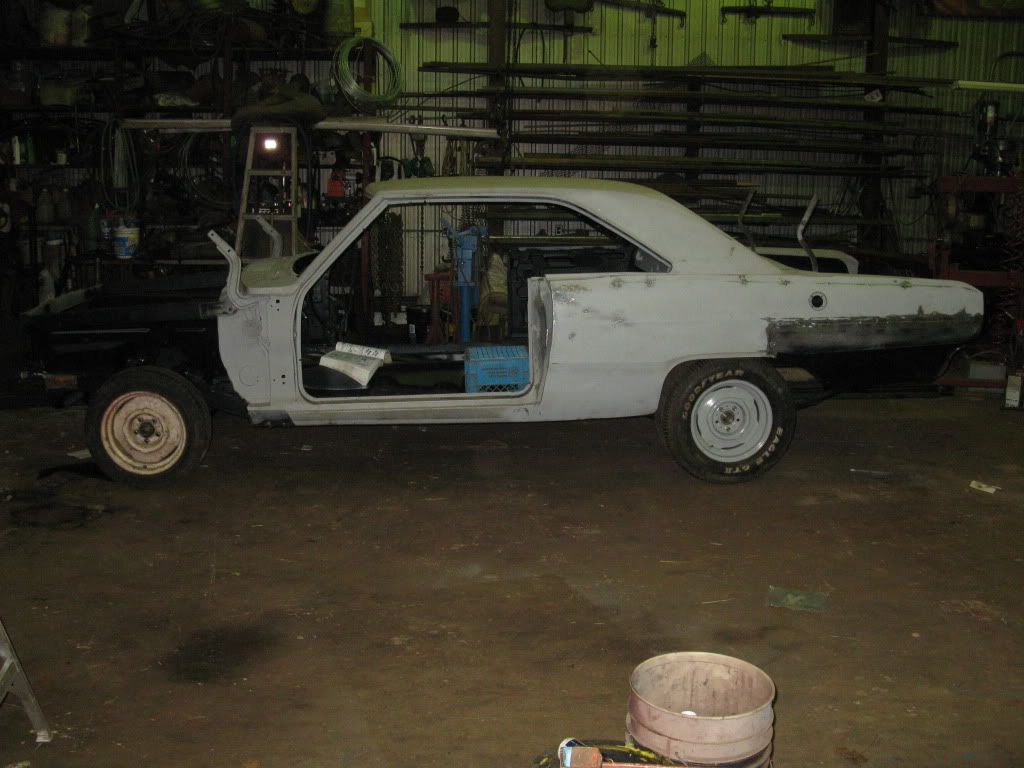
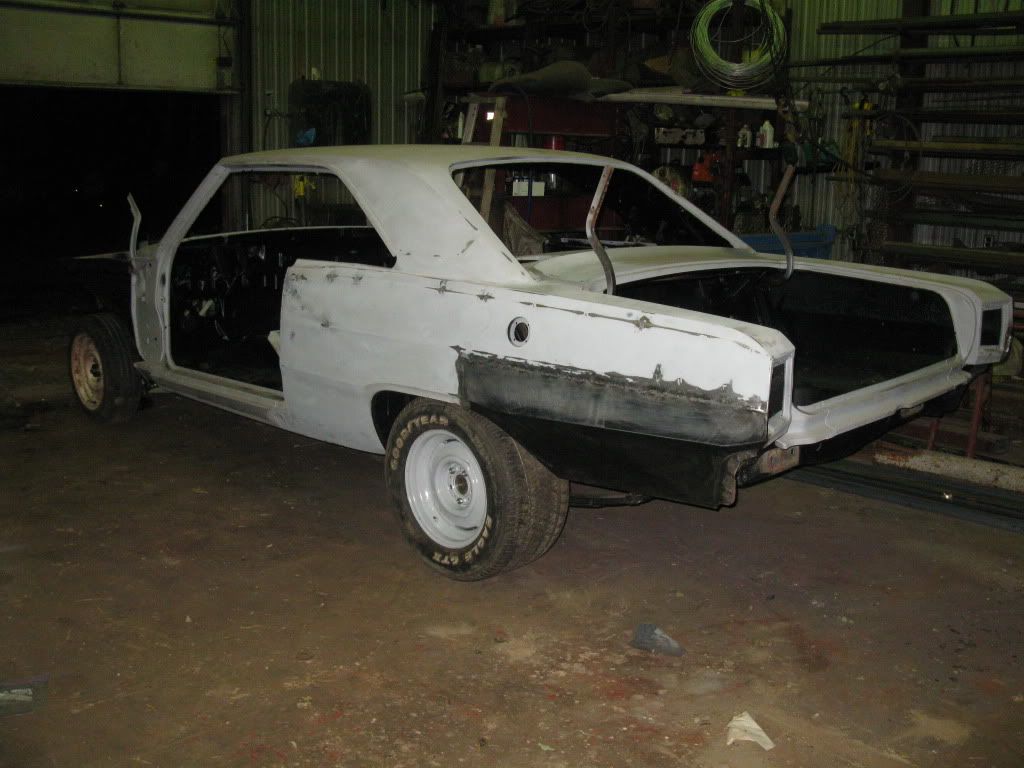
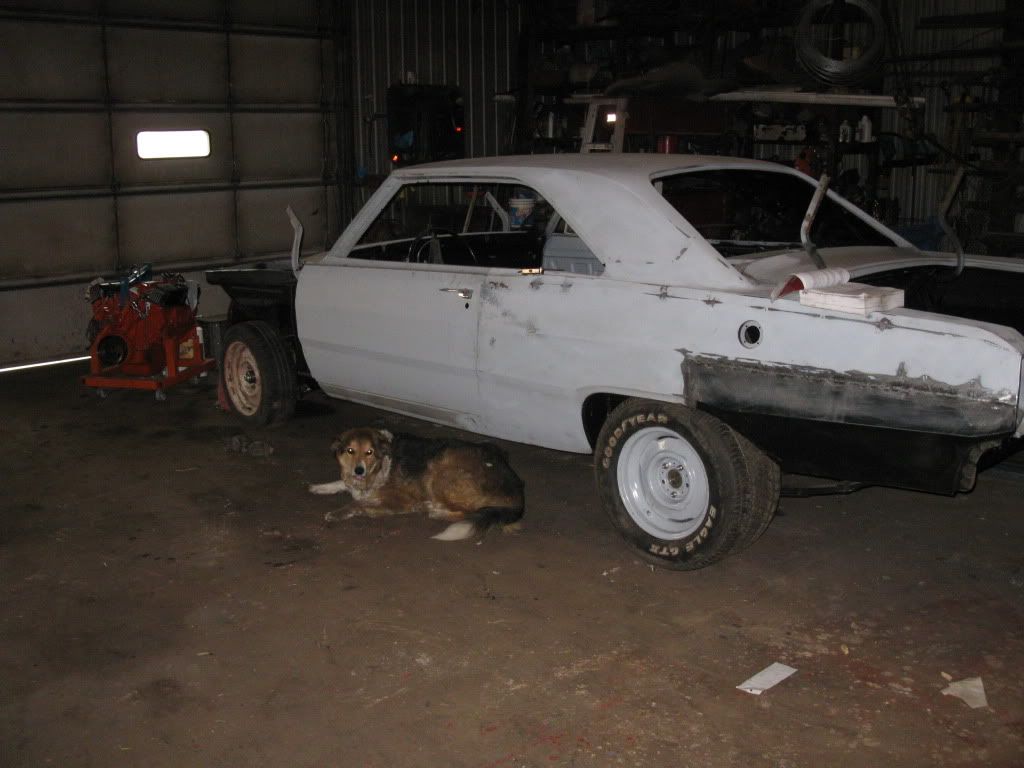
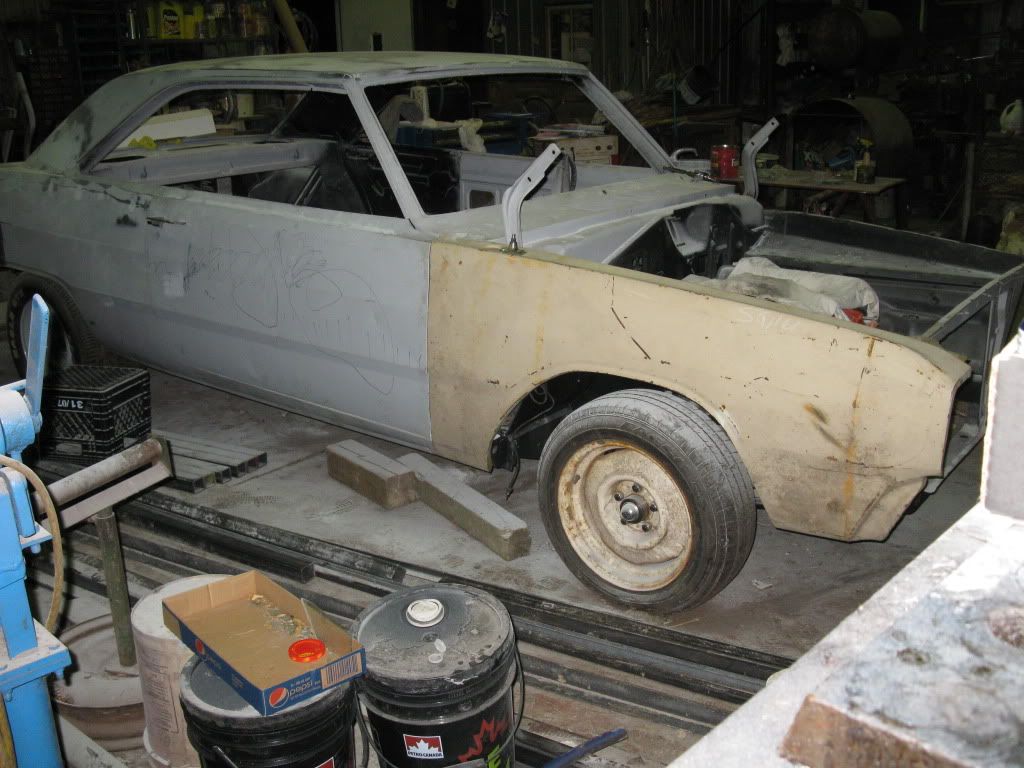
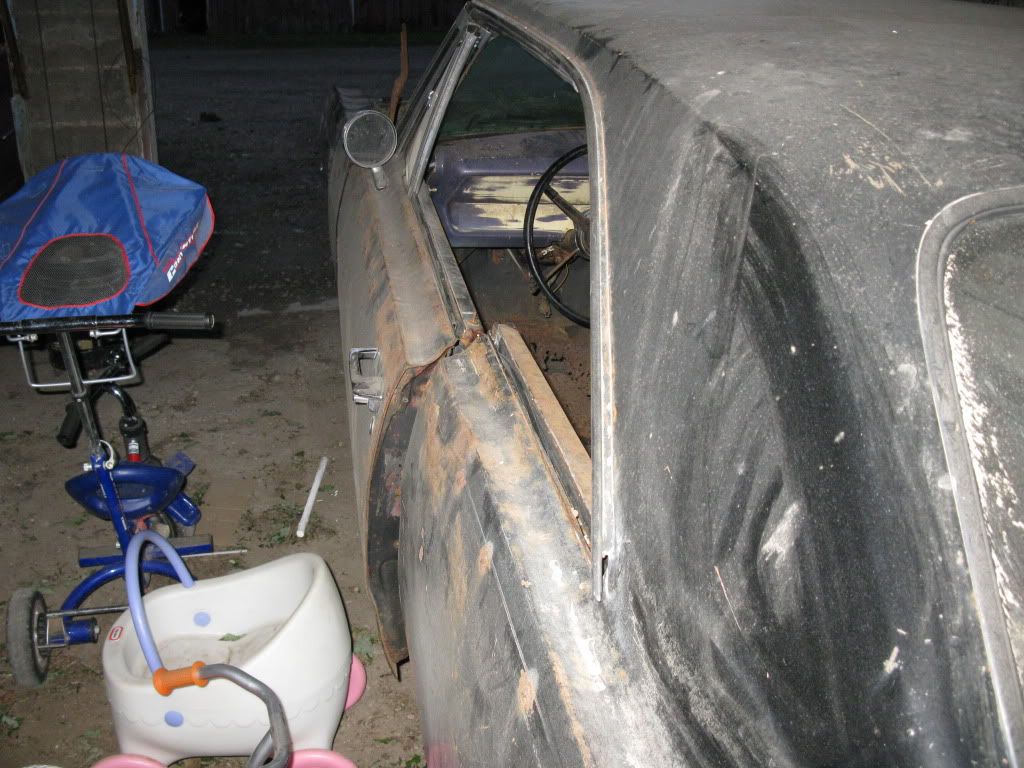
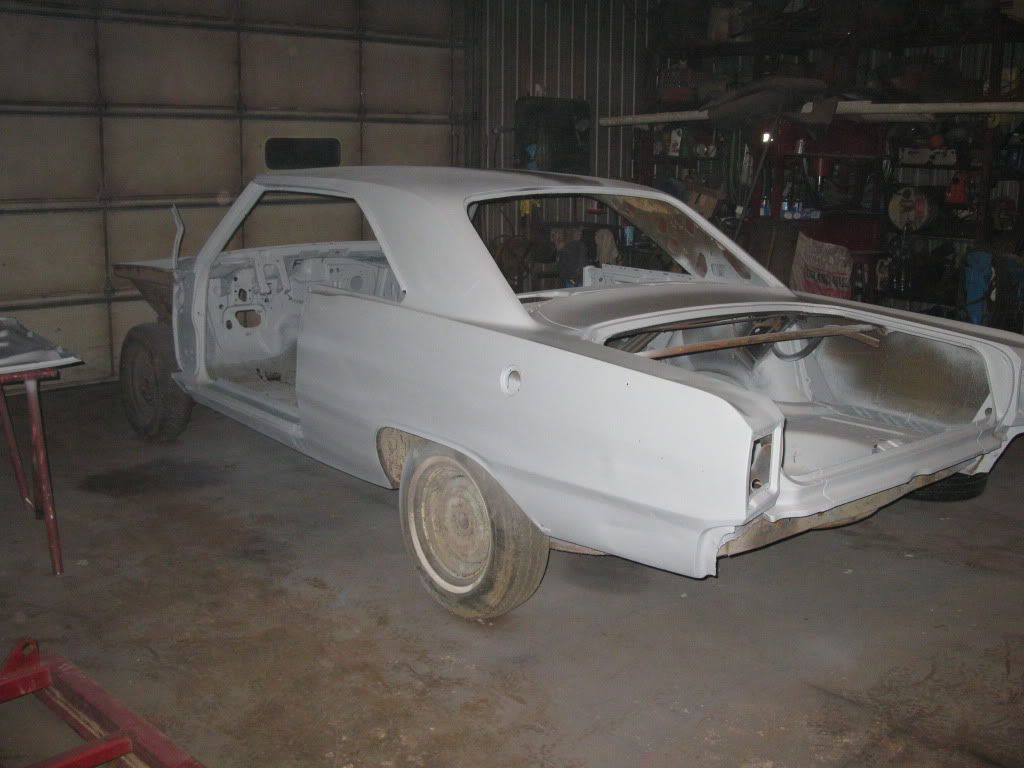
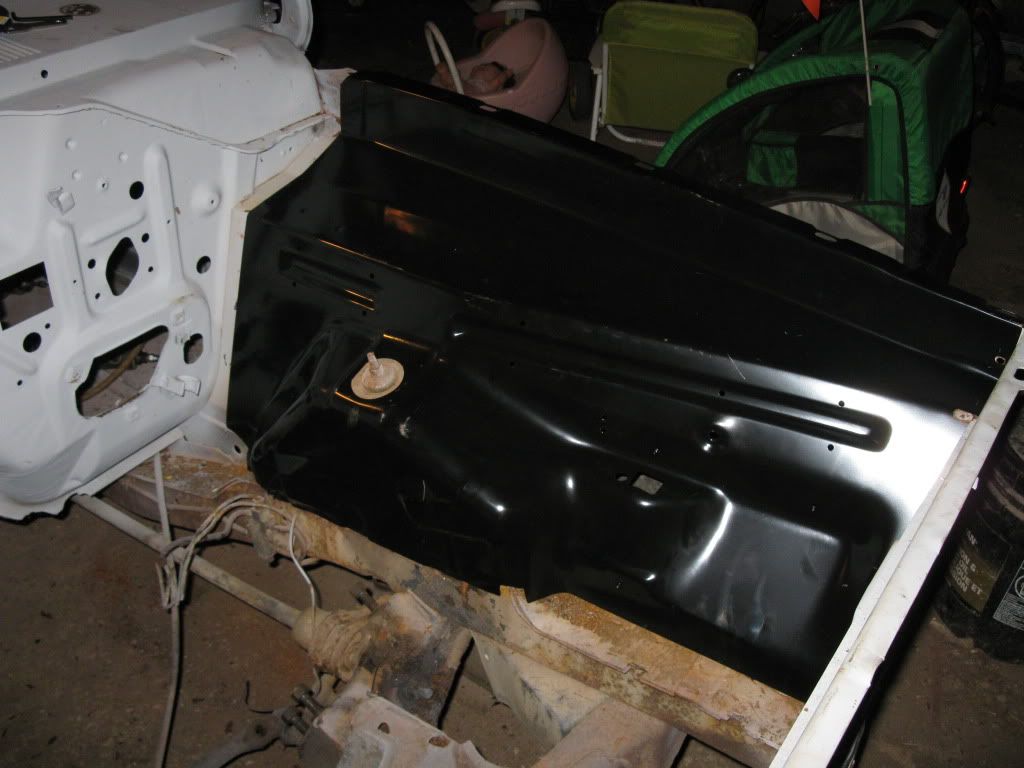
So i have been doing alot of body work as of late and research on parts to rebuild my 1967 dodge dart.

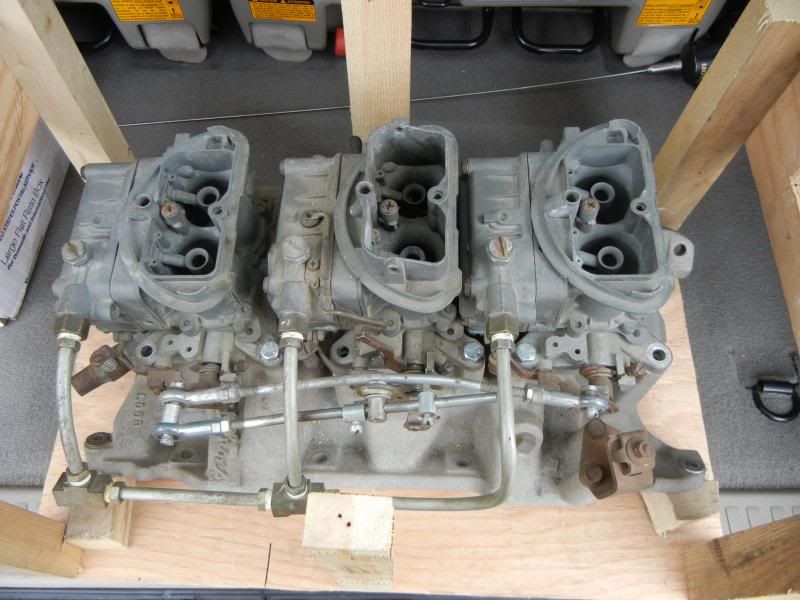
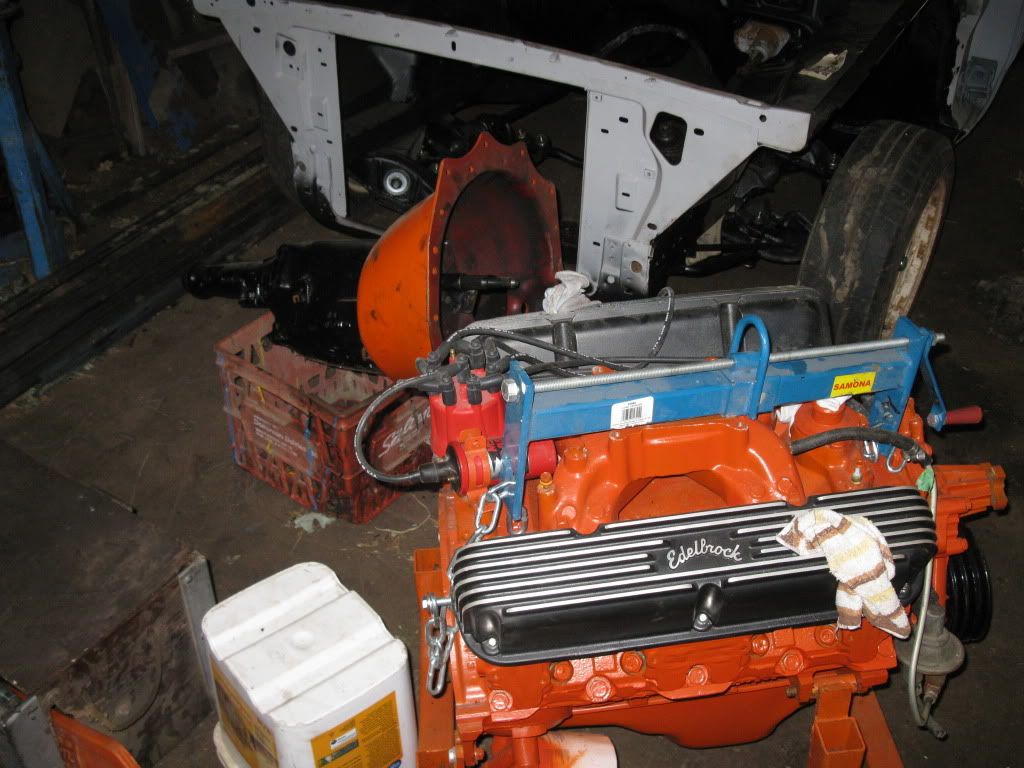
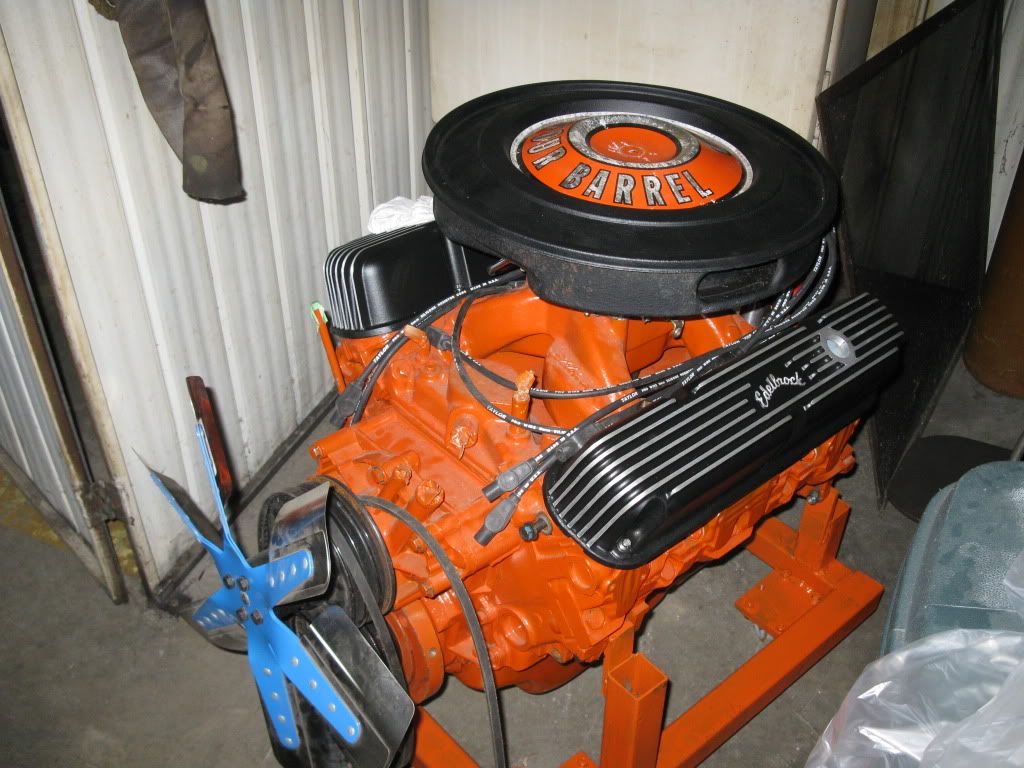
I have a 340 rebuilt
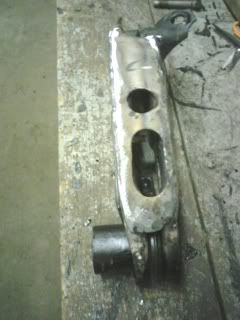
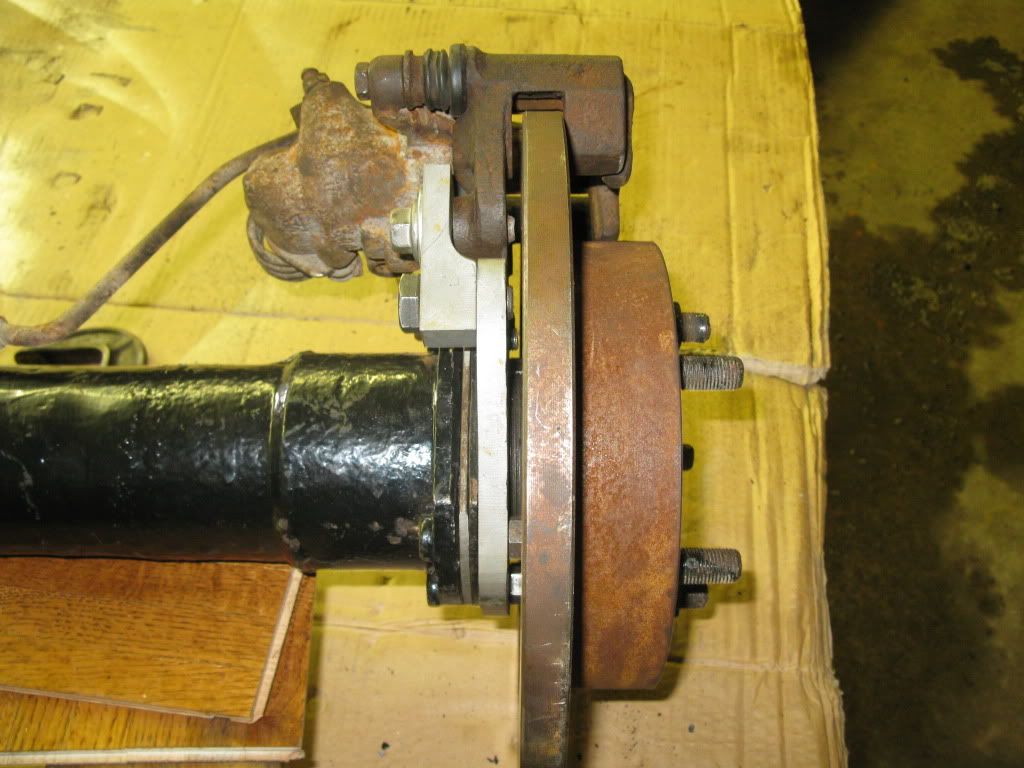
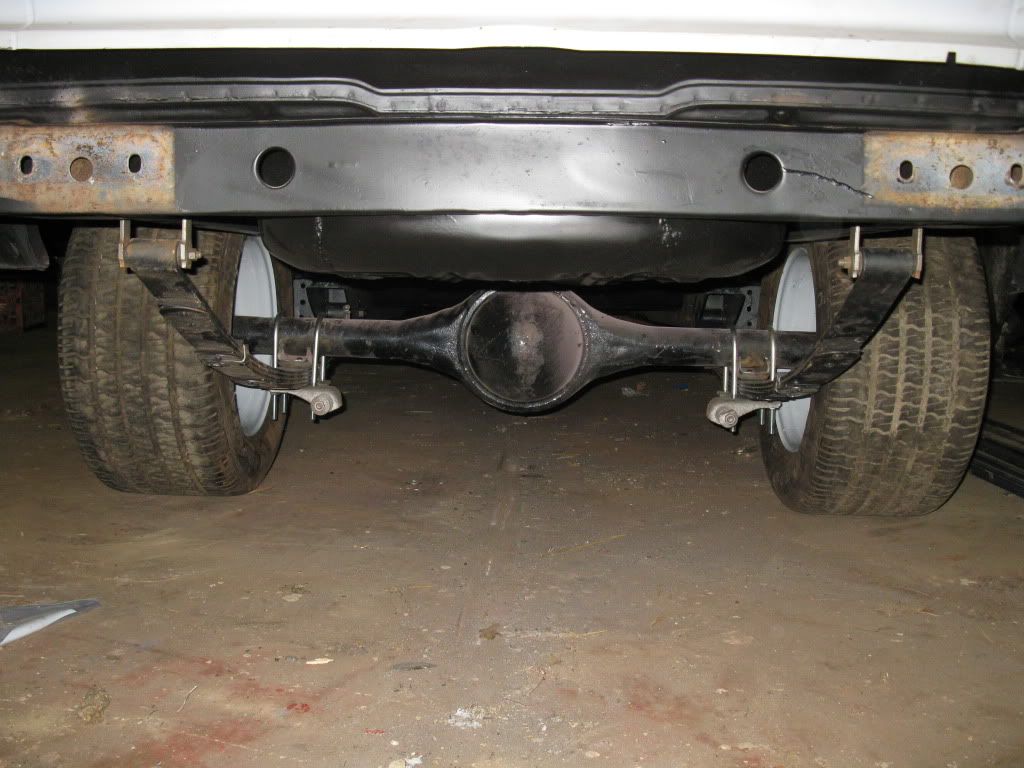
8 3/4 narrowed, 4 speed a833 rebuilt.
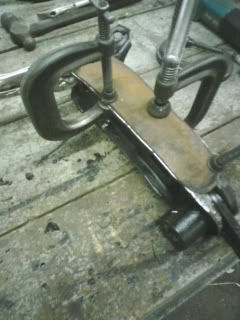
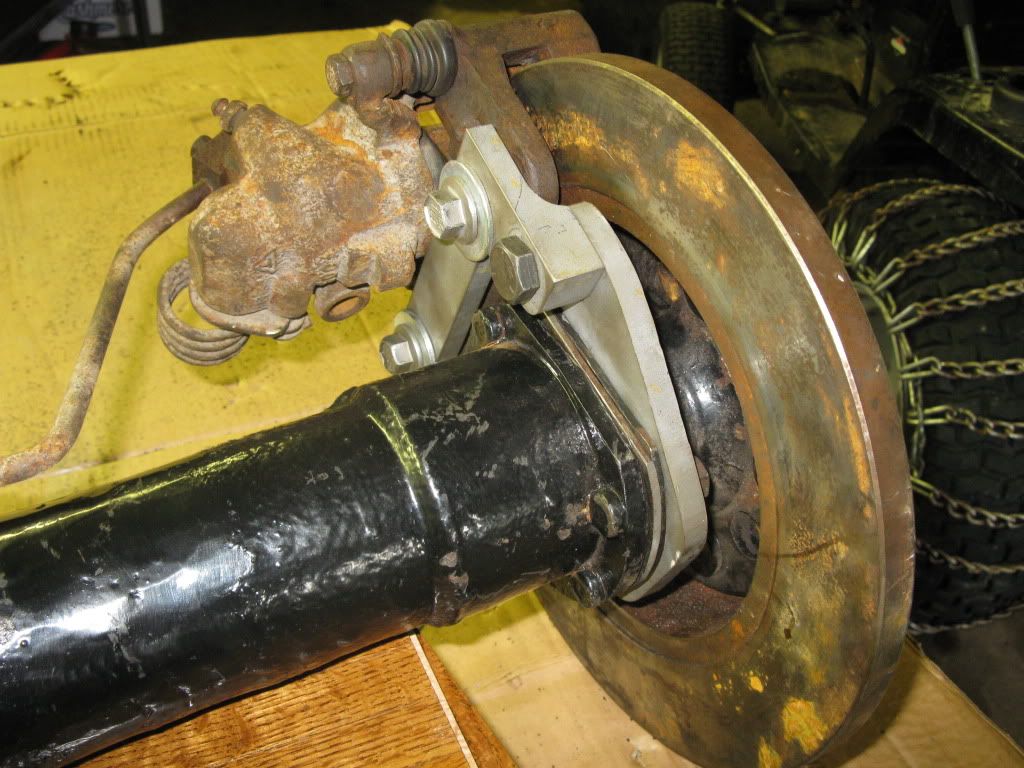
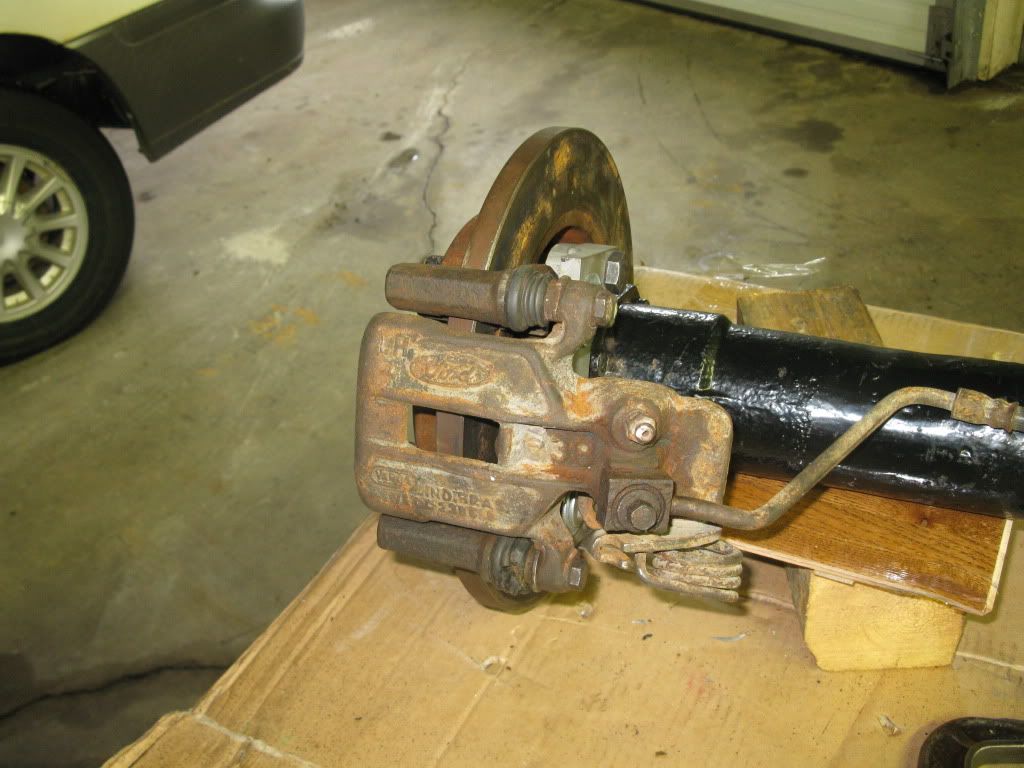
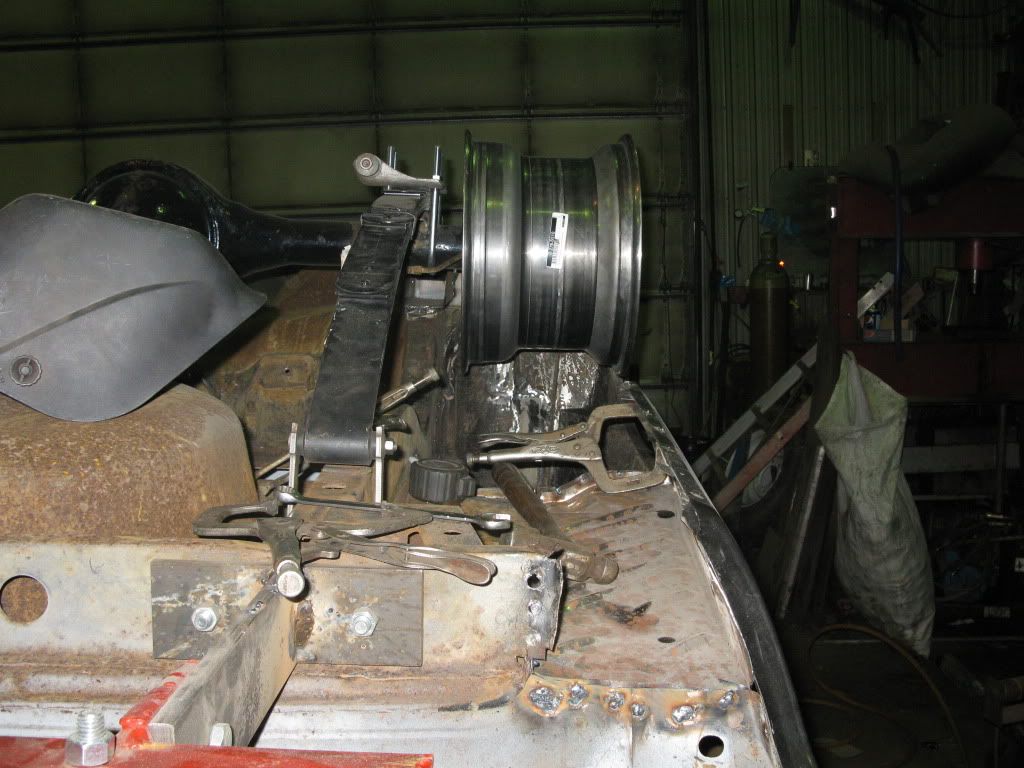
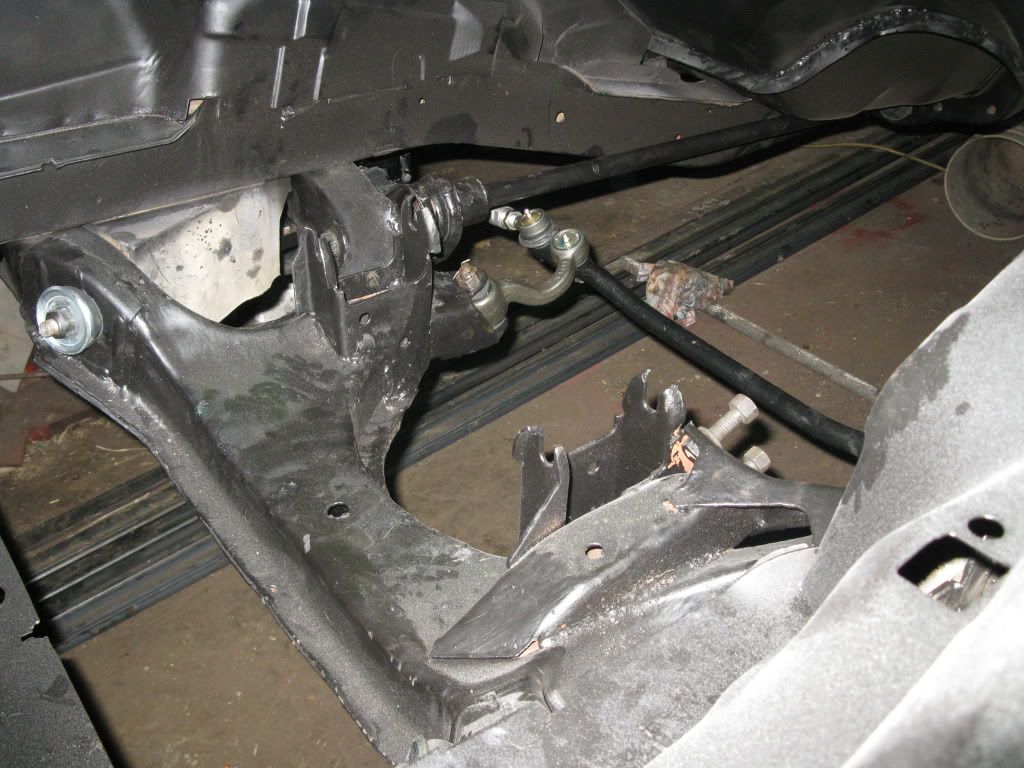
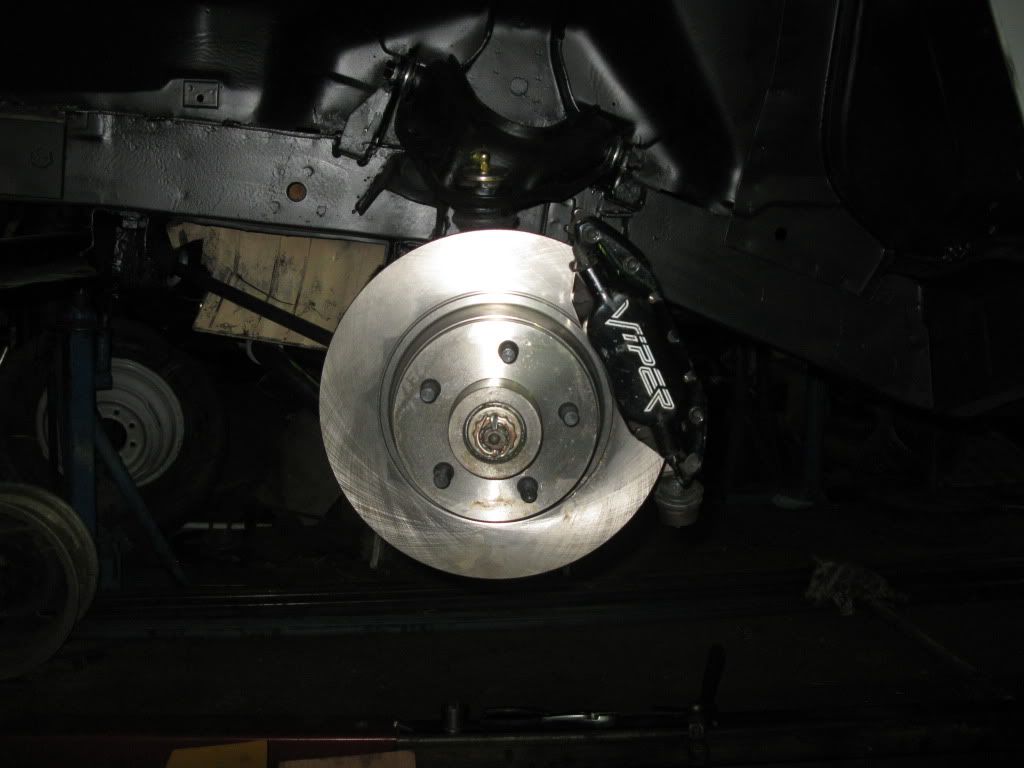
working on researching suspension stuff. Mainly street but some inspiration to go fast in a straight line.
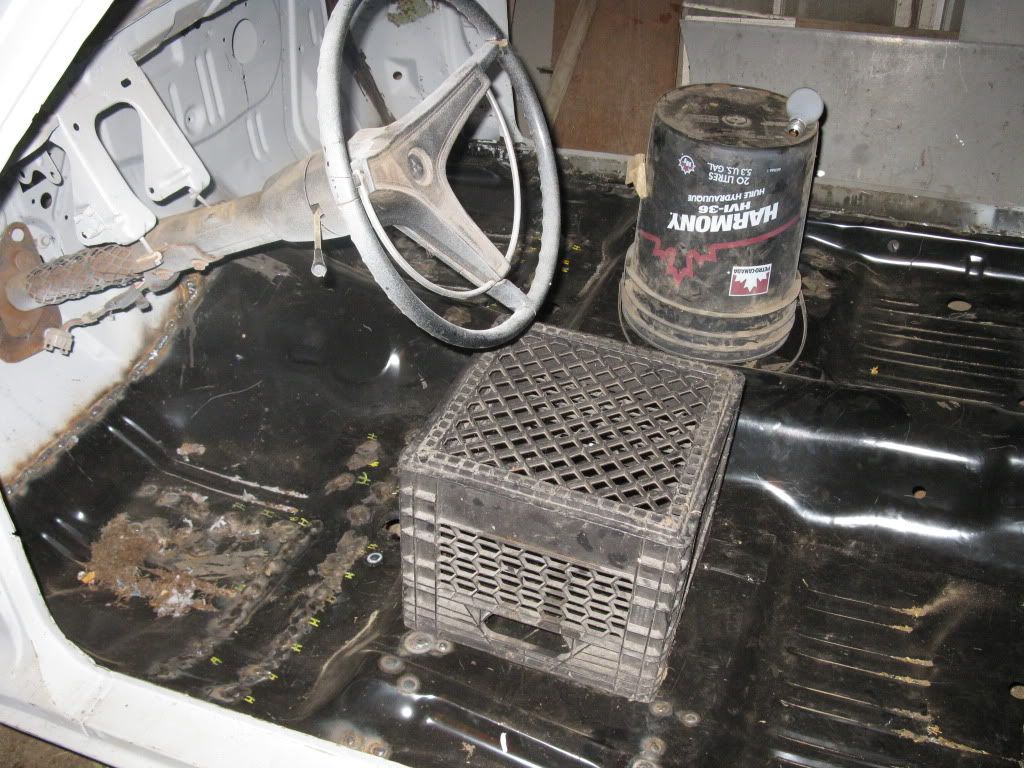
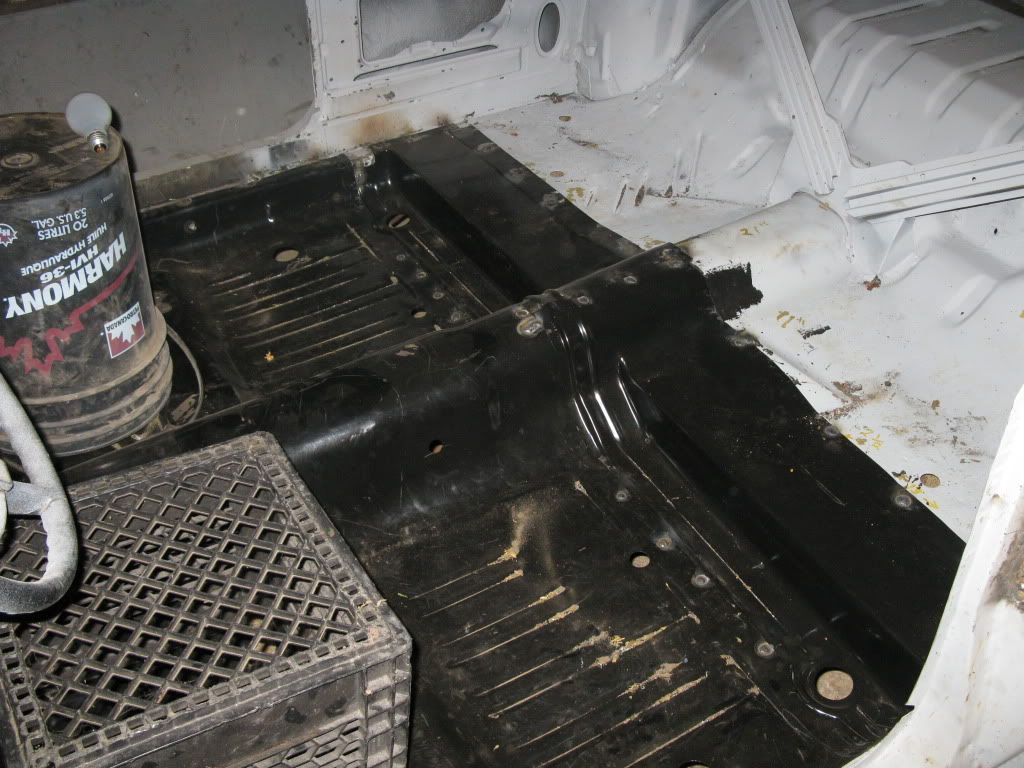
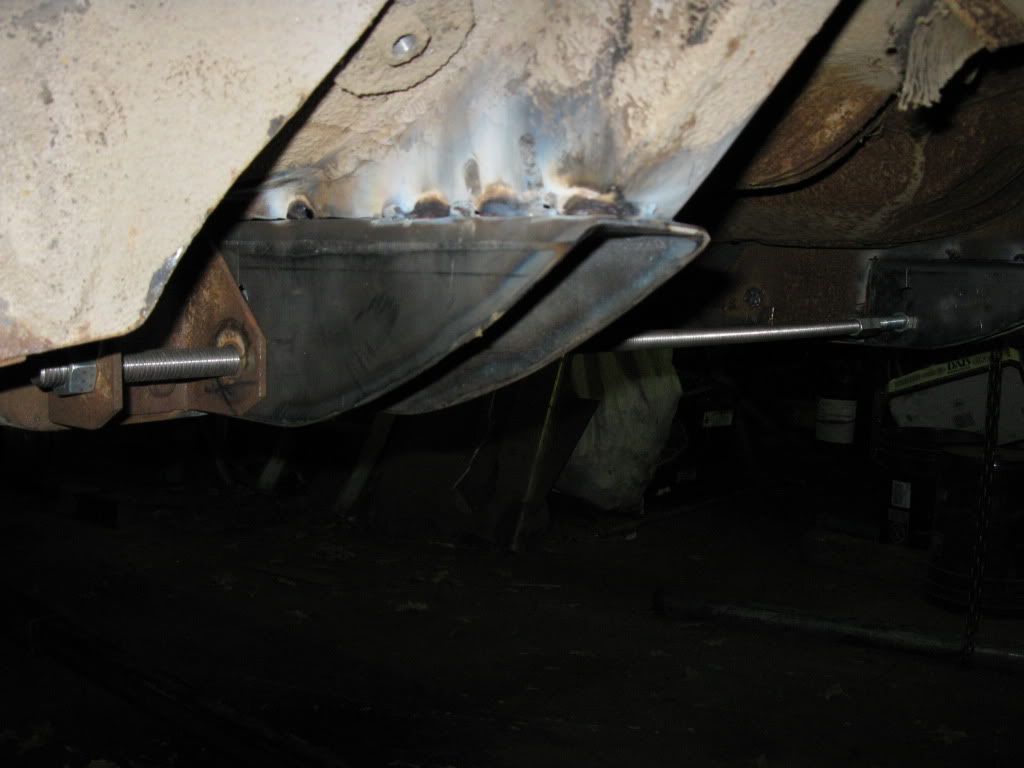
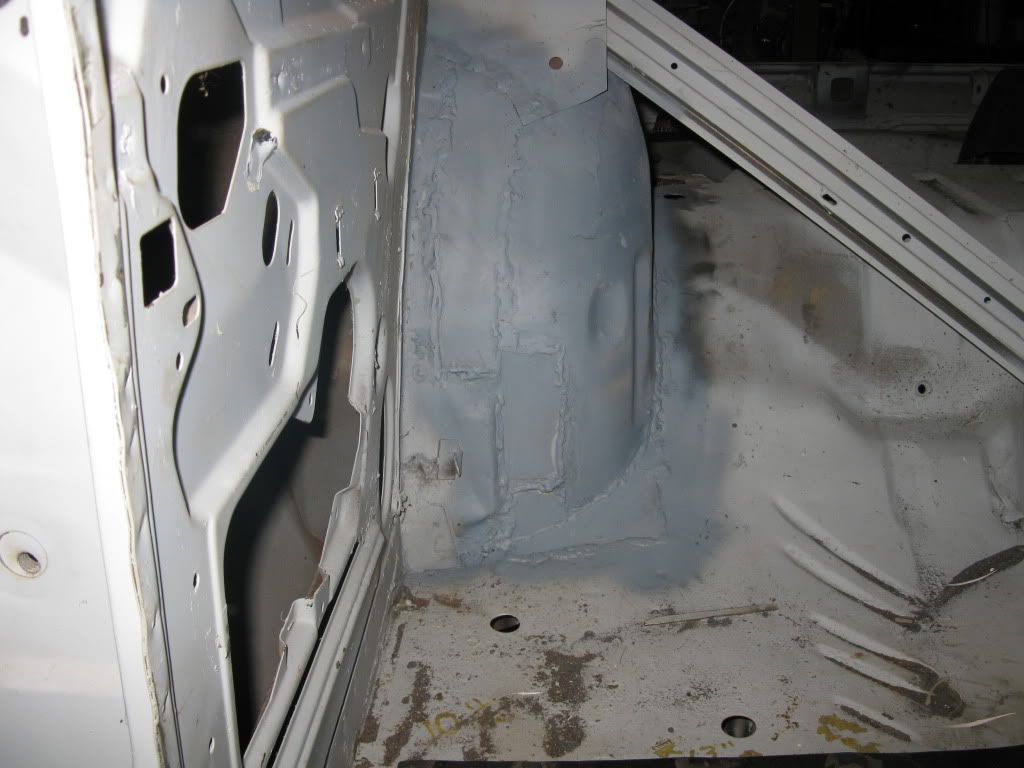
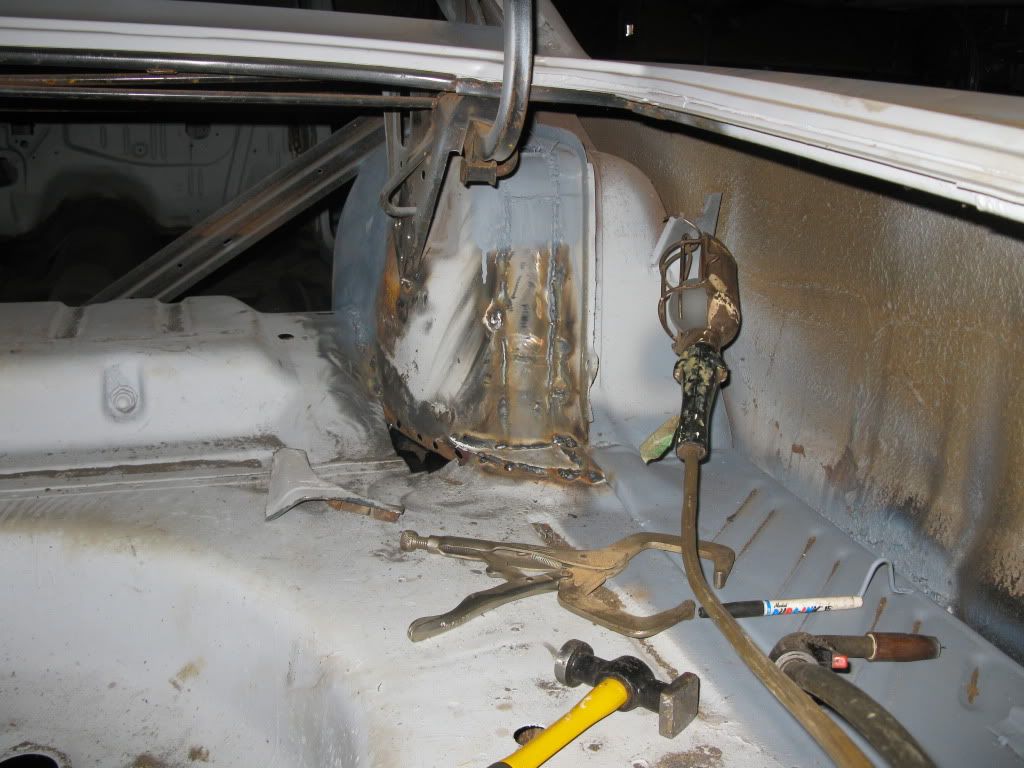
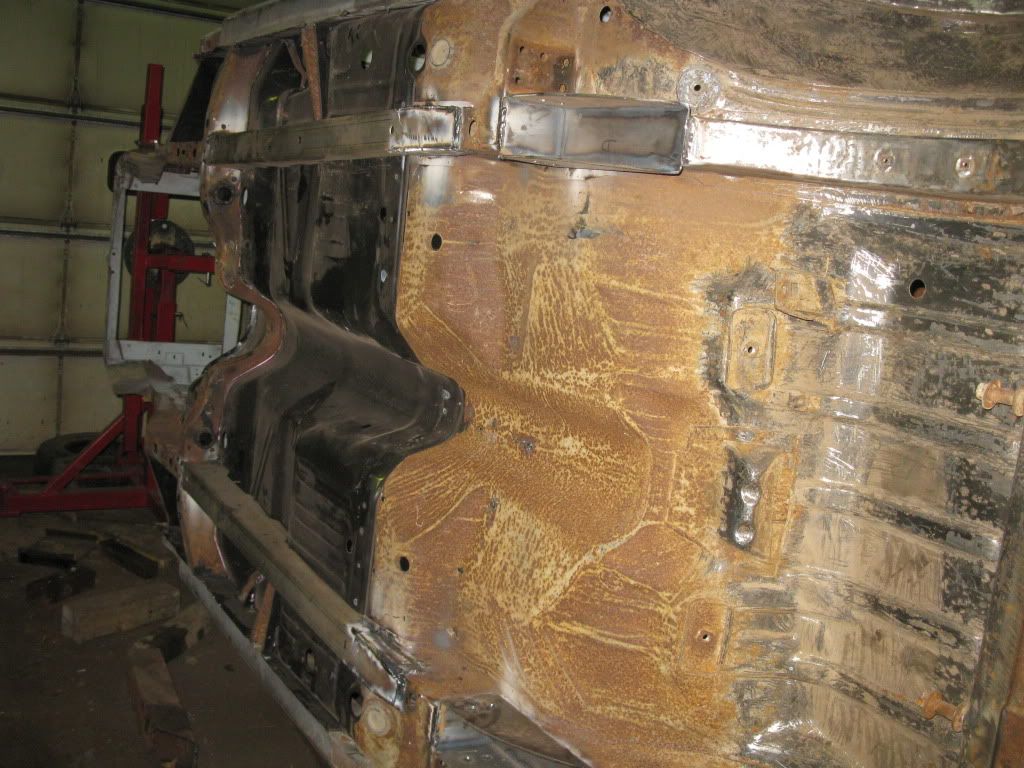
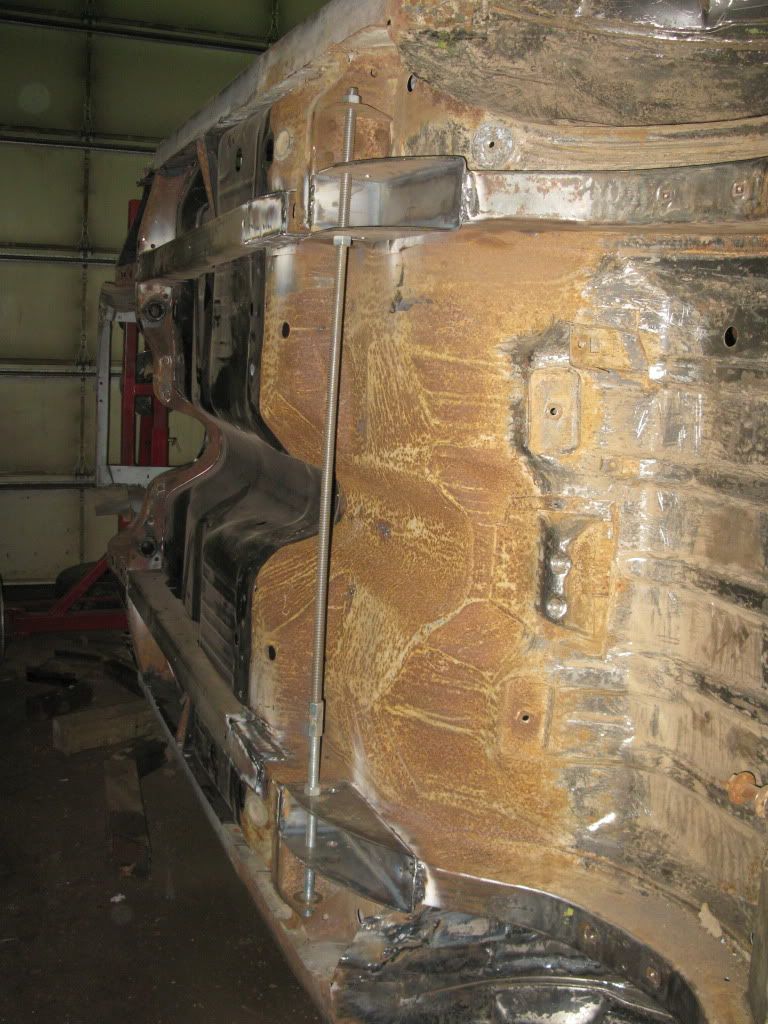
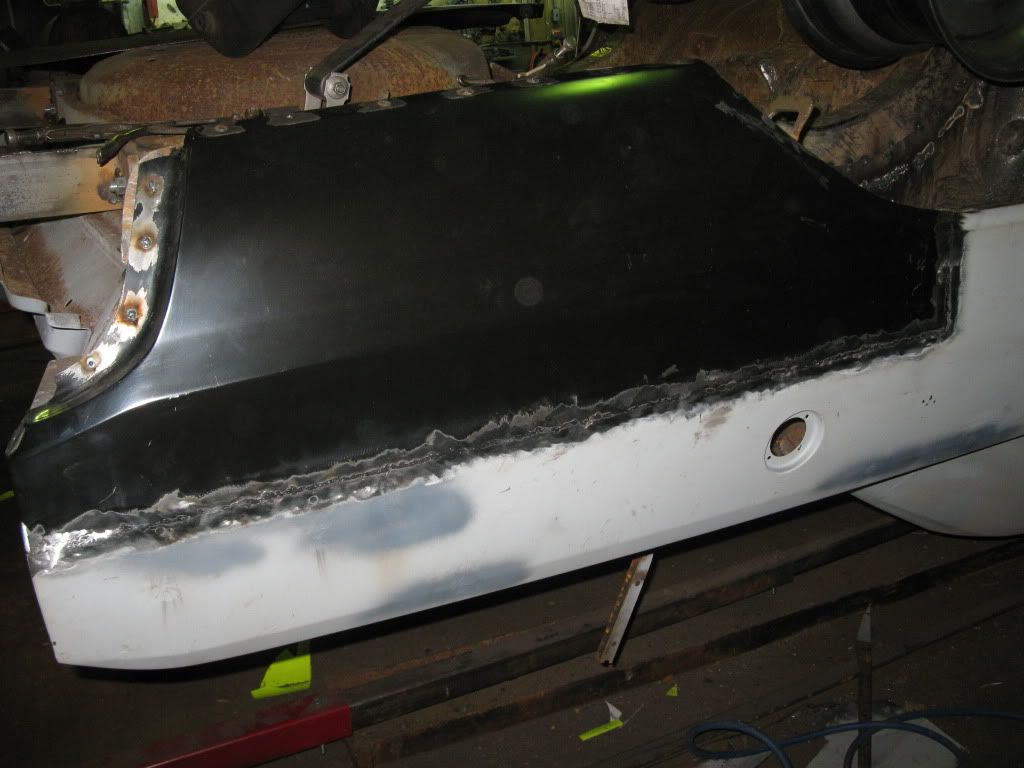
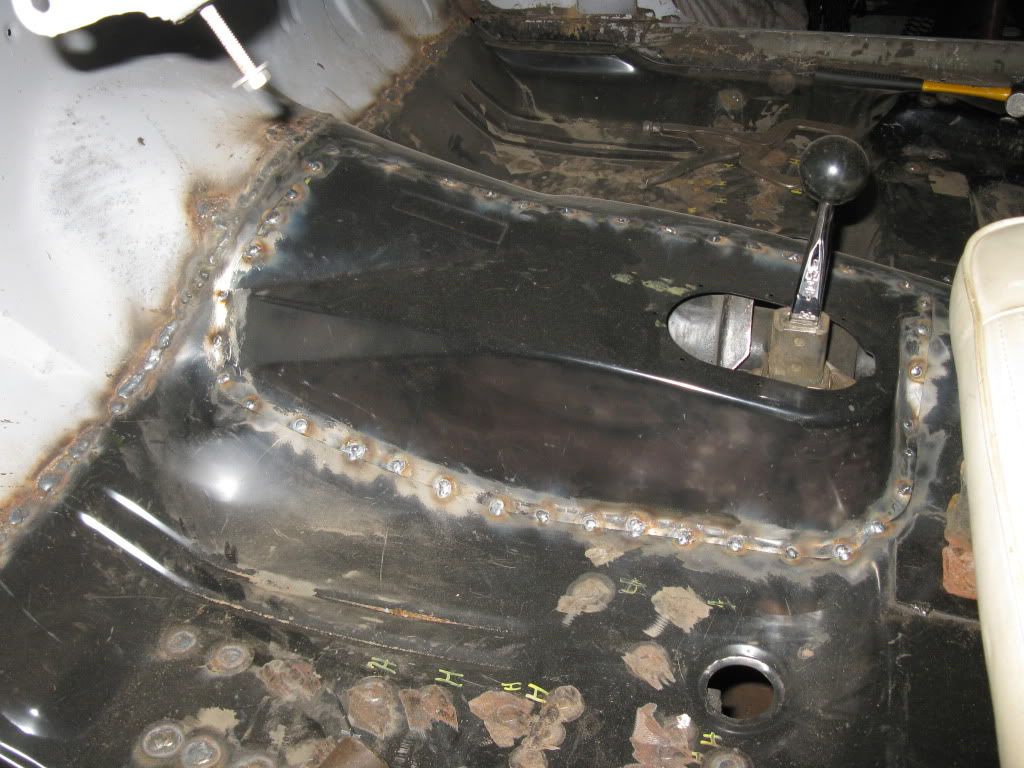
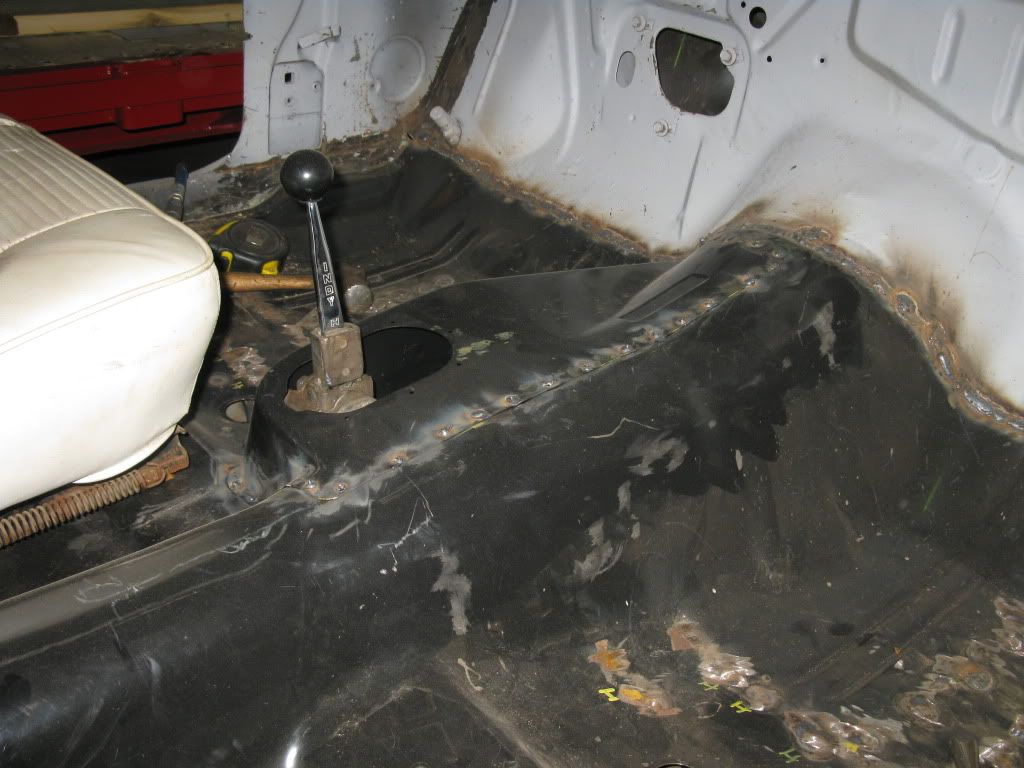
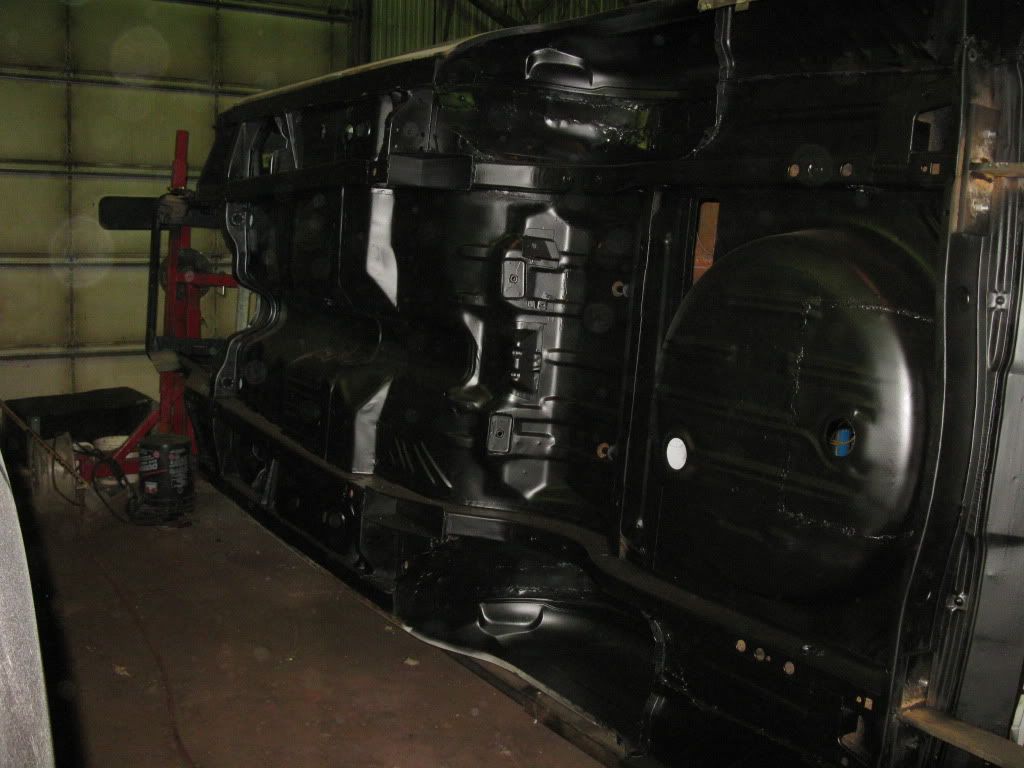
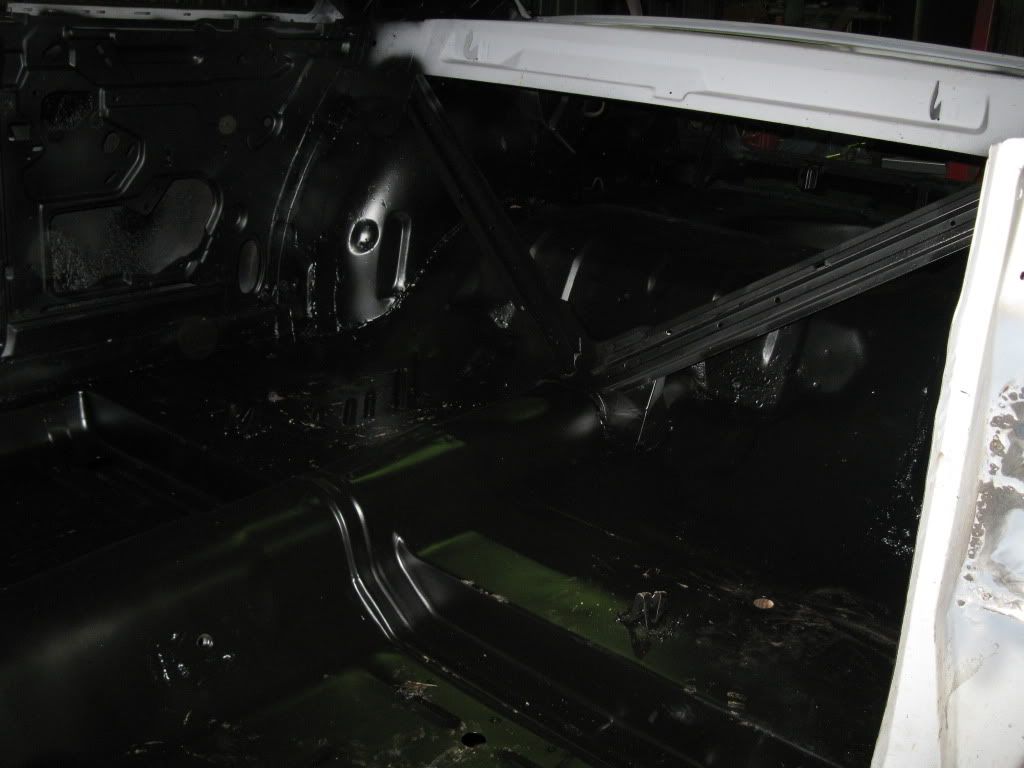
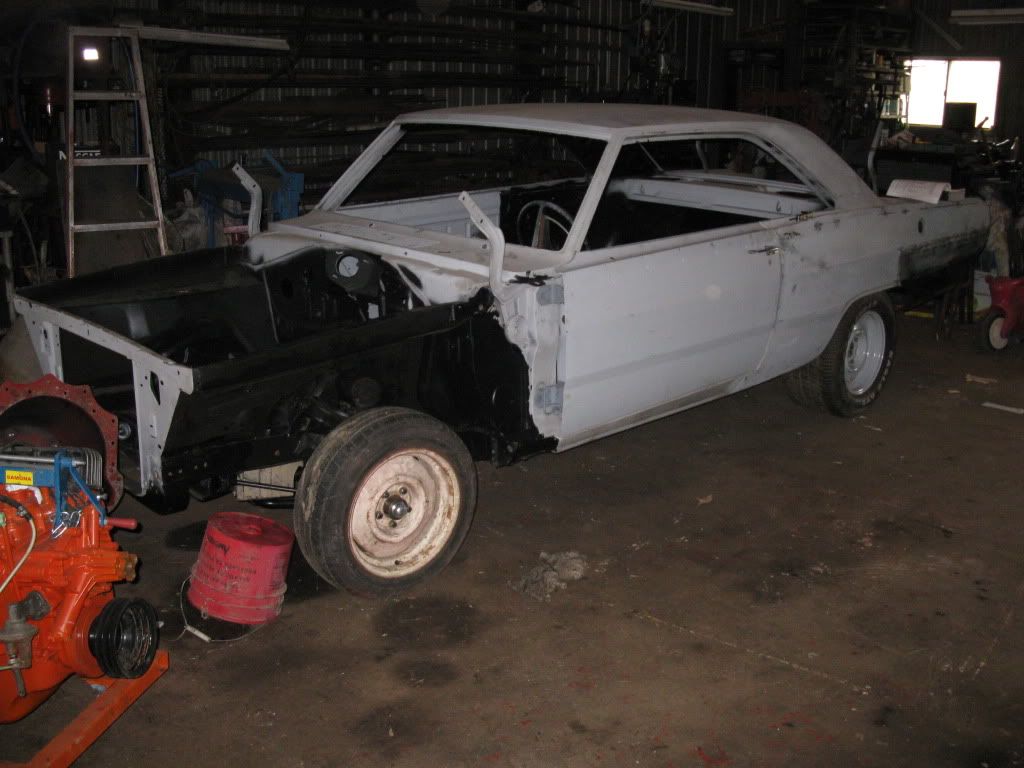
in the process of replacing the entire floor pan.
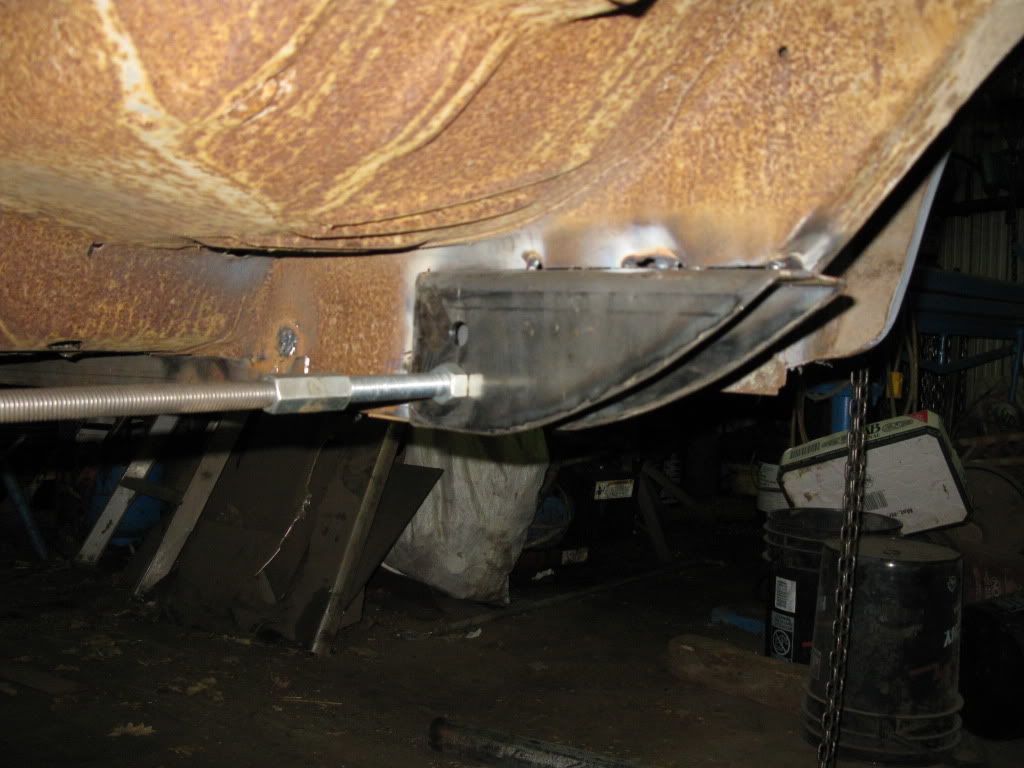
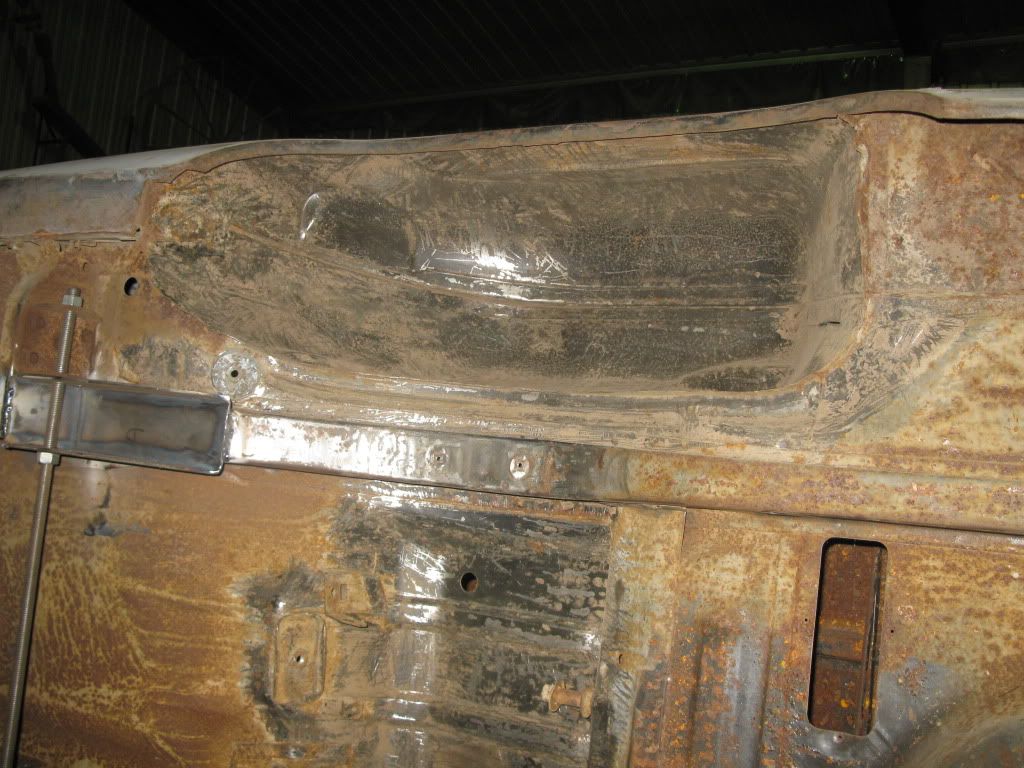
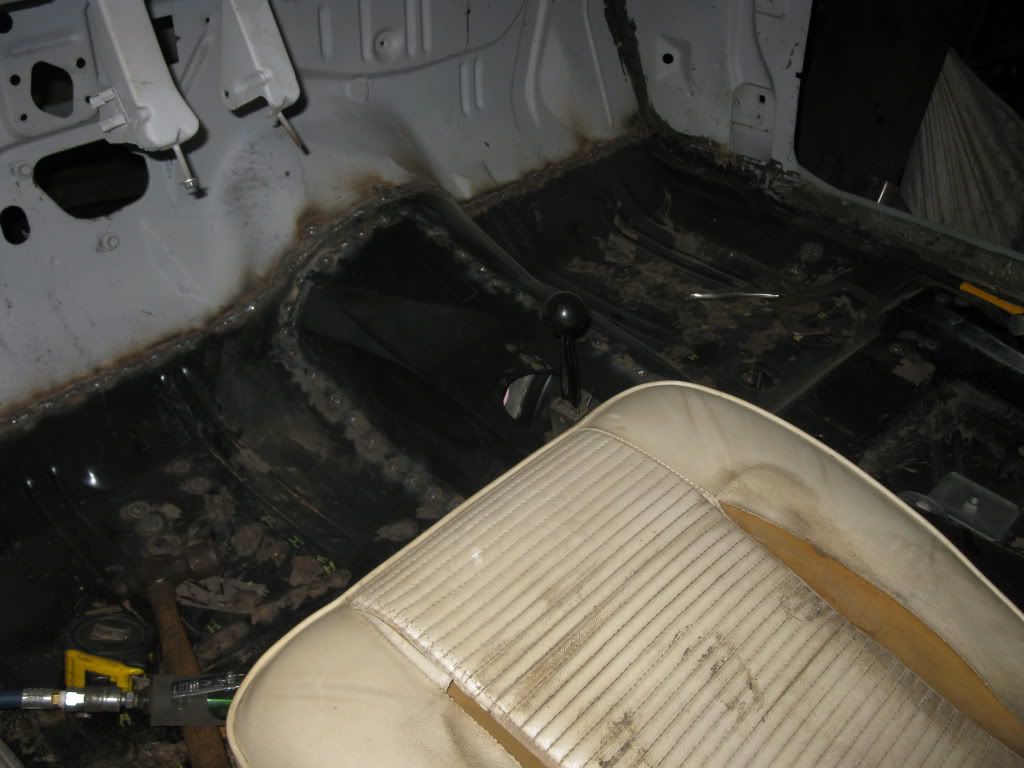
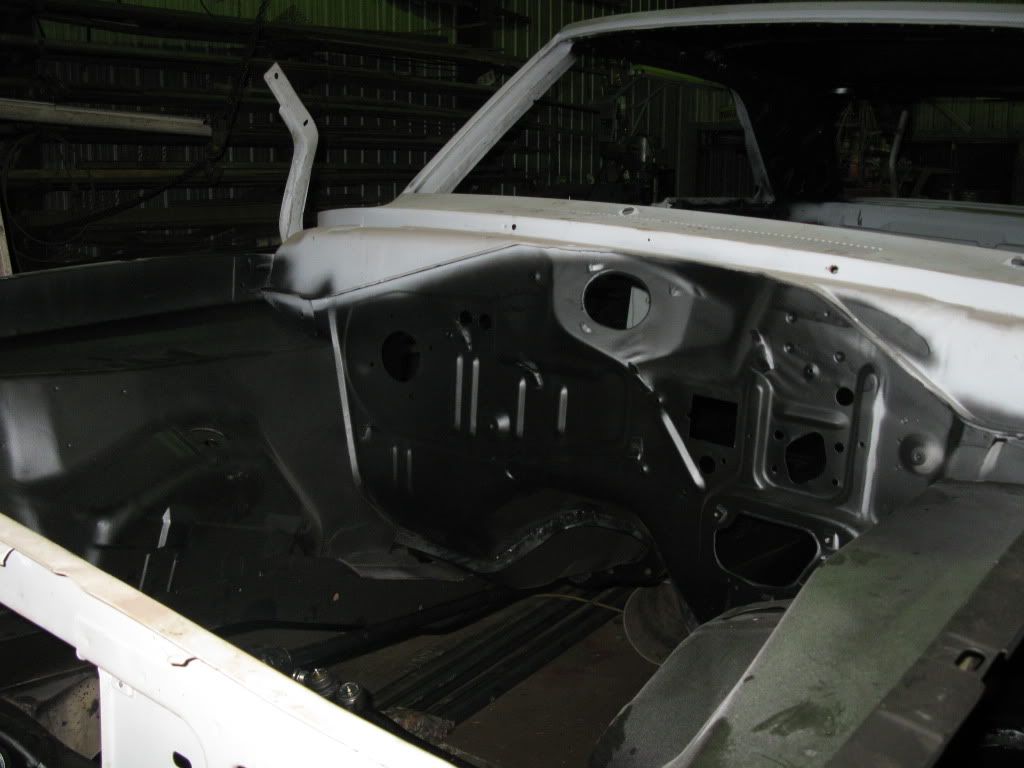
I have accomplished the drivers side inner fender.

After the floor i will be moving on to mini tubbing the dart.

IMG_1248.jpg

IMG_1507.jpg

IMG_1300.jpg

IMG_1535.jpg

IMG_0464.jpg
 
So i have been putting the floor pans in the dart. I dont get much free time to work on it so the progress is slow.
The milk crate and the pail are for my daughter and i to go for rides. She drives and i ride shot gun

IMG_1632.jpg

IMG_1631.jpg


Also will be modifying the front suspension and converting the front drum brakes to using ar engineerings adapter plate to use the 92-02 dodge viper calipers. and late 70's discs. I found these calipers for a good price on ebay.
IMG_1583.jpg


At the moment putting in subframe connectors, but somehow i mixed up the connectors and put them on the wrong sides so now i need to cut out the tack welds and put them on the correct sides. How i managed this i am still unsure how i mixed them up.... I remember mocking them up 10 times to be sure i had them right .... and i still fuddled up.

First is a pic of the homemade boxes to relocate the rear leaf springs in 3 inches to gain more tire clearance
IMG_0109.jpg

IMG_0108.jpg
 
Next my dad decided to build a rotisserie for me so i could flip the dart upside down in order to work on the underside of the car with more ease. He accomplished it in his spare time with left over steel tubing. He is loving the idea of the dart now. I can see his imagination start flowing when i am working on another step on the dart. I can see he wants to ride shot gun someday to relive some of his youth.

IMG_0107.jpg

IMG_0106.jpg
 
here i am beefing up a lower control arm to take the flex out of the front end to gain more precision in the steering and suspension travel.
The plates are homemade instead of paying 30 bucks for manufactured pieces.

p_00046.jpg

p_00047.jpg

p_00048.jpg

p_00050.jpg
 
still doing a bit of work on the dart

I have cut the wheel tub on the passenger side after scrapping the undercoating off. I almost have the 2 1/4 inch strip welded back in. I keep forgetting to take the camera outside.

I have also been looking at the jeep disk brake setup and pondering how to get the emergency brake to work. A friend wanted his rear brakes on his mustang fixed so we pulled his 2000 mustang into the shop when i noticed the rear brakes and the parking brake in the caliper. Exact idea i was dreaming about after looking at the jeep calipers and parking brake assembly.

I also noticed that Dr diff sells a kit for these exact calipers for a big chunk of change. So i plan to whip out a fresh chunk of 3/8 plate and finesse it into a dd2's version of caliper mount using the base mustangs rear caliper and the rotor.

shop is a bit tight lately as my dad is building a new 10 ton 20 foot trailer. Axles will have Dodge Ram brakes (took the axles from a ram and made his own heavy axle tubes)

Will hopefully remember to take some pics tomorrow.
 
inally took some pictures tonight of the passenger side wheel tub.

Its been slow progress because i don't get a lot of time to work on it as of late, but i have one side nearly done
IMG_0310.jpg

IMG_0309.jpg
 
The Ford mustang setup is going to work wonders.

I have all the brackets made up and can use everything and tap into the existing lines on the dart.

IMG_0276.jpg

IMG_0280.jpg

IMG_0279.jpg


finally welded the subframe connectors in ... and finished one mini tub. Now the fun of moving to the other side .
IMG_0318.jpg

This is the before i start to cut open the wheel tub and take out the trunk extension and fender patch.
IMG_0316.jpg

IMG_0315.jpg

Ugggh ... so much more work to do and so little time
 
k This has been my latest adventure.
Still plugging away on the sheet metal behind the rear wheels and the wheel tubs.
IMG_0336.jpg

Decided i wanted to find a 10 inch wide rim and use the dog dish hubcaps.
So i found a 15 inch hoop from speedway motors.
IMG_0344.jpg

IMG_0345.jpg

I found and drilled out the spot welds out of the factory rim so i could weld the center into the 15 inch hoop.
p_00044-1.jpg

p_000462-1.jpg

The one rim had the welds on the backside so i simply turned out the welds and knocked the center out.
p_000482.jpg

the speedway rim had an inner diameter of 12.625 and the factory rims center was 13.25. So i spun the diameter to the smaller size and placed it into the new hoop.
IMG_0338.jpg

I have not set up the backspace on the rim yet, but i did mock the new rim up on the car to see how well she fit.
IMG_0337.jpg

IMG_0343.jpg

IMG_0333.jpg

Now just to weld it all up and then i have a 15 inch rim and 10 inches wide so i can cram some 295/50/15 tires into the new mini tub.
 
So i did some humping on the dart. Have not had much time as of late to work on the dart, but finish the rear fenders and put the hump in.
IMG_0376.jpg

IMG_0377.jpg

IMG_0381.jpg

now to work on the seat belt mounts. Finish the trunk floor and then wire brush the rust underneath to get ready for some por 15
 
finally put some nice zero rust to the underside of the car. Used a gallon of the zero rust and ran out so i had to order some more in. Should be in tomorrow for the inside of the car.
IMG_0439.jpg
 
more zero rust sprayed in all the nooks and crannies and areas i didnt know existed [smilie=2:
This stuff takes a bit of time to get off your hands [smilie=2:
[IMG]http://i198.photobucket.com/albums/aa307/dodgedifferent3/Dartie/IMG_0450.jpg[/IMG]

IMG_0451.jpg


IMG_0452.jpg


IMG_0455.jpg


Installed the '74 k frame for the spool mounts... added some 11/16 tie rods from a big ol' C barge. :giggedy: Since they were bolt in items.
Only thing i wonder about is i put in some 1 inch torsion bars :hmmm: Second guessing them at the moment, but i will mainly do street driving. Thinking they may be too rigid for the small block .. but may use them if i go BB :hmmm:
IMG_0454.jpg


Got hooked up with some AR engineering mounting brackets to mount 92-02 viper calipers on the front and using the 77 chargers rotors :giggedy: (as per mopar action's green brick)

IMG_0453.jpg
 
Nice job, keep up the good work... What year mustang brakes are those? I am thinking of doing something similar to my 66.
 
So i finally took the dart off the rotisserie. Then i sat down and stared at her for quiet some time. Felt like i made a huge leap on it tonight by putting her on her wheels.
IMG_0464-1.jpg

IMG_0465.jpg

IMG_0466.jpg


Then i sat down behind dartie and was amazed at the size of the rear wheels and how BIG they were when underneath :)

IMG_0467.jpg


Now put down that lube and quit looking at her undercarriage :)
 
!! WOW !! Must be nice to have a big-*** lathe large enough to "just turn out the center" of some wheels. You make my old hands hurt just reading this.
 
Put some doors on Dartie this week. Put the tie rods all together.
Chedder (dog) was guarding the dart to be sure nobody tried to drive away?
IMG_0491.jpg


IMG_0493.jpg


Was planning on sliding the 340 in to check the fit. See if the 6 pack intake will fit under the hood. Find drive shaft length, set rear pinion angle.
IMG_0492.jpg


Then return to body work.
 
Finally figured out what a dart with front fenders looks like. I completely forgot what they looked like.
IMG_0530.jpg


I have a pair of fiberglass fenders but i didnt like how they fit on and there would have been waaay too much fiddle farting around to get them to fit correctly. So i pulled out the third pair of steel fenders and put them on the dart. The one drivers side fender is going to need some metal work, but thats the joys of rebuilding a car i guess. Will take some pics of the fenders cancer later...


I finally have the roof flat ...
i have been working on the back fenders a bit.
 
I have the fenders finally fixed and put on the dart. As i was aligning them up i ran some masking tape down the drivers side of the car when i noticed that the car had been bashed in behind the driver door. looks like it was t-boned.

Car sat till now when i could bring it in to the body shop to have it pulled out.
The shop i sent it to is going to get everything straight and put it into primer to be ready for paint. Slow payments will be the name of the game.

I will then assemble everything i can to make sure its all good and fits perfectly. Then hit the paint booth.

progress will be almost at a standstill due legal family issues, but it will migrate forward when pennies are found.
 
So i have been over to check on the Dart a few times and i keep forgetting my camera.

However he has the Dart straight as an arrow and looking amazing ... almost like a different car.

So i decided to tinker on the six pack carbs. Ran into a few issues so i had to change the float bowls on all three carbs :( The sight plugs are a bit higher but i am hoping i can set them right when i go to use them. I cleaned polished and made them look alot nicer. Straightened out all the linkage and cleaned up the manifold and painted as well.

from this
189839_10150115142791986_502621985_6901441_2627731_n.jpg

200213_10150115142706986_502621985_6901437_7849796_n.jpg


to this
2012-03-29142350.jpg

2012-03-29142404.jpg

2012-03-29142437.jpg


Now i just hope they work as intended when i install them .... *crosses fingers and toes*
 
-
Back
Top