Got one side of my mini tubb finished!

-

mattsmopars

Well-Known Member
Joined
May 24, 2007
Messages
1,122
Reaction score
24
Location
Cookeville,TN
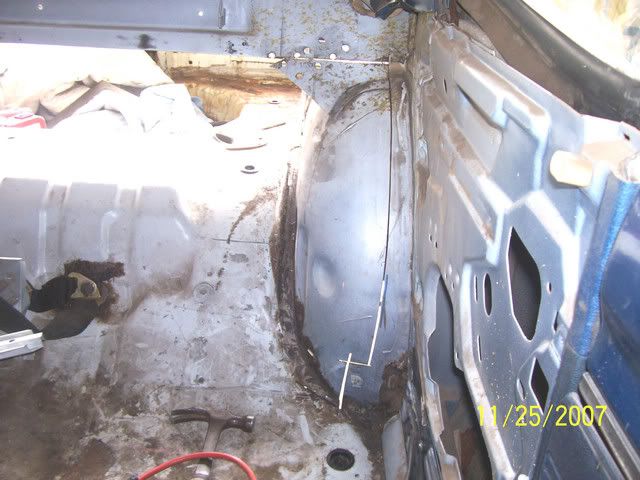
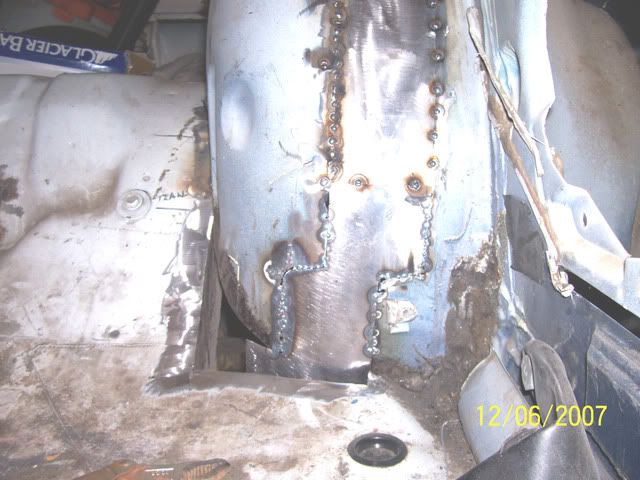
Well, i have been working on my 67 dart alot lately, besides going to the mopar nationals. I got one side of my mini tubb welded in , all i have left is a little filler to make it look stock from the inside of the trunk. Alot of time , make small filler pieces and welding, but definatly worth it. Heres afew pictures. I have the spring relocation finished, so now i like the other side , and i can start the frame connectors.
Matt

IMG_0149-1 bbd.jpg


IMG_0143-1 bbd.jpg


IMG_0150-1 bbd.jpg


IMG_0152-1 bbd.jpg


IMG_0153-1 bbd.jpg
 
Great job!! It looks like you enjoy your work and do it well.
gongrat's matt :cheers:
 
Thanks for the replies fellows. I got the other side out tonight , if i did not have to cut the grass tomorrow , I might get it part of the way back in. Oh well maybe in a few days!
 
Looks good Matt! I couldn't do the project myself so I have a guy that's mini tubbing and moving my springs in on my 67. He should be done in the next week or so.

What size wheel and tire are you planning on running back there? I would like to run a 325/50R15 on a 10 inch wheel.
 
Great looking job Matt. I'm still swaying in the wind while sitting on the fence about mini tubbing mine. It looks like a LOT of hours of welding and finishing work is involved.
A couple of questions, if you don't mind.

First, how did you handle the seat belt mount that's attached to the floor right at the front of the tub? Mine would have to be removed and re-mounted if I do the mini tub.

Second, have you tried installing your rear seat? does the mini tub push the well in far enough to interfere with rear seat fitment?

Thanks.
 
Get the other side done otherwise it will only be good for the circle track.

Lol, Jim
 
Nice work Matt!

To answer the seat belt mount question. Make a step cut.
Picture011.jpg

Picture041.jpg


I have a powerpoint presentation for doing a minitub job that was done by someone else. If you are interested in it, shoot me an e-mail address.

Rob
 
Thanks Rob, that's a good idea and will work with that setup. However, mine are actually mounted to the floor right at the front of where you would cut the floor to move it back to the framerail.
I'm definitely interested in the PP presentation, thanks.

Email: [email protected]
 
I cut the floor out in a square and this will include the seat belt anchor point. I the got the tub installed again, made my patchs where the floor and tub meet. Cut off the seat belt anchor point and install it ot the new path i made.AS for the rear seat i have not had it back in , but i don't think this will interfer with it.It is still behind the cross bracing. As rob said you can stager your cut around that point. Rob has a powerpoint that is a great tool he sent to me.The first three pictures are of the other side that i cutt out last night. It shows how i cut it and the section that you take out.Once the tub is back in, you will have a piece front and rear that you have to fab up to cover the holes in the floor.The next three picture are the patches i made to make the floor mate up to the tub. The front picture shows how i put the seat belt mount point back in the piece that i made. The other picture is the piece that i made to extend the rear of the tub , as it needs to be extended about 1.5''. I am planning on running a 325/50/15 mickey thompson, I think that b569rr or Tom on bigblockdart is to thank for that. I want to run 15x10 wheels. Hope this helps a answer a few questions.
Matt

IMG_0158.jpg


IMG_0154.jpg


IMG_0160.jpg


IMG_0149.jpg


IMG_0153.jpg


IMG_0142.jpg
 
Thanks Rob, that's a good idea and will work with that setup. However, mine are actually mounted to the floor right at the front of where you would cut the floor to move it back to the framerail.
I'm definitely interested in the PP presentation, thanks.

Email: [email protected]

Tried sending it and your server kicked it back. Something about max limit in the mailbox.
 
Thanks for the explanation and photos Matt. Excellent work and some VERY nice welds. :)

ROb: Damned junk mail had my mail box full. I just emptied it out, so if you wouldn't mind, try sending that PPP again. Thanks.
 
Well i have not had that much time to work on the mini tub on my 67 dart as of late. This is the latest progress on the right side wheel house. I did get the band welded in tonight ,but i don't have any pictures , but this will give you the idea.Hopefully i will get this finished up, or at least all of the welding finished this week.
Matt

IMG_0193.jpg


IMG_0194.jpg


IMG_0195.jpg


IMG_0196.jpg


IMG_0197.jpg


IMG_0198.jpg


IMG_0199.jpg


IMG_0200.jpg
 
Nice work!

Brings back memories, but we cheated with my car.

Cut out the entire spare tire well, built a custom cradle for a 20 gallon fuel cell.
It made the job a whole lot easier with the spare tire well removed.

cuda22-1.jpg


The body shop was supposed to fill in the rough spots and seam seal (before) they painted the car.
They said to take it back to them to get it smoothed in right, and touched up again, but in all honesty, I'm just gonna line the trunk anyways so you won't see any of that.

DSCN3753.jpg


Also massaged the fore portion of the wheel opening 1.5 inches forward for tire clearance.
 
Well i got the other side finished today. It should be basically all the welding.I will go back with some duraglass and filler to smooth it all out , but its mostly done.Here are some photos of the work today.I will probable cut alittle of the outer wheelhouse and quater lip off as well.

IMG_0204.jpg


IMG_0205.jpg


IMG_0206.jpg


IMG_0203.jpg


IMG_0207.jpg


IMG_0208.jpg
 
nice work . . .

x2

I wish my Demon was done like that. Instead, the inner and outter housings were both removed and large tubs were put in. The trunk hinges were removed as well. The trunk lid is now pin-on. It's steel not glass. Even with most of the inner bracing removed, taking off the trunk lid is a pain when doing it by myself. :banghead:
 
-
Back
Top