Voltage Regulator Question

-

ekb16hatch

Newbie
Joined
Oct 19, 2011
Messages
38
Reaction score
0
Location
Indianapolis, Indiana
Can I upgrade the old mechanical voltage regulator to a new solid state regulator without upgrading to a 70' and later alternator? I've searched and haven't found a clear answer to this question. Any help or input would be greatly appreciated. Thanks
 
Just about all replacement regulators you are going to come across are actually electronic. To find out, simply look at the bottom. An old mechanical has two large resistors underneath. An electronic does not. Also, if you EVER replace your old alternator, make CERTAIN you get a later square back. You can ground one field and continue using your old style regulator.

This is an original type mechanical

440-1621-large.jpg


Below is a "parts store" electronic replacement

5310small.jpg


The alleged "better quality" is NAPA VR-1001 or Standard brand VR-128

41-aG0961CL._SY300_.jpg
 
Thank you, I bought a regulator that looks just like the one in the picture. Can I splice the two wires off of my old regulator (FLD and IGN) together and connect it to the center prong on the new regulator and run a new wire while still keeping my pre-70' alternator...or how would that work?
c8313.jpg
 
No. That regulator requires a 70 / later alternator properly called "isolated field" many times improperly called "dual field" because it has two insulated field connections
 
Great thank you I appreciate it. Should the new voltage regulator help with flickering/dim headlights and all that? Everything is pretty much stock on my car except my MSD ignition system.
 
Buy a length of blue wire, splice it into the blue wire at your original regulator, and route it along with the current harness going to the newer alternator. The female terminal that you will cut off of the green wire at the original regulator is same as the one you will need at alternator end of the new blue wire.
I suggest you buy the correct connector for that new regulator also.
Hope this helps
 
As mentioned, you can buy an electronic regulator that works with your existing round-back alternator. Check rockauto, they list an $11 one that is in a chrome flat pack, but with connectors that match your old one, so a 5 min swap. Unlike 67Dart273, I have seen many new Vreg's in the old black box that are the old mechanical relay type (resistors underneath). At least they look like that in the photos.

Re flickering lights, it probably won't help much. If the terminals weren't corroded or melted, your lights should run fine off the battery alone. Inspect your bulkhead connector and headlight switch connector and clean the terminals. That is equivalent to shaking a flashlight to make it work better (ever do that?), for the many readers who are electronically challenged.

One approach is to add under-hood relays for the headlights. Then the switch simply actuates a relay, which feeds direct battery voltage to the lights. I installed a complete relay/fuse box in my cars for all such switching, as have others.
 
I think I am going to upgrade to the later square back alternator. I have already purchased the alternator, voltage regulator and connector. The problem I am having is when I try to bolt on the new alternator it seems that my old brackets arent correct. The back of the alternator is practically touching my aluminum head and the bottom adjustment bracket doesnt line up with the bolt hole in the new alternator. Any guidance or help would be greatly appreciated. Thanks!
 
Next you will be changing the motor, where does it end? Just get the correct VR for pre-70 as 2 options were shown to you in post #2 by 67Dart273....
 
Need photos. If the alternator has 2 pulley grooves, I recall the belt normally runs in the inner-most groove, but there were many pulley-belt variations, depending on AC, pwr steering, engine, etc and some had 2 belts on the alternator. You didn't bother to tell us anything about your car, like the year or even the engine! Easy to move the alternator outward with spacer collars. I like the purty chrome ones at Ace Hardware.
 
The NAPA unit works great and cheaper than the mopar unit. It will be listed in the marine section of chrysler parts at Napa if the counter guy looks at you sideways when you ask for it.
 
Well I purchased the new style alternator and VR several months ago and never got around to putting it on. Haha I know it's always something. I have a 67 dodge dart, 318 bored 60 over with a 390 stroker kit, no power steering and no A/C, complete MSD electronic ignition system. I'll have to post pictures later. The new alternator does have two pulley groves though.
 
Great thank you I appreciate it. Should the new voltage regulator help with flickering/dim headlights and all that? Everything is pretty much stock on my car except my MSD ignition system.
Maybe not. The battery in the trunk presents a whole new set of possible issues. What size of + wire did you use to run to the battery in the trunk? And how did you run the battery - to the car? Bolted to the trunk floor? Is there an inline battery switch?

The battery serves a purpose beyond energy storage as what is called a 'ballast' for the alternator and the electrical system. This means that if for any reason the alternator tries to put put too much voltage for a moment, then battery clamps down that 'surge' and keeps the system voltage stabilized. If the bettery is remotely located, and the wire guage is too small and/or the + and - connections are not very good and very low resistance, then the ballast effect of the battery is limited or lost and there can be significant voltage fluctuations in the electrical system and possible short lives for the alternator. Flickering lights can be due to this.

Rear mounted batteries are great for weight transfer and better wieght balance in some racing apps, but for street cars, it is something that has to be done well or you create new problems.
 
Thank you for that nm9stheham...I have the battery - terminal grounded to the trunk floor and no I do not have an inline battery switch. The guy I purchased the car off of prior to all the work I had done on the car already had the battery in the trunk. He did however use 4g wire from the positive terminal of the battery connecting directly to the starter. I have some extra welding cable in my garage...I think its 1/0 gauge. I'll run the welding cable from the battery to the starter and see if I notice a difference before I start changing everything thing else and let you guys know what I come up with.
 
Here are the pictures that I said I would add...
 

Attachments

  • photo 1[6].JPG
    115.5 KB · Views: 256
  • photo 2[6].JPG
    105.7 KB · Views: 264
  • photo 3[3].JPG
    108.1 KB · Views: 273
  • photo 4[6].JPG
    119.4 KB · Views: 266
IMO, 4G is decent in the engine compartment but not adequate for a long run to the trunk. I have always used 0 or 00 welding cable. Also, the ground back through the chassis needs to be done with large gage cables, good quality crimped or screw clamped lugs at all connections, bare clean metal, and some sort No-Ox or similar conductive paste. Ground 'noise' and ground transients can realy mess things up. I would just make sure this is all good.
 
If it really is 4 that is too small

You need to run some tests, I've posted this numerous times.

1.....Grounding. The battery neg. post, the car (in this case unibody) and the engine block and alternator all need to be as close as the exact same voltage as possible

Here's how you check. Make this test with engine running, battery up and normalized, and engine warm. This is because the voltage regulator has temperature compensation. Make this test first with all accessories off, and again with lights, heater, whatever loads you and put on turned on. In your case, you will have to make a long extension for your meter

Clamp one probe of your multimeter to the battery NEG clamp. It would be better if you could have a helper stab the probe right into the top of the post itself. With the meter set on low DC volts, stab the other probe into the VR mounting flange. Be sure to stab through any rust, chrome, paint.

You are hoping for a very low reading, the lower the better, zero is perfect. More than about .3v (three tenths of a volt) means you have a ground problem and need to do some work.

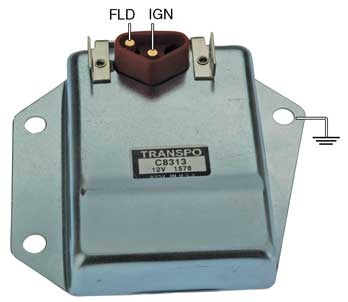
2....Next check voltage drop in the hot side of the harness. To do this, hook one probe of your meter to the POS post of the battery. Again a helper stabbing the probe into the POS post would be best, but as close to the post as you can get is OK. With the engine NOT running, but with the key in the RUN position, hook the other lead to as close as you can get to the VR "ign" connection, which is the "IGN" run wire in the engine bay. This is probably going to be either the high side of the ballast, or the blue field wire on the alternator. Once again, you are hoping for a very low reading

With "stock" wiring, you would have going through the following circuit path............

Battery.......starter relay......fuse link.......through the bulkhead connector........ammeter connections........through the ammeter............. welded harness splice..........ignition switch connector........through the switch........back out the switch connector.........back out the bulkhead.......and to the switched ignition loads under the hood..........to the VR

Lots of stuff there, but the biggest suspects are the bulkhead connector, the switch connector and the switch itself.

ANY added V drop will ADD to charging voltage. This means, example, that if you have a V reg that is trying to regulate at 14.2, and you have .2 drop in the ground and another .4 drop in the ignition harness, you now have 14.2 + .2 + .4 so now the battery will charge at 14.8V instead of 14.2

3....It's also very very important with a trunk mount battery to pay attention to GROUNDING in the system, because with a front mount battery, the heavy starter current is almost always grounded right to the block. With a trunk mount battery grounded to the body, you must use large enough cables, and get the engine / trans combo grounded well enough that the thing will crank.

You can measure THAT too!!!!

Clip your meter to the battery neg post, and to the engine block and crank the engine long enough for the meter to settle down, say, 4 seconds, and read the meter during cranking. How much voltage you read? That is the voltage drop you have through all the connections, cables, and the body, to the engine block.

4.....Same deal on the "hot" side

Carefully clip your meter to the "big" battery stud on the starter, or maybe the alternator stud, and run you meter extension probe back to the battery "hot" post. Again crank the engine, and read the meter while cranking. This is the drop across your no4 cable.

Do this with engine warm, as it takes more "juice" to do so, and you get a better picture of what is required
 
... it seems that my old brackets arent correct. The back of the alternator is practically touching my aluminum head and the bottom adjustment bracket doesnt line up with the bolt hole in the new alternator. ...
Looks basically OK in the photo. If it doesn't touch the head, no problem, as long as the output stud and terminals are not in danger of shorting out. Hard to tell, but looks like the belt isn't quite perpendicular to the crankshaft axis, as if the alternator should move forward some. You can easily do that with spacers. Search for photos here. You can get spacers even at Ace. V-belt pulleys can be up to 1/8" off alignment and still work fine, maybe even more on a long span like yours.

I lost you on the bottom tension bolt not aligning with the adjustment arm. It seems you don't know that the adjustment arm should pivot on the water pump bolt. You loosen the pivot when replacing the alternator and tighten it last after the tension is set. If the alternator hole falls beyond the adjustment slot, just get a shorter belt. They come in 2" increments of circumference. You can download a Gates V-belt catalog free. There are 3 common belt widths.
 
The pictures that I posted are of my current set up. What I was talking about as far as the alternator brackets go is when I try and install the new "square back" style alternator using the same brackets that are in the pictures I posted. I wasnt sure if I had the correct alternator brackets for the upgrade.
 
-
Back
Top