Here is the processs that I have been using over the years and it works great, Borrowed from Totally Auto Inc, I know it is long but it works:
Whether you've decided on factory-correct, over-restored or full-blown custom, these prep and paint tips will help. Heck, the engine doesn't know what color it's painted, as long as the paint sticks. As with any successful paint work, it's all in the prep.
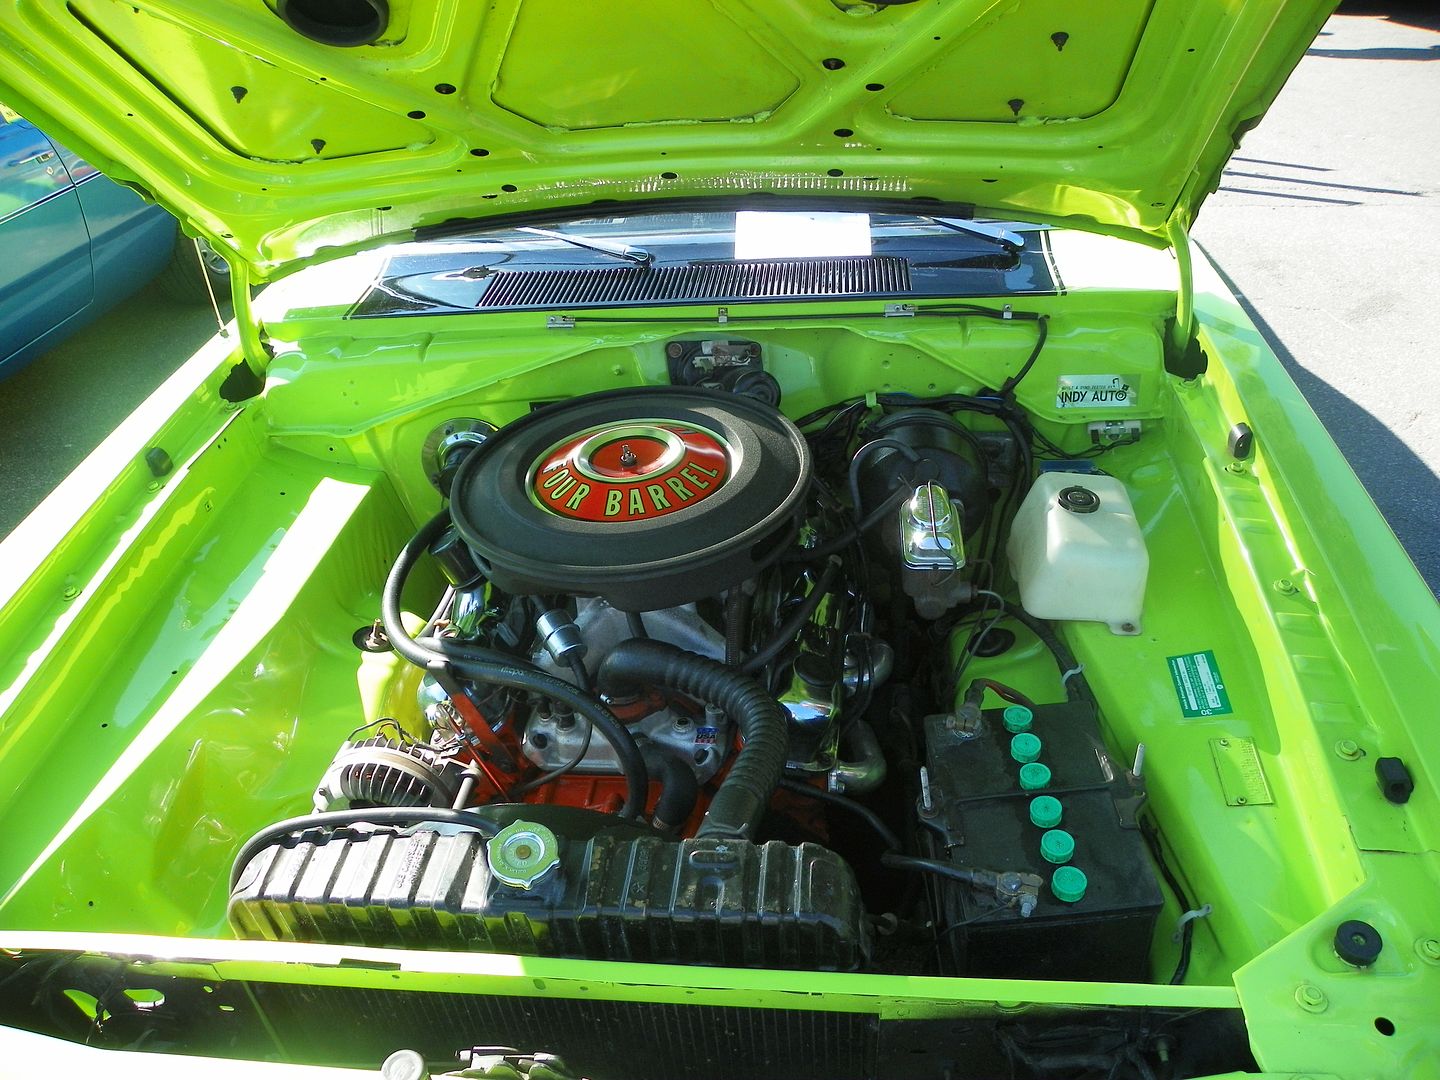
Much of the heavy metal, like the block, heads, intake, etc., should have been at least hot tanked and degreased; brackets and such can be sandblasted or glass-beaded. Much of the hardware is still available new, and what isn't should at least be glass-beaded. The surface of sheetmetal parts like valve covers, oil pans and thin brackets can be damaged by sand or glass, creating a pebble finish. These parts should be stripped using a chemical aircraft/automotive stripper following manufacturer's recommendations. For small parts we use Klean-Strips spray gun cleaner. Its purpose is to remove hardened paint from spray equipment, but its 5-gallon pail and handy parts basket make it perfect for stripping small parts. Not only does the paint literally fall off quickly, but the original surface finish is left clean and undisturbed. Be careful when using this stripper; it contains some nasty stuff. Potassium hydroxide and methylene chloride are just two of the active ingredients that aren't real nice to humans. Always wear rubber gloves, safety glasses and an apron while using this product (preferably outdoors). Of course, you should always work according to the instructions on the can. Be careful with the parts as well. Rubber, plastics or synthetics will deteriorate if they even get near this stuff. It may also darken materials with a high zinc content, but this isn't detrimental to the part. Cleaning times vary with the condition of the part, the ambient temperature and the age of the product, but one thing is for sure: The parts go in painted and grimy and come out bare and natural. Regardless of how you accomplish it, all parts that are to be painted should be clean, oil-free and down to bare metal, and that metal needs to be etched and conditioned. At Totally Auto we use PPG's DX 579 metal cleaner and DX 520 SG metal conditioner. DX 579 is a non-flammable, phosphoric acid-based liquid cleaner. It is used to deep clean and etch a metal surface prior to paint, or to prepare the surface for a subsequent chemical coating. DX 520SG is one such chemical coating. DX 520 is also a phosphoric acid-based chemical that will produce a zinc phosphate coating on steel and galvanized surfaces. It contains a small amount of detergent, which aids in the removal of light soil and oils and promotes the formation of a uniform zinc phosphate coating, which has an excellent resistance to corrosion. These products are for professional use but are available at your local paint supply house. When all the parts are cleaned, stripped, pampered, etched and conditioned, they can be installed on the engine. Be very careful to keep your hands, tools, and parts clean and oil-free during the pre-paint assembly process. Any oil could contaminate the job, and you'd have to start all over. Working clean will also prevent any debris from getting into your fresh engine. So with the engine clean, the metal prepped and the parts that you want to paint installed, you'd think you were ready to paint but you're not. After assembly, we squirt the entire mass down with PPG's No. 220 fast-evaporating wax and grease remover. Using shop air and a blow tip accelerates the evaporation, which vaporizes any remaining contaminates such as oil. But you're still not ready for paint.
Now the engine is ready to be masked. We could write an entire book on what the factory masked, what was painted, what was oversprayed and what was not. These decisions are up to you and your research. The exhaust ports, intake inlet, fuel pump boss, radiator and heater hose bungs, distributor hole and more were plugged or masked with regular 3M masking tape. Next we wash and scuff the engine several times with PPG's No. 330 cleaner and an abrasive scuff pad to remove any oils that could have been left from our hands as we masked the engine. We wash it again for general principle and then we are ready to paint.
We'll assume you already know the risks of painting at home. It requires adequate ventilation; it's bad for your health and bad for your neighbors; it makes Mother Nature mad and all that stuff, but you're probably going to do it anyway. Our polyurethane acrylic enamel (available in an easy to use spray can) resists chemical abrasion and the elements. It also offers excellent color, gloss and depth retention, plus, if applied properly, it'll handle the heat from most any street engine.
The trick to painting an engine is to keep the material thickness (mils) to a minimum. Each painter has his own tricks that work, and I'm going to tell you mine. First, we use the acrylic enamel , which does not need to be clearcoated. This eliminates one layer that can be considered a heat barrier.
Second, we don't use any primer or sealer. No primer? You read it right. Remember, we want to keep the paint as thin and layer-free as possible. Trust me, though, when applied properly, the paint really bites. I've talked to many respected folks at PPG, including a chemist, regarding this matter and why it works. Everyone agreed that this is a great technique, but no one would use the word guarantee. Suffice to say, there are a ton of engines painted in this manner, and even after severe use, the paint's still sticking.
Third is a trick that can come only from experience with a spray gun: laying on only two wet coats while attaining full coverage. If you lay the paint on thick it's sure to crack; too thin and rust will form. Suggested film build is 1.2 mils per coat. I feel that 2.5 mils is optimum for an engine. Hence, the two wet coats.
The last tip pertains to gloss. Stock engines simply weren't very shiny. If that's the look you're after, you can simply dry spray the paint. If you are like us and want to see yourself in the oil pan, it can be done. Lay the paint on wet and practice, practice, practice!
ENGINE PAINT APPLICATION GUIDE
EARLY ORANGE
66-67 HEMI
MAX WEDGE
HP ORANGE
70 -71 340
70-71 383 (W/Holley)
69 383 (W/ Carter)
69-71 HEMI,
69-71 440 HP
ENGINE TURQUOISE
68-69 383 (W/Holley)
65-68 383 (W/Carter)
68 440-4 HP
69 440 LP
MOPAR BLUE
69 340
72-74 340-360
340 built after 4/71
70-74 383 (W/Carter)
(except some 70-71 W/air)
70-74 440 LP
72-74 440 (W/Carter)
ENGINE RED
65-68 273/340, & 318
We have done our best to reasearch this list, some variants may be possible.


")