1964 1/2 valiant build thread.

-
well guys. l been slowly plugging away. got some more parts in and some progress made. here are some pics.

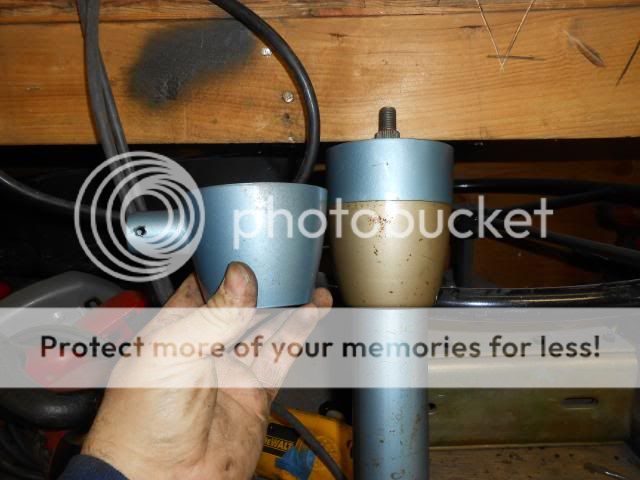
i got the floor shift collar for my steering column installed. now gotta take it all back down and paint it.


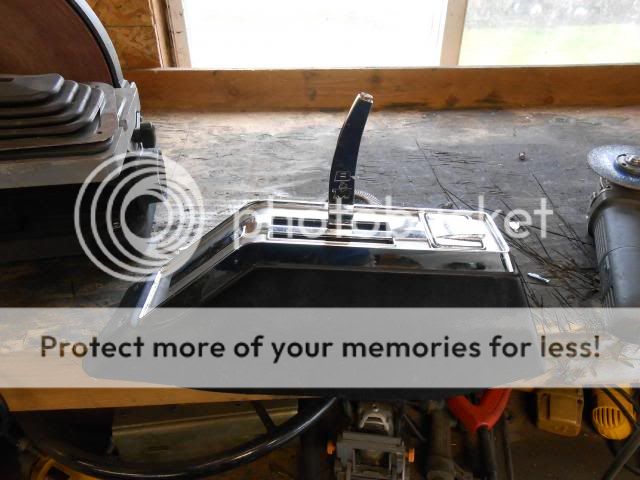
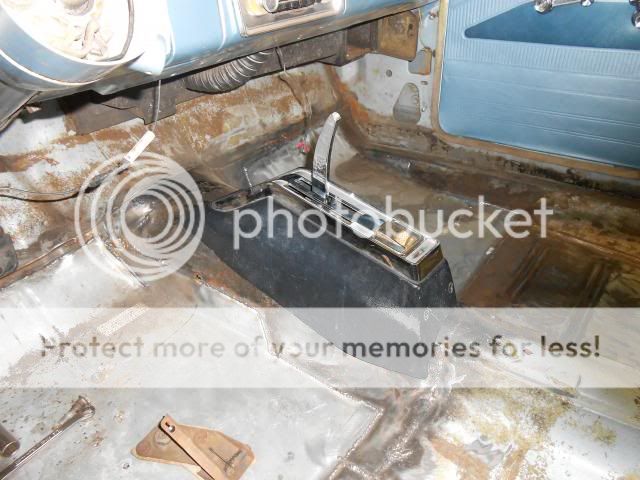
i received the floor shift console that i purchased here. getting ready to mock it up with the b & m shifter. I will be taking the shifter apart and building a new shift arm.


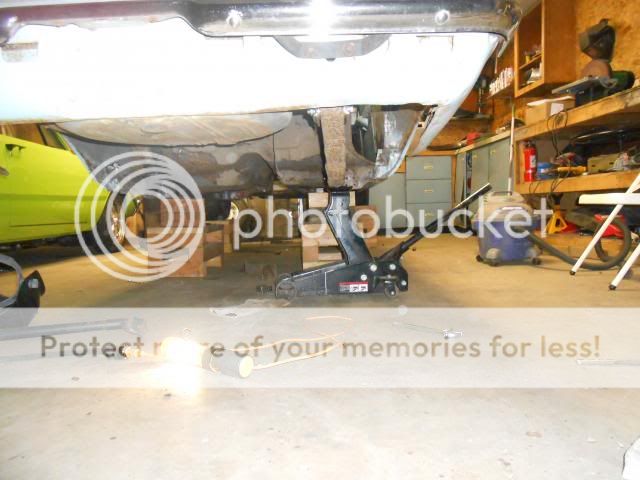
then i got the passenger side slider all mounted up.


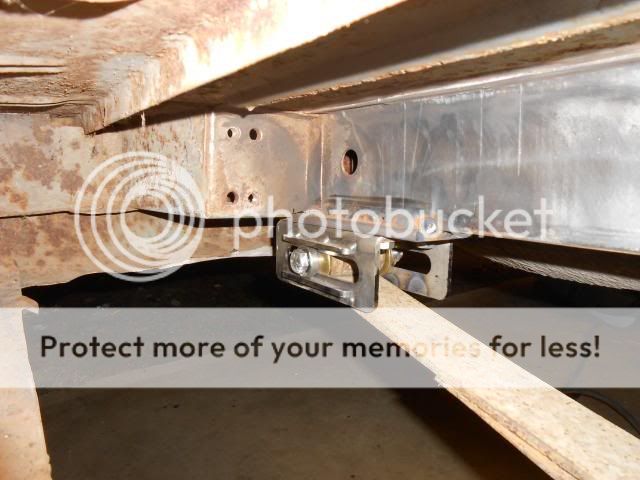
then i scored a set of used super stock springs. the already have the solid bushings pressed into the front spring eye.


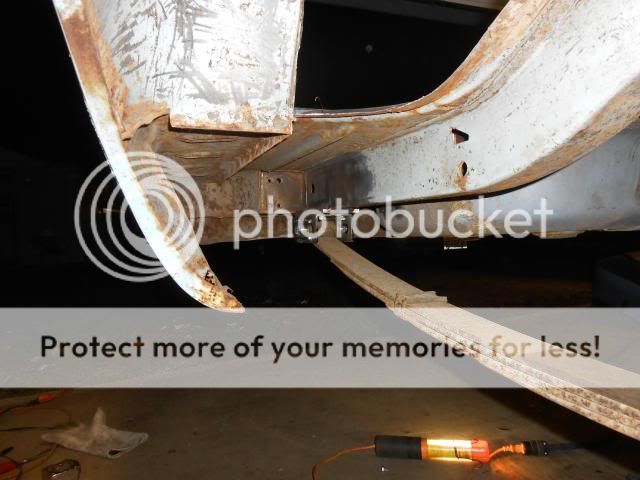
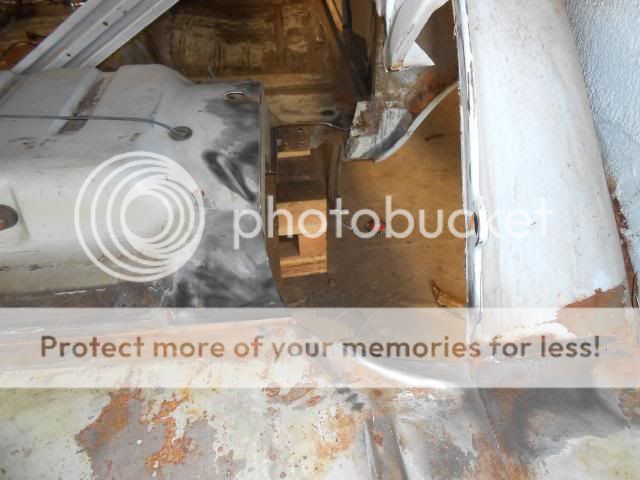
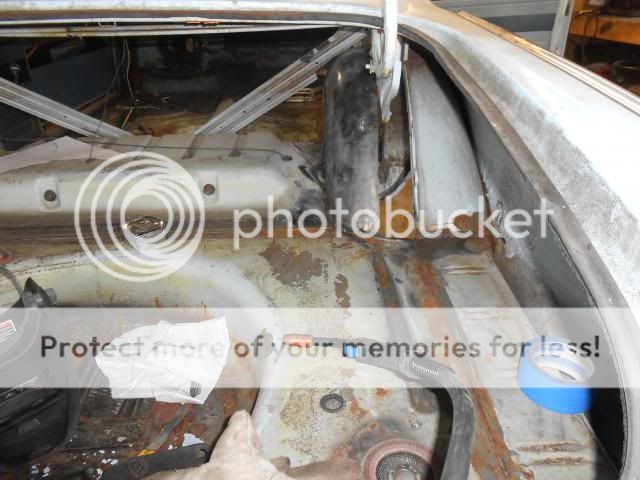
then i got back to the part i have been procrastinating on. the mini tub. i got the floor cut for the inner portion of the tub and got the inner tub tacked into place. just have to put the center strip in and get it finish welded up. then i will seam seal it all and get her buttoned back up.


I have front seats if you want buckets you neeed to fins covers any 1 I have 6 of them black and red I have your carpet that car is SAWEEET
 
I have front seats if you want buckets you neeed to fins covers any 1 I have 6 of them black and red I have your carpet that car is SAWEEET

the car came with a bench seat. the seats have bee recovered in the past and are pretty decent still. going to be running the bench seat. I am interested in the carpet though. is it new or used? what color?
 
Damn dude-you are makin moves with the quickness on this thing. I can't wait to see the finished product.
 
Damn dude-you are makin moves with the quickness on this thing. I can't wait to see the finished product.

I havn't touched it in a week now. i been swamped with working overtime and this last weekend i took the girlfriend on a small weekend vacation. next weekend the progress will continue.
 
Nice work,gun. If I had started with mine as a roller,this is how I would have done mine.
 
Nice work,gun. If I had started with mine as a roller,this is how I would have done mine.

yeah. i was torn with this one. its is a very limited budget build but i figured frame ties were a must and only cost a few bucks. then i had to swap the rear to handle the 360. then if i had to buy wheels and tires anyways i might as well go ahead and go straight to 10" rims and get it over with. so then i moved the springs in and mini tubbed. the good news is that after the mini tub its all bolt on **** and should go pretty fast. gonna rebuild the entire front end also.
 
Well, I just went through the whole thread and now I'm tired. :D

Nice work man!

thanks! its funny how i got bored as soon as i got my dart done. I drove the piss out of it all summer and then i had no more projects. I had to start another car to keep myself from going stir crazy. lol
 
Subscribed. Thinking about mini-tubing and relocating the springs on the Swinger soon and I appreciate the pictures.

Keep up the good work!

-Mike
 
Subscribed. Thinking about mini-tubing and relocating the springs on the Swinger soon and I appreciate the pictures.

Keep up the good work!

-Mike


DO IT! best thing you can do for these cars. sure makes em look tough with big ol tires tucked up in there.
 
I just bought some 17"x 8" Bullitt Wheels for the car, and a B-body 8-3/4" rear. Should all go in nicely. I just need the relocation kit from RMS, a center section, and some brakes lol.
 
How hard is it to mini tub? Always seemed intumidating to me.

I don't know. YoungGun made it look pretty easy lol. I'm sure my attitude will change after I cut out the first wheel tub and realize I have no idea what I'm doing.

In all honesty though, I think you just need to lay out the procedure and follow the steps.

1- Remove back seat and interior panels, along with the rear section of carpeting
2- Empty the trunk
3- Jack up the rear end, secure it on either blocks like YoungGun did or use like 27 jackstands.
4- Remove the rear tires and cover all of the brake hardware.
5- Ensure that there are no fuel or brake lines near where you will be cutting.
6- Relieve tension on the trunk torsion spring assembly (not exactly sure how this is done, but I'll figure it out.
7- Cut off the bottom of the trunk torsion spring bracket that attaches to the wheel tub (or just drill out the spot welds).
8- First cut out the inner section of the wheel tub, running a straight line from front to back, along the flat spot just over the inner-top crest of the wheel tub, where it will be easiest to add a section of straight, flat sheet metal later on.
9- Then wire-wheel out the seam sealer and cut the bottom seam of the of the wheel tub where it attaches to the trunk/passenger floor.
10- Re-position the wheel tub 2-3" inward, parallel to the edge of the frame rail, ensuring that the trunk torsion spring assembly can still be attached properly.
11- Tack the wheel tub in its new position.
12- Cut a 2-3" section of flat sheet metal to cover the gap betwene the re-positioned inner wheel tub section and remaining section of outer wheel tub.
13- Tack weld the added section of wheel tub in and ensure that everything lines up.
14- Finish weld and seam seal the wheel tub to ensure no air infiltration and no areas for water to splash in.
15- Undercoat the exterior of the added section of wheel tub above the tires (or at least paint it to stand up to the exterior elements).
16- Prime/Paint the wheel tubs inside the trunk/passenger area.

Repeat for other side.

I am probably missing something (and please feel free to tell me if I am), but that is my plan to follow if I end up needing the extra tire space with my new wheels/tires.

-Mike
 
Hey Gun,

Whatcha planning on using for the rear end? I have both A-bdy and B-bdy rears in my stash but I'm leaning very heavily toward the Dakota 8-1/4" for my '64 GT. Main reason is the stand-alone rear wheel anti-lock brake system (RWAL). Look for the article in Mopar Action by Ehrenberg a few issues back.

The earliest ones had 5 lug flanges (up to '91?). Up until '96 they were 27 spline and if posi used Auburn series 3 carriers. Starting in '97 they became 29 spline and posi was Trac Loc series 3 carriers. They'll easily hold way more power than your 5.9 will put to it. I seem to understand there are people running in the 10's on slicks without breakage.

I already have a 27 spline 3.55 SG unit. My plan is to shorten it and eliminate the C-clips by using 8-3/4" / Dana housing ends. I don't know if I'll need custom axles, or if the ones from a Dana or 9-1/4" have enough meat on them to be cut and resplined.

Just wish my Dart was anywhere near as clean as your starting point, but thats what sandblasting and welding were invented for. Subscribed.

Mike in FL
 
I don't know. YoungGun made it look pretty easy lol. I'm sure my attitude will change after I cut out the first wheel tub and realize I have no idea what I'm doing.

In all honesty though, I think you just need to lay out the procedure and follow the steps.

1- Remove back seat and interior panels, along with the rear section of carpeting
2- Empty the trunk
3- Jack up the rear end, secure it on either blocks like YoungGun did or use like 27 jackstands.
4- Remove the rear tires and cover all of the brake hardware.
5- Ensure that there are no fuel or brake lines near where you will be cutting.
6- Relieve tension on the trunk torsion spring assembly (not exactly sure how this is done, but I'll figure it out.
7- Cut off the bottom of the trunk torsion spring bracket that attaches to the wheel tub (or just drill out the spot welds).
8- First cut out the inner section of the wheel tub, running a straight line from front to back, along the flat spot just over the inner-top crest of the wheel tub, where it will be easiest to add a section of straight, flat sheet metal later on.
9- Then wire-wheel out the seam sealer and cut the bottom seam of the of the wheel tub where it attaches to the trunk/passenger floor.
10- Re-position the wheel tub 2-3" inward, parallel to the edge of the frame rail, ensuring that the trunk torsion spring assembly can still be attached properly.
11- Tack the wheel tub in its new position.
12- Cut a 2-3" section of flat sheet metal to cover the gap betwene the re-positioned inner wheel tub section and remaining section of outer wheel tub.
13- Tack weld the added section of wheel tub in and ensure that everything lines up.
14- Finish weld and seam seal the wheel tub to ensure no air infiltration and no areas for water to splash in.
15- Undercoat the exterior of the added section of wheel tub above the tires (or at least paint it to stand up to the exterior elements).
16- Prime/Paint the wheel tubs inside the trunk/passenger area.

Repeat for other side.

I am probably missing something (and please feel free to tell me if I am), but that is my plan to follow if I end up needing the extra tire space with my new wheels/tires.

-Mike

pretty good break down. this is the 3rd car I have done the mini tub on and its more a pain in the *** then it is hard. its a lot of scraping and cleaning. the actual fab work is pretty basic. I have some more pics of today's progress to give you some more visual aids.
 
Hey Gun,

Whatcha planning on using for the rear end? I have both A-bdy and B-bdy rears in my stash but I'm leaning very heavily toward the Dakota 8-1/4" for my '64 GT. Main reason is the stand-alone rear wheel anti-lock brake system (RWAL). Look for the article in Mopar Action by Ehrenberg a few issues back.

The earliest ones had 5 lug flanges (up to '91?). Up until '96 they were 27 spline and if posi used Auburn series 3 carriers. Starting in '97 they became 29 spline and posi was Trac Loc series 3 carriers. They'll easily hold way more power than your 5.9 will put to it. I seem to understand there are people running in the 10's on slicks without breakage.

I already have a 27 spline 3.55 SG unit. My plan is to shorten it and eliminate the C-clips by using 8-3/4" / Dana housing ends. I don't know if I'll need custom axles, or if the ones from a Dana or 9-1/4" have enough meat on them to be cut and resplined.

Just wish my Dart was anywhere near as clean as your starting point, but thats what sandblasting and welding were invented for. Subscribed.

Mike in FL


I already have an a-body 8 3\4 rear ready to go for this car. I have a set of 3.31 rear gears in an open diff. I have brand new brakes and everything. I had a set of moser axels made up. they are the standard a-body drum brake axels so they will take the 1.75" rear shoes and drums but I had the big bolt pattern drilled into the axel flanges and all I have to do is redrill the drums for the big bolt swap.
 
ok guys I got off my *** and got some work done today. got the passenger side mini tub nearly done. I got it all fitted and tacked into place. started to finish weld it all and got some done then called it a day. here are some pics.


I have been working tons of overtime at work to fund this project and the parts pile keeps growing. just got my new roller cam shaft for abodybomber. its a crower cam with .497 lift and .230ish duration. and also got my knock off performer air gap intake.


I also got the automatic brake pedal assembly needed to swap out the clutch pedal in the car. I just got a new set of dimple dies and was dying to try them on something so here was the test mule.


:happy1:

Awesome-I'm lovin' this build. Pretty sure I'll be taking many cues from your pictures here. Especially the tubs, subs, spring relocation and sliders. Like you said-meaty tires stuffed in the wells make for a tough look.
 
-
Back
Top