1970 Swinger 340 Hemi Orange 4 speed

-
Hemiorangeswinger, hats off to you. Good work and I look forward to watching the Youtube segments as well. I think it is great that you are using your skills to save that H code car. There were something like 13000 of them made in 1970. it sounds like a lot but I think ( just guessing) that half of them are left and out of that half, probably half need restored. I look forward to following your build as I am also putting mine back together. I didn't have as much metal work as you though. But my car is basically at the same stage, in epoxy primer ready for prep and paint. Keep up the good work, there are many of us cheering you on!!

Thanks for the compliment! I'm glad you're enjoying the thread/vids. Yeah I don't think too many 1970 340 Darts are around anymore.. I'm lucky if I see one or two at the car shows around here. I was looking for a Hemi Orange 340 Dart for years before I came across this one and I'm glad I was patient because this one has all the options I wanted, which probably helps a lot with the motivation on restoring it since it's needed so much to bring back from the dead!

Mine is an early production car (sept 69) and I find it interesting that the early production ones never had the go wing provisions underneith the trunk lid. You have any pics of yours?

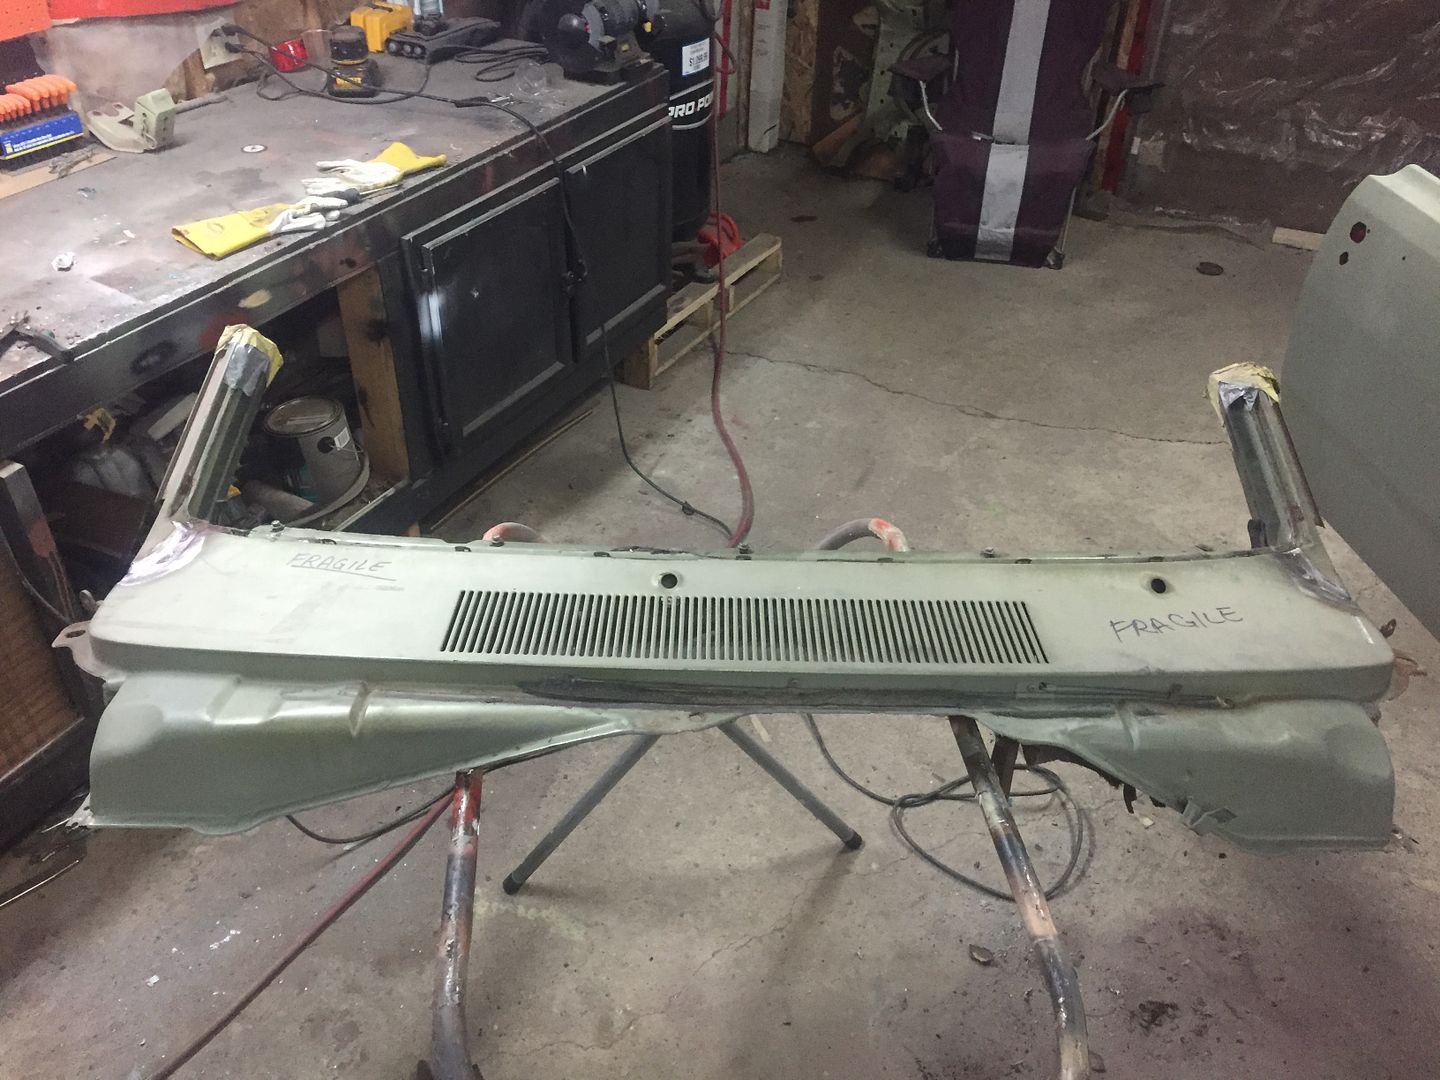
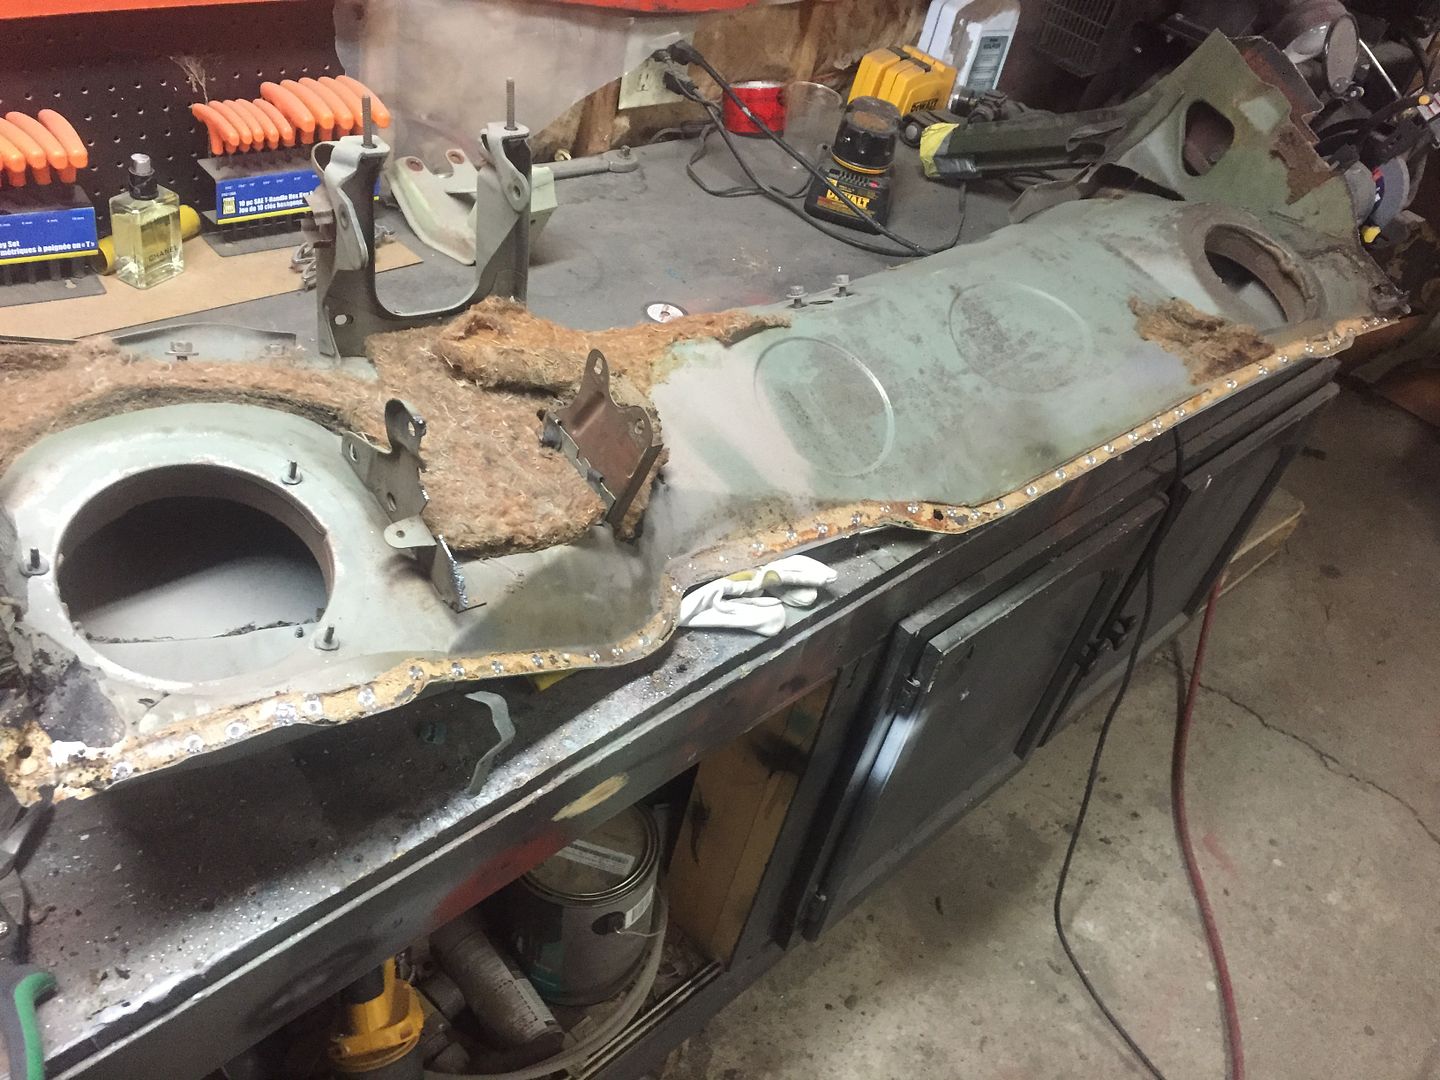
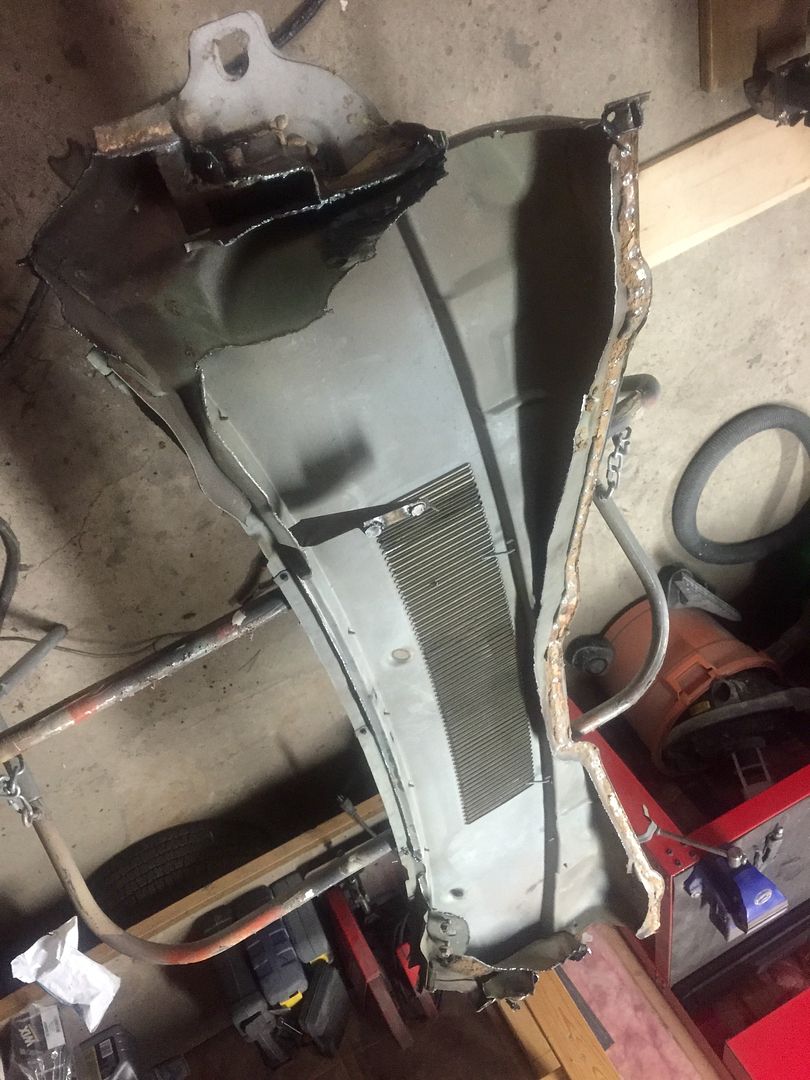
I started on removing the upper cowl assembly from my doner piece. I'm drilling the firewall/cowl seam from the bottom to retain all the original spot welds on the upper cowl so it looks factory under the hood when I panel bond (fuser structural) this lip to my car.. I will then weld the upper cowl on along the windshield seam and sides to retain the strength. When I remove the upper cowl from my car I will only drill the spot welds out thru the first layer of steel across the firewall seam so the original spotwelds will still be in place for the lower cowl/firewall.. It is a lot of work but should make for a seamless repair.

 
I would expect nothing less out of this build..... very nice work !!!

Thanks!!

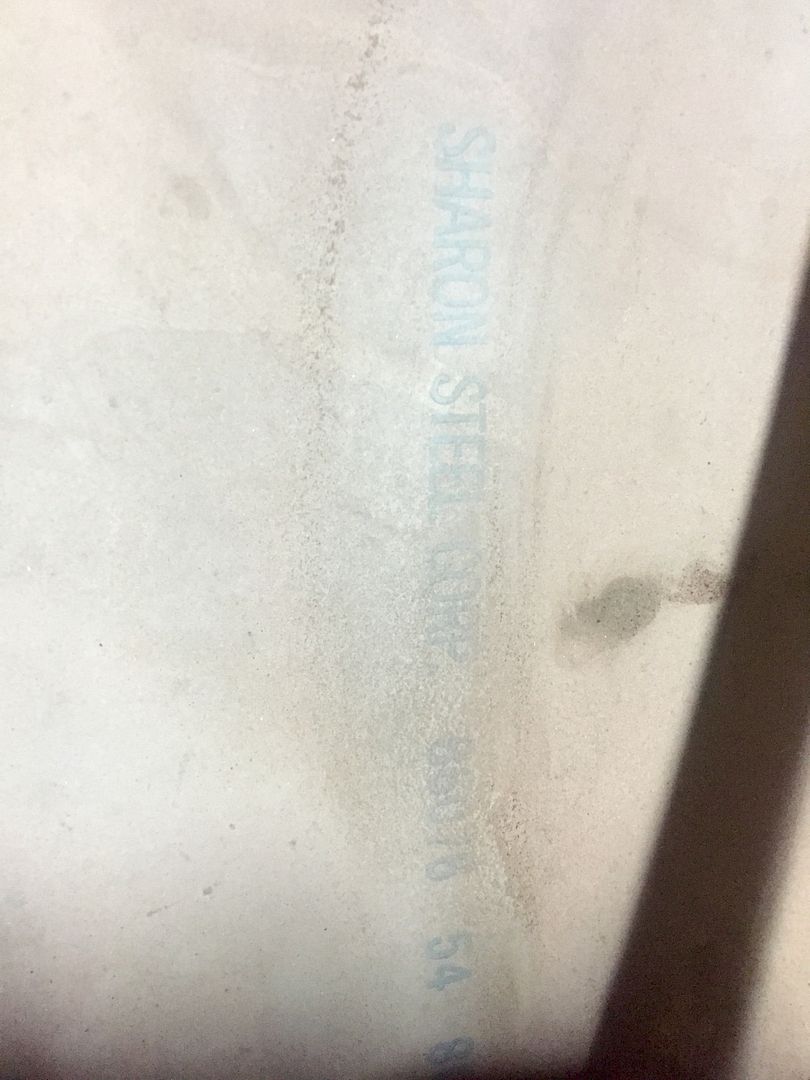
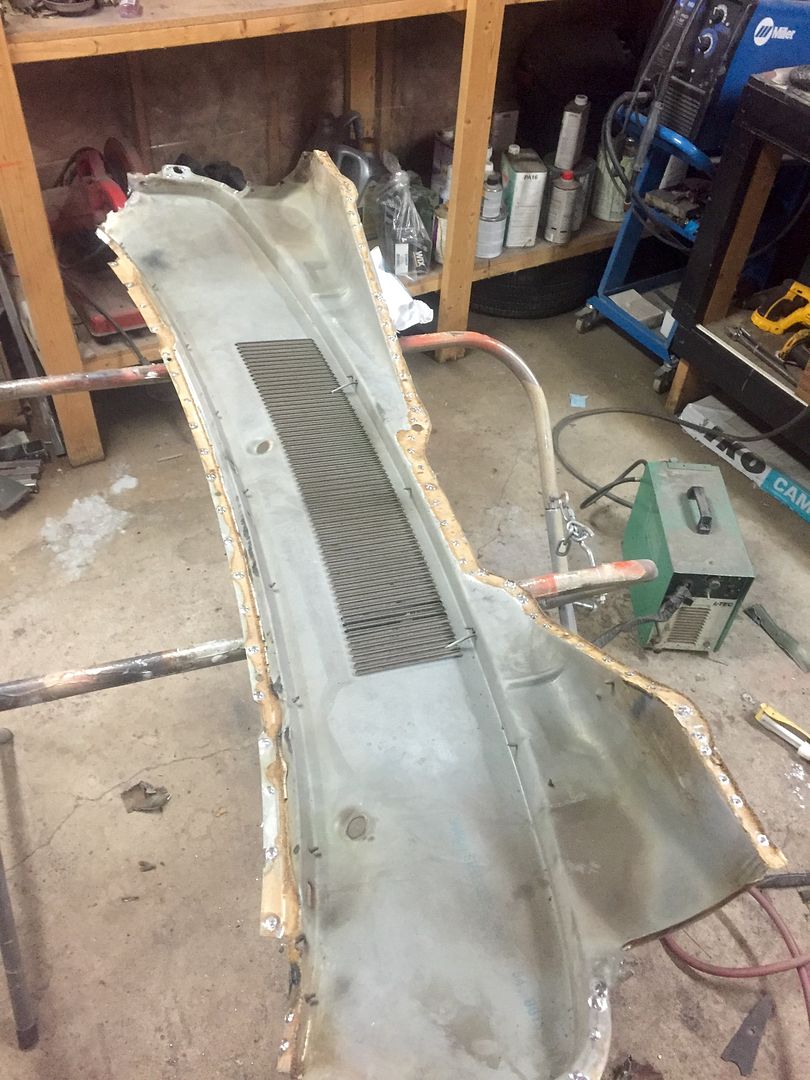
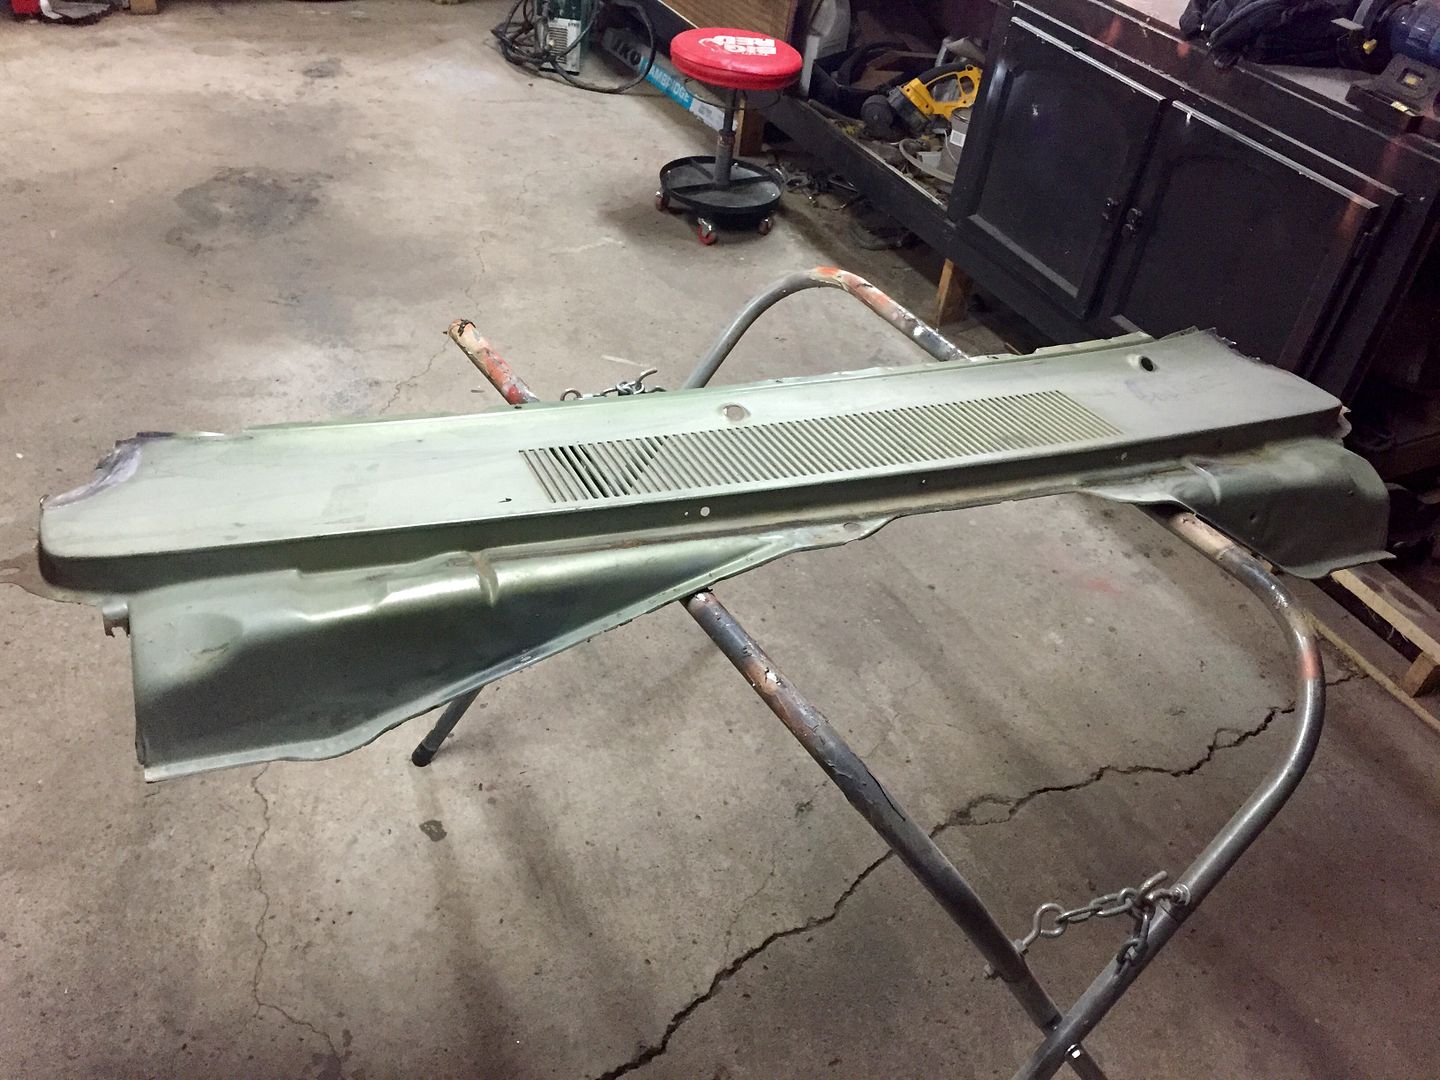
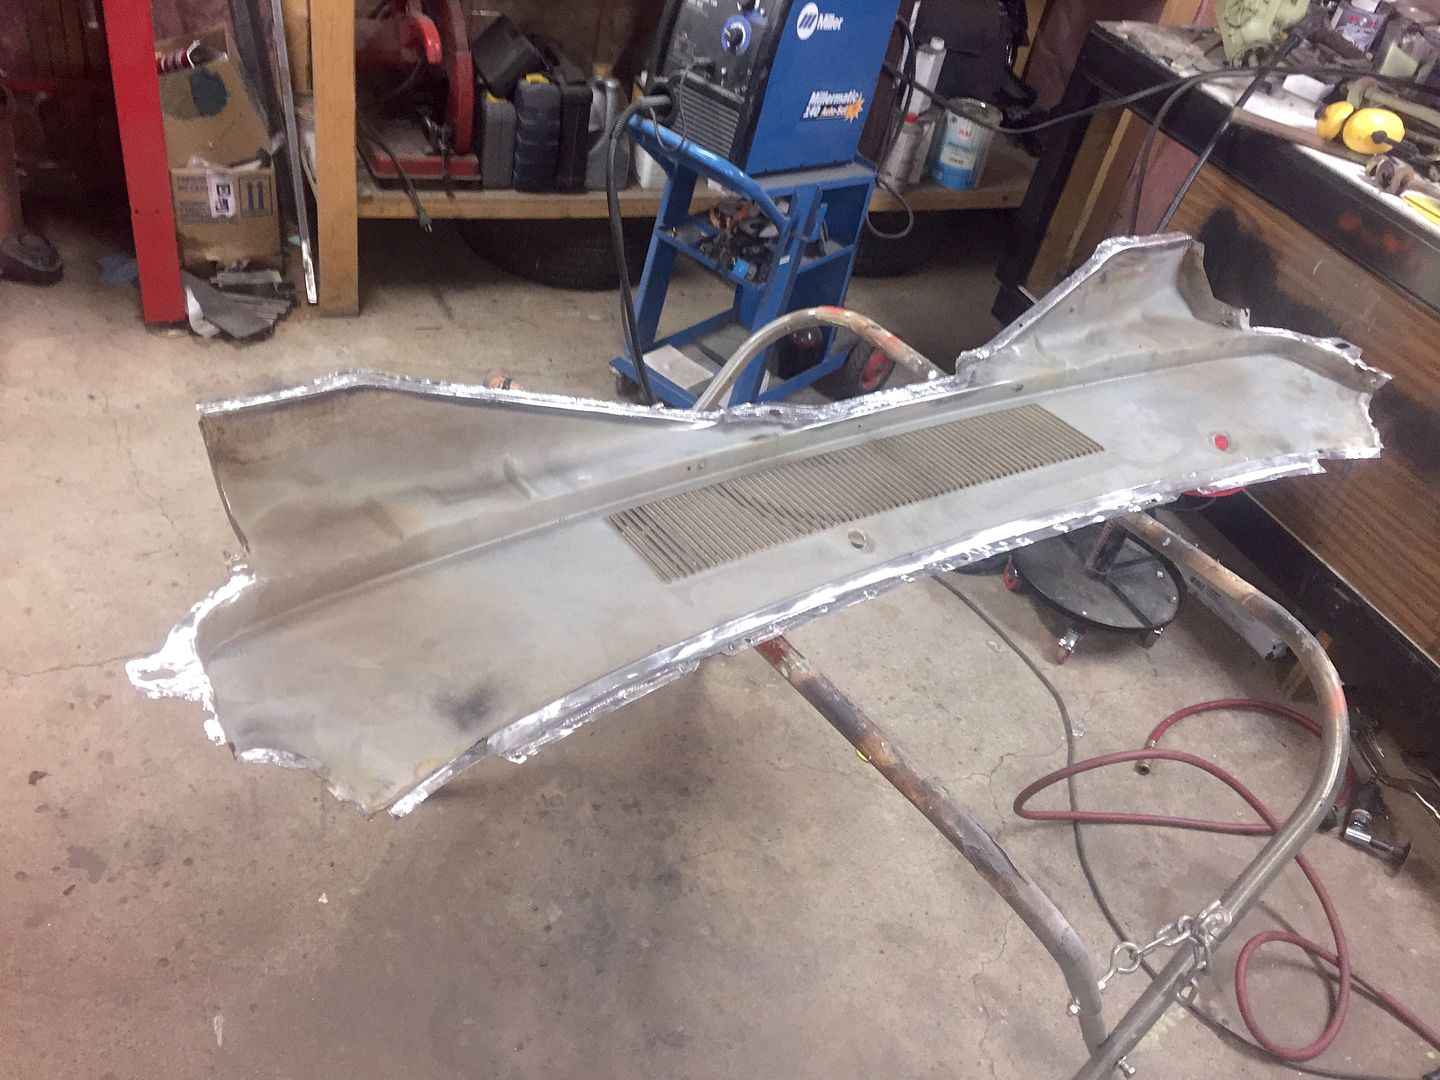
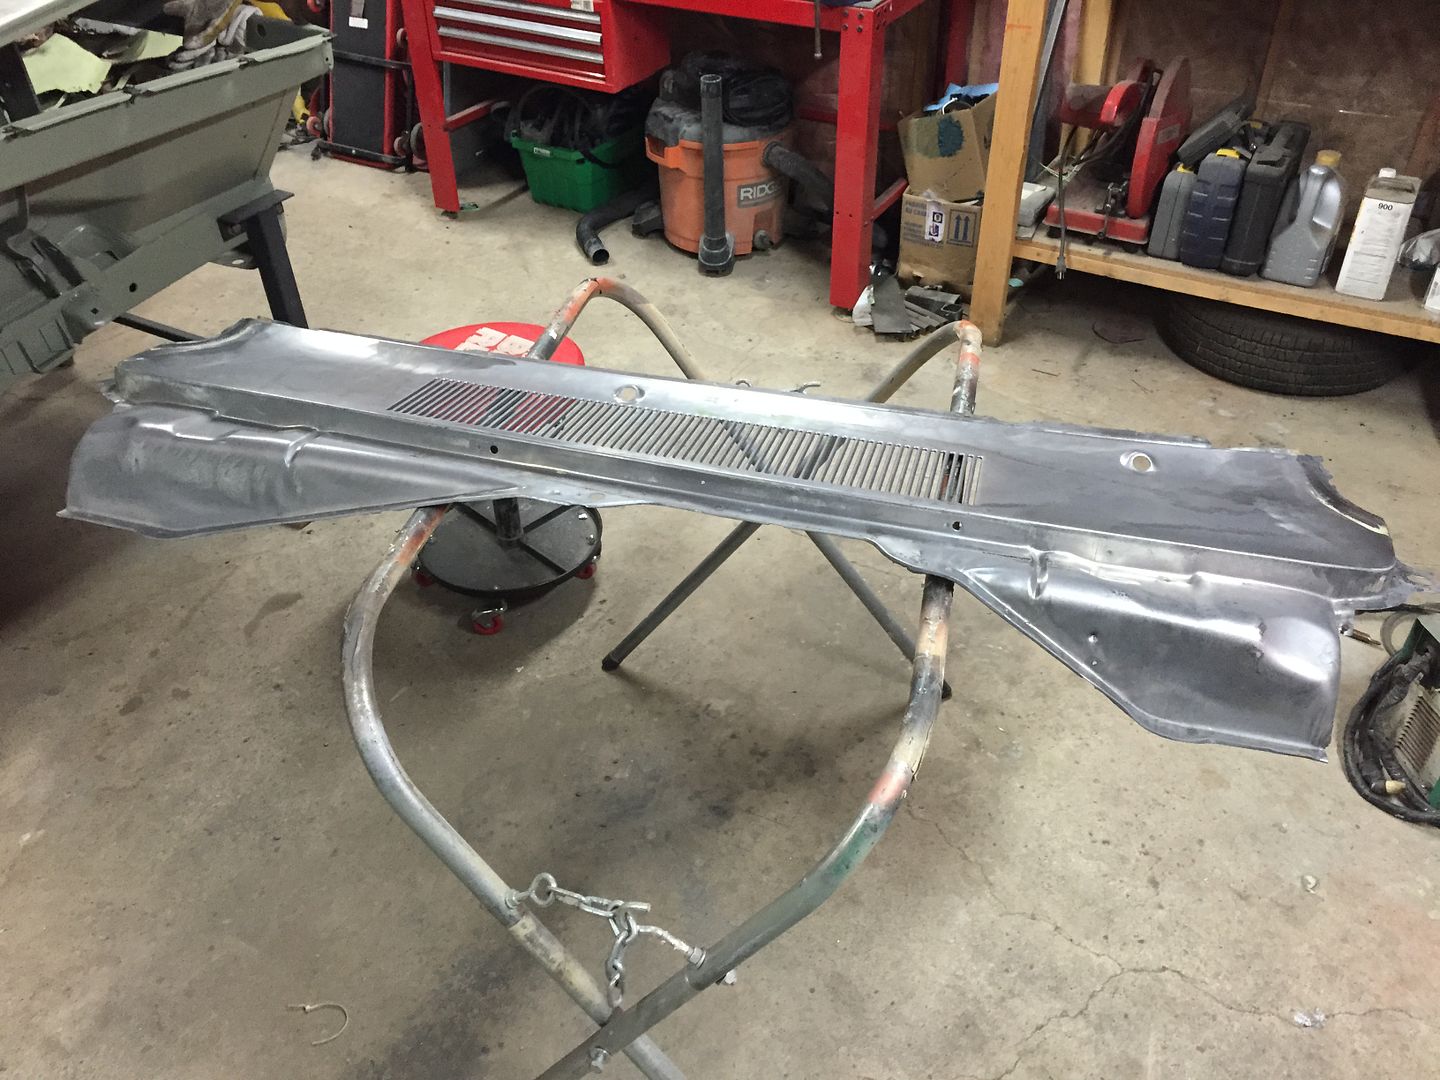
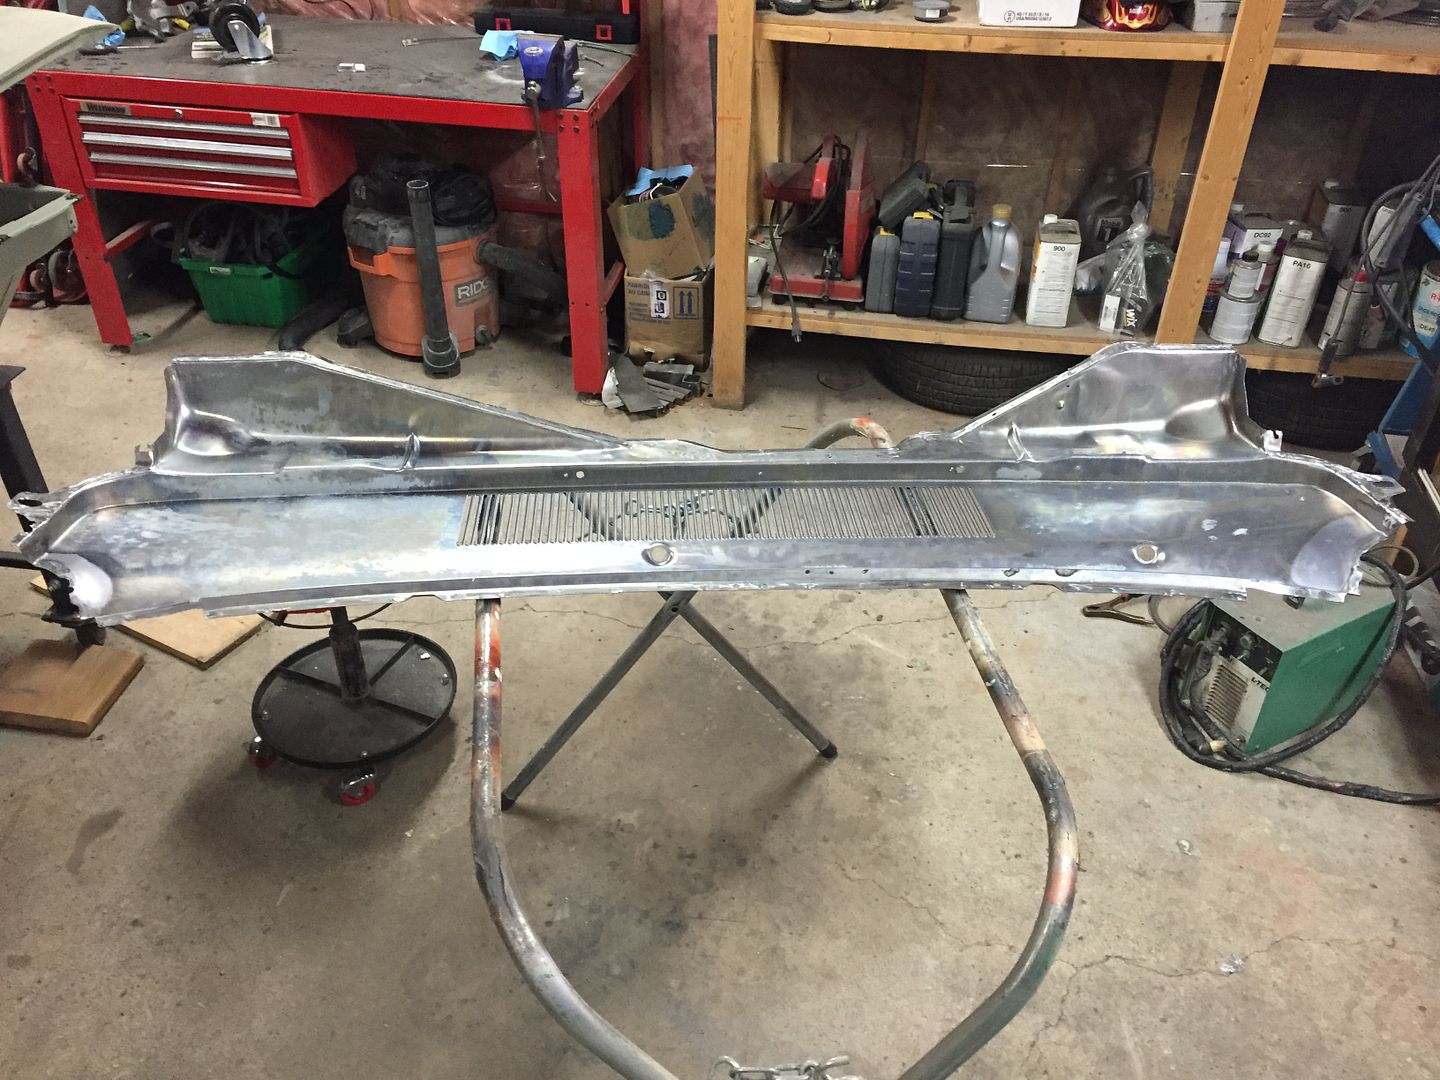
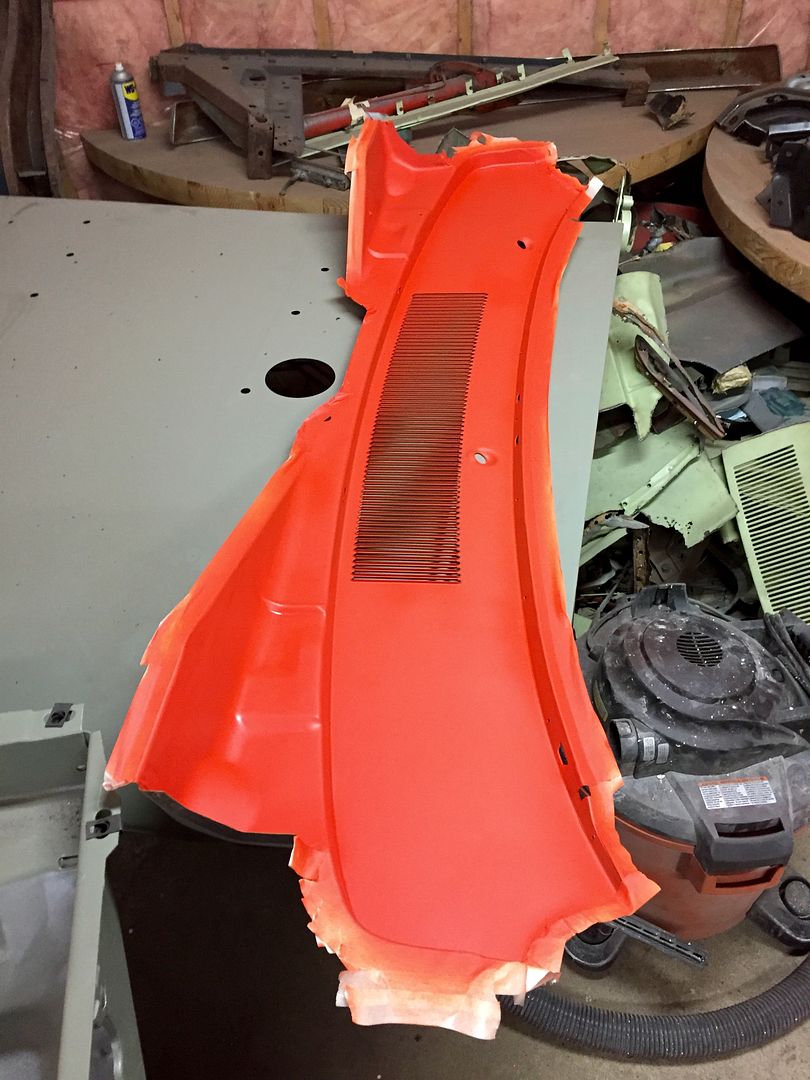
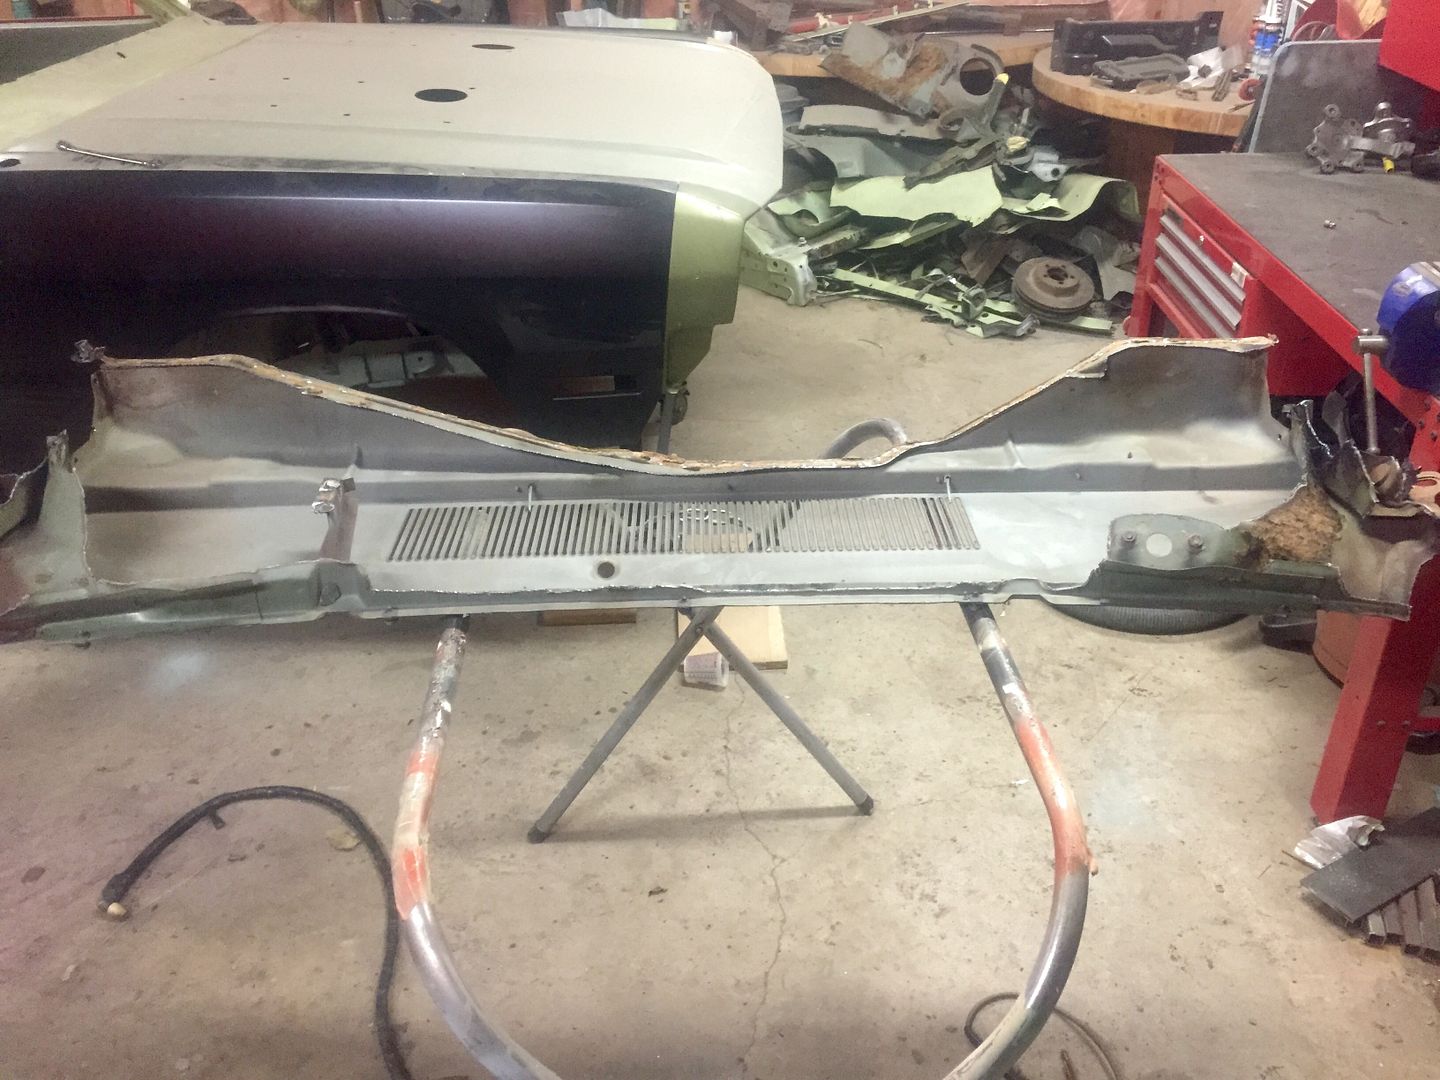
A little more progress on the upper cowl removal.. I thought I could save the lower cowl but I didn't wanna risk damaging the upper so I took the plasma cutter to it and removed as much metal as I could. This weekend I'll finish removing the rest of the metal and grind down all the welds and bring it to the dipper to clean all the old paint off it. This upper cowl is mint and still has the sheet metal manufacturer stamps all over it.


Thanks for the compliment! I'm glad you're enjoying the thread/vids. Yeah I don't think too many 1970 340 Darts are around anymore.. I'm lucky if I see one or two at the car shows around here. I was looking for a Hemi Orange 340 Dart for years before I came across this one and I'm glad I was patient because this one has all the options I wanted, which probably helps a lot with the motivation on restoring it since it's needed so much to bring back from the dead!

Mine is an early production car (sept 69) and I find it interesting that the early production ones never had the go wing provisions underneith the trunk lid. You have any pics of yours?

I started on removing the upper cowl assembly from my doner piece. I'm drilling the firewall/cowl seam from the bottom to retain all the original spot welds on the upper cowl so it looks factory under the hood when I panel bond (fuser structural) this lip to my car.. I will then weld the upper cowl on along the windshield seam and sides to retain the strength. When I remove the upper cowl from my car I will only drill the spot welds out thru the first layer of steel across the firewall seam so the original spotwelds will still be in place for the lower cowl/firewall.. It is a lot of work but should make for a seamless repair.


Yes, I will have to post some pics. I have owned mine twenty years or so, so I have pictures of various stages when I had it on the road. You mention the Go Wing. My car had one on, but the trunk lid was incorrect. The holes were drilled through with homemade brackets made out of an old license plate. I did obtain a "correct " trunk lid and brackets because I like that option with the trunk stripe. What code is it on a build sheet? I figure my car will never be concours correct, because right now I dont feel I will nitpick down to hose clamps etc. Plus I will run electronic ignition and Edelbrock carb and intake, things like that. I want to maintain the "stock" appearance with 14 inch rally wheels, vinyl top etc.
 
Wow. I just happened upon your thread today, and I just had to read the whole thing. You know your **** man! I am doing a lot of the same on my Duster restoration. The condition of mine is very similar to yours, minus front frame rail issues. I'm having a lot of problems with my outer rockers just like you did. Didn't want to bite the bullet on whole new rockers, but I guess I'm going to have to, if I cant find sections.

Projects like these have a tendency to make a person feel down or lose hope. I've been feeling a lot of that lately. Also its hard to be able to fund these projects. I'm in college right now, going through paint and body school. Your thread helped me keep the fire lit, and stay motivated.

Thanks a lot man,
-Jack
 
You have any pics of yours?

Hemiorangeswinger, I have a thread started called "Getting back into it" Long story short, I had to build a barage at my house and get my car out of storage to "continue " on my Mopar restoration journey. I am going to paste a link that hiopefully takes you to my thread, rather than hijacking yours with my pics. I have posted some recent pics that are basically the state my car is in presently.

http://www.forabodiesonly.com/mopar/showthread.php?t=290664&referrerid=1550
 
Yes, I will have to post some pics. I have owned mine twenty years or so, so I have pictures of various stages when I had it on the road. You mention the Go Wing. My car had one on, but the trunk lid was incorrect. The holes were drilled through with homemade brackets made out of an old license plate. I did obtain a "correct " trunk lid and brackets because I like that option with the trunk stripe. What code is it on a build sheet? I figure my car will never be concours correct, because right now I dont feel I will nitpick down to hose clamps etc. Plus I will run electronic ignition and Edelbrock carb and intake, things like that. I want to maintain the "stock" appearance with 14 inch rally wheels, vinyl top etc.

Wow, you've owned it for quite a while! You must have the 73-76 trunk lid, which I believe has a larger key lock than the 70-72. I am not sure what the go wing option is.. My dads Swinger was a factory go wing car tho. I'm on the same boat with mine.. My original engine is long gone, so I am going to build a 360 for it (the one that came from my car) and dress it up as a 340.

I checked out your Resto thread and your car is looking good!

Wow. I just happened upon your thread today, and I just had to read the whole thing. You know your **** man! I am doing a lot of the same on my Duster restoration. The condition of mine is very similar to yours, minus front frame rail issues. I'm having a lot of problems with my outer rockers just like you did. Didn't want to bite the bullet on whole new rockers, but I guess I'm going to have to, if I cant find sections.

Projects like these have a tendency to make a person feel down or lose hope. I've been feeling a lot of that lately. Also its hard to be able to fund these projects. I'm in college right now, going through paint and body school. Your thread helped me keep the fire lit, and stay motivated.

Thanks a lot man,
-Jack

Thanks!! I highly recommend the AMD rockers, they'll make for a much cleaner repair. Those other brand half rockers are nowhere near the correct angles and contours.. I'm sure your outer rockers will be bad behind the quarters too. You should make a thread for your Resto on here!
I know what you mean.. It's hard to keep motivated at times, but I find doing one project at a time helps a lot, and really shows you've accomplished a lot. Hopefully this thread helps!
 
I got the cowl all prepped and dropped off at the dippers, along with my K-frame. Hopefully I get them back in a day or two so I can continue on with replacing the cowl on my car. Removing one of these cowls without drilling any holes in it is one hell of a challenge!


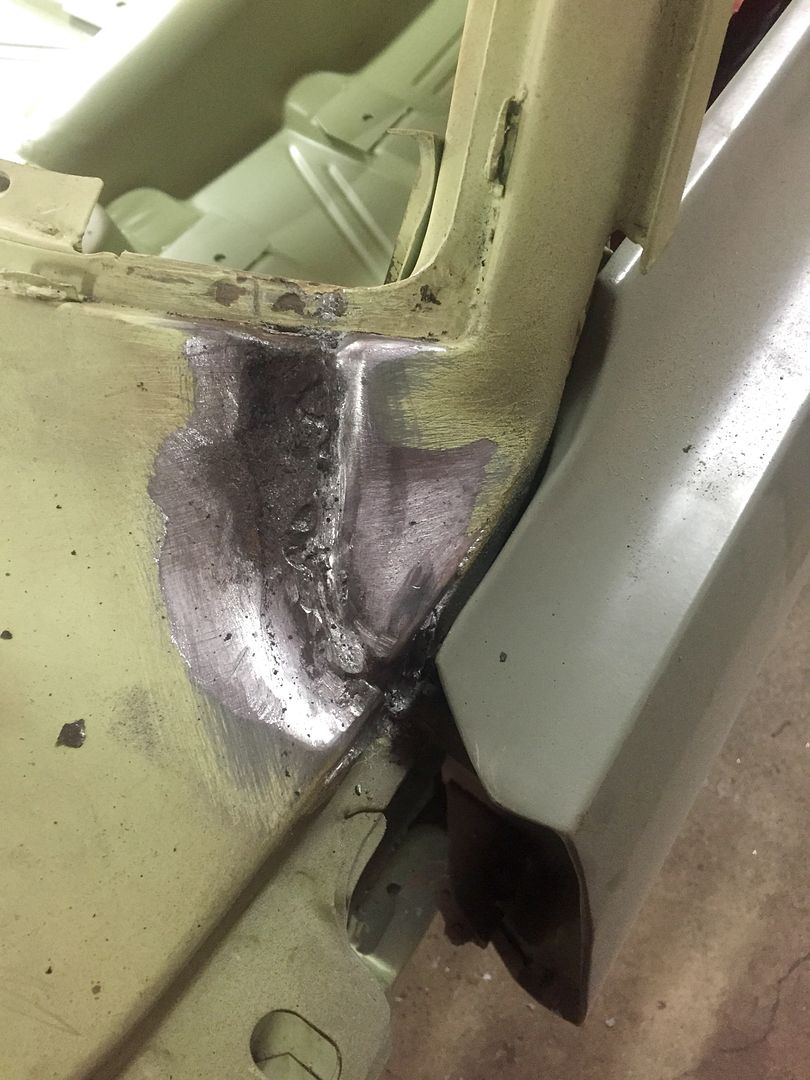
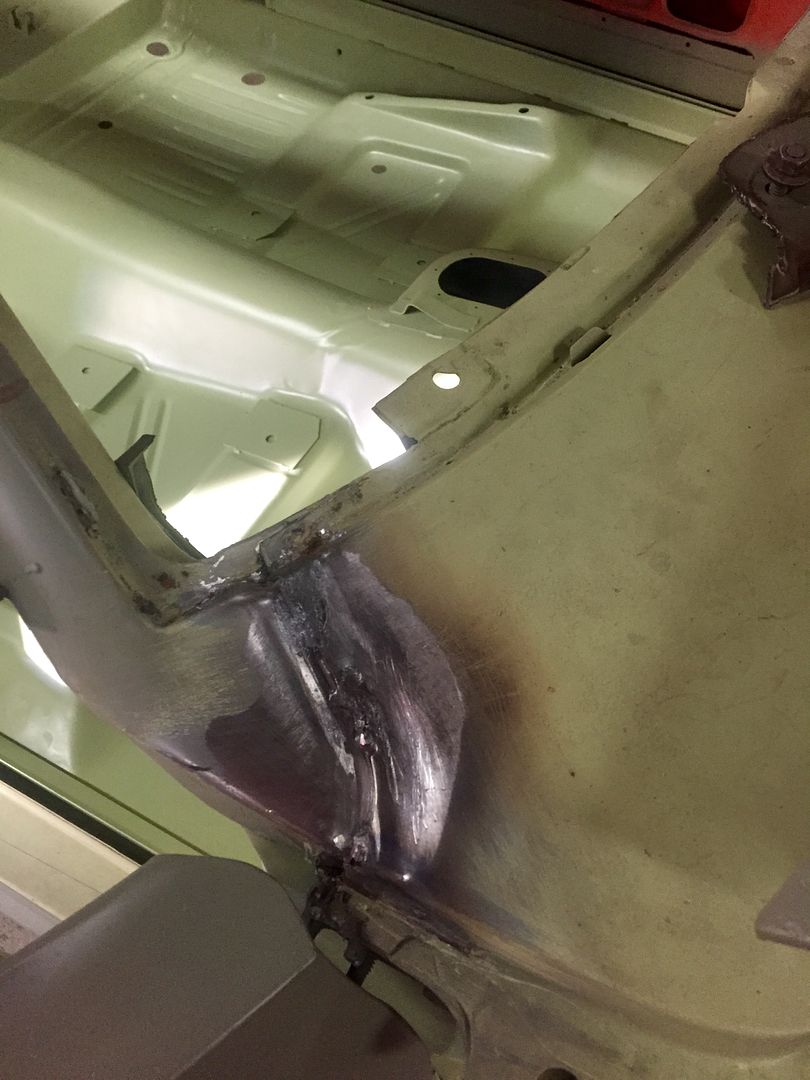
Started rusting under the lead. I will weld this seam solid when I put the new cowl on and use fiberglass instead. (Like I did on the quarters)


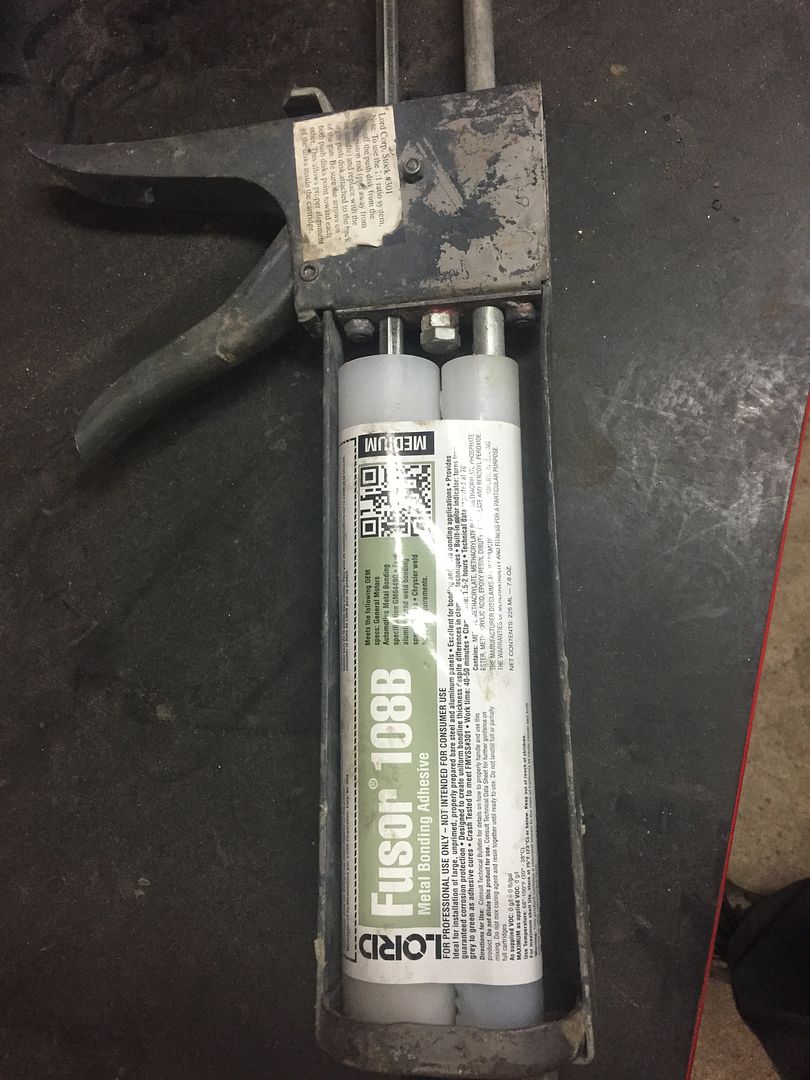
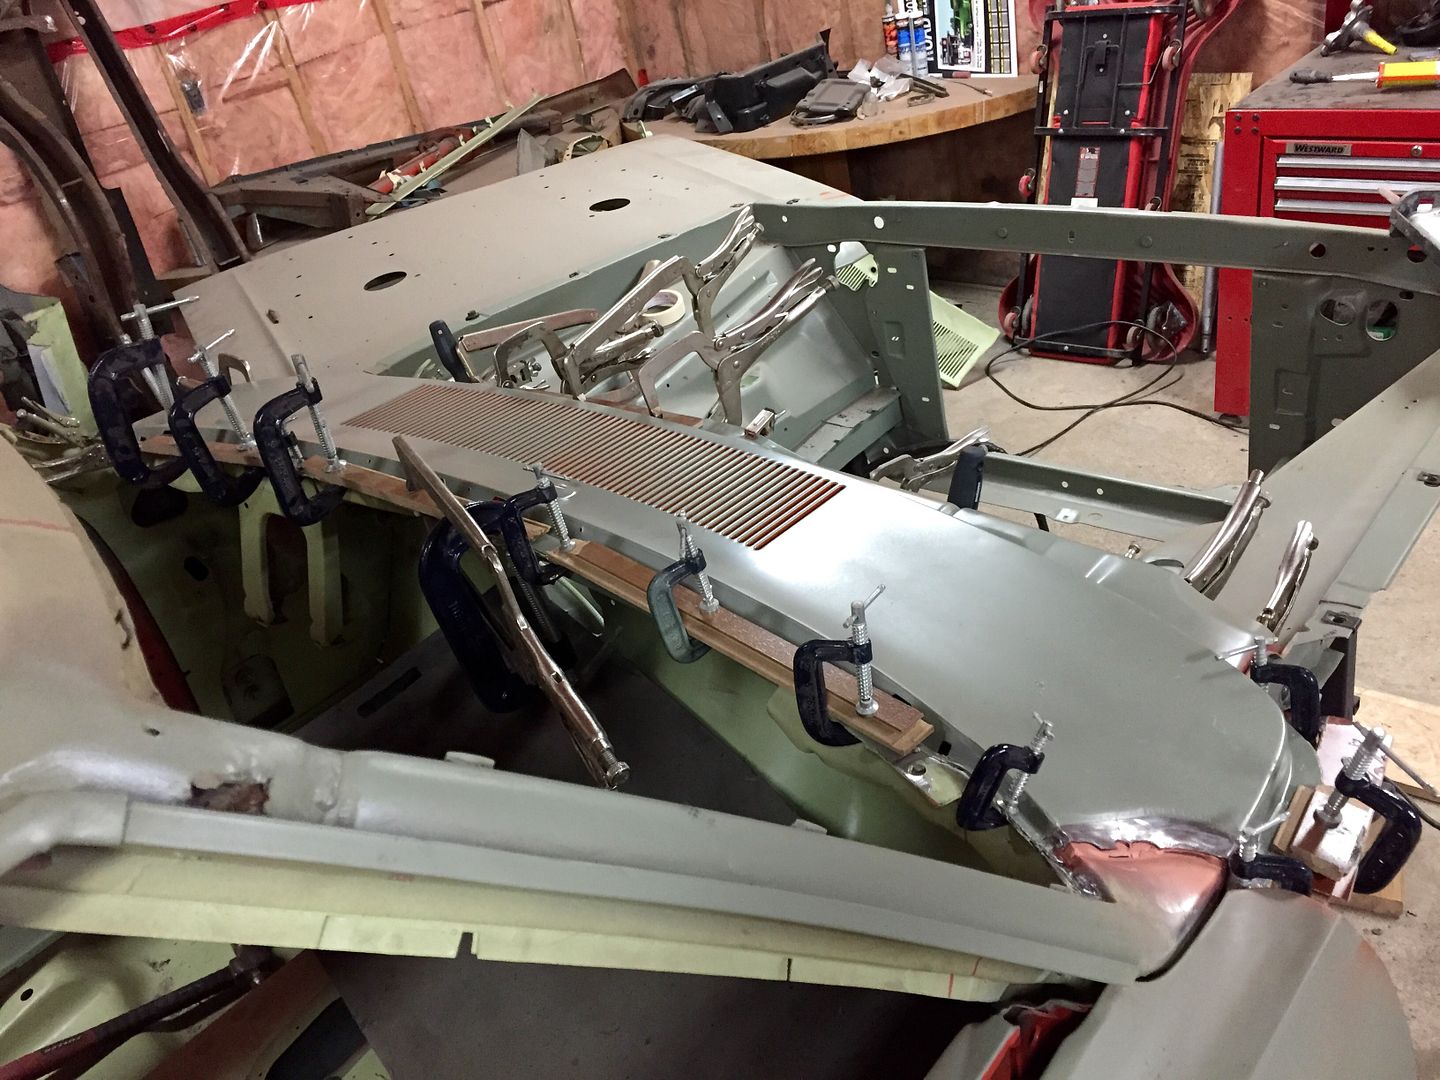
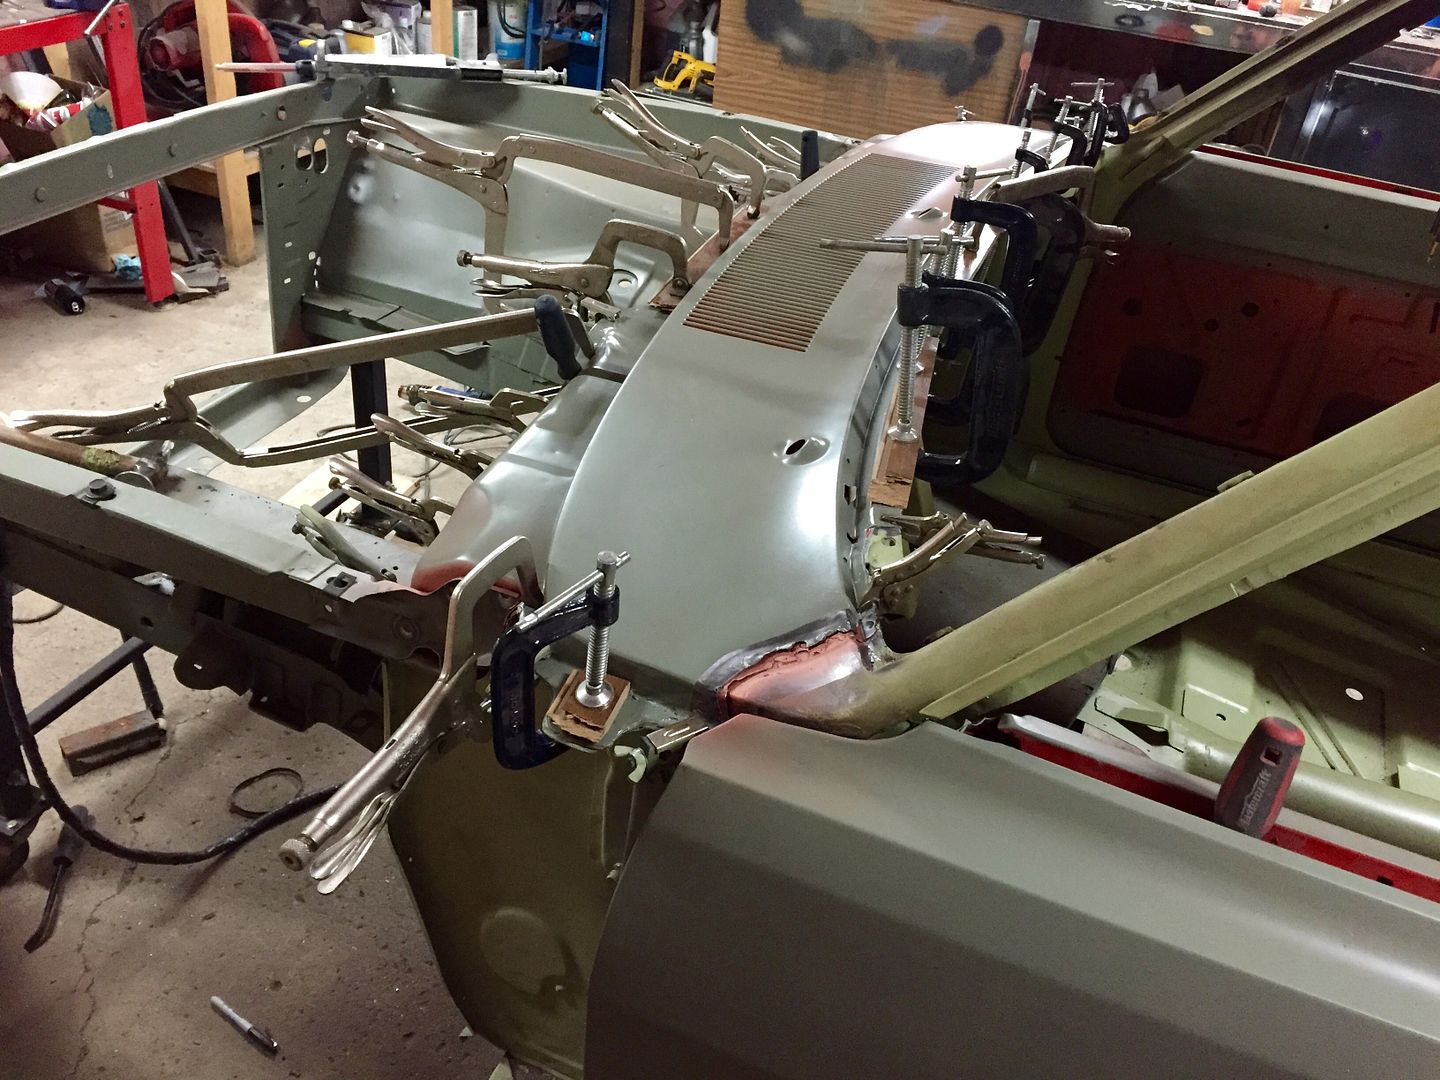
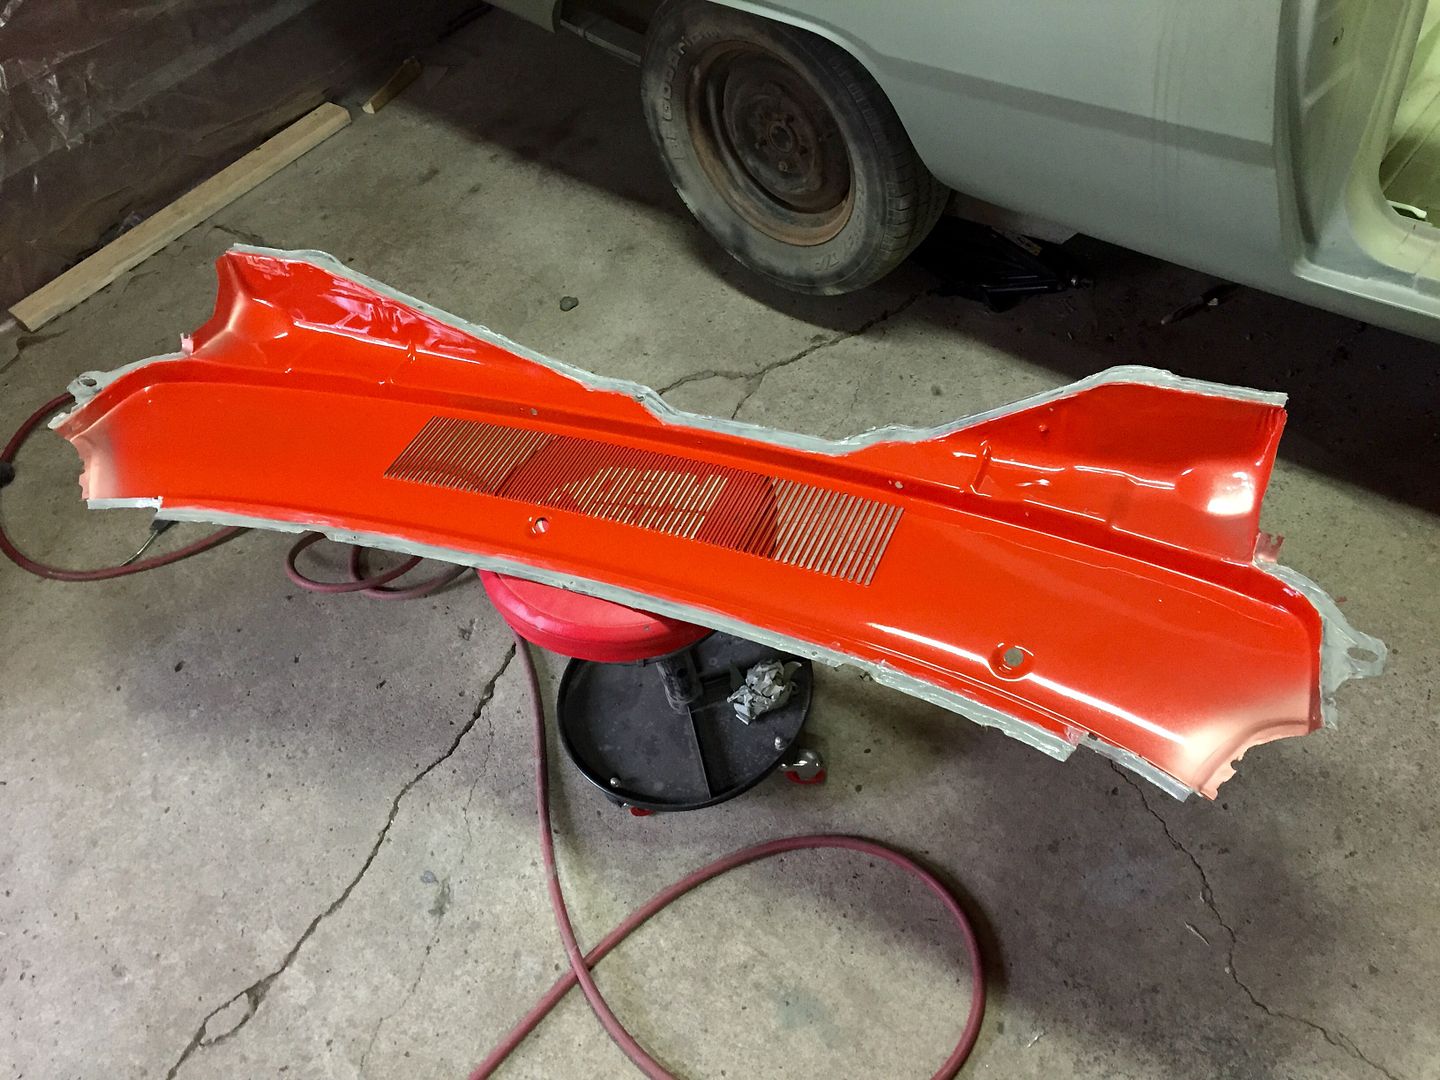
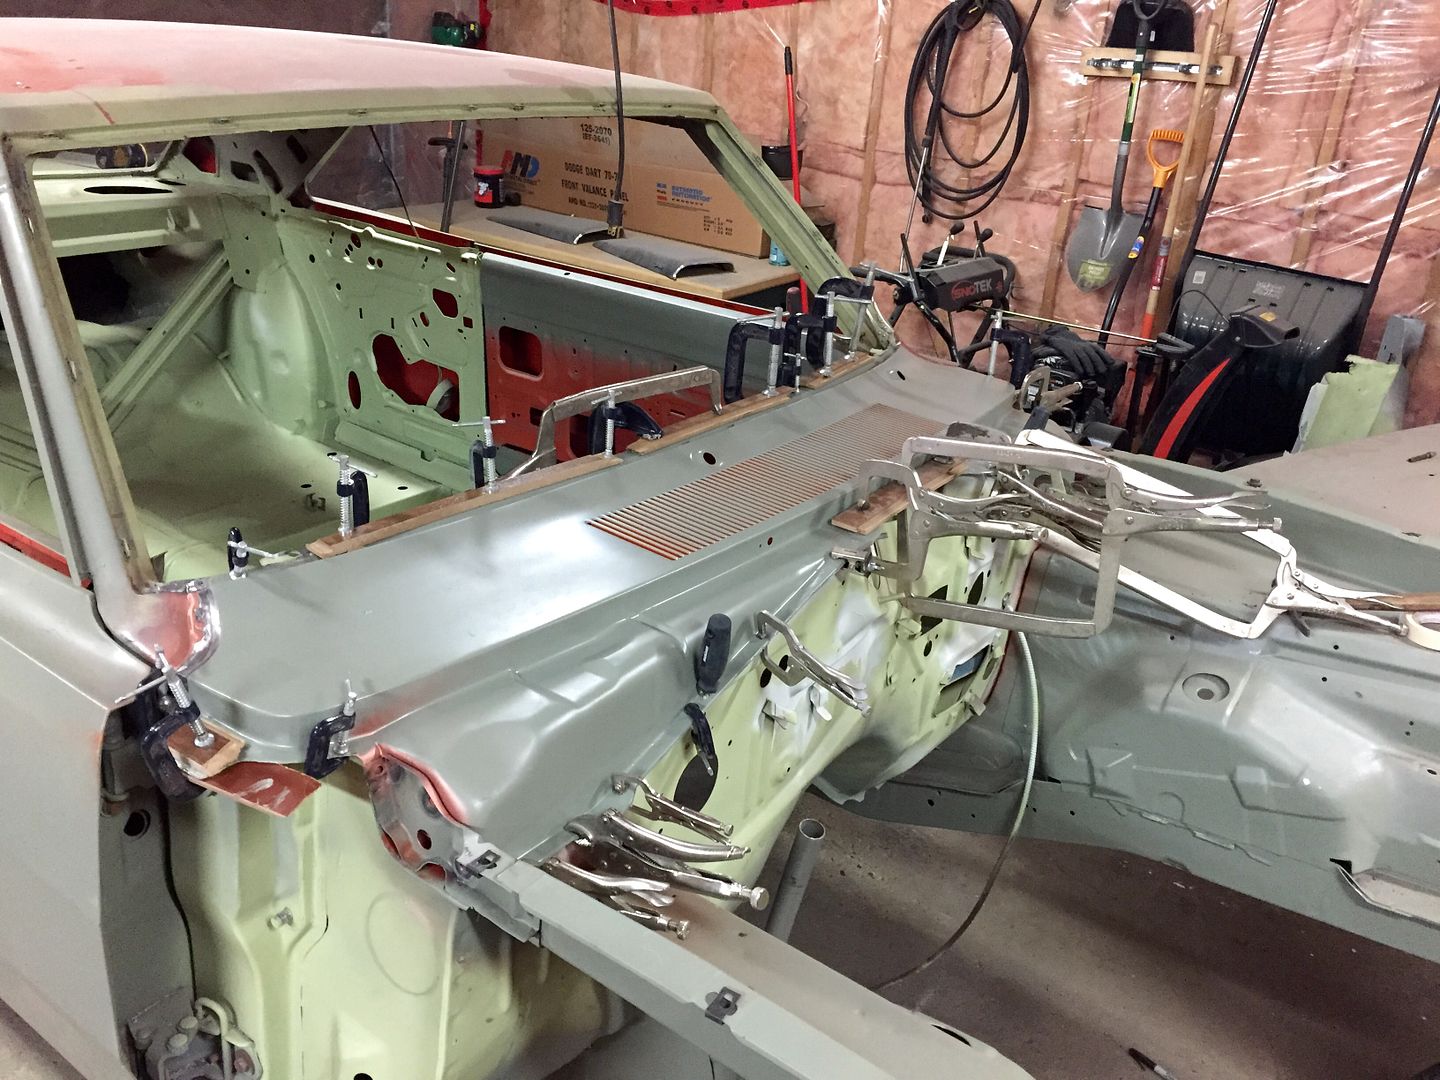
Here is the glue I'm going to use. My dad recommended glueing the top seam as well to prevent water leaking between the seam where the dash bolts.. Which makes sense because if water goes thru the cowl vents from washing it or driving in the rain it will spray up into that seam area and leak down under the dash. The factory used some sort of foam sealer that they spot welded thru. So now I'm only going to weld the sides and lead seam. This glue is used in body shops for panel replacement, so I shouldn't have any worries of failure. It almost feels like cheating glueing the panel on, but in reality it has been way more work because I didn't wanna drill thru my doner cowl.. Once it's done nobody will ever know it has been touched because it still retains all the original spot weld markings. I also picked up some good seam sealer as well for the lower cowl baffles. I will epoxy/paint inside the cowl area too just like I did to the quarters and doors.


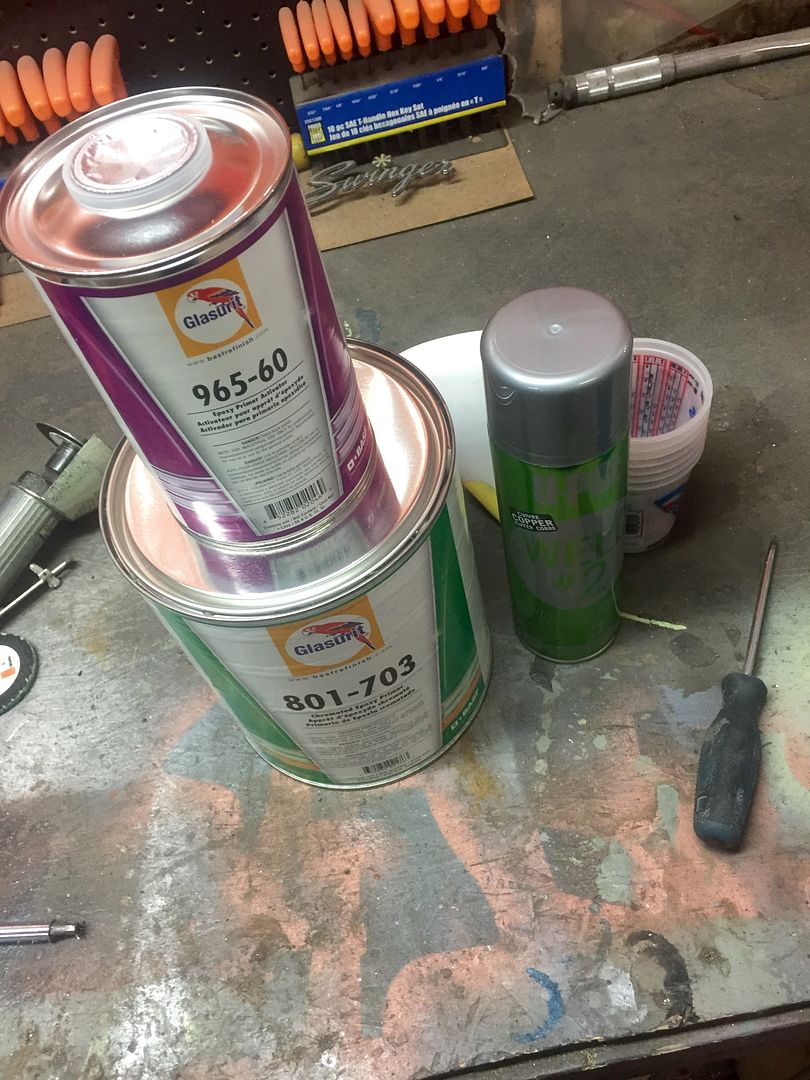
Picked up another gallon of epoxy primer. I think my car weighs an extra 100lbs from all the epoxy on it!
 
Wow, you've owned it for quite a while! You must have the 73-76 trunk lid, which I believe has a larger key lock than the 70-72. I am not sure what the go wing option is.. My dads Swinger was a factory go wing car tho. I'm on the same boat with mine.. My original engine is long gone, so I am going to build a 360 for it (the one that came from my car) and dress it up as a 340.

I checked out your Resto thread and your car is looking good!


Thanks!! I highly recommend the AMD rockers, they'll make for a much cleaner repair. Those other brand half rockers are nowhere near the correct angles and contours.. I'm sure your outer rockers will be bad behind the quarters too. You should make a thread for your Resto on here!
I know what you mean.. It's hard to keep motivated at times, but I find doing one project at a time helps a lot, and really shows you've accomplished a lot. Hopefully this thread helps!

Oh, I do have a Resto Thread going on here! Just like you explained my outers are rotted under the quarters.

Here is a link to my thread. (Sorry for high jacking)

http://www.forabodiesonly.com/mopar/showthread.php?t=230771
 
Oh, I do have a Resto Thread going on here! Just like you explained my outers are rotted under the quarters.

Here is a link to my thread. (Sorry for high jacking)

http://www.forabodiesonly.com/mopar/showthread.php?t=230771

Wow! Looks like you're already thru a lot of the rust repair. That'll be a nice Duster when you're done. Your rockers don't look as bad as mine were, so like you said in your thread, it might be better to just section in that back piece from a doner car. The rest of the rocker looks good from the inside down where those drains are? Mine wasn't thru where the inner was spot welded to the outer along that bottom seam, but it was paper thin in spots and would have rusted thru in no time. If yours is still good and showing little rust I'd pump some evaporust thru there for a few days and it'll make that pinch weld seam spotless.
 
Wow! Looks like you're already thru a lot of the rust repair. That'll be a nice Duster when you're done. Your rockers don't look as bad as mine were, so like you said in your thread, it might be better to just section in that back piece from a doner car. The rest of the rocker looks good from the inside down where those drains are? Mine wasn't thru where the inner was spot welded to the outer along that bottom seam, but it was paper thin in spots and would have rusted thru in no time. If yours is still good and showing little rust I'd pump some evaporust thru there for a few days and it'll make that pinch weld seam spotless.
Problem is finding a donor car to section that piece with. The Northeast is awful on cars. You cant find these cars around here anymore. The ones that are solid enough that these areas wouldnt be toast, are way to nice to cut up. My parts car is good for some pieces but not the rockers! I've been trying to find someone willing to sell me some from down south or out west, but no such luck.

As for the rest of the rockers, they are very solid. But I dont like the idea of putting an acid inside an area where i cant make sure its all the way clean again. I was planning on using Eastwood's Internal Frame Coating on these. It converts the rust, then seals it from further damage.

I know what you mean.. Cars up here are all usually rusted really bad! I have been buying used parts from California. Lee Robinson parts out a lot of a bodies and he would be worth PMing on here to see if he can help you.

Evaporust is water based and non toxic! You should pick some up and try it.. You'll be amazed. It won't touch any paints or coatings and will never eat any bare metal if left soaked for however long. I have a few gallons of it and soak a lot of misc parts like bolts and door mechanisms and they come out like new. I pumped it thru my old torsion bar crossmember with a pond sump before I found out my frame rails were rotten and it cleaned it to bare shiny metal where the blaster couldn't get. I still plan on pumping it thru my rear frame rails once it's on the rotisserie because I have no other way of cleaning the rust out of them.
 
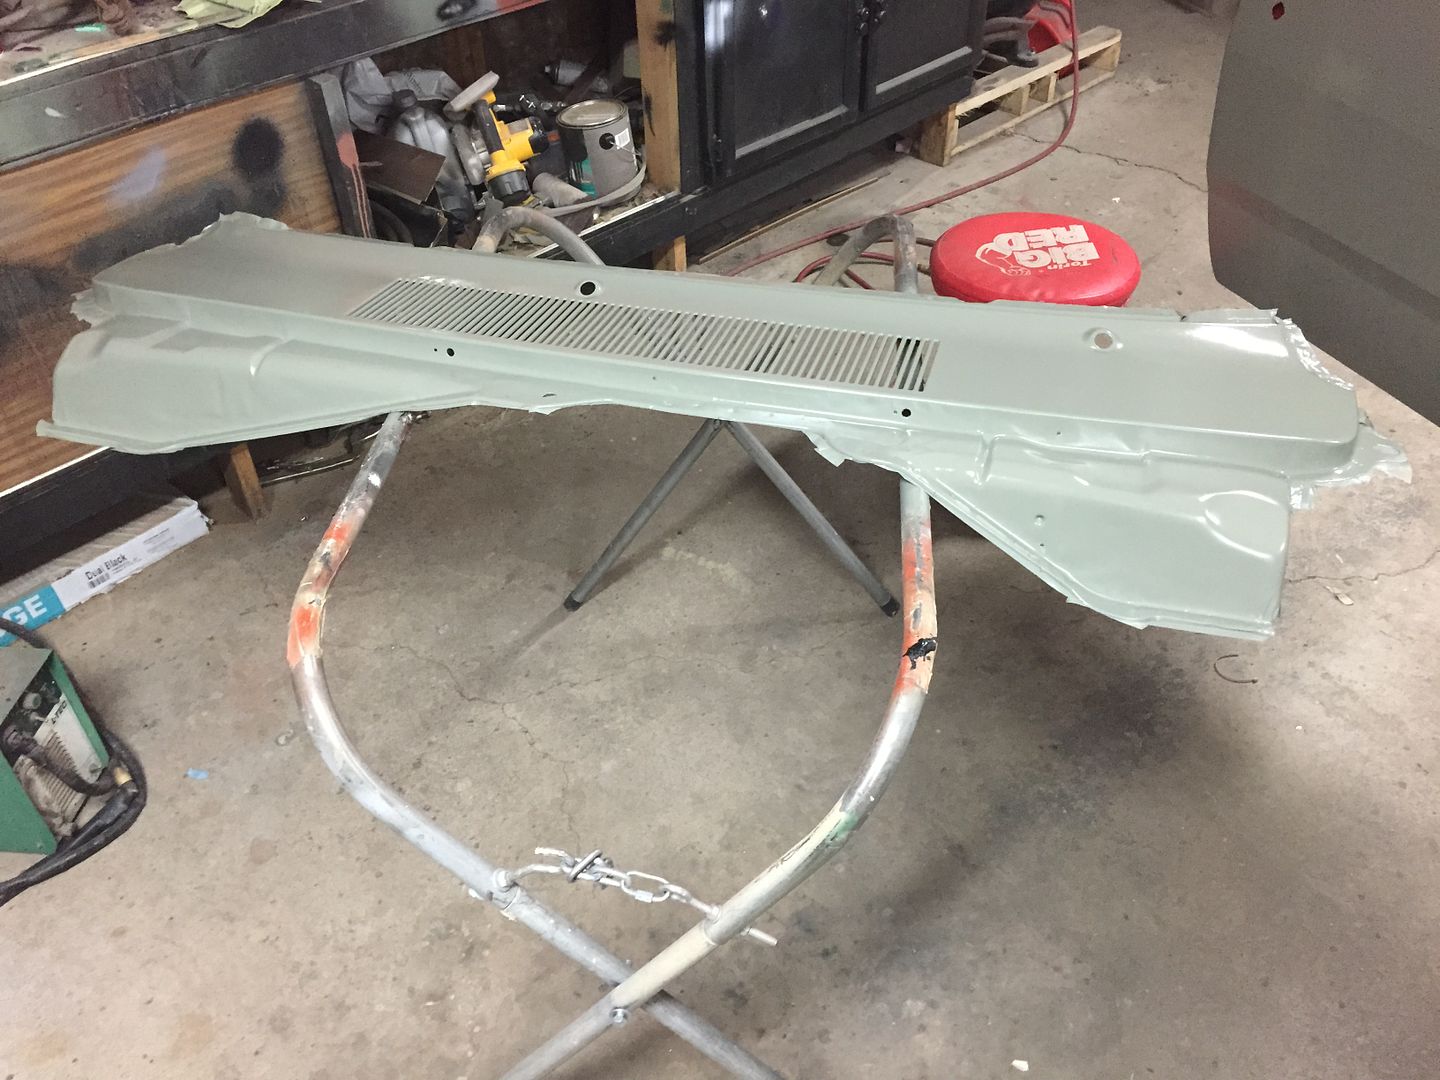
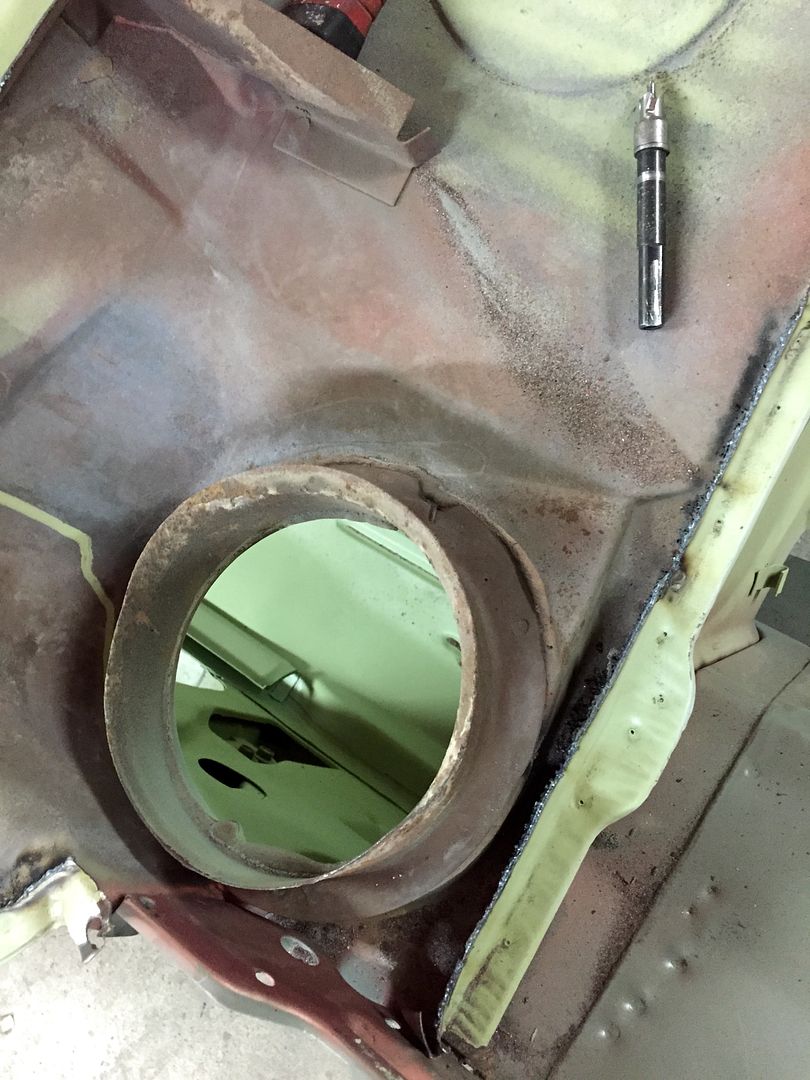
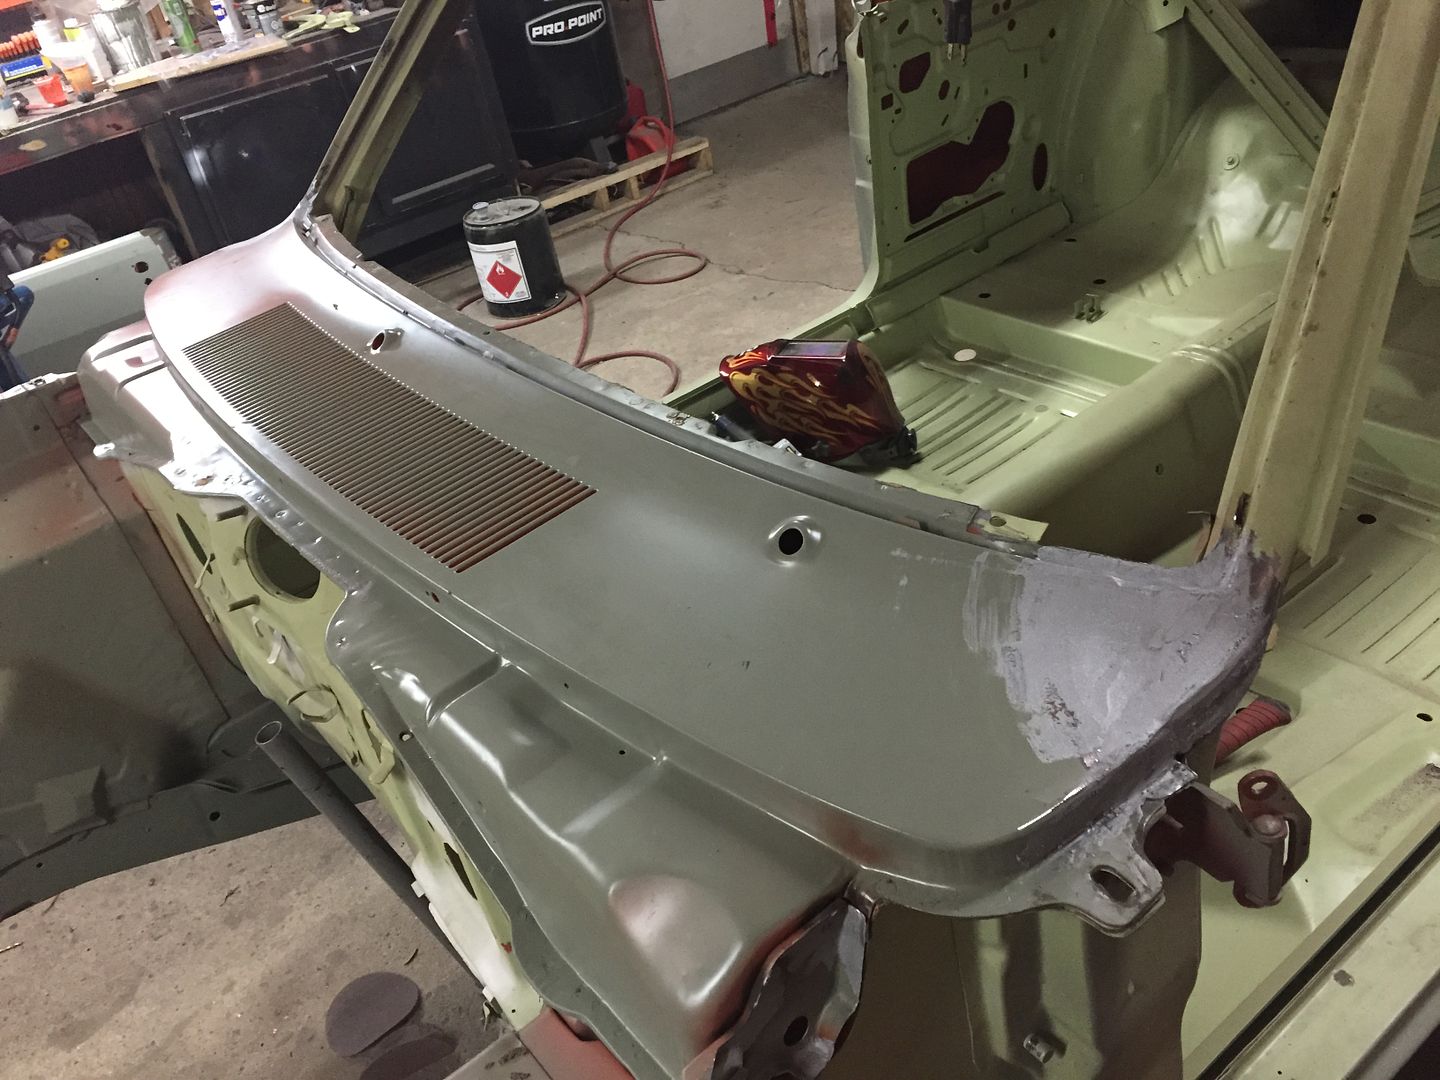
I got my cowl back from the dipper and it was nice bright shiny metal! After cleaning the oils off with brake clean I orbitaled it with 80 grit and scuffed it with a red scotch brite pad. Then I masked it off where it will be glued/welded and put a coat of glasurit epoxy primer on it. This weekend I will remove the cowl from my car and clean up the lower cowl area.. Hopefully get it epoxied, seam sealed and painted, that's if I don't find any surprises!


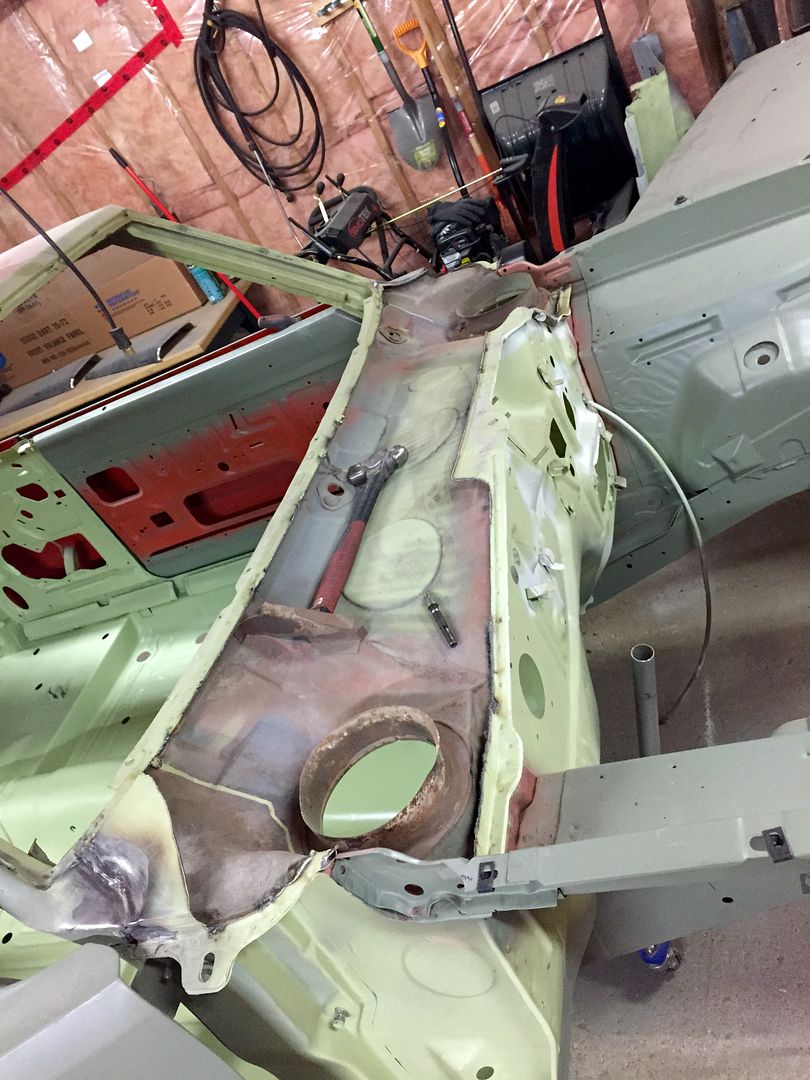
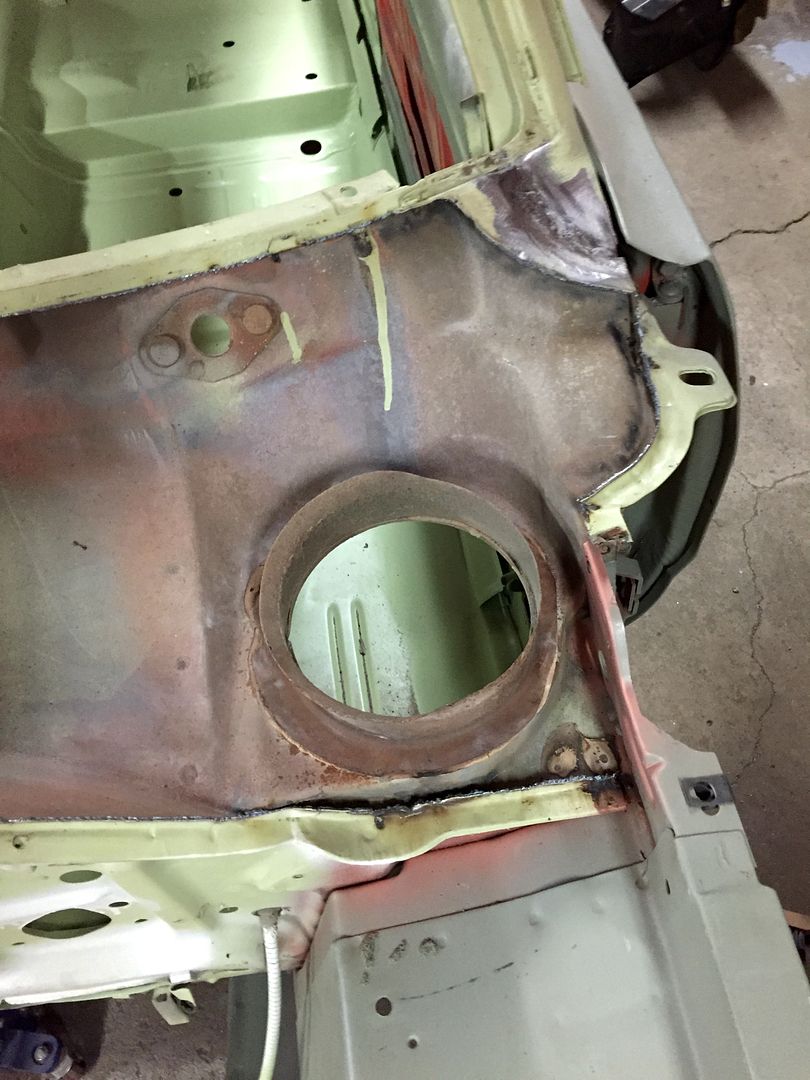
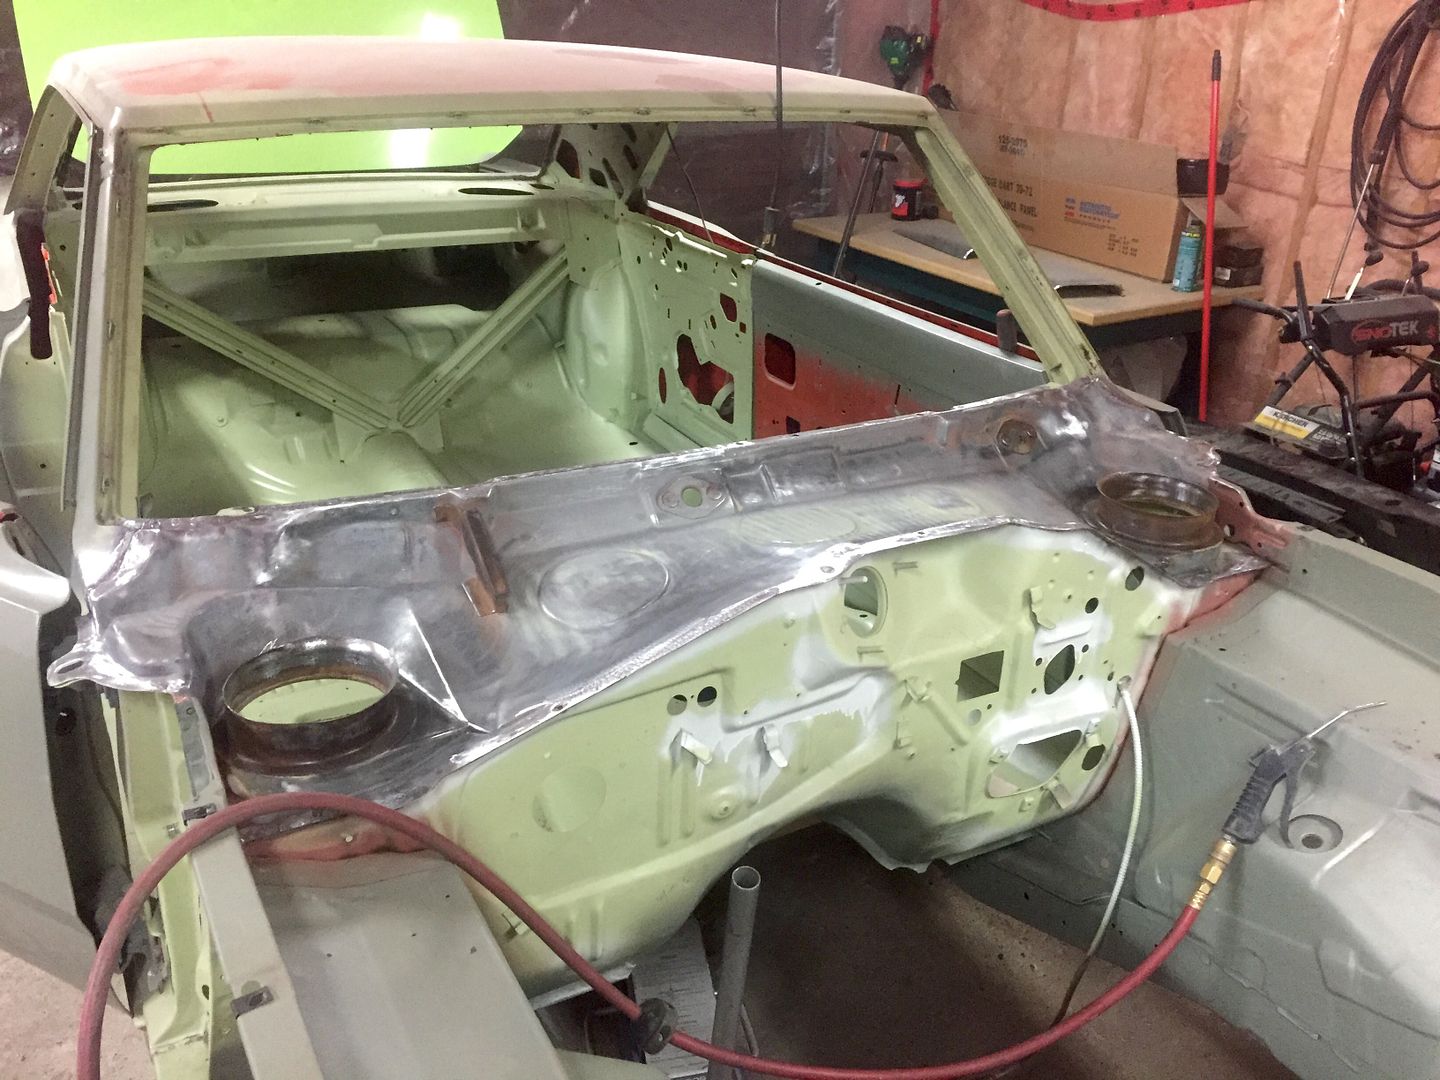
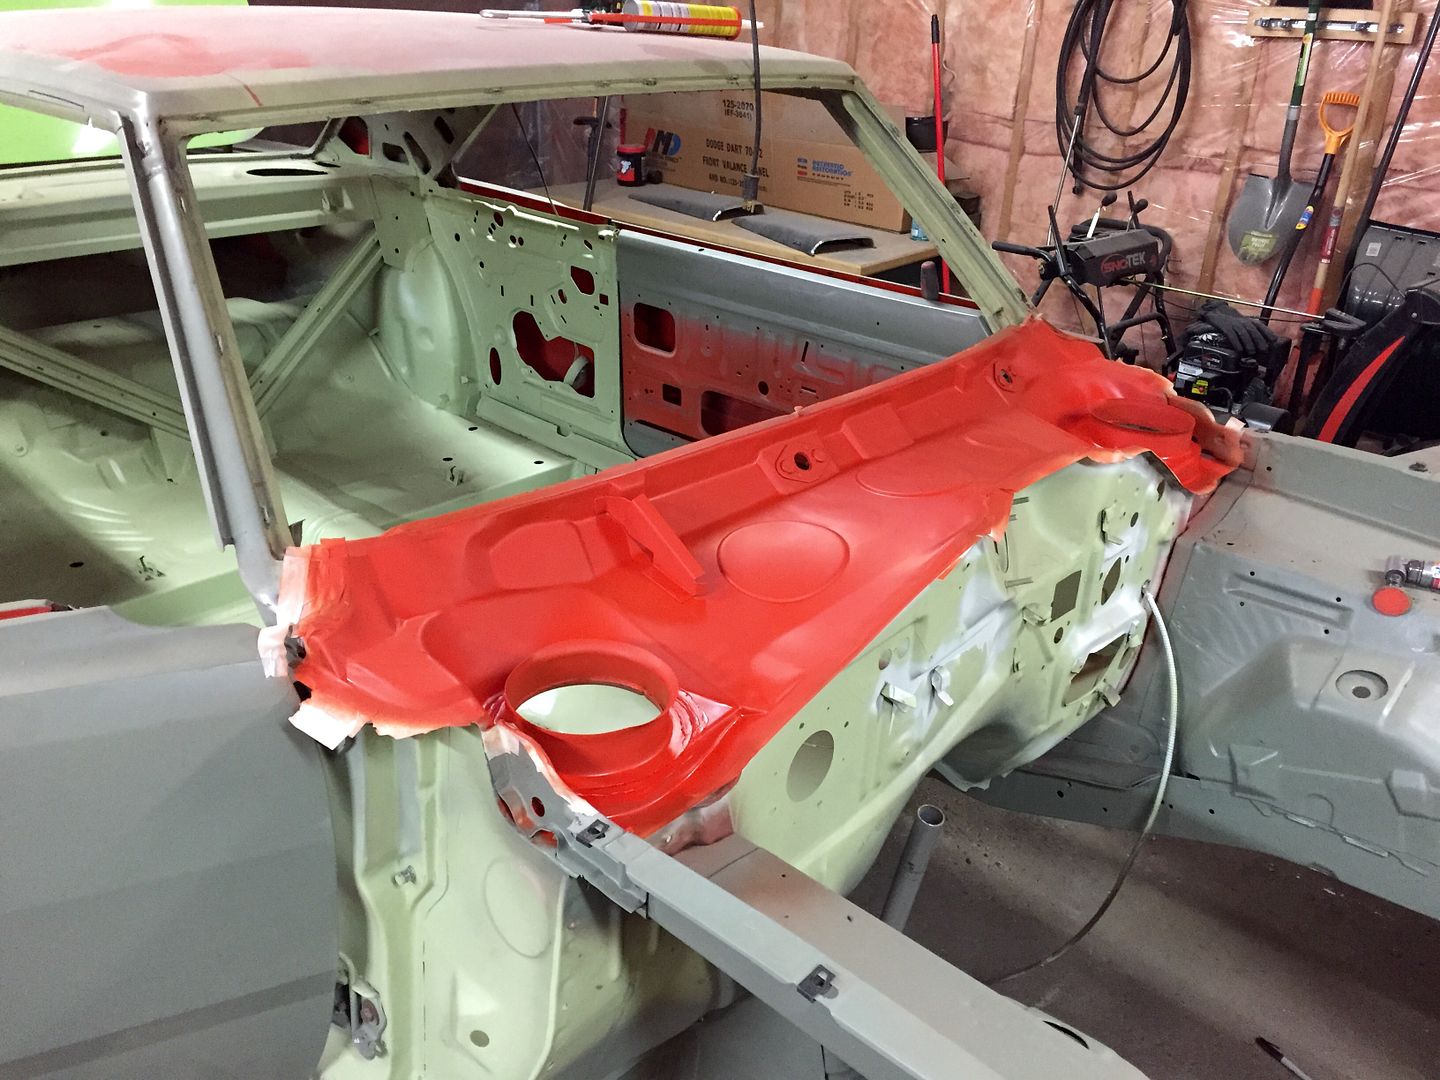
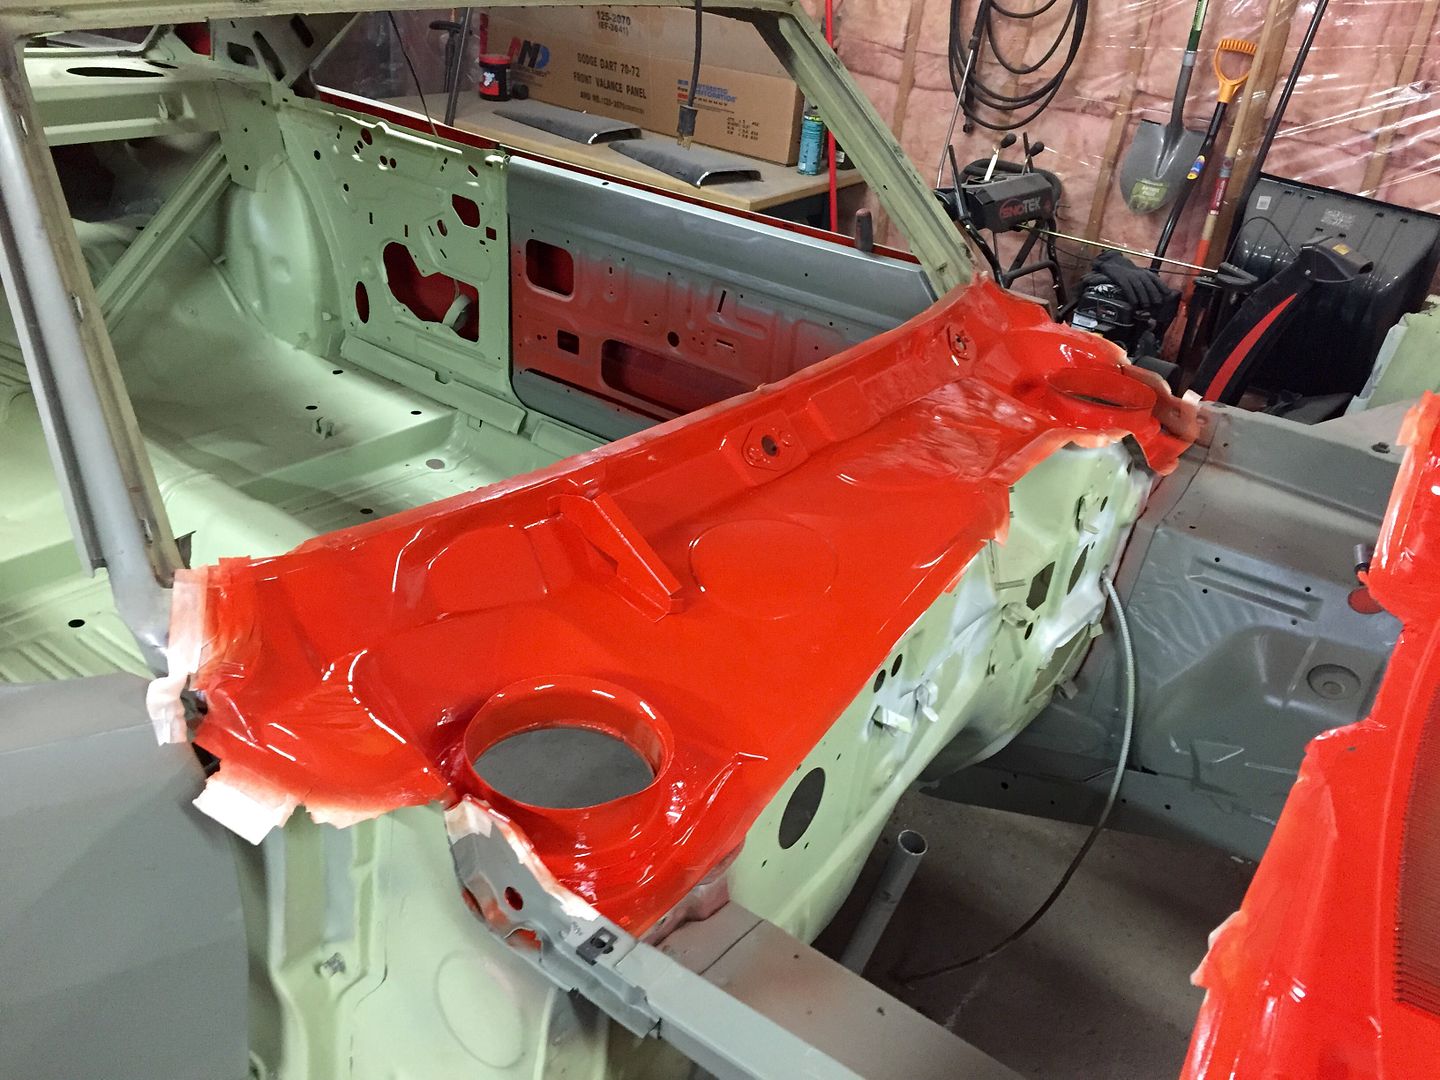
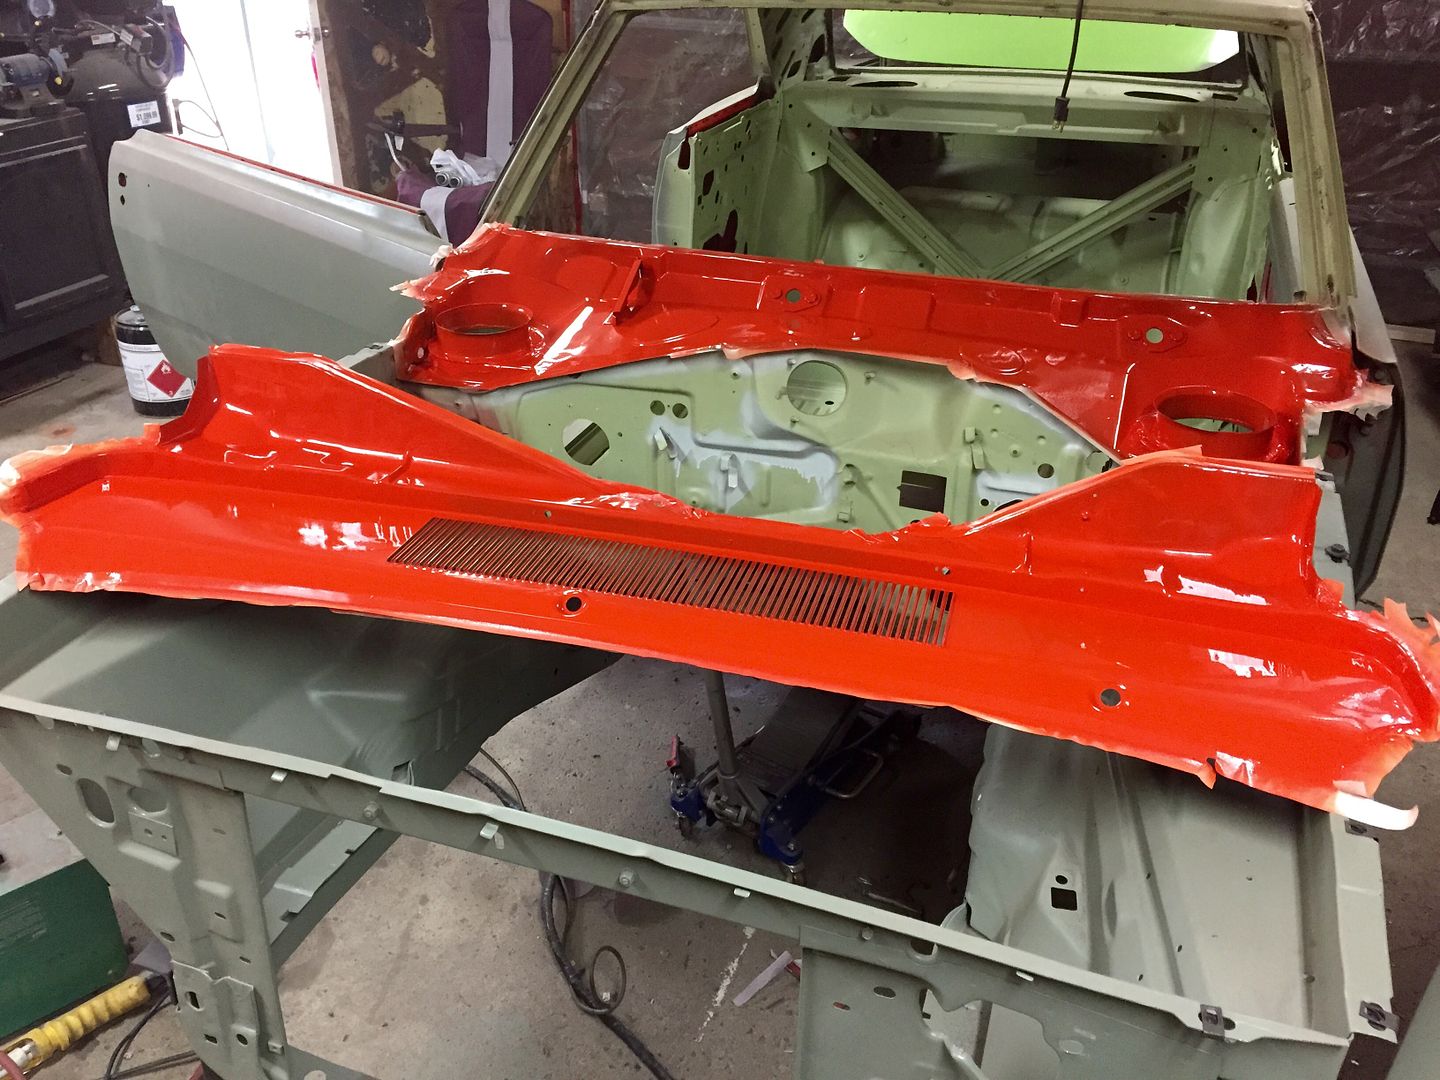
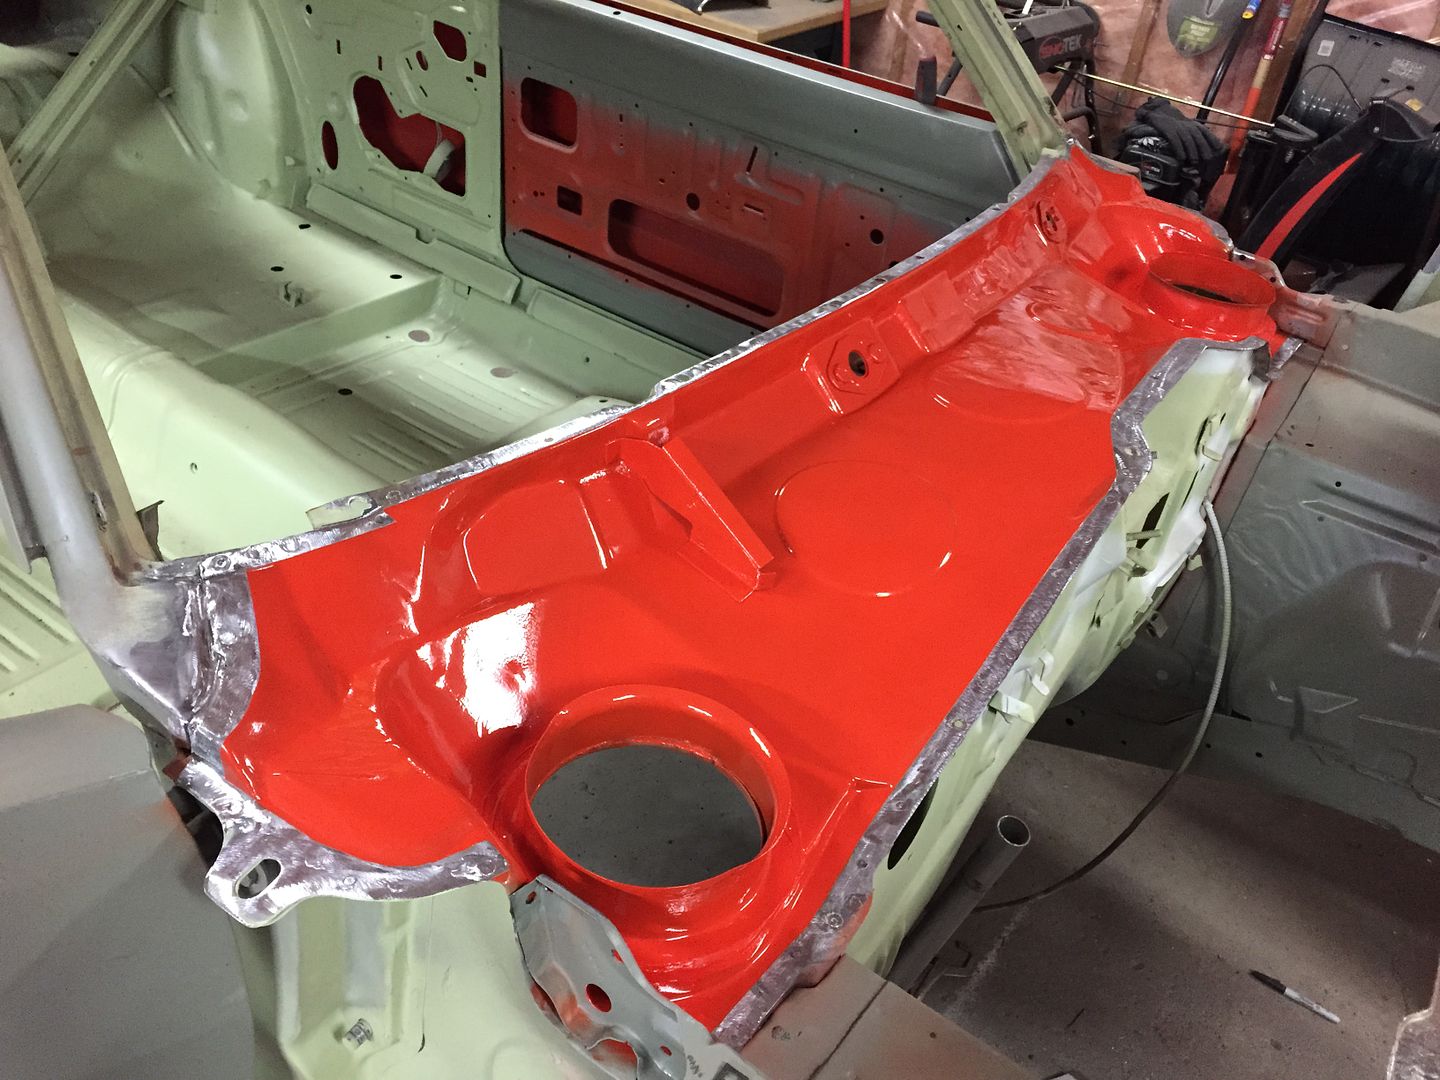
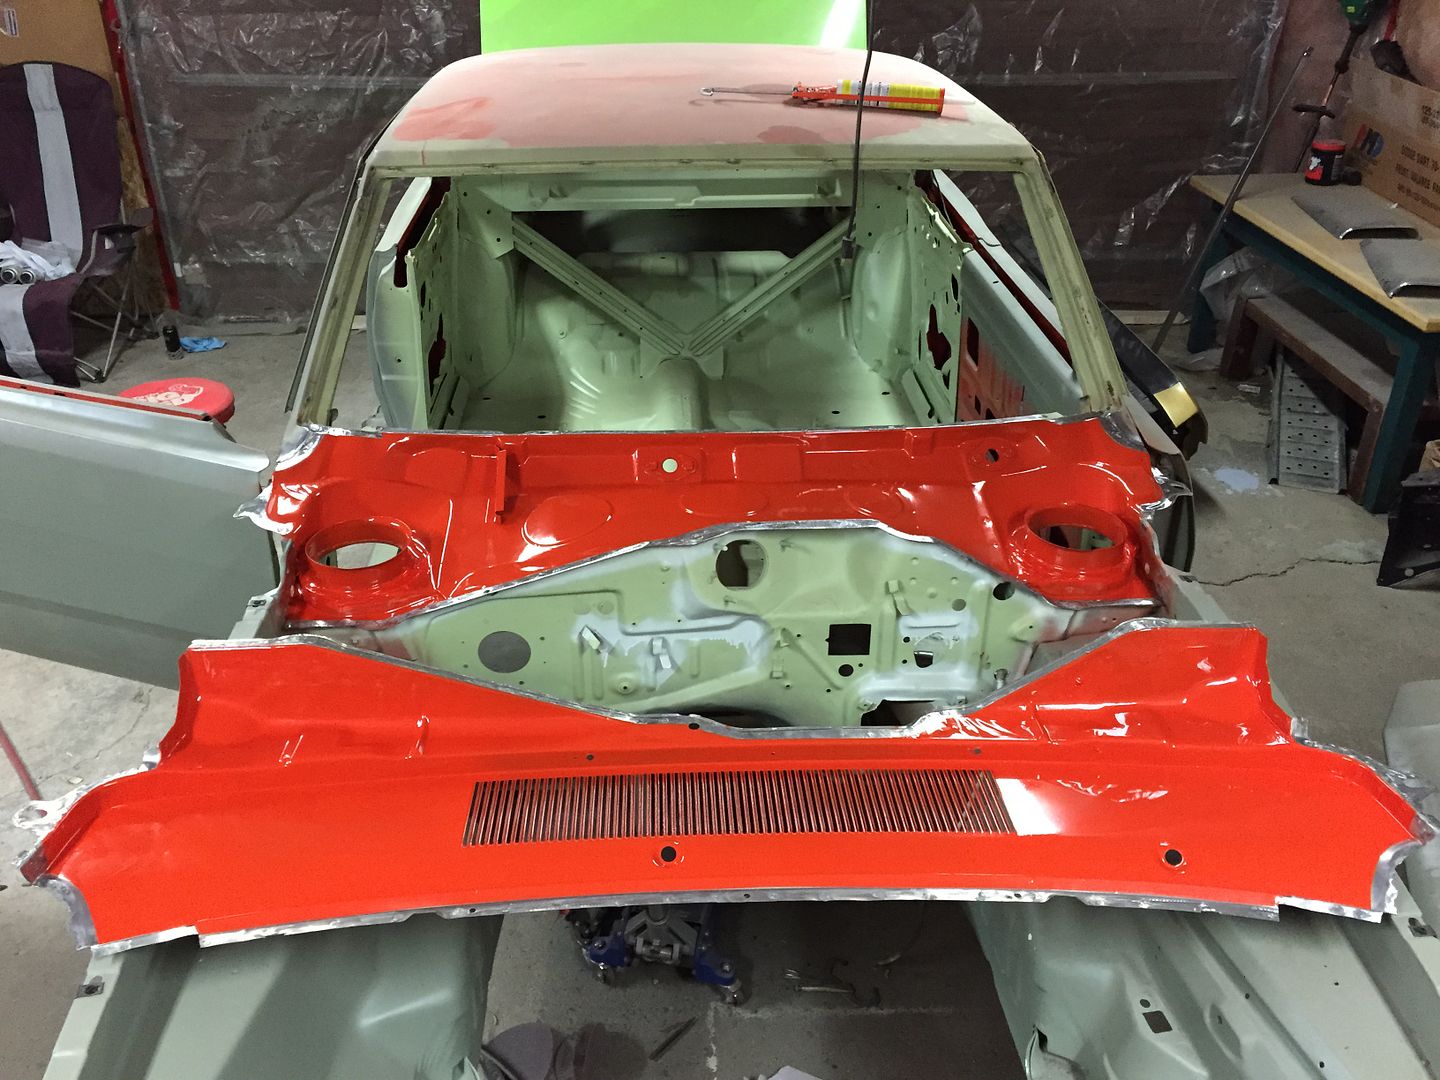
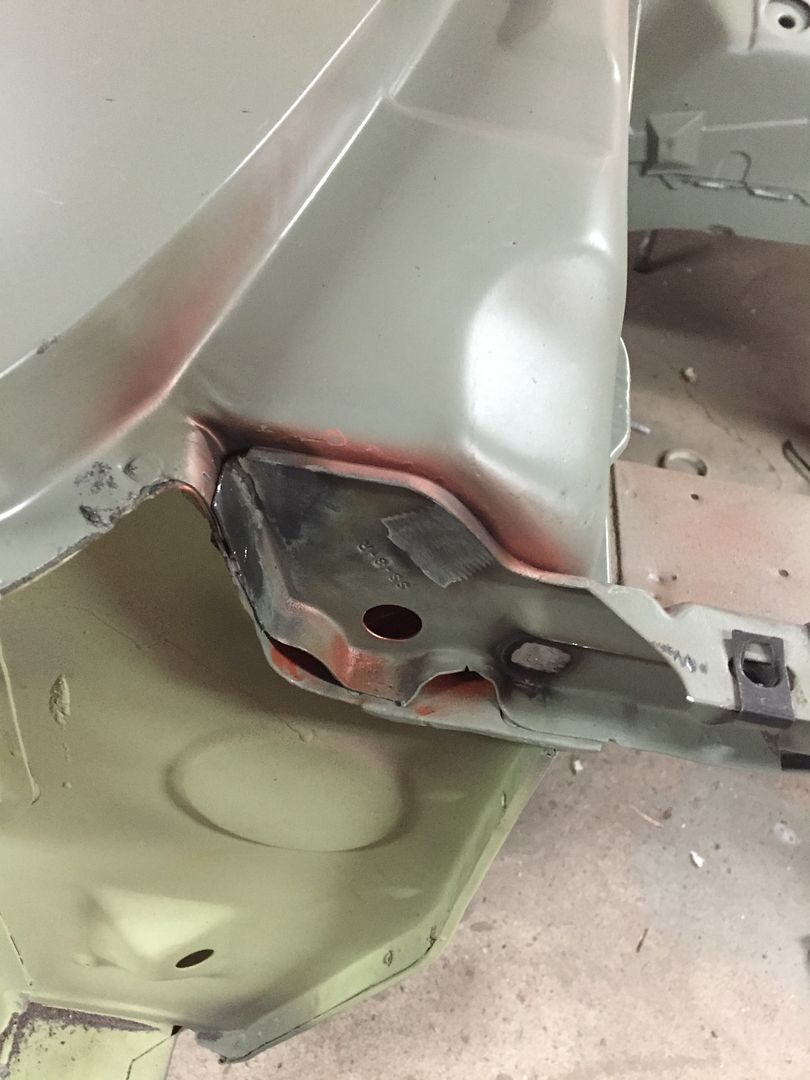
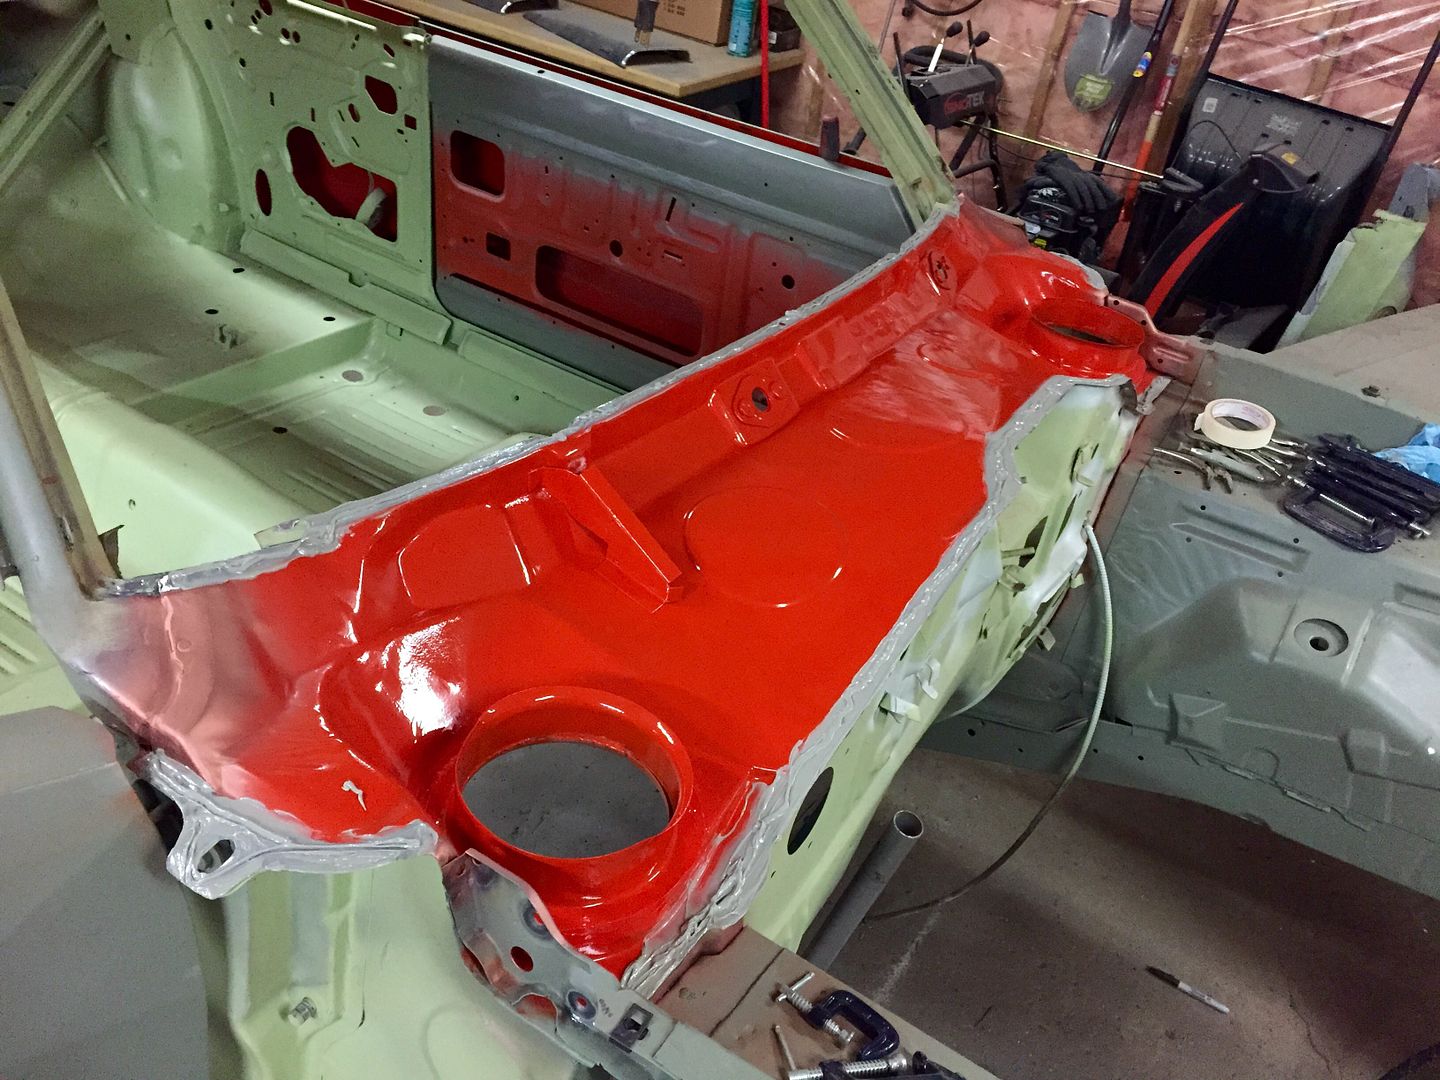
I got a lot done on the cowl today. I removed the upper cowl, ground down the spotwelds, sanded the lower cowl area and removed the surface rust from the baffles. I just put a coat of epoxy on the lower cowl area and hopefully tomorrow I can re seam seal the baffles and paint some Hemi Orange on it! This week I should be able to glue/weld the upper cowl on.


Nice and clean! I was worried there'd be rust in this area.. It had a lot of compacted dirt and sandblasting sand in this area tho! It'll be a peace of mind painting and sealing in here so no water will leak in the car.


In the process of stripping the rust/paint off in the lower cowl.


Test fit... Fits perfect!


Epoxied!


Like this thread, great work. Car will be stunning when done.
 
Thanks for the compliments guys!!

This is the last major metal repair on the car... There is still a lot of welding to do.. Mainly some roof rust repair and a bunch of random holes to weld up in the engine compartment and trunk pan (had a hitch at one point in its life) it's nice to finally be at this point, because I can't wait to start the bodywork/paint! I'm borrowing a rotisserie in the next couple weeks and I'll fix the rear shackle mounts (under the rear torque boxes has a little rust repair to do) and then I'll touch up the spots the blaster missed and put another coat of epoxy on the bottom side.. Then I'll clean out the rear frame rails, treat the rust on them and undercoat the bottom of the car, then it'll come back off the rotisserie for final bodywork and paint.

I love Hemi Orange!


This is by far my favourite resto thread.... Not only that, but an amazing resource for anyone to draw on who is looking to restore one of these cars.

Great job so far!:cheers:
 
I've rear your hole thread and you've done an amazing work on your car. I really like the attention to all small details. That's what's counts when it's done.

Hats off my friend and good luck. I will subscribe to watch the progress.
 
Hemiorangeswinger,It looks like you got a lot done, the orange paint is looking good. I have a few questions: what brand of paint are you using? and also you had mentioned skim coating the car with filler, are you using a glazing putty or lightweight filler? Also, I did a name change, so my avatar name may not be familiar, the pic is the same. Your passenger door looks really straight, did you do any work to it?.
 
This is by far my favourite resto thread.... Not only that, but an amazing resource for anyone to draw on who is looking to restore one of these cars.

Great job so far!:cheers:

Thanks!! Hopefully it helps people out on there restorations. Your guys comments help me stay motivated. This is going to be one long thread by the time this car is completed!

I've rear your hole thread and you've done an amazing work on your car. I really like the attention to all small details. That's what's counts when it's done.

Hats off my friend and good luck. I will subscribe to watch the progress.

Thanks for the compliment!

Hemiorangeswinger,It looks like you got a lot done, the orange paint is looking good. I have a few questions: what brand of paint are you using? and also you had mentioned skim coating the car with filler, are you using a glazing putty or lightweight filler? Also, I did a name change, so my avatar name may not be familiar, the pic is the same. Your passenger door looks really straight, did you do any work to it?.

Thanks, I am using Glasurit base/clear. I believe the base coat is the 55 line. It's solvent based and very pricey, but has excellent coverage and is probably the most accurate to the original EV2 colour when it comes to solvent now. There are some other brands thru The dupont distributor here that have solvent (forget the name) but that line doesn't even carry the paint code. I will be using all glasurit products on this car including primer when I get to that point just because I like to stick with the same brand and using good quality paints, primers and sealers really shows especially long term, since I only plan on doing this car once. I used to use DuPont chroma-premier but you can't get it in solvent anymore, so I switched to BASF line and I like it more anyways.

Yes the entire car will be skim coated with evercoat rage lightweight filler and blocked out with all the panels on. This way it will ensure nice sharp lines and no transitions between panels. When applying the filler I will use masking tape across the body lines and apply the filler to that point and repeat this process across every panel, then it will be blocked out by hand with a long board and be primed and sanded until perfect. Then it'll come all back apart again for paint. It's alot more work doing it this method but will ensure perfect alignment when it gets re assembled after paint.

I put AMD door skins on the car.. It's quite a few pages back now, but I showed the entire process. The passenger door has no filler in it yet, but took a lot of work to get right. I had to weld a 1/8" welding rod all along the door edge where it meets the quarter because the gap was to big. I still have to fix a couple spots on the doors with the welding rod to make it right, but I'll do that later on when I re align everything.

Hope this helps!

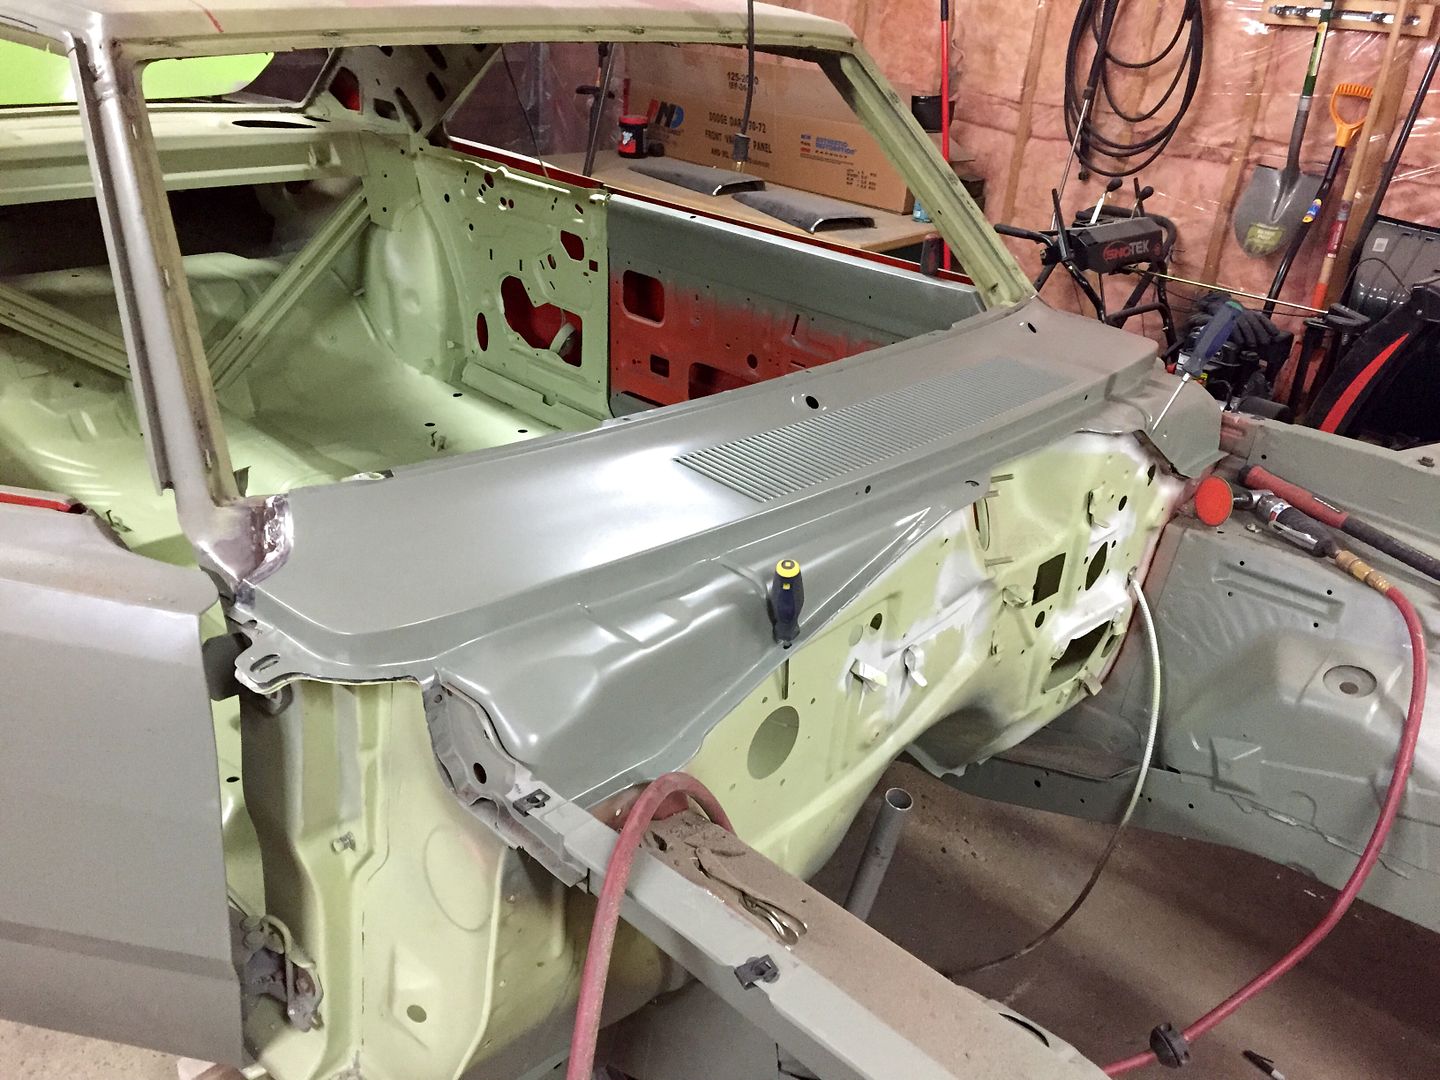
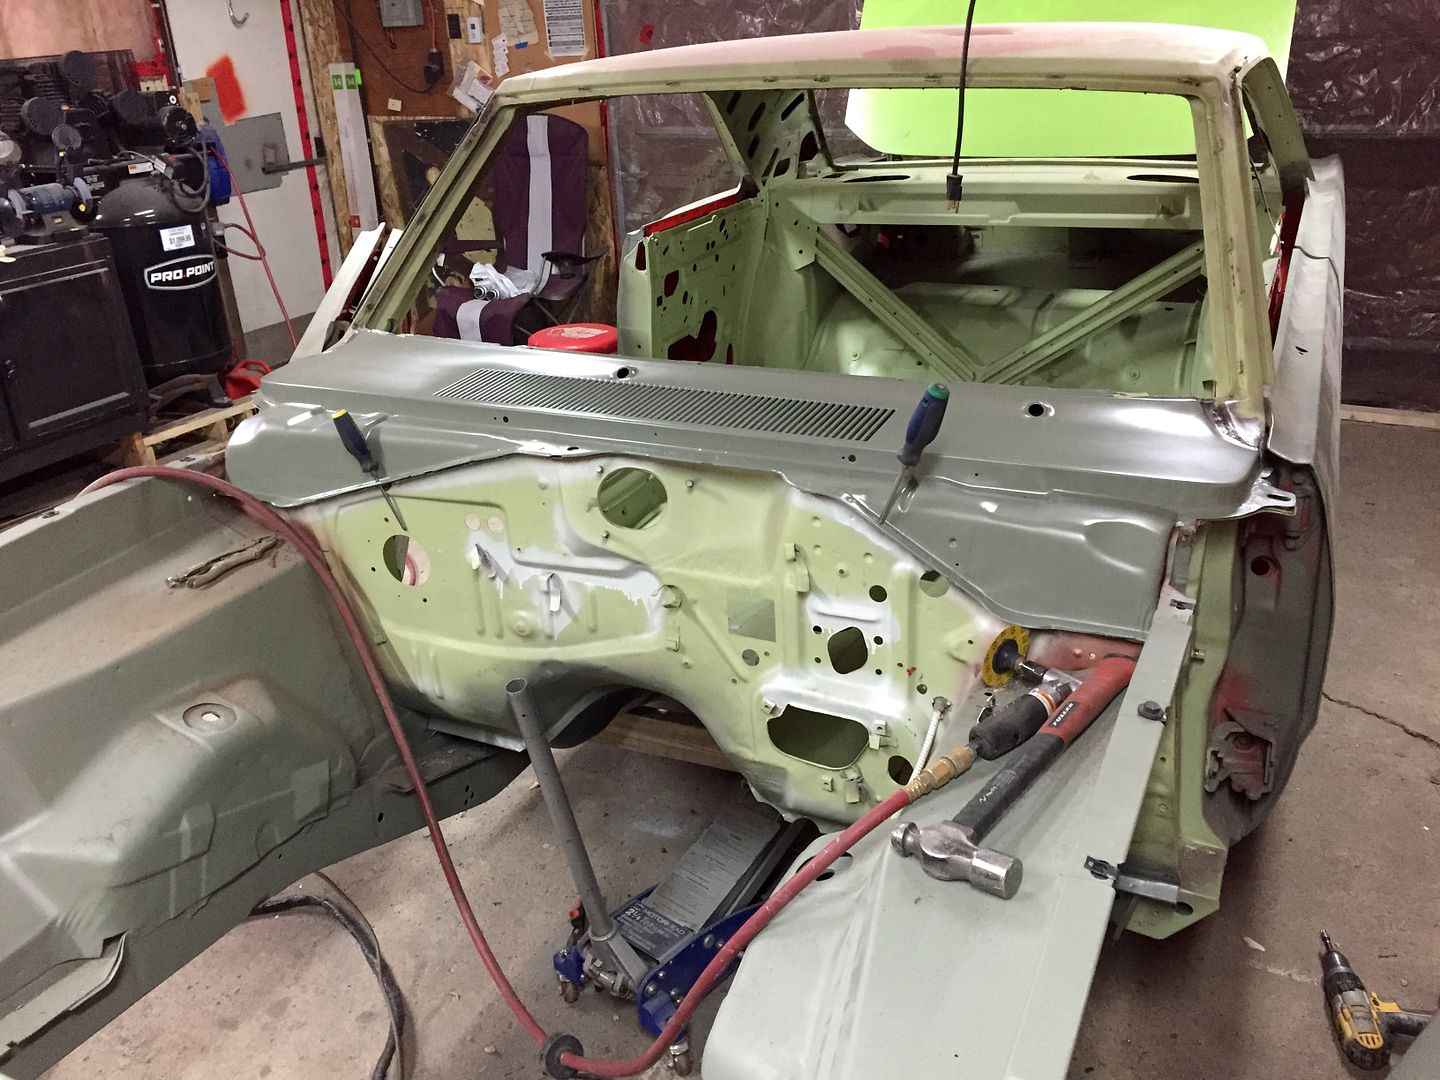
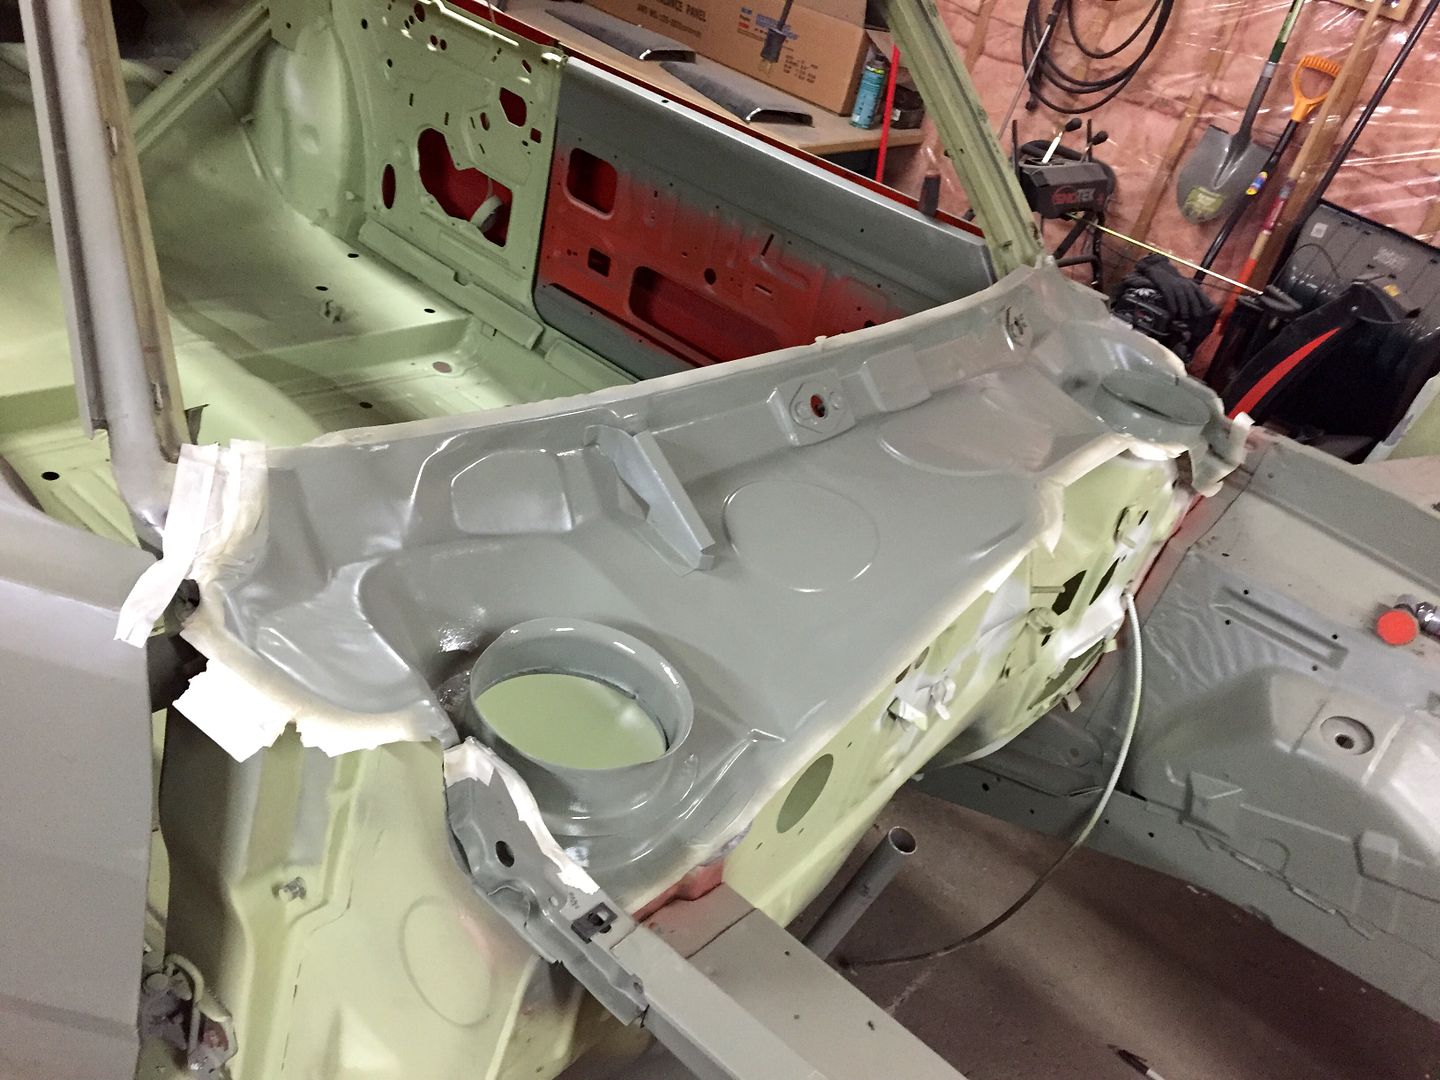
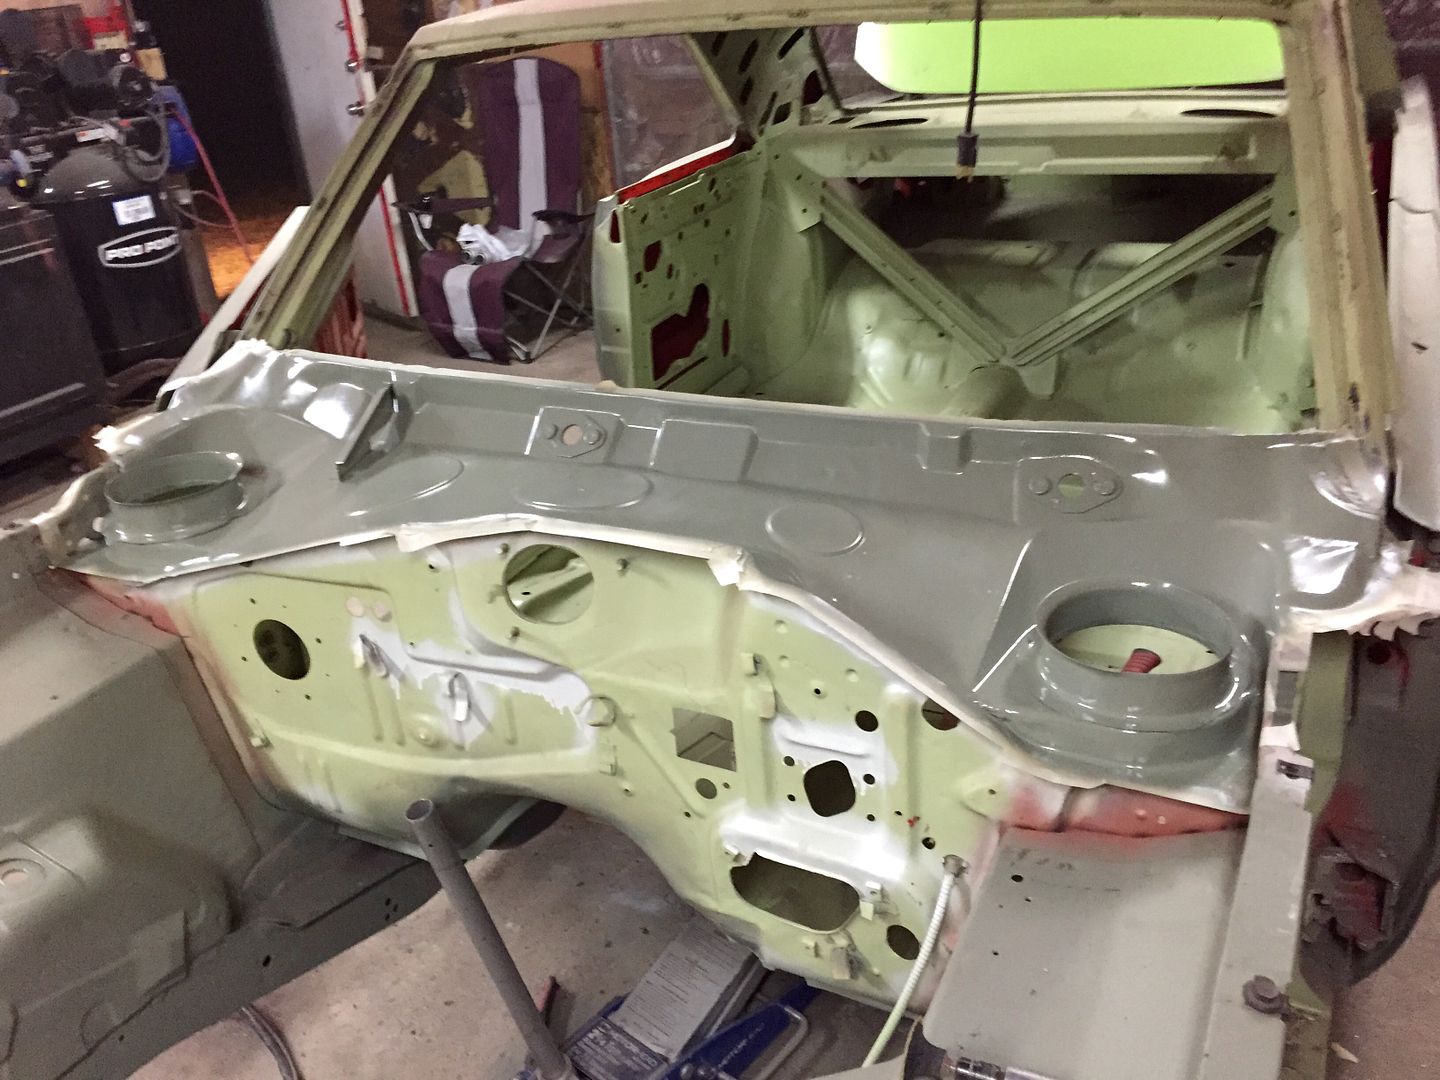
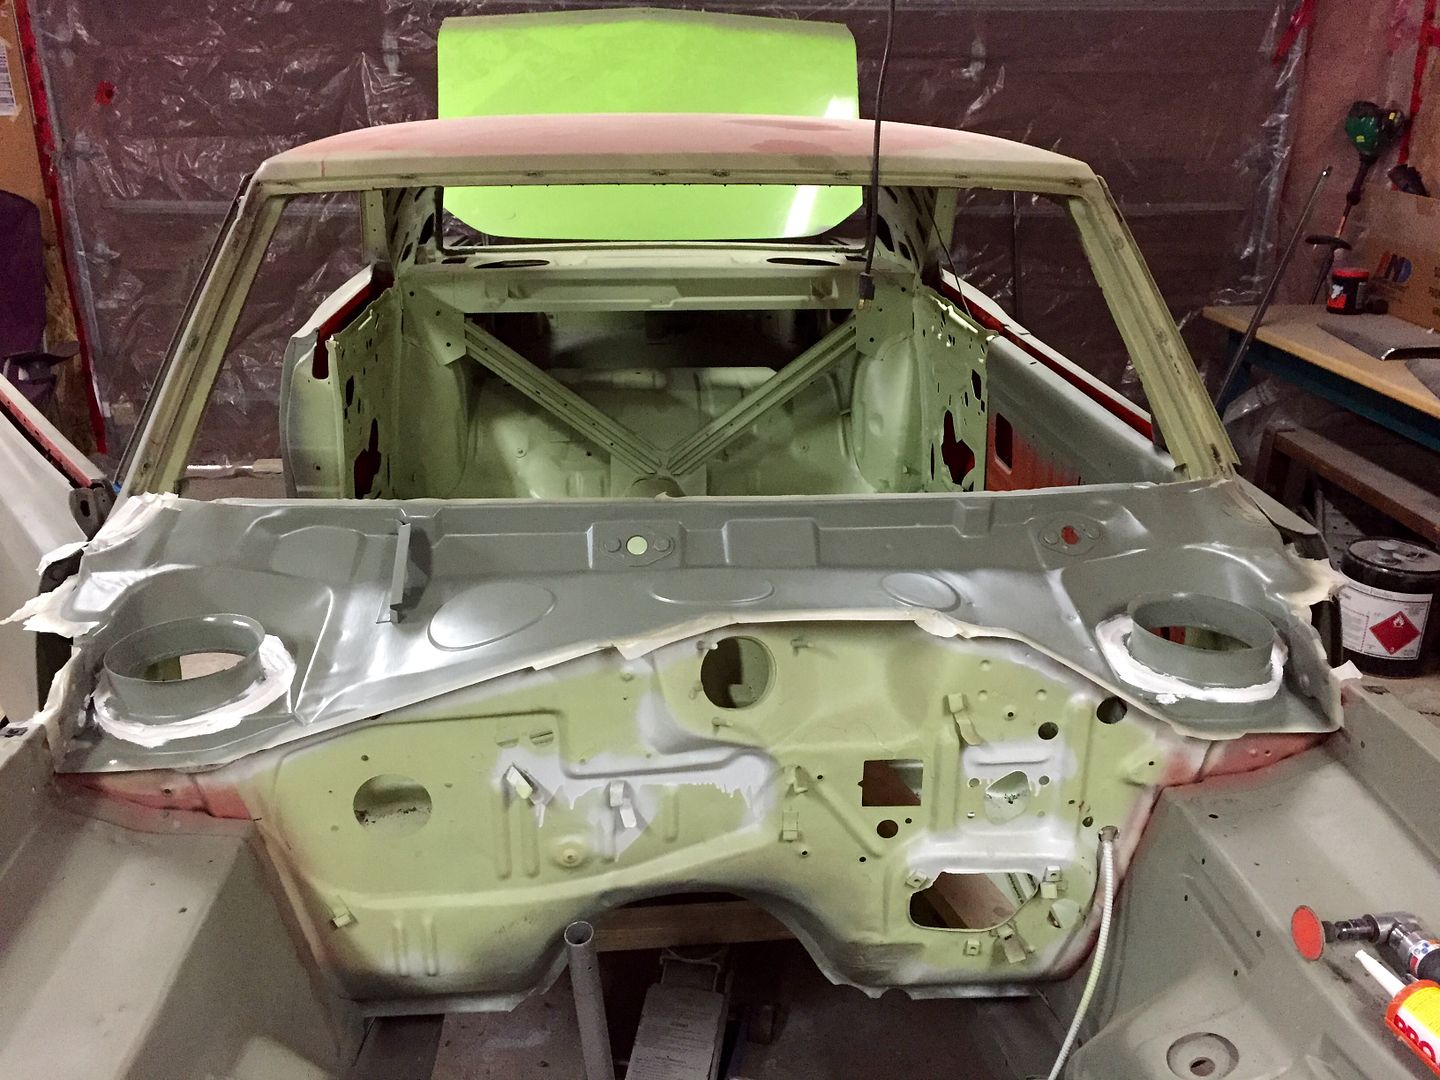
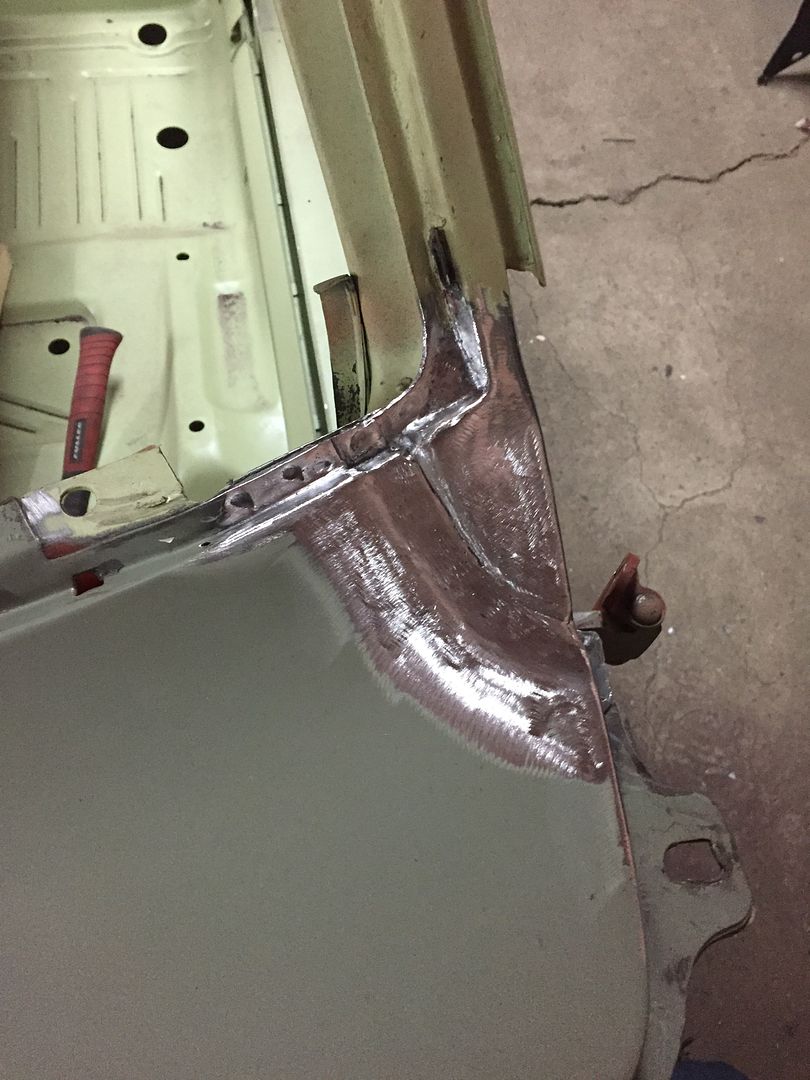
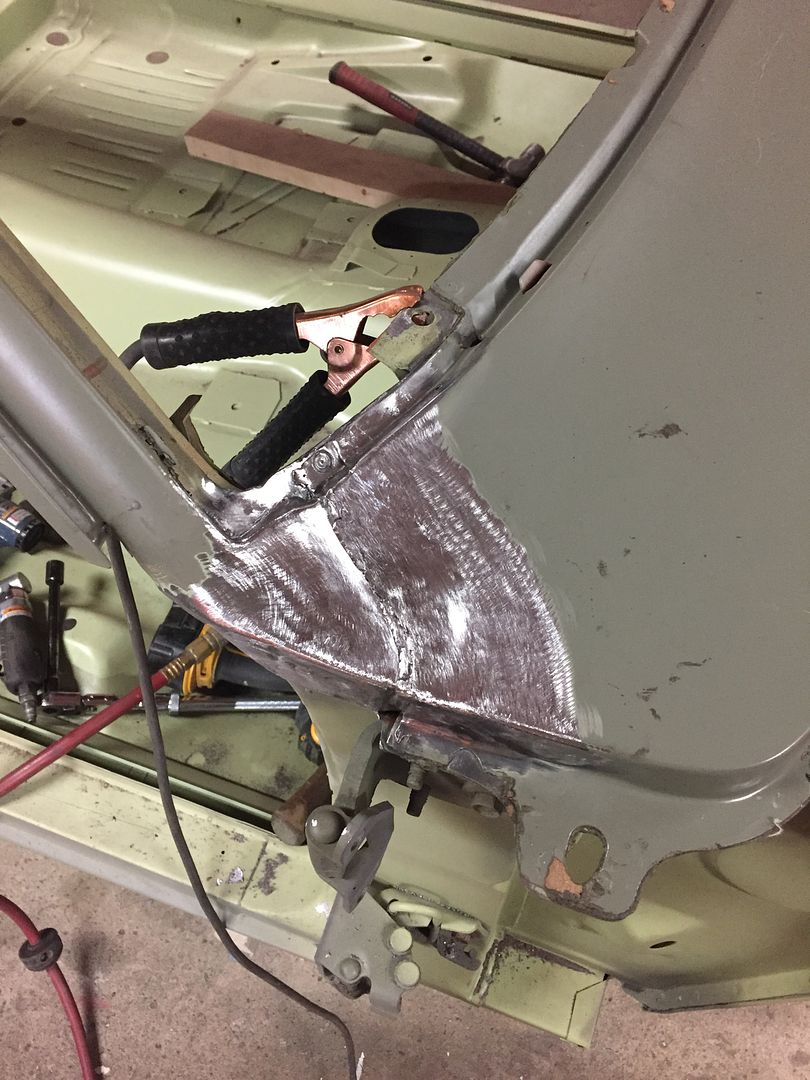
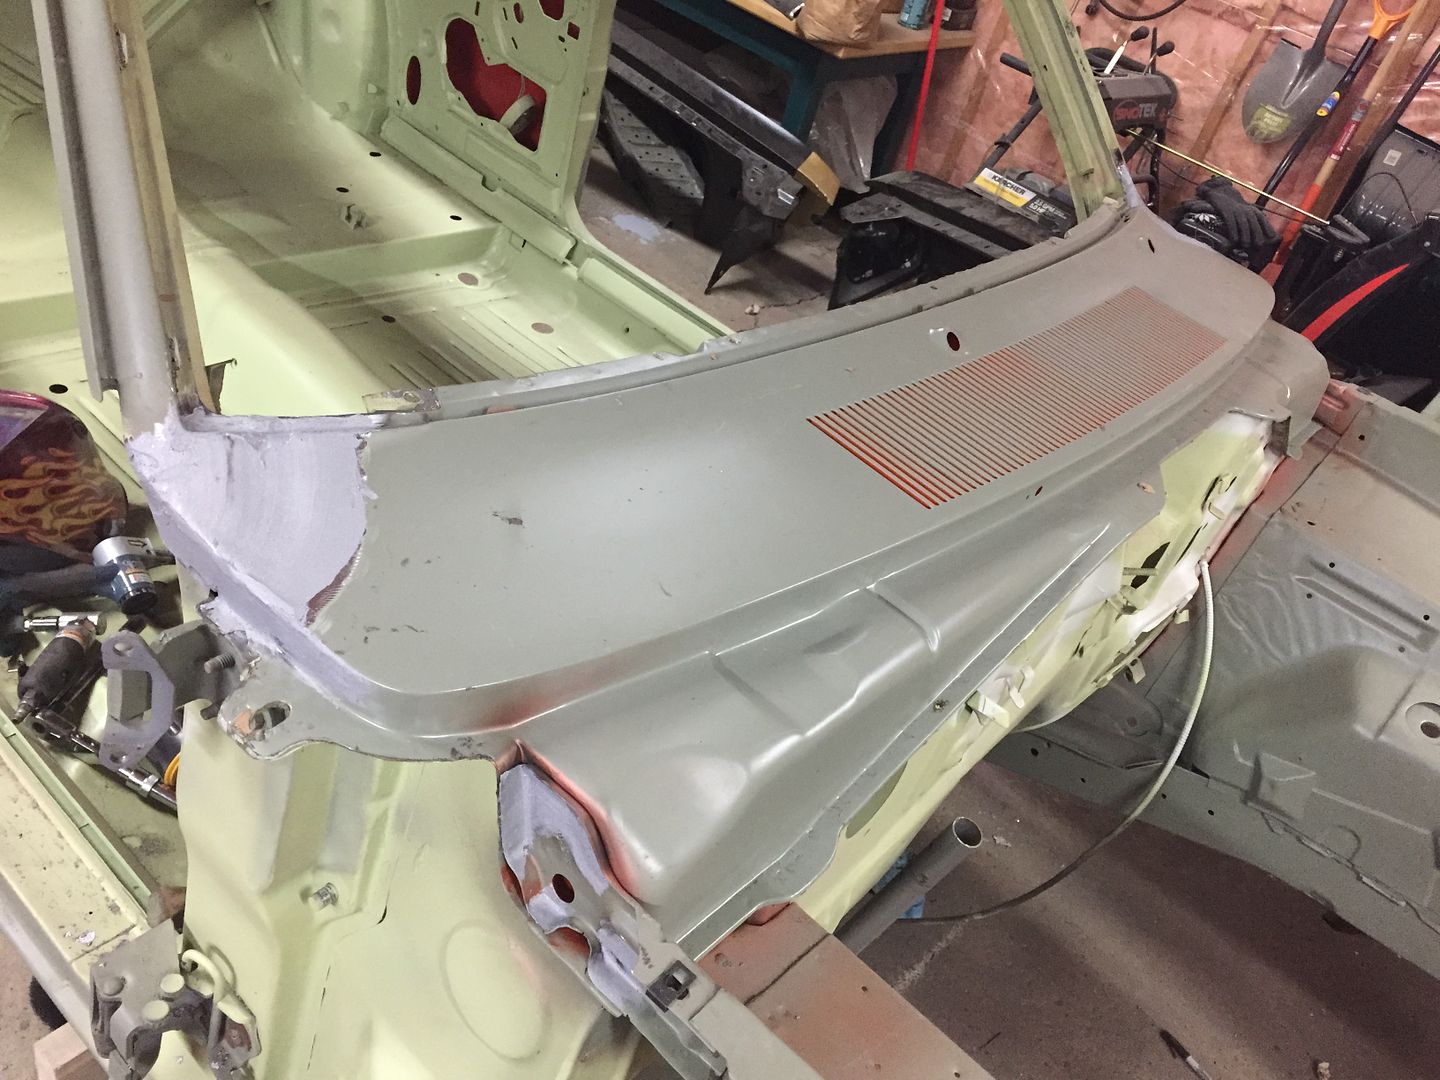
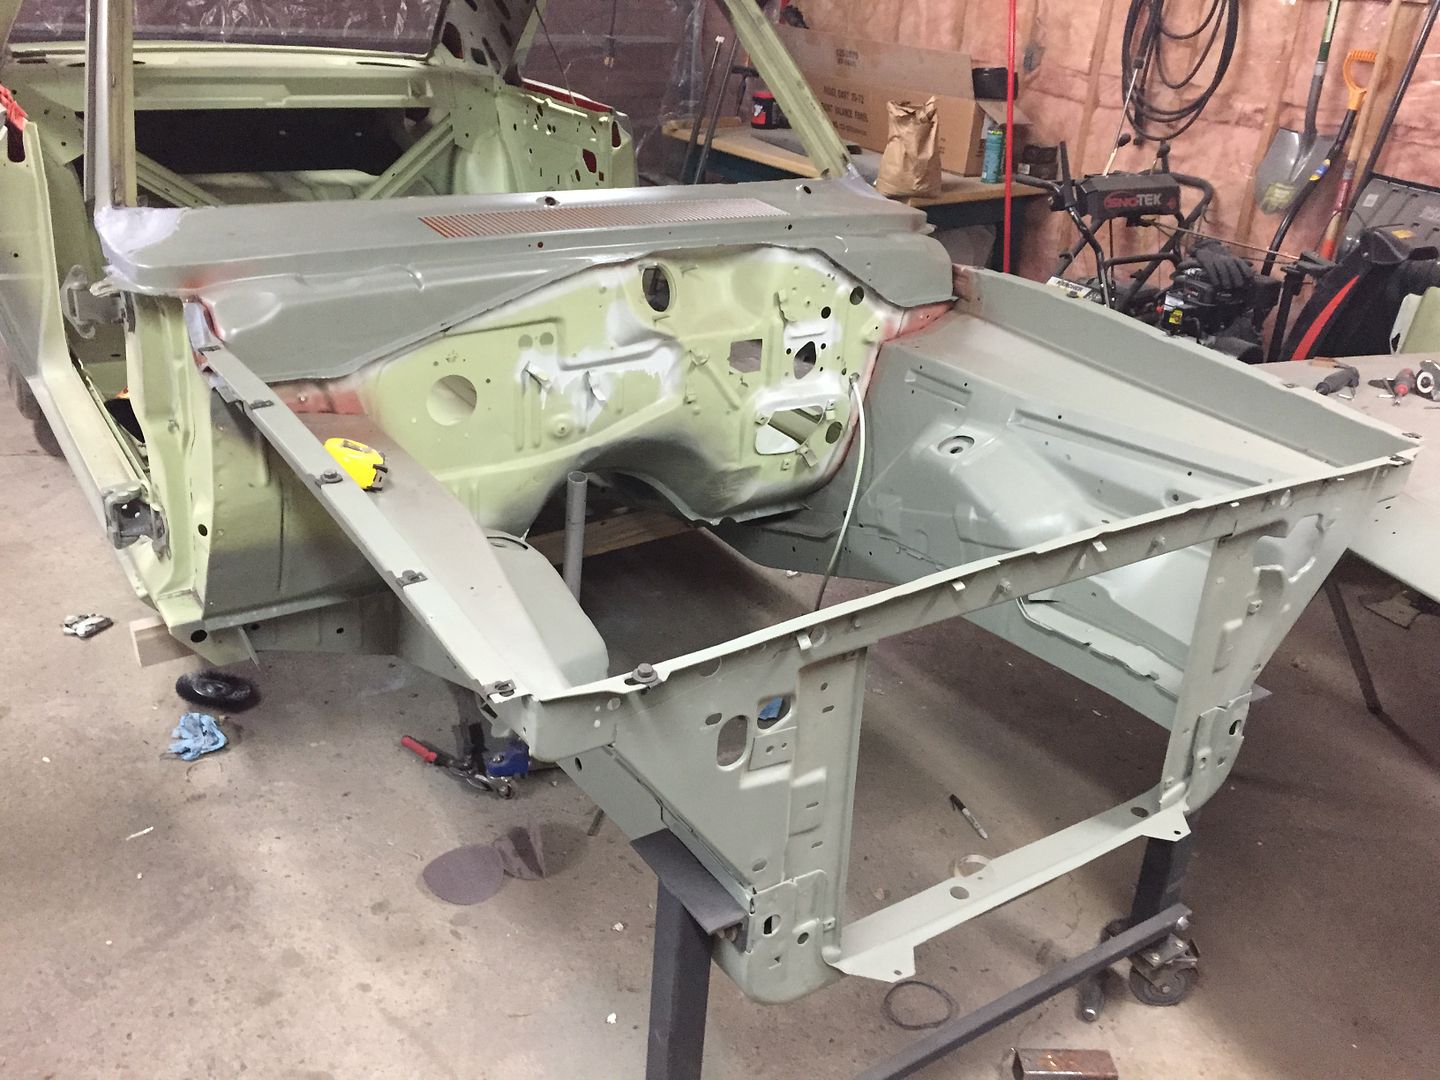
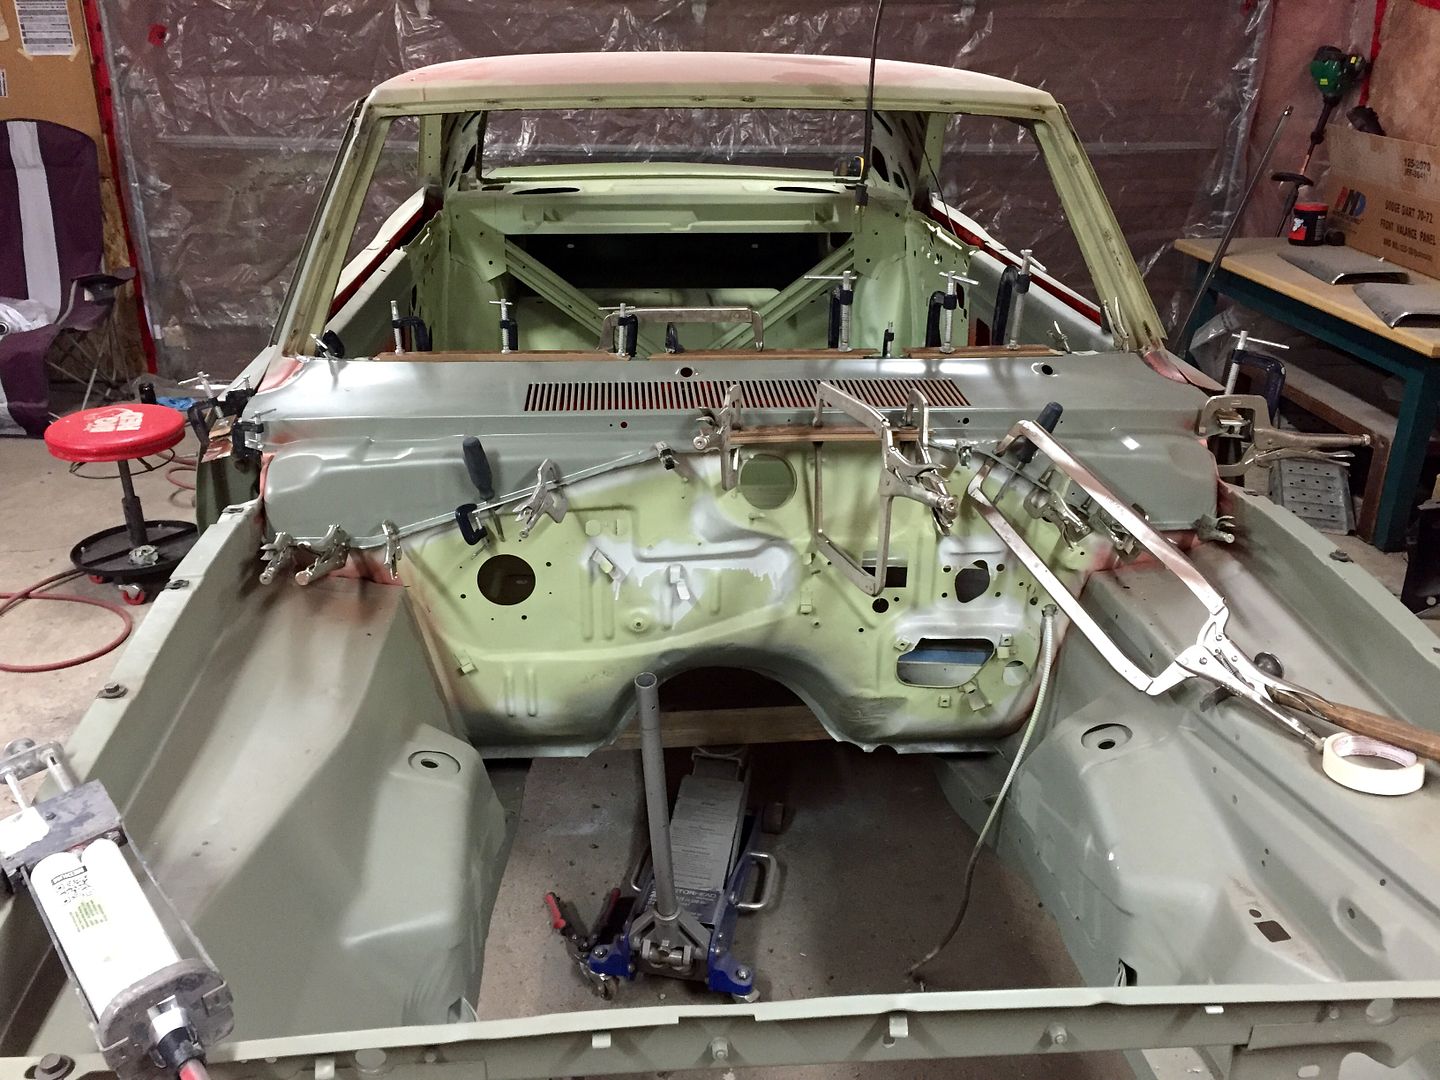
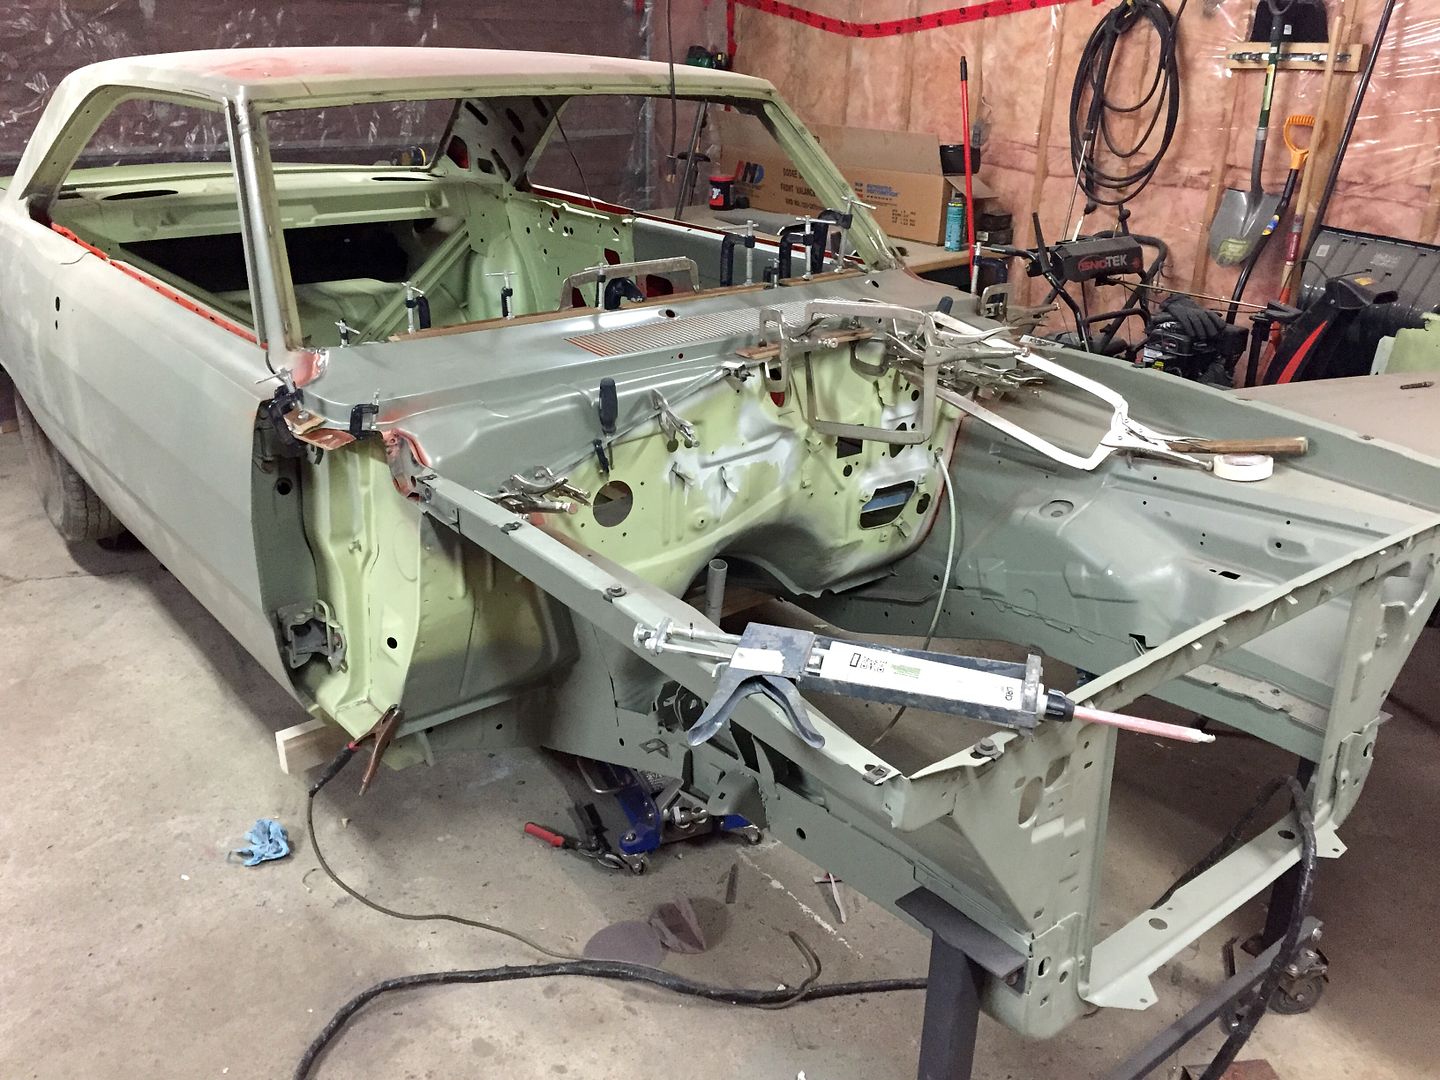
I got the cowl glued on! I also welded the lead seams solid and started welding the inner fender to cowl extensions on, but it was to stinky in the garage to continue, so I stopped (that fusor glue stinks!) as you can see I got a lot of clamps and pieces of wood holding it down, the glue has already set now and is rock solid and watertight! I covered all the bare steel with the glue and then added an additional bead so there wasn't any chance of bare metal.


Finished up the welding on the upper cowl and removed all the clamps. I also put a coat of all metal on tonight and tomorrow I'll sand it and apply another coat. This week/weekend I plan on doing the bodywork on the firewall and welding up some misc. holes that were drilled in the firewall and inner fenders and put a coat of epoxy on it and move on to the roof. Not looking forward to the repairs, but it's the last of the outside body to do. I still have the deck lid to get dipped and epoxied, but that's easy.


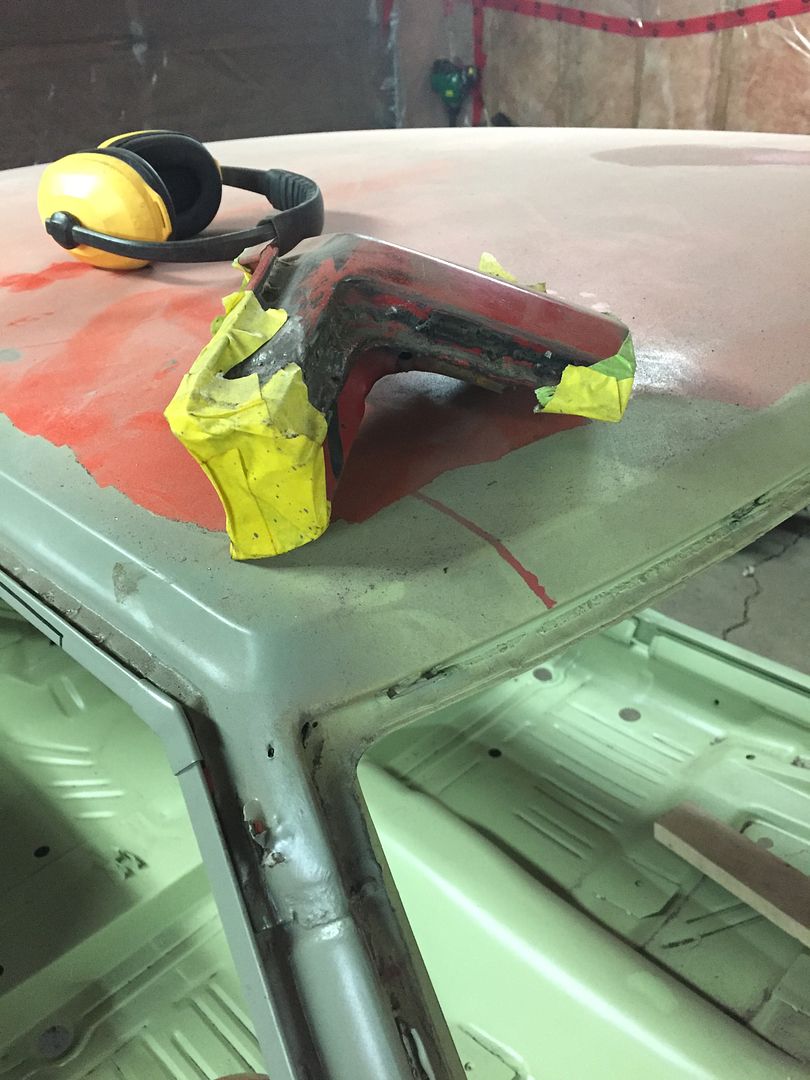
Here is the roof skin repair I've gotta do. I think this happened from mouse piss.


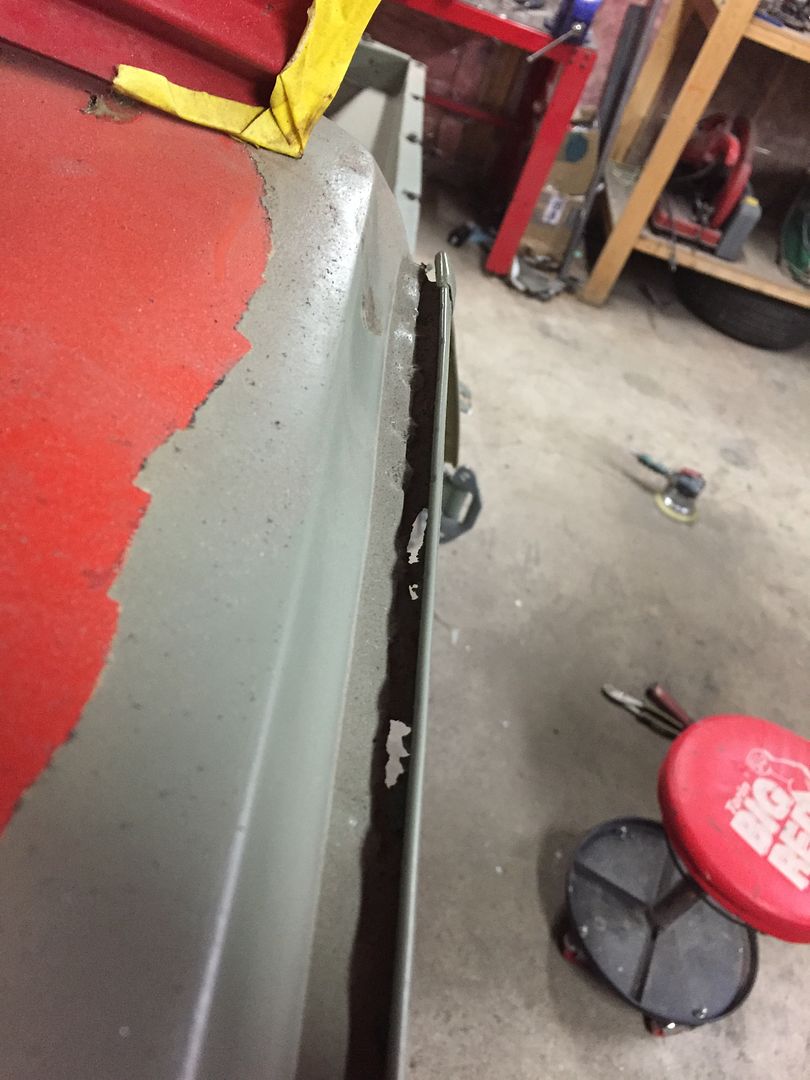
Here's the part I'm not looking forward to repairing.. The seam sealer failed here and let water in and rusted this area.. The rest of the roof seam gutters are perfect. This will be a tricky repair. The roof skin itself is fine, but the gutter edge rusted thru
 
-
Back
Top