67 Dart 270...Project Old School

-
Hello all,

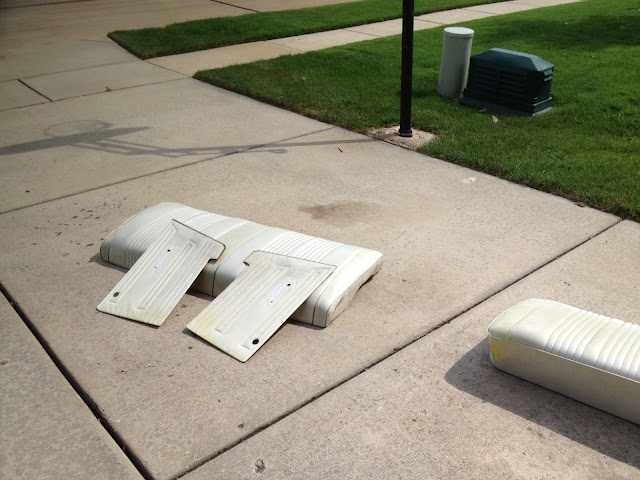
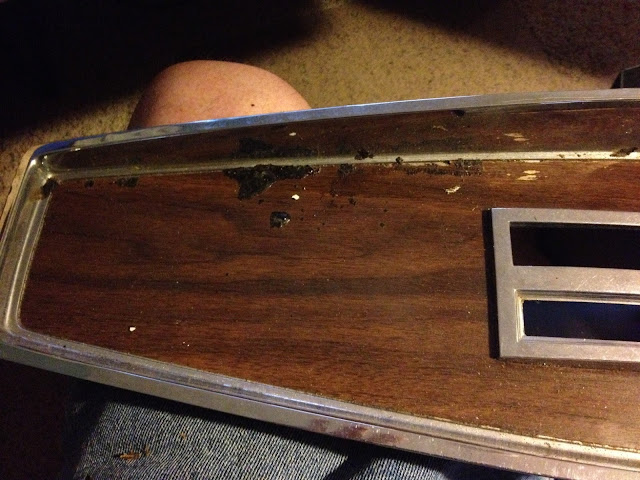
A couple of years ago a friend of mine found a console at a swap meet. I have had it mocked up in the car for over a year, but this weekend I finally cleaned it up. This is what I started with:
consoletop02.jpg


consoleshell01.jpg


consoleshell02.jpg


My car is a 270 series with a low trim level so the wood grain on the console did not match anything in the car. I did buy the wood grain decal from Year One, but decided against it. I took the wood grain decals and headed to a local graphics shop where they recreated the decals in black to match to 270 dash color.

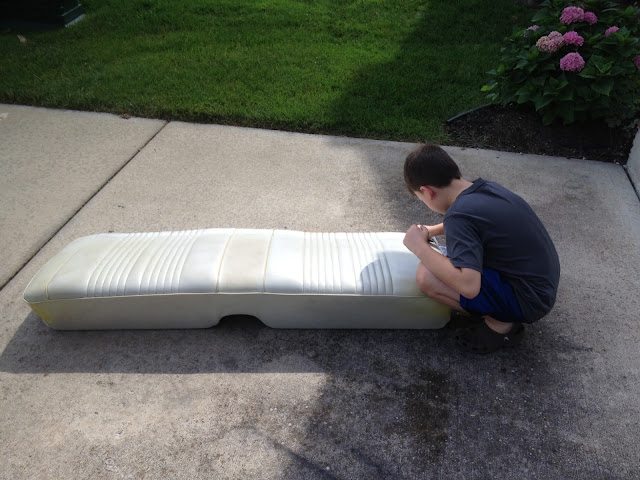
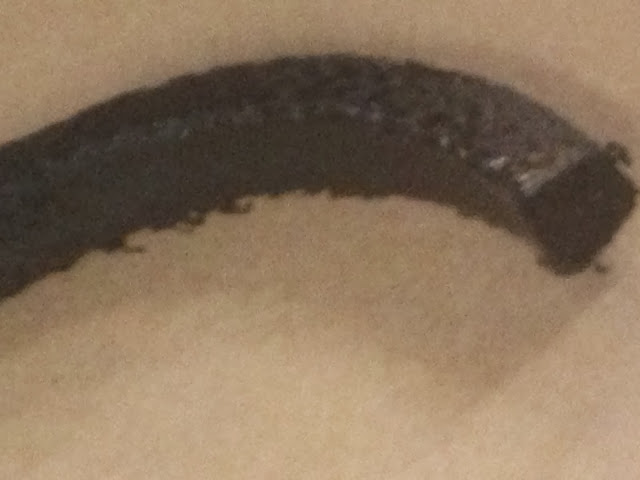
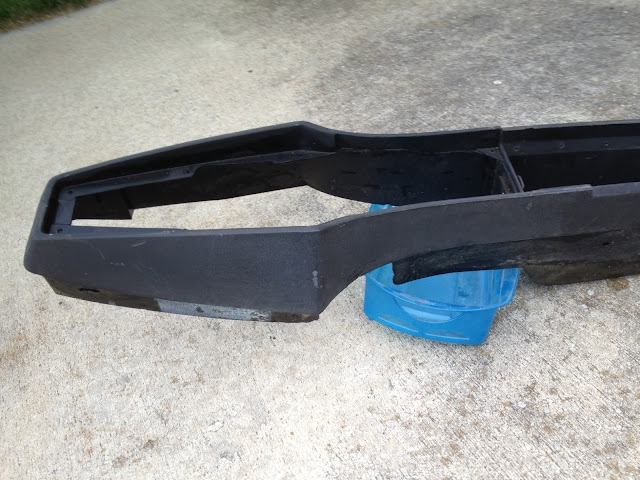
Now came the fun part of trying to remove all the old wood grain.
consoletop01.jpg


consoletop03.jpg


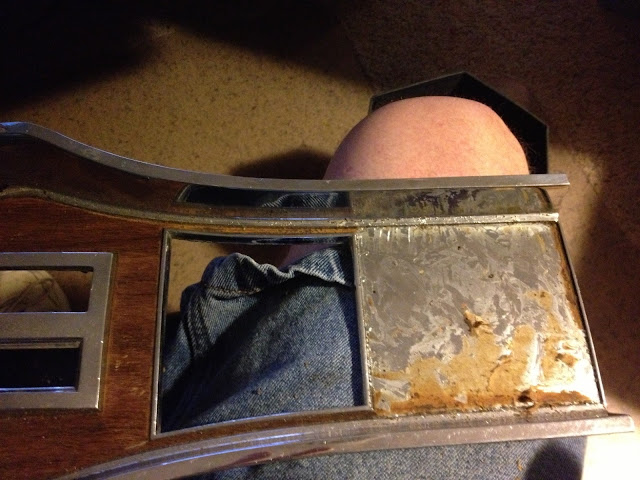
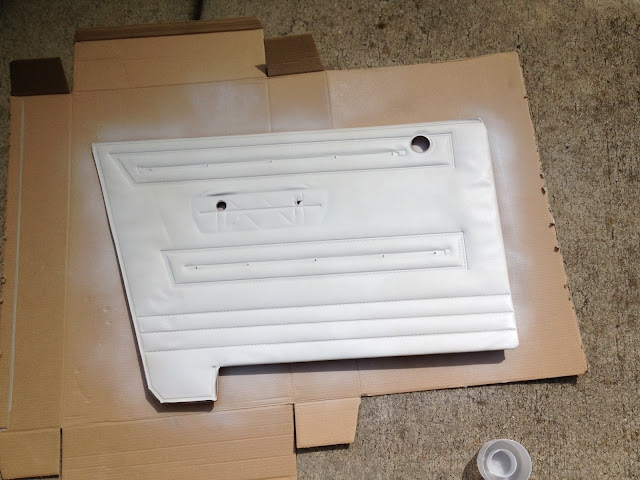
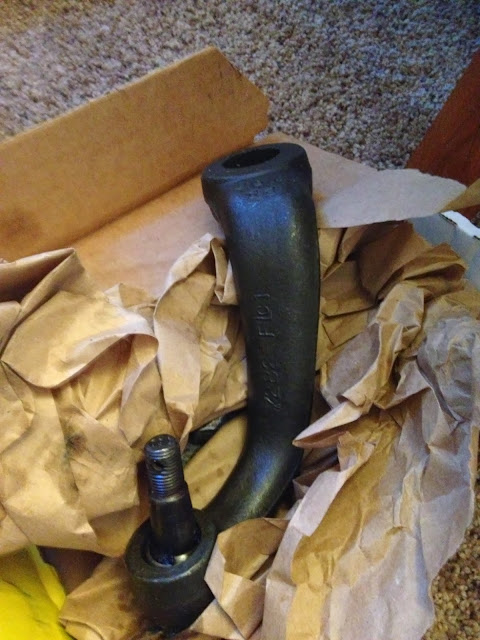
Once I had all the wood grain removed, I used adhesive remover to clean up the residue left by the wood grain decal. I then washed these pieces with soap and water and dried carefully before applying the new decal. I also washed the console shell in soapy water and used a soft brush to get it cleaned up. Once it was dry I used black spray paint specifically for plastics to coat the shell.

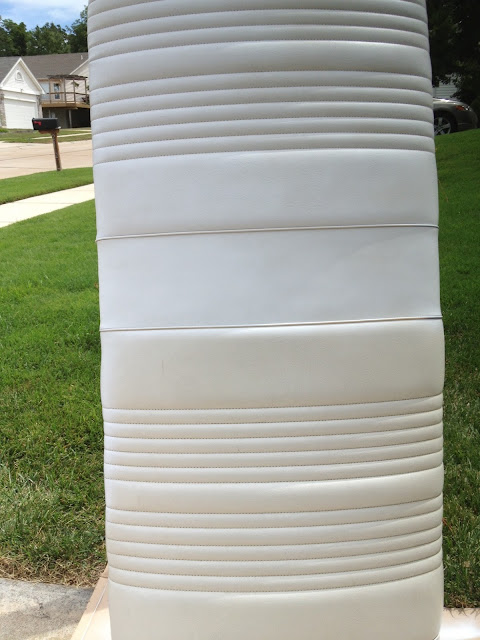
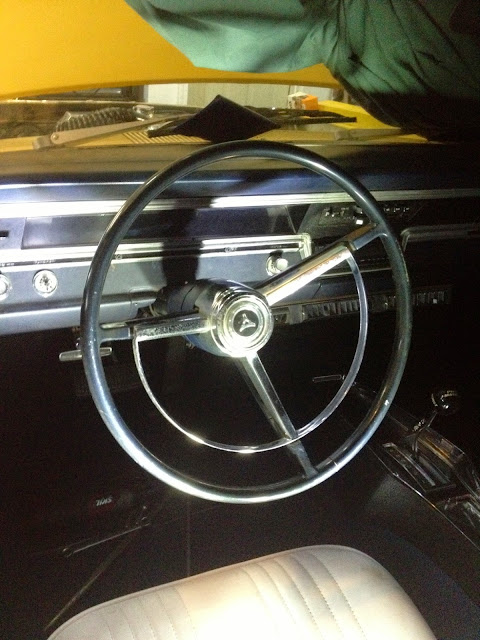
This is what it all looks like mocked up with the new paint and decal:
console01.jpg


console02.jpg


console03.jpg


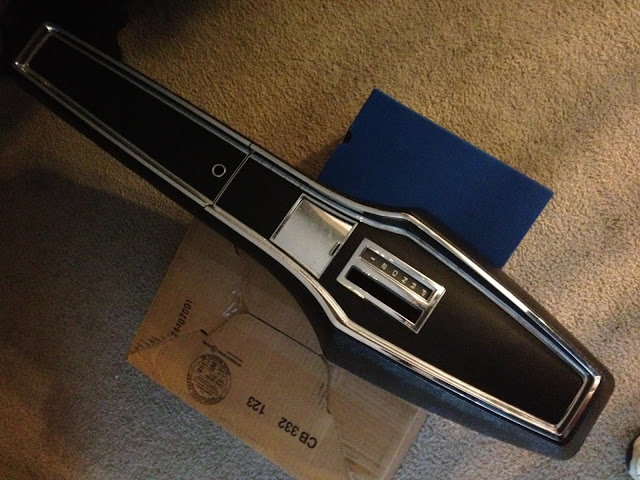
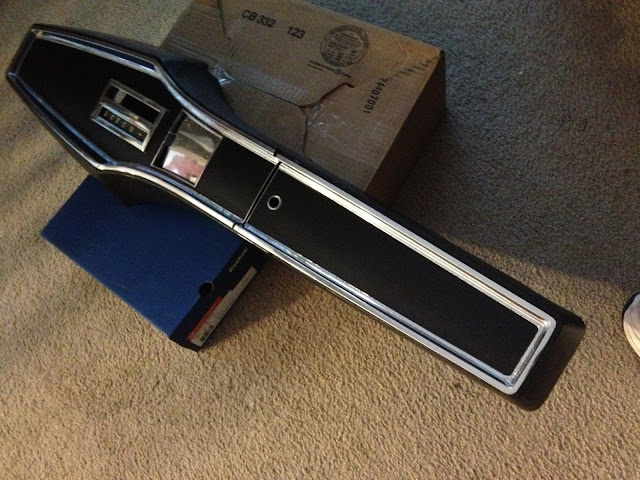
It is not perfect, but is "driver" quality. Not I just need to find the ziplock bag with all the hardware to assemble it the final time.
 
Hello all,

We had some decent weather this weekend so I pulled the back seat and rear panels and dyed them white to match the bucket seats up front. Here are all the pieces in the driveway.
rearpanel02.jpg


The Dart had been painted Viper yellow previously with none of the door seals in place, so there was yellow paint everywhere. You can really see it on the corner of the lower cushion. The original color of the seats and panels was pearl white with a hint of gold in it. The new front bucket seats are your basic low back bucket in white.

I hired some help to scrub off 47 years worth of dirt and grime. We first just cleaned them up as best we could with mild soap and water. We then followed that up with a rise of straight water. We then switched to using the Eastwood's cleaner and adhesion promoter to clean the seats and panels. The Eastwood cleaner did a fantastic job of getting the grime off as well as a good portion of the paint.
adamwork01.jpg


The first pieces I dyed were the rear panels. The first task was to remove the chrome strips off the door panels. Once I had the chrome strips off, I cleaned them and prep'ed them for dye.
rearpanel01.jpg


The large seat cushions were a little more challenging just due to their physical size and the amount of time it takes to cover all that surface area. In the following photo I am about half way done with the first coat. You can see the slight difference in color.
lowerbench02.jpg


By the time I was done spraying all the surface areas my index fingers and thumbs on both hands were cramped up. Here is what it looked like installed back in the car.
backseat02.jpg


Makes me wish I had pulled the seat belts and dyed them navy blue.
 
OK, after fighting with google plus and it's inability to share individual photos I finally found a way to access the old picasa web interface to share phtotos.

I have been doing minor tweaks to the Dart since I lasted posted. The most significant changes revolve around oil pool reduction. It was embarrasing how much oil would pool under the Dart if it was parked for more then 5 minutes. Not only does the engine leak, but the rear end as well. First up I pulled the pan off the motor and replaced the rear main seal. This seal is vintage 1978:
mainseal.jpg


While I was in there replacing the main seal, I decided to replace the oil pump, pickup, and pan. The pan and pickup were left over from my ill fated magnum swap. I sprayed the new oil pan to match the motor:
newpan.jpg


Nice and shiney.... Here is a shot of the new high volume Mellings oil pump and pickup installed:
oilpumpandpickup.jpg


It is always a relief to see oil pressure on the gauge:
oilpress01.jpg


While I have the drag link out of the car I am thinking this might be an opportune time to swap in a Flaming River 16:1 manual box in place of the factory 24:1 box. The $500 price tag is the only thing giving me pause. In the mean time I can work on replacing the pinion seal on the 742 case, 8.75 rear end.
 
After completing the rear main seal replacement the amount of oil leaking was reduced significantly, but I found oil leaking around the oil filter. I ordered a new oil filter adapter with an O-ring seal in hopes it will solve the issue. Since I has a gift card from Summit Racing I ordered the oil filter adapter and also ordered a quick change vacuum secondary spring kit.
.
oilfilterplate.jpg


Since I had the drag link out of the car from pulling the oil pan, I decided the spring for the Flamming River 16:1 manual steering box to replace the stock manual box.
flammingriverbox.jpg


While I am replacing the steeering box I will also replace the pitman arm.

pitmanarm.jpg


Hopefully this is the correct one for a 67 Dart that originally had a /6 under the hood. I plan to post up the installation of the Flamming River Manual box for others who are interested in this swap. Mine should be easy as I am going manual to manual.
 
How many turns lock to lock with that 16:1 box ?

The box is not installed in the car yet, but with the box mounted in a vise and using a set of vise grips I get a little over 4.5 turns lock to lock.

For comparison, the stock box is in the car, but not attached to a drag link. When I turn the steering wheel lock to lock I get almost 5.75 turns.

With the drag link hooked up and the rest of the steering I think the number of turns lock to lock will be lower. I seem to remember closer to 5 turns lock to lock with the steering all hooked up with the stock box. The Flaming River box should be closer to a power steering box which IIRC is around 3.5 turns lock to lock. I will report back when I have the new box completely installed.
 
I promised to get back with more information about the Flaming River manual box install. With the drag link and tie rods hooked back up, I am getting 3 turns lock to lock. The Dart is still on jack stands, so I haven't gotten to sample the steering effort at a stop or out on the road. I will try to get some pictures and more details posted about the install later this week.
 
Hello all,

Lets just start by saying things have been busy at work. He is some more information for someone who is looking to swap in a Flaming River quick ratio manual box. My 67 Dart has manual steering from the factory, so the swap should be straight forward. My Dart also has Summit Racing, long tube headers that will prove to complicate things a bit. I already had the drag link out of the car for a rear main seal replacement. You will need to get the drag link out of the car. I didn't have to pull the pitman arm off the old box to get it out, but it did require raising the engine a bit to be able to snake it past the headers.

Speaking of headers, you can leave the driver's side header on if you remove the steering column from the car. After the drag link is out of the way, the next step is to remove the retaining pin from the steering column.
columnpin01.jpg


You can drive it out with a screw driver and hammer, but the thing you have to watch out for is the column doesn't lock on a 67. You will need to use a set of vice grips to hold the column still while you drive out the pin.

Inside the car you need to disconnect the main steering column harness and also the reverse light switch plug near the firewall. You can now unbolt the steering column from the dash. The object is to slide the coupler off the steering box so you can pull the steering column out of the car. Here is a shot of the coupler as you work it off the steering box.
columndisconnect.jpg


Once you have the coupler disconnected, carefully remove the column from the car and set it in a safe place.
steeringcolumn01.jpg


I have already installed a floor shifter and console in my car, so I have additional plans for the column. One of the things I needed to do was connect my shifter so the backup lights would come on. This meant I needed to pirate the wiring plug from the reverse light switch on the column.
columnreverseswitch01.jpg


I removed the reverse light swtich from the column and I will use the wires and plug to connect it to my floor shifter. Since I have a floor shifter I don't need the column shifter or gear indicator on the column. Using a very thin cut off wheel in my Dremel tool, I cut these off flush with the column housing.
columnuncut03.jpg


So I went from the picture above to the picture below...

columncut02.jpg


All that was left to do was fill the holes and apply some matching paint.

columncut02.jpg


I used some two-part epoxy to fill the hole and some high build primer to fill the scratches. I then applied some matching paint.
columnpaint2.jpg


With the column out of the car I was almost able to fully bolt down the new Flaming River box. I ended up having to loosen the driver side header to get the bolts tighted down on the box. I installed my new pitman arm and hooked up the drag link and tie rod ends so I could verify where my steering was centered.

I reinstalled the steering column and ran the steering lock to lock and back to center to ensure the steering wheel was lined up. Now it is time to reinstall the coupler pin. I carefully tapped it back into place.
steeringwheeldone.jpg


Seems very straight forward and not complicated at all. It was...for the most part, except for the headers. Headers are a gift that keeps on giving. As I was getting everything hooked back up I noticed this when I climbed under the car:
steeringboxtoheader02.jpg


The extra thick casting in this location was hitting the header. My advice if you have headers is to take a die grinder and knock the corner off the casting before you install it. The other option is to try to bend the header away or dent the header. You can image it would be a lot easier to do before installing the box in the car.

Speaking of beefy casting, the Flaming River box is very robust and cast out of iron. As a result it weighs 5-10 lbs more then the aluminum case box it replaced.
 
Thanks for sharing that info on the flaming river steering box as ive been checking them out from summit as well for my 67 and wasn't sure whether i was going to have any issues with fitment.Is that pitman arm just a standard type for the 67 as im not sure if they are the same for the 68-69 dart? as ive rebuilt the whole front end on mine and if i dont have to buy a replacement pitman arm to use with the box.Keep up the great work and its good to see another gem saved from the crusher.
 
Best price I found on the Flaming River Box was from Speedway Motors. The price difference was roughly $50 compared to Summit Racing. The pitman arm is the correct one for e a 67 Dart and it came from Rockauto. I searched the forums here for the correct Moog part number.
 
I have been chasing oil leaks on my Dart, but I finally got all of the oil leaks plugged. One piece of equipment that was invaluable in finding leaks on the back of the engine is a telescoping mirror. With this new tool in hand I was able to determine I had oil leaking from the back of the intake. The leak was right in the intersection where the head meets the deck and the back of the intake meets the deck.

I pulled the intake and scraped off all the old gaskets. I cleaned all the mounting surfaces with carb cleaner before mounting the new gaskets and applying a liberal amount of black RTV in the corners where the end gaskets meet the head. I let the RTV skim over for 45 minutes before installing the intake and torqueing it down.

I also took the added step of removing the passenger side breather and installing the correct grommet for a PCV valve. I installed a new PCV valve and connected it with hose to the large port on the back of my Holley 3310 carb. I also took the opportunity to swap on the quick change secondary spring housing and purple spring.

I took the car on a test drive Sunday morning to Panera Bread Company for breakfast with my two sons. When I got home I checked all the usual places for any oil leaks and found none. YIPPEEEE!!!! ...wait, what is that dripping off the drag link? That's not oil...its...its...coolant and water? I followed the stream back to a seeping freeze plug. The good news is the freeze plug is accessible through the maze of header tubes.

Now I know what I am doing next weekend.
 
Hello all,

I have been dodging a date with destiny for well over a year. There were all kinds of excuses from "it's too hot" to "but my car is leaking oil like a sieve". The excuse last week was rain....no they really did cancel the test and tune for rain. I got home from work late and gave the car a quick once over trying to remember what all needed to be done before it was ready to race.

I noticed there was no battery hold down so I grabbed my old aluminum hold down and bolted that down. I kept thinking I was forgetting something, but oh well, I grabbed a small tool bag and my helmet bag and tossed them into the back seat. As I started out I began to notice the skies darkening. There were spot rain showers in the area, but it was relatively clear when I came home 30 minutes earlier.

When I was about a mile from the Mississippi river the first drops of rain began the slow pitter patter on the windshield. The roads around me still looked dry so I wasn't worried. As I crossed the river the rain began to fall a little faster and I had to turn on the windshield wipers. The highway across the river was wet like it had been raining here for a while. OK, now I was worried. Oh well, It would still make for a nice test drive. As I closed in on Gateway Motorsports Park, the rain stopped and the roads dried out. It was a relief to see cars in the pit and staging lanes as the track came into view from the highway.

Should I have been worried when the lady in the ticket booth asked if I was with the Camaro club? "Hummm no...should I be?" They sold me a tech card regardless and I headed to tech. Nice guys in tech...."just print your name there and sign there"...."by the way, where is your radiator over flow bottle?" DOH!!! I knew I forgot something. "Just get yourself a plastic bottle and zip tie it in there." Thanks, so off I went to the concession stand to grab a water bottle and chug the contents. The tool bag contained the needed strapping material and within a minute the bottle was strapped into place and connected to the radiator.

Off to the staging lanes for my first pass.
DART_AT_GMP.jpg


The first pass resulted in a 13.48.
GMP_052814_RUN01.jpg


A second pass improved slightly to a 13.44.

GMP_052814_RUN02.jpg


The car flattened out on the top end as reflected in the MPH. Either too much timing or not enough fuel. I made a third pass, but got too aggressive on the starting line and blew away the tires. The only good thing about the last pass was the MPH which finally topped 100.

I was amazed I could get low 1.9x 60 foot times using a 17" street tire. It would be interesting to see what the car would do on drag radials. All in all, a big improvement from the 15.21 at 85mph we got over a year ago.
DART_AT_GMP02.jpg
 
STRUT RODS!!!!

These landed on my front porch over the weekend:
strutrods01.jpg


They are the QA1 adjustable strut rods. I have been putting this task off for four years. My left side strut rod bushing is almost non-existent. These should solve that problem nicely.

I was hoping to get back to the track this past Wednesday to test out raising the float levels. The rear float level was very low and the front was only slightly low. Nascar trucks rolled into town last week so that cancelled the test and tune in order to make preparations. After I raised the float bowls I drove to the gas station and filled up with 87 octane fuel. I immediately had a flooding condition. I am not sure if the flooding was caused by the float change or the new fuel. The fuel must be boiling and causing additional fuel to blow past the needle and seat. I have a 1/2" plastic space under the carb already, but still the problem persists.

I purchased a set of clear site plugs so I can see if the float levels are rising as carb gets heat soaked. I am starting to wonder if I kept lowering the rear float level to cure the flooding problem originally. I will have to get this sorted out before Wednesday's trip to the track. The weather will be 15-20 degrees warmer, so the heat soak issue will be further exacerbated.
 
Hello all,

Over the past weekend I installed new bulbs for the rear brake lights and front turn signals. I also mounted the front headlights. When I was testing the turn signals, parking lights and running lights, I noticed the front turn signals turned off when I went from parking light configuration to full running lights with the headlights on. Is this a feature or is there something wrong with my headlight switch?
Thanks,
I know that on '68 Darts the parking lights go off by design when you turn on the headlights. This feature was built into the headlight switch. '69 parking lights stay on with the headlights. I'm not sure about '67 but it you have a '68 headlight switch it would turn off the parking lights when the headlights are turned on.
 
Someone clued me in that the 67 Darts were the same way as the 68 Dart where the parking lights in the grill go out when you turn on the lights. The 67 Dart is the oldest car I have ever owned. I owned a bunch of early 70s cars and by that time the parking lights always stayed on with the headlights, this was something new for me (newbie alert).

I know that on '68 Darts the parking lights go off by design when you turn on the headlights. This feature was built into the headlight switch. '69 parking lights stay on with the headlights. I'm not sure about '67 but it you have a '68 headlight switch it would turn off the parking lights when the headlights are turned on.
 
Over the weekend I got the QA1 strut rods installed. I was extremely lazy and cut the originals in half and popped them out. My dream was to install the new QA1 strut rods without having to mess with the torsion bars. Fat Chance!!! the QA1s would not get short enough to fit in without some help.

I removed the tension from the torsion bars and used a simple ratchet strap connected to the lower control arm and the front subframe. The ratchet strap is a small one with only a 4" handle on the ratchet, so we aren't talking about a lot of tension here. This allowed me to get the QA1 strut rods into the lower control arm. I released the small amount of tension on the ratchet strap and proceeded with the install.

Once you get the QA1 strut rods in place, I adjusted their length to the measurement I took from the original strut rods (15" at MY measuring points). I then tightened everything down and reapplied tension to the torsion bars back to my original settings. I took the Dart for a quick drive and everything felt solid. The tug to the left when I jumped on the brakes was gone. Now I need to get a real alignment and I should be good to go.
 
Someone clued me in that the 67 Darts were the same way as the 68 Dart where the parking lights in the grill go out when you turn on the lights. The 67 Dart is the oldest car I have ever owned. I owned a bunch of early 70s cars and by that time the parking lights always stayed on with the headlights, this was something new for me (newbie alert).

You can easily change this if you feel you want to. All Ma did was use the very same headlight switch, and move the "park" feed wire over to the "tail" terminal in the headlight switch connector. You don't even need to move the wire. You can just get back in the harness a few inches, and splice them together.

Keep in mind, though, that 67 parking lenses might be a bit hard to find. I don't need to melt mine because I like to show off the bulbs, LOL
 
I plan to leave it stock for now. Thanks for the information.


You can easily change this if you feel you want to. All Ma did was use the very same headlight switch, and move the "park" feed wire over to the "tail" terminal in the headlight switch connector. You don't even need to move the wire. You can just get back in the harness a few inches, and splice them together.

Keep in mind, though, that 67 parking lenses might be a bit hard to find. I don't need to melt mine because I like to show off the bulbs, LOL
 
After getting the new strut rods installed I got the car aligned for the first time. The guy I use is out in the country with this big old barn full of the latest Hunter equipment. He got my alignment all squared away and the car drives like a dream.

This past Saturday night I headed to the drag strip and ran in the Arm Drop Drags. I used the opportunity to tune on the Dart and try some of the suggestions from the Racers Forum. Dialing in some additional timing I was able to run the following:

60ft 1.922
330ft 5.457
660ft 8.444
MPH 82.07
1000 11.034
1/4 13.233
MPH 102.58

The only changes for this trip to the track was resetting the float levels on the carb and dialing in 20 degrees initial timing (up from 16.5). I am getting tantalizingly close to the 12s.
 
One of the things that bugs me on the Dart is the wonderful pulsating vibration that seems to start around 60 MPH. Getting in and out of the throttle changes the pulses. The 8 3/4 is rebuilt with new axles and bearings. The driveshaft is new from Victory drivelines. When I had the front end aligned I also had them rebalance the rear tires. The tires were out of balance, but it didn't make any difference in the vibration I am feeling.

The vibration really feels like it is coming from the rear end. After doing a search, I found out about u-joint working angles. I pulled out my angle finder and quickly realized I never set the pinion angle on the rear.

First up I measured the rake of the car which I got 1 degree negative. Measuring the engine I got 2 degrees down. The drive shaft measured 2 degrees down and the rear was pointing 1 degrees up. Hummm...that doesn't look right.

Saturday morning I hit all the parts stores in the area and managed to come up with four, 2 degree wedges. I was going to have to stack two wedges on each side in hopes of getting 4 degrees of change. I loosened the U bolts on the rear and slid in two wedges on each side and tightened everything back to spec.

When I re-measured I got -3 degrees on the rear and 3 degrees down on the driveshaft. Road testing showed the vibration was still there, but now it didn't start until 61/62 MPH. However, at 50-55 MPH the car felt much smoother.

I am thinking I need to come up with either a 6 degree or a 7 degree wedge to get the nose of the rear down a bit more. What has been your experience?
 
You've put a lot of work into that. Mine is still nude over at the neighbors...............
 
I have basically been tweaking on the car over the past few weeks. One project I tackled (again) was mounting an electric fan. Last time I used a 2400 CFM fan, this time I went with 4400 CFM fan off a Taurus 3.8L car. This ended up becoming a very involved project because the fan/shroud would not fit between the radiator and water pump pulley.

The first thing I did was trim down the fan to get it as thin as possible. This required a lot of trial and error with me having to glue back in sections and re-trim to make sure it would sit flat on the radiator. It still didn't quite fit between the radiator and water pump pulley when I test fit it. I then figured out how to sink the radiator into the radiator support. This actually turned out to be pretty easy. You slot the radiator support so you can have the radiator mounting brackets on the outside of the radiator support. Test fit showed it wasn't going to be enough. The fan motor was hitting on the water pump pulley. The solution: move the radiator to the driver's side about an inch. This provided the required space so the water pump did not interfere with the fan motor.
radiator01.jpg


efan01.jpg


This created a new problem because I had previously moved the battery down to the frame rail on the driver's side. The battery tray and battery no longer fit between the radiator and inner fender. Solution: Use a smaller battery. I used a battery for Honda Civic that is only 5 inches wide. I built a custom battery tray for it out of sheet metal and painted it with hammer tone black paint.

I used a soft start fan controller that starts the fan at 60% fan speed at your set temperature. The controller ramps the fan speed up to 100% when the temperature reaches 10 degrees over your set temperature. The controller also runs the fans for 30 seconds after you shut the car off. This feature turned out to be pretty handy in the staging lanes to cool the car off.

On the performance front, I swapped in the lightest secondary spring Holley makes for the 3310. I was originally afraid the white spring would cause the car to bog, but the 3.91 gear and the 3200 stall convert kept this from being an issue.

I headed to the Wednesday night test and tune on Sept. 3, 2014 to see if there was any performance improvement. Right off the bat, I was rewarded with a 13.09. I then got two backup passes of 13.02 and 13.01. That was too close to the 12s to not try to squeak in. I removed the spare tire, jack, jumper cables, and tool bag from the trunk for about 85 lbs of weight reduction. Back at the starting line I got too eager and due to the weight being removed from over the rear wheels the car spun which resulted in a 13.22. I snuck into the back of the staging lanes and got one more pass where I did manage to ease the car off the line and hit my shifts. The result:
Dart090314_12.91.jpg
 
-
Back
Top