70 duster: updating, and a no-dough pro-touring makeover

-
so, a little bit has happened since the last update.

ive put about 400 miles on the car.

weve done a family trip

my wife gave her input.


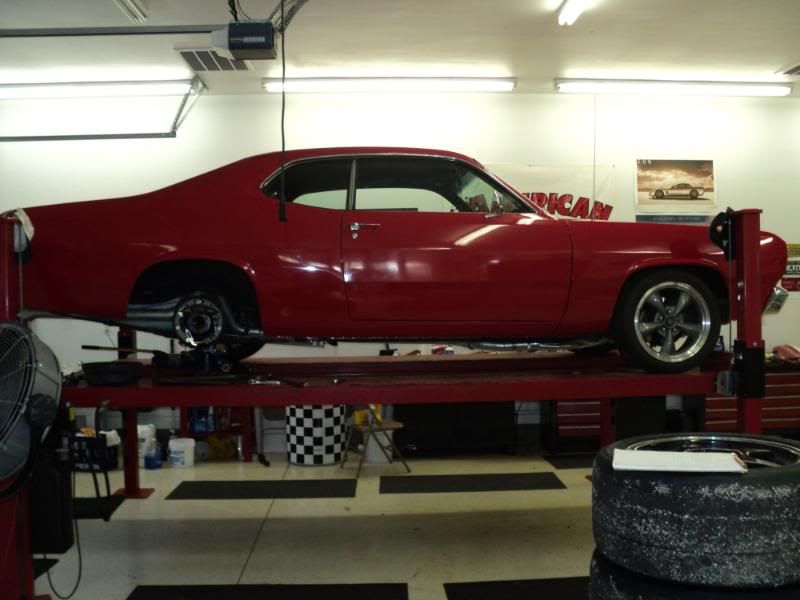
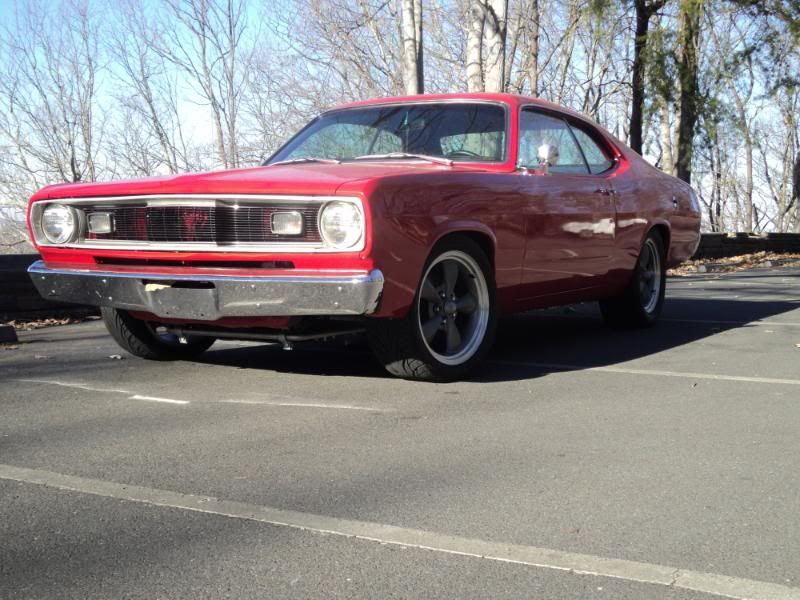
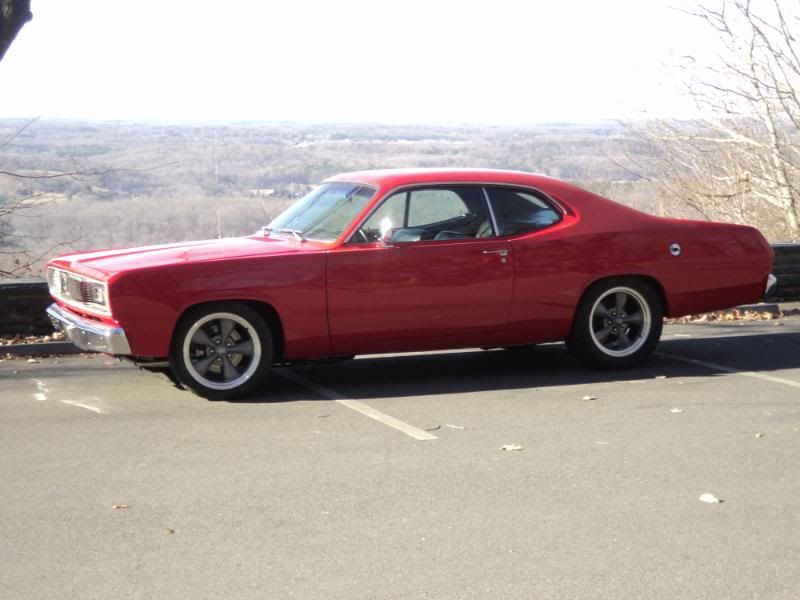
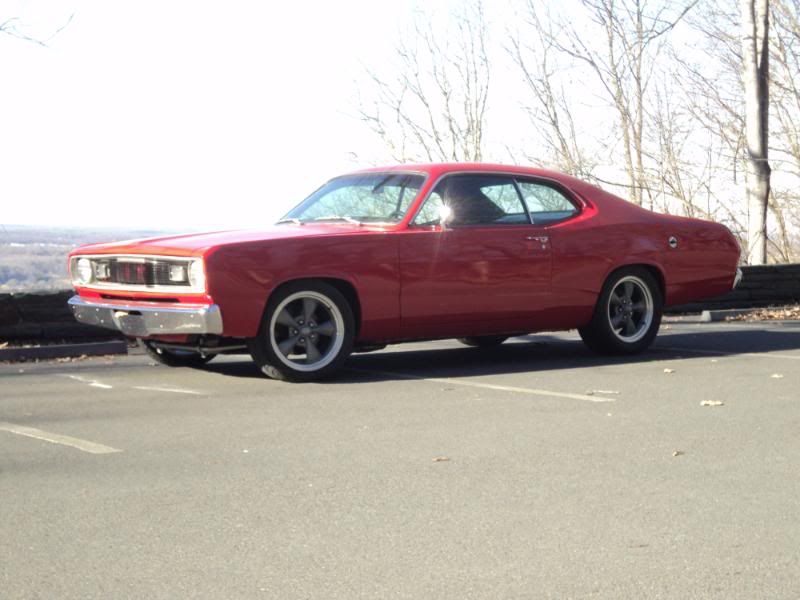
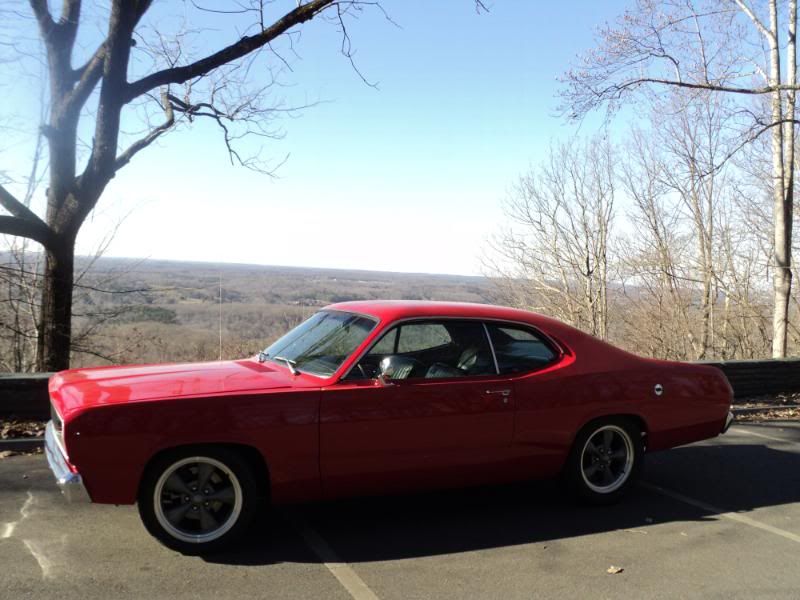
the family trip went great. we went to the NC transportation museum in Spencer, NC. spent the day looking at the exhibits, riding the train, and enjoying our time as a family. as luck would hav it, the plymouth club was having a car show there that weekend, so we put the duster in it. didnt win anything, but that wasnt the point. we had a blast.

we also learned a few things about the car, and traveling as a family in it.

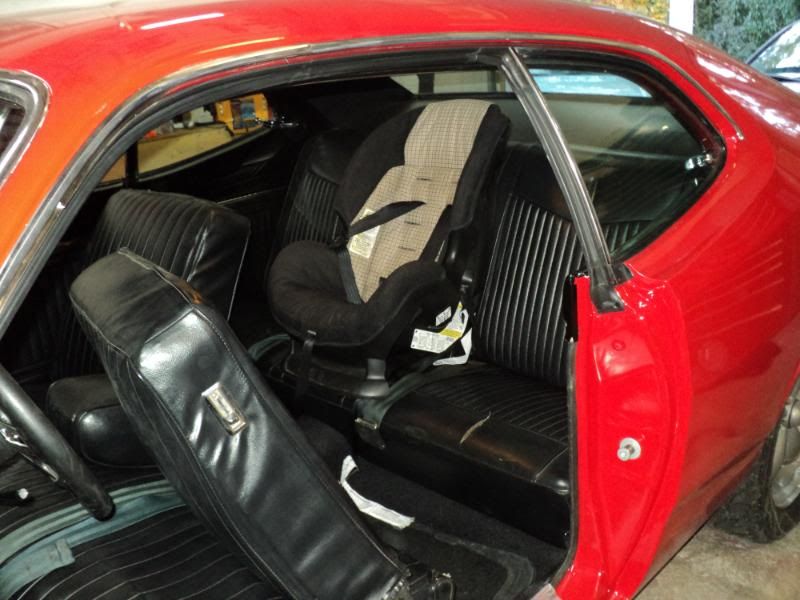
1. mary has no leg room in the back seat. with her car seat, her legs are firm up against the seat back on the pass side.
2. theres a lot of noise from the trunk.
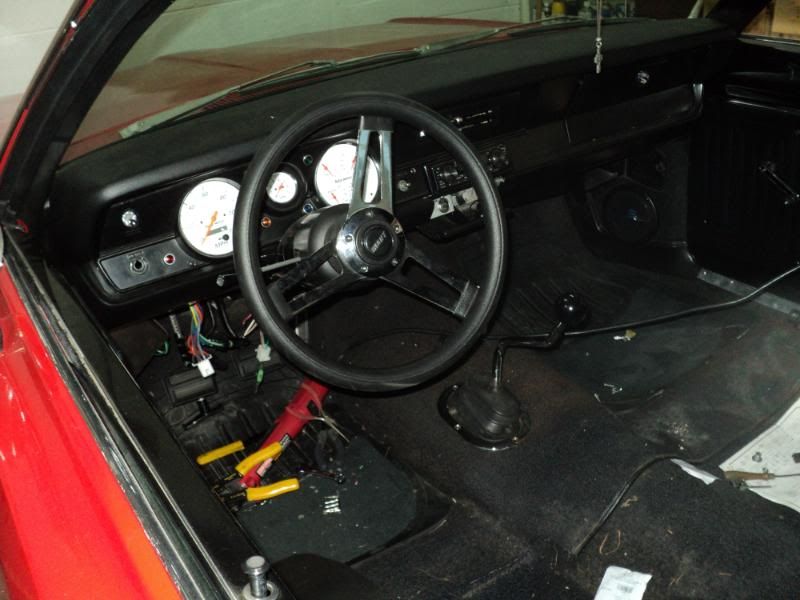
3. the turn signals dont work
4. the heater never gets completely closed off.
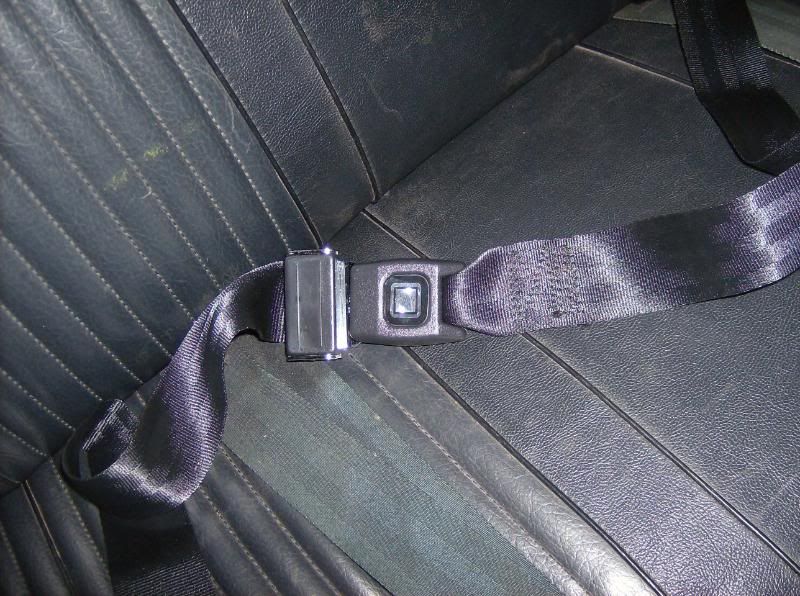
5. my wife feels uncomfortable with only a lapbelt, and cant wear the fixed shoulder belt because it hits her in the ear.
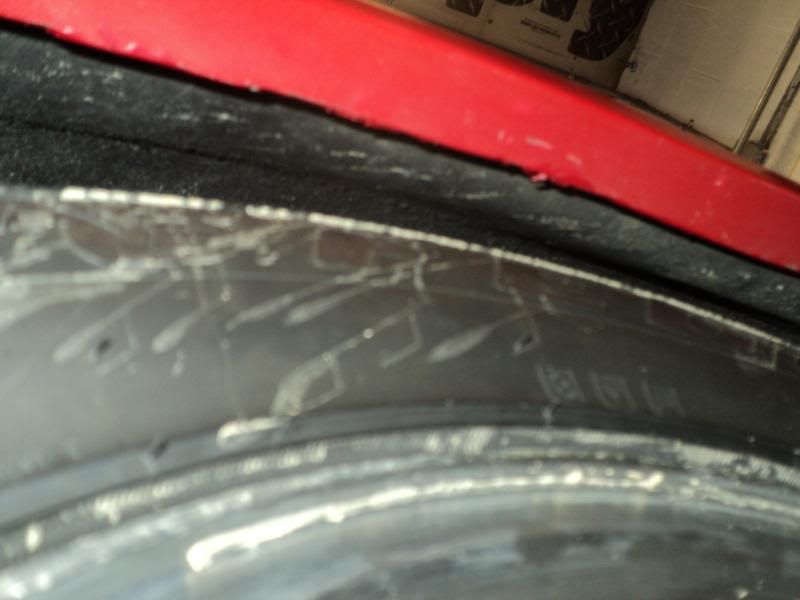
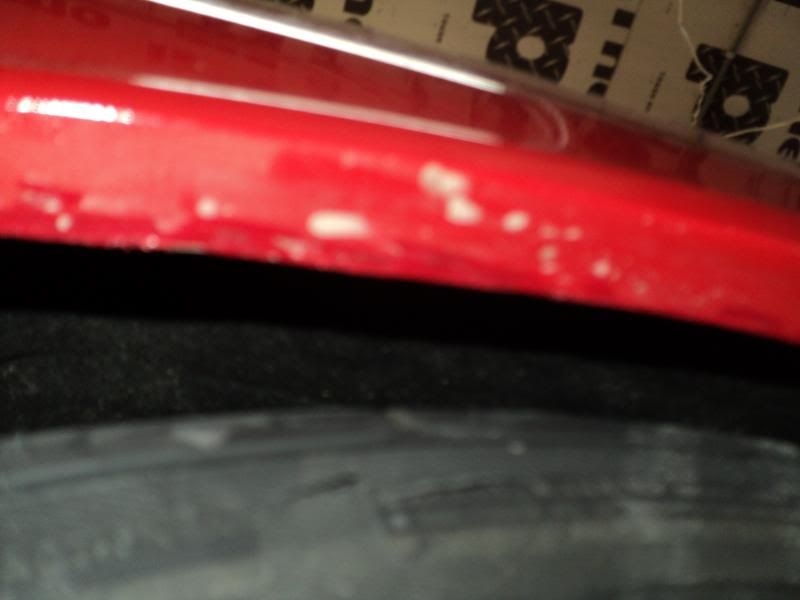
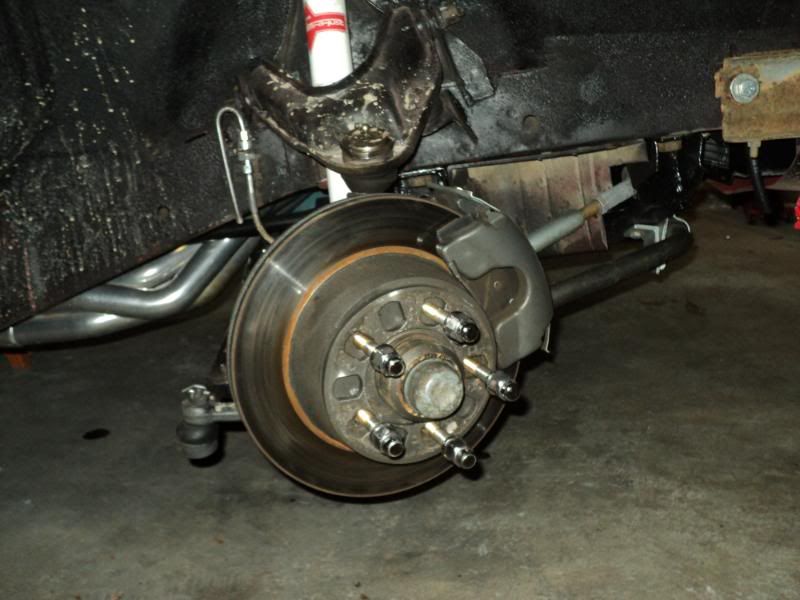
6. with a full tank of gas, stroller and assorted stuff, and the family, the right rear tire comes into contct with the fender lip

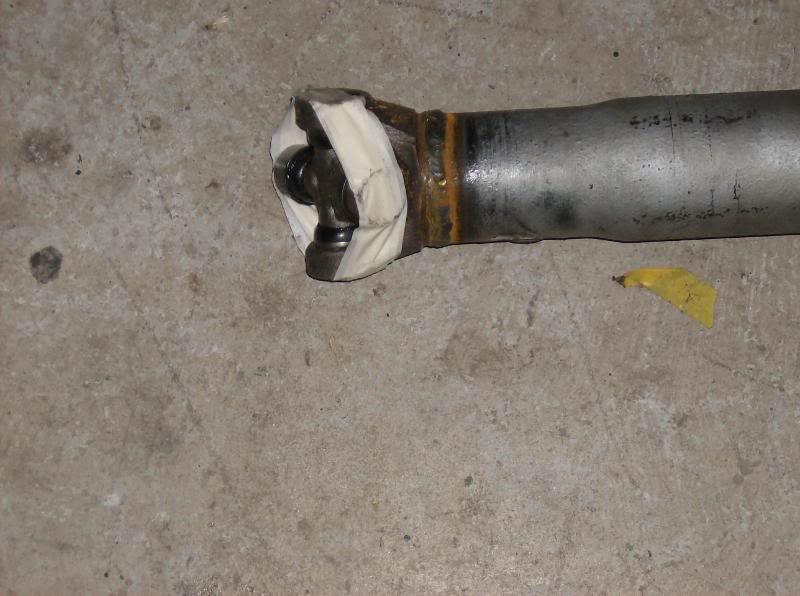
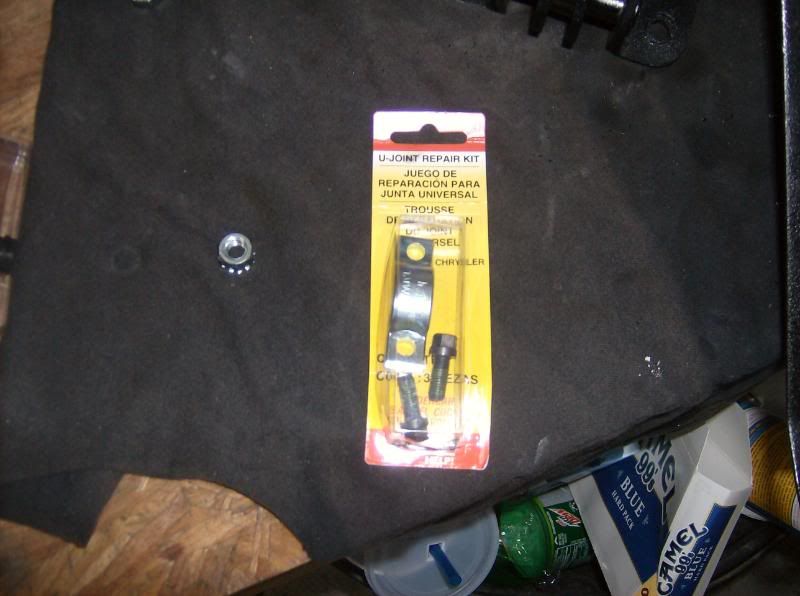
we also had the shifter come apart. the bolts that hold the stick to the box loosened, and one fell out. when i put it back together at home, i cleaned, adjusted, greased, and locktited everything.


all in all, a great outing. i wouldnt trade it for the world.

so ive started working on that list some. as well as my other priorities.

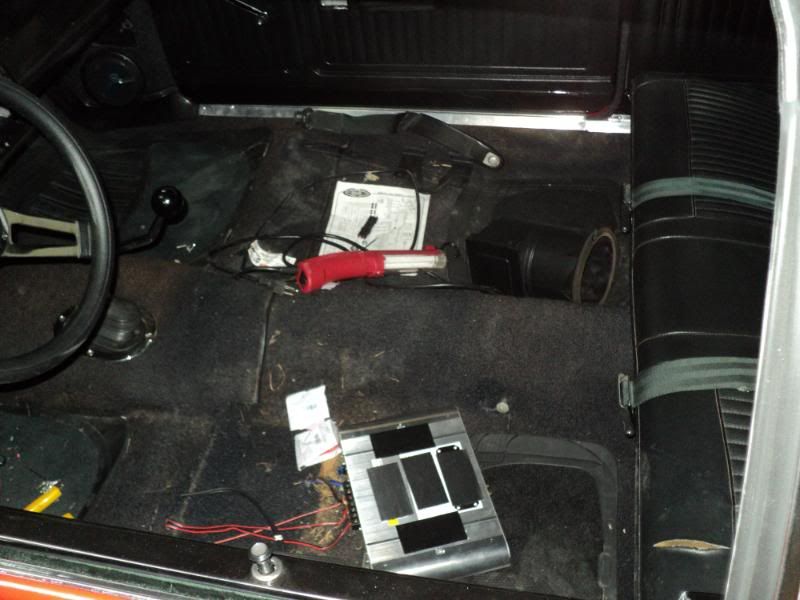
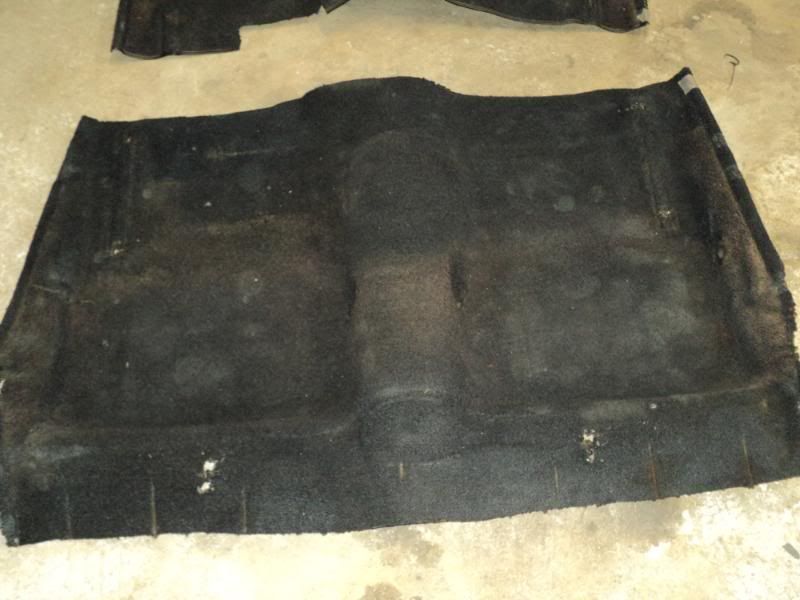
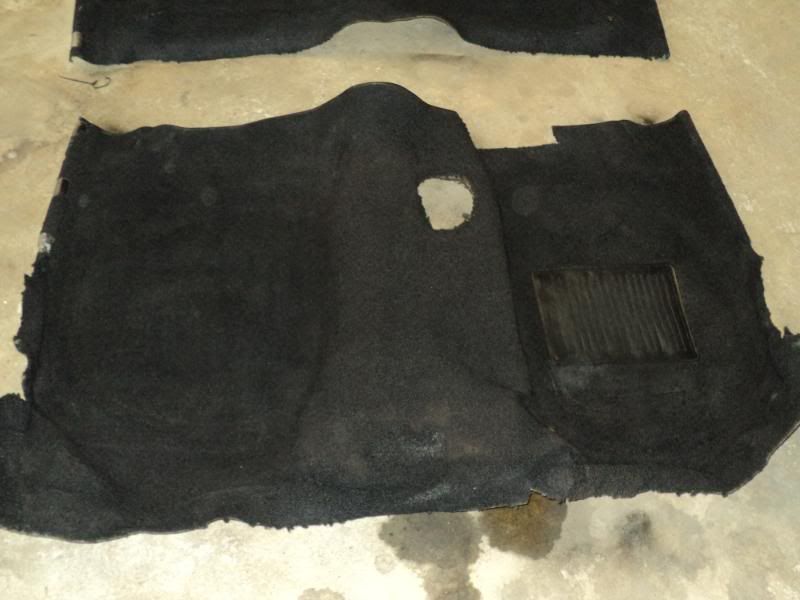
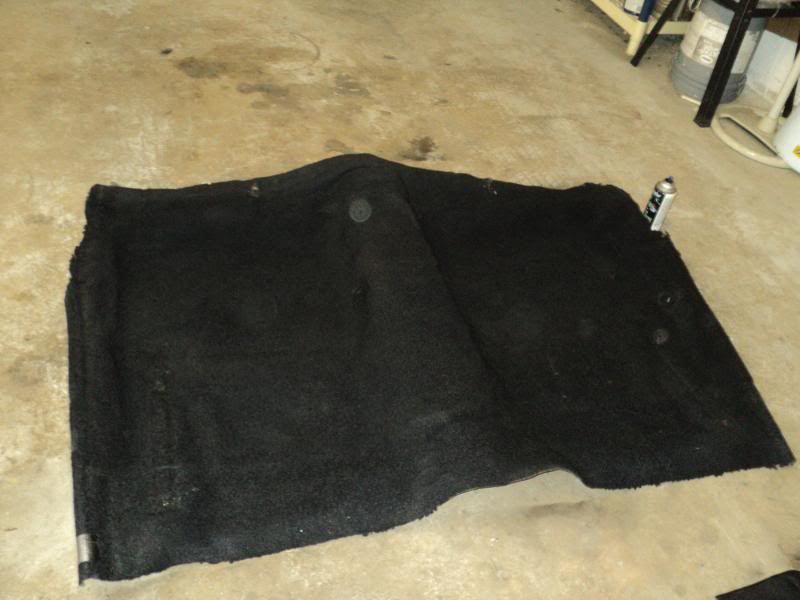
the first one to start on was the trunk, mostly because it annoyed me and i had most of the stuff to do what i wanted to do.

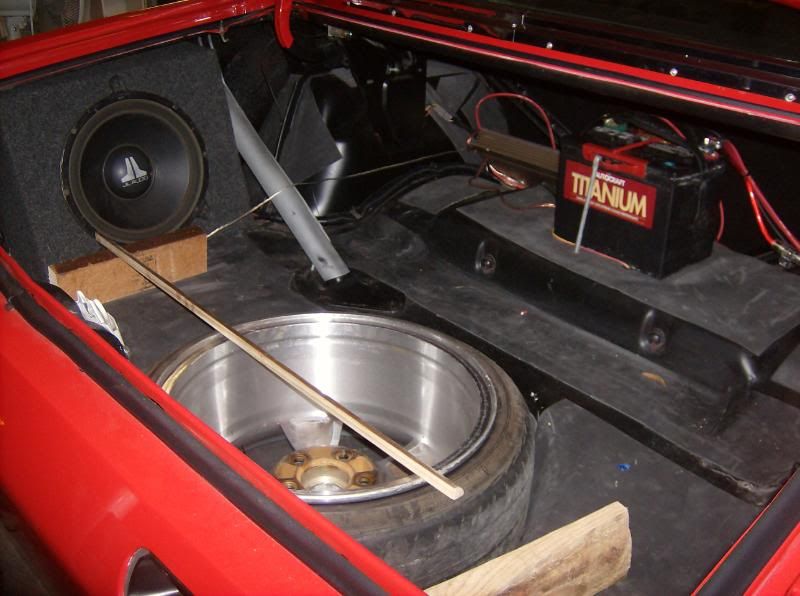
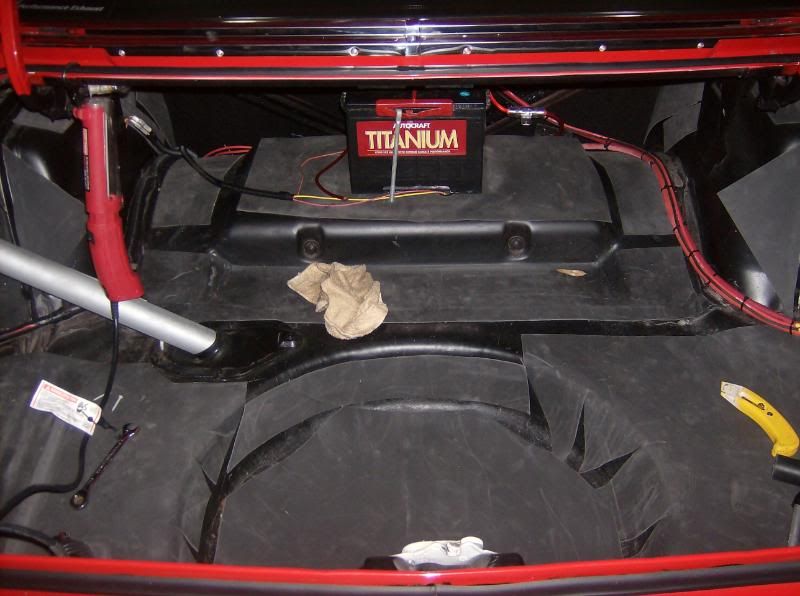
i pulled everything out, cleaned all the metal, and started to sound deaden it. my wife came down to the shop for something, and made the comment about the battery being in a very inconvienient spot for fitting luggage in the trunk. that was all the encouragement i needed. i had been debating moving it over the axle centerline for a little better weight distribution, but couldnt justify it. well, we all know what comes next. the snowball effect.
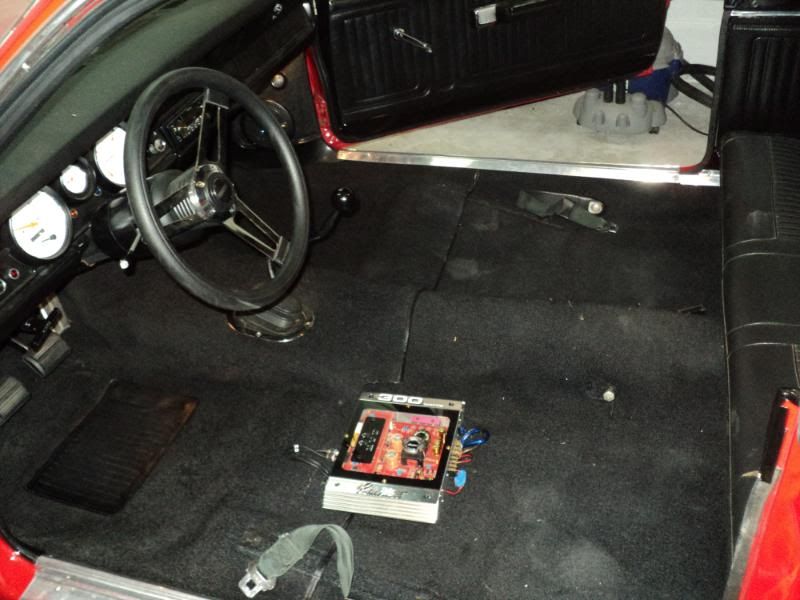
thankfully, i have plenty of supplies stashed away. like battery cable, wiring, etc. moving the battery to the center of the package tray area allowed me to upgrade my amp wiring, upgrade my MSD power and ground wiring, and free up a lot of trunk space. unfortunately, it also made my current subwoofer enclosure unusable. so im thinking about that, and have something to try before i make a decision.

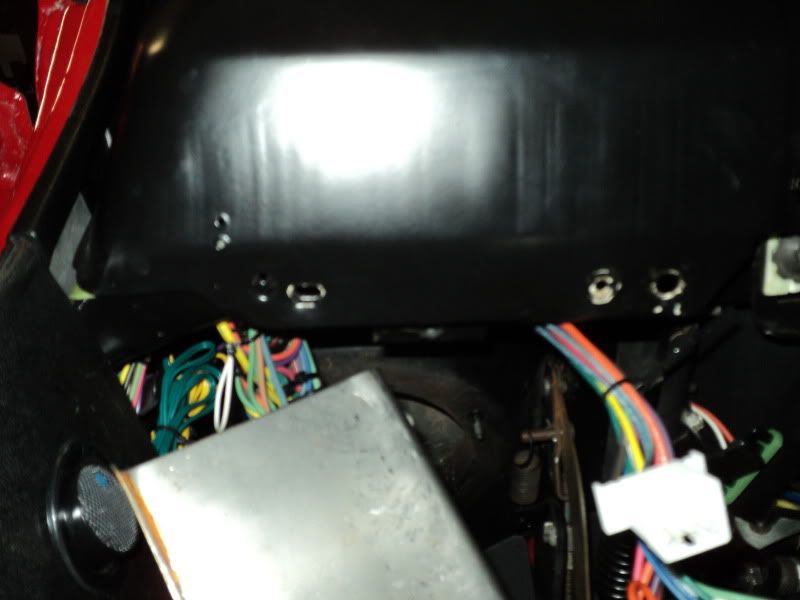
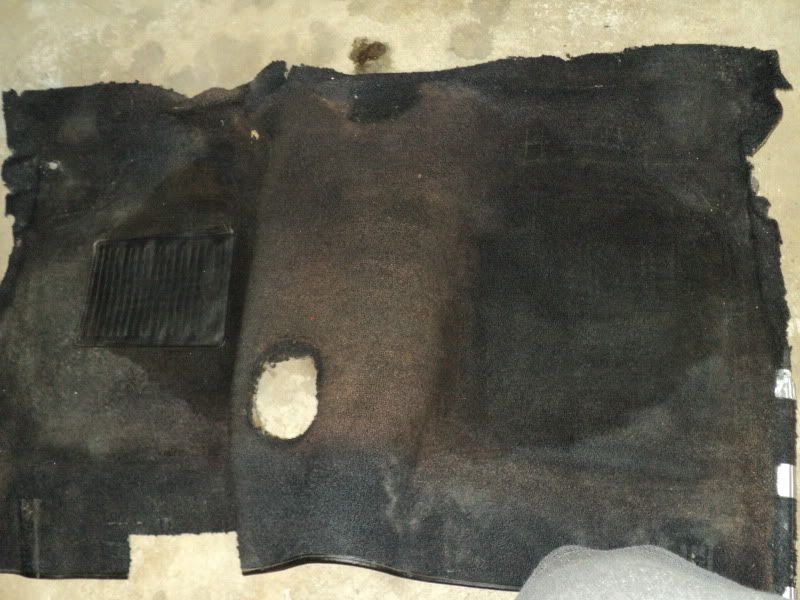
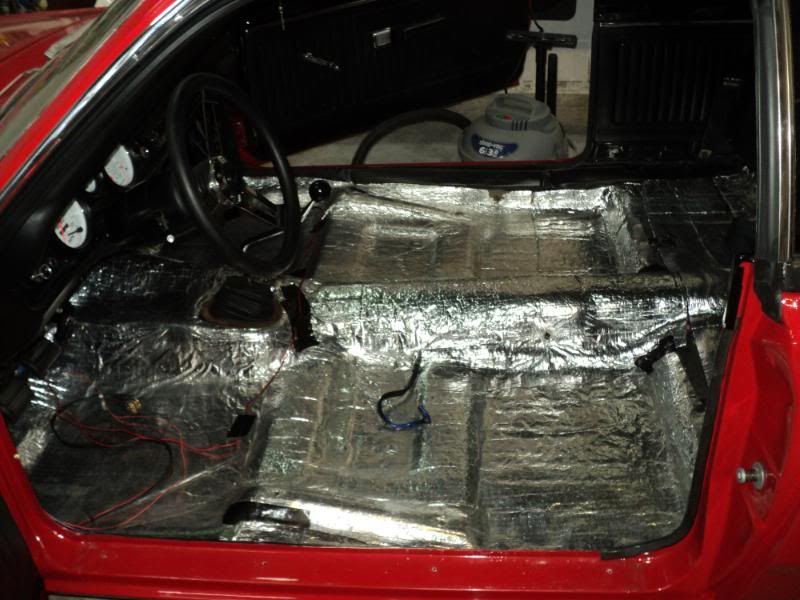
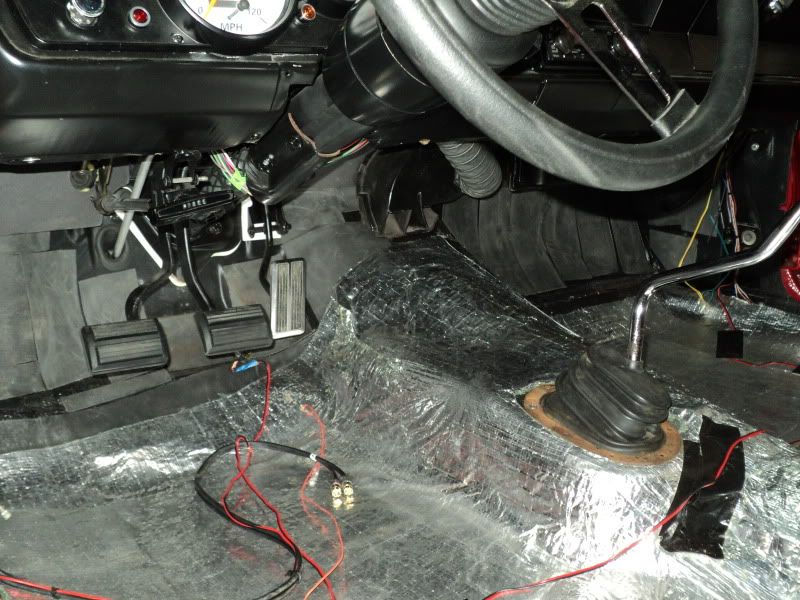
to lay down the sound deadening, i had a few sheets of the mcmaster carr adhesice backed elastomeric left over from when i did my mazda. so i used it.

heres what the current product looks like:
Picture233-1.jpg

Picture234-1.jpg


used a heat gun and a j-roller to get it to fit well.

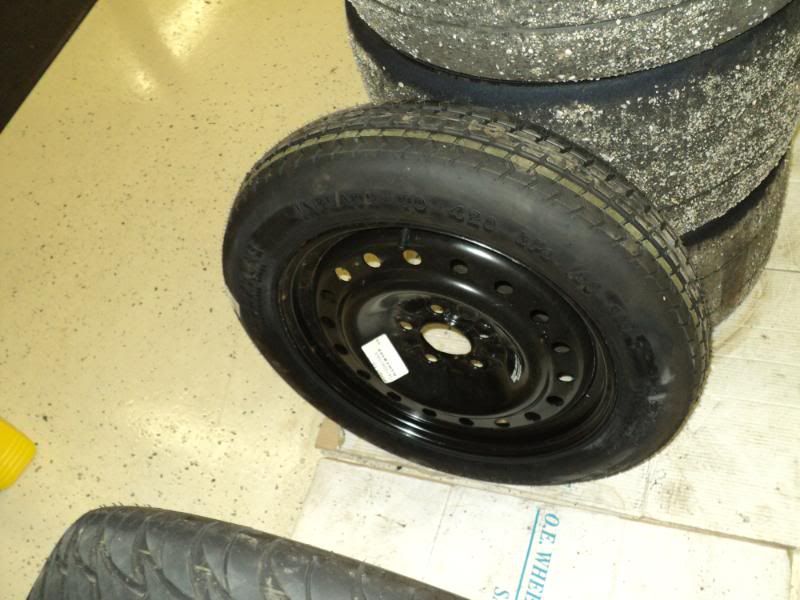
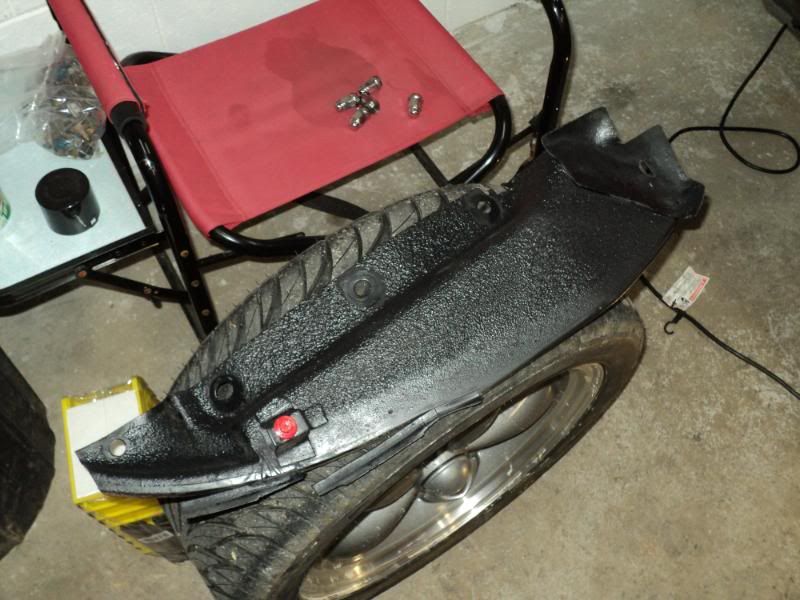
i also decided while i was in there to finally get a spare tire and jack for the first time since 1998. while i was at beavers honda salvage up in moorseville picking up an engine, i spotted a jack, wrench, and carrier assembly from an 07 civic coupe. had the right measurements according to the tape measure, so i bought it for 35. fits right in, but my spare doesnt. the 235/60/15 i have doesnt fit the wheelwell, and the 255/40/17 sticks up a rediculous amount. so im going to find a donut spare from a 1998 mustang cobra.

heres what im talking about:
Picture238-1.jpg

Picture239-1.jpg


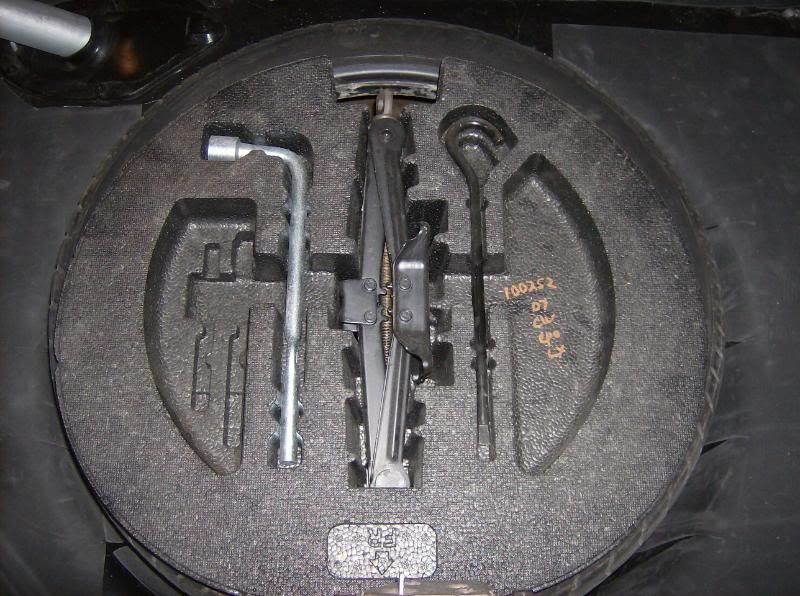
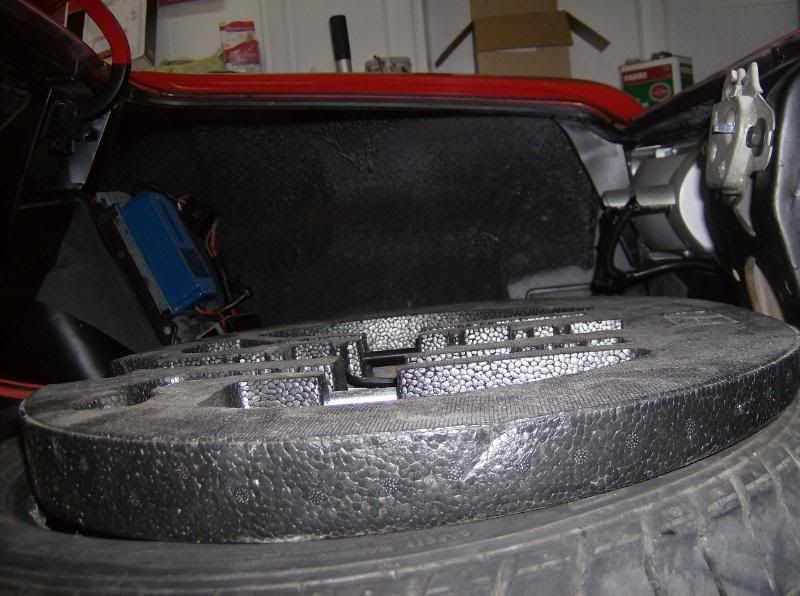
theres only about 6 inches from the top of the assmbly to the trunk lid.


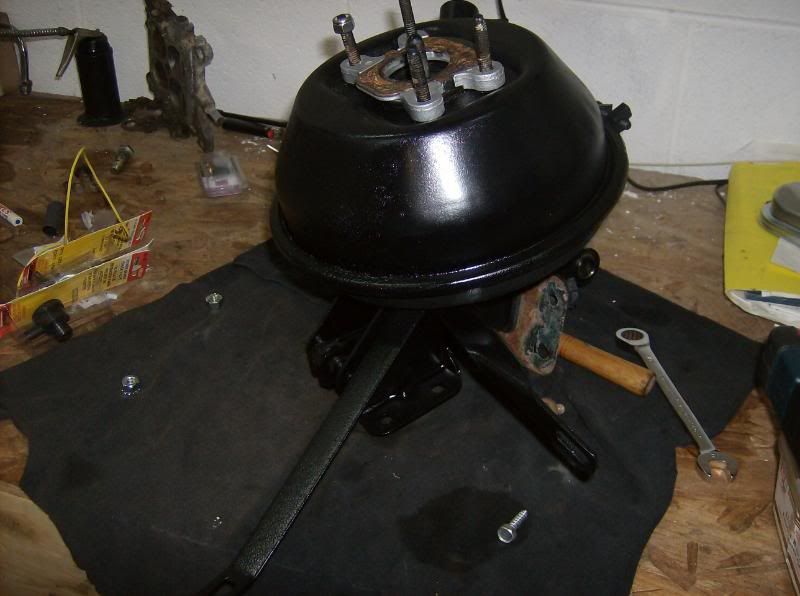
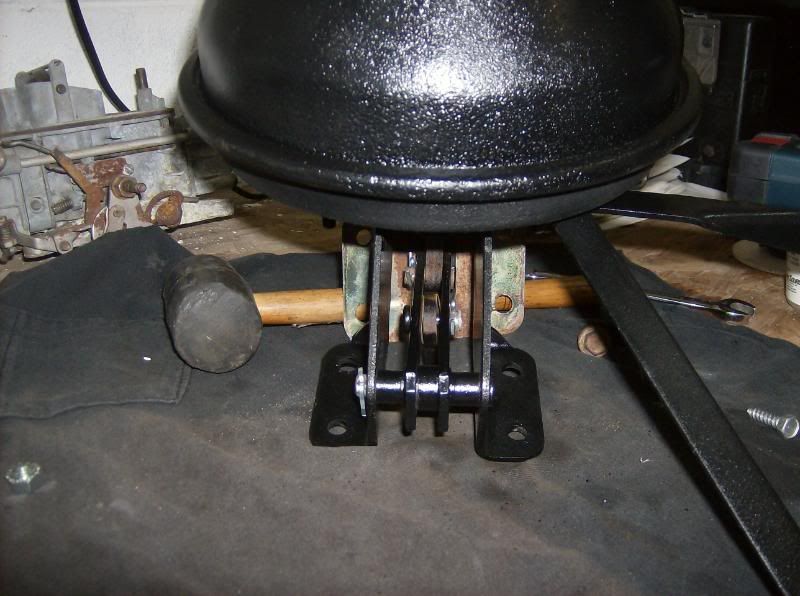
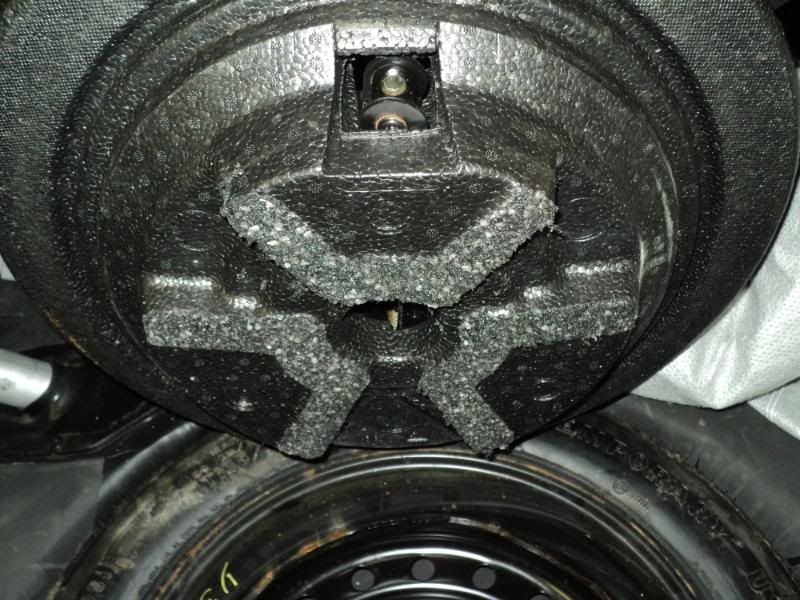
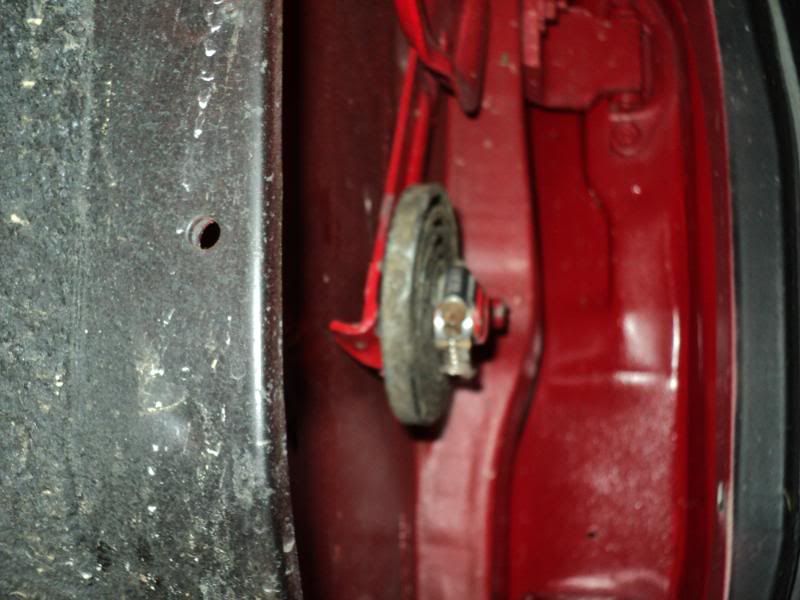
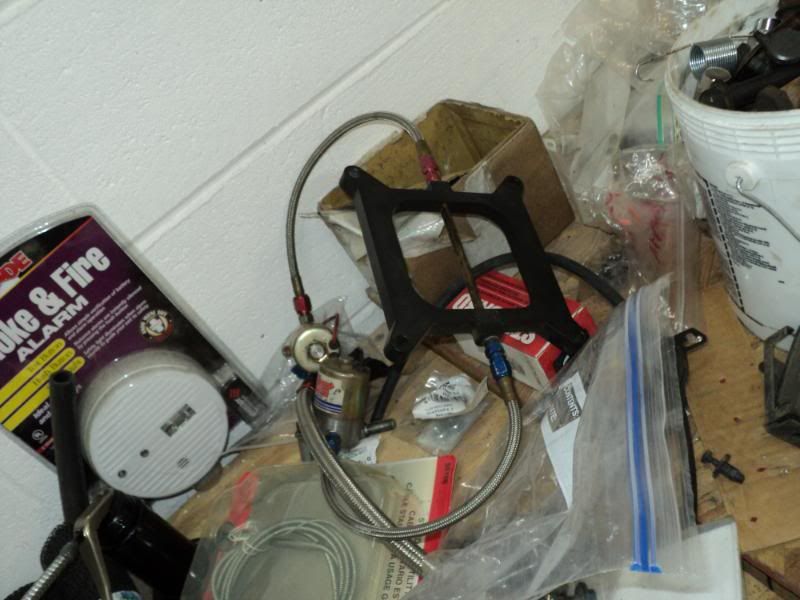
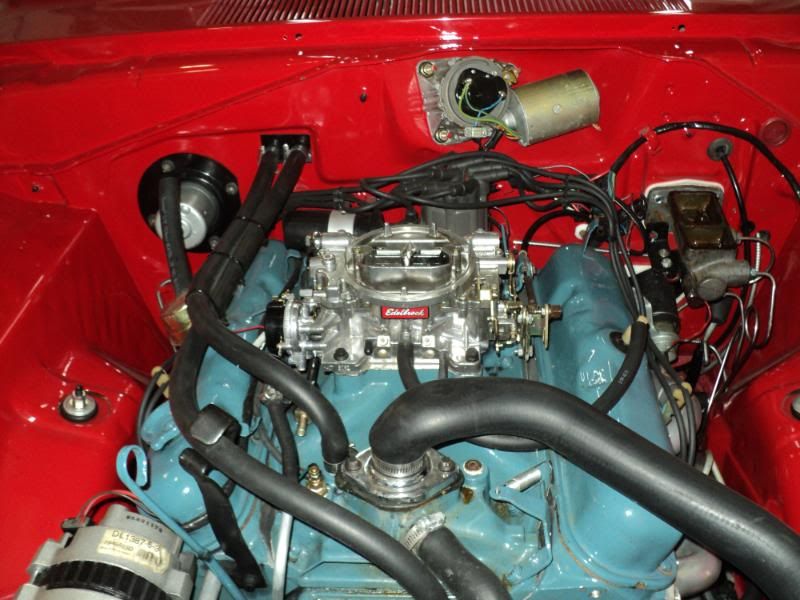
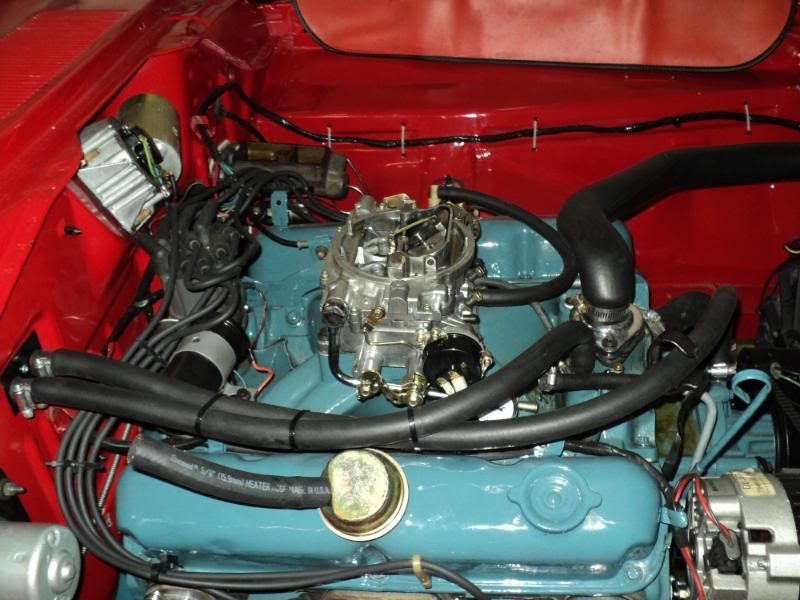
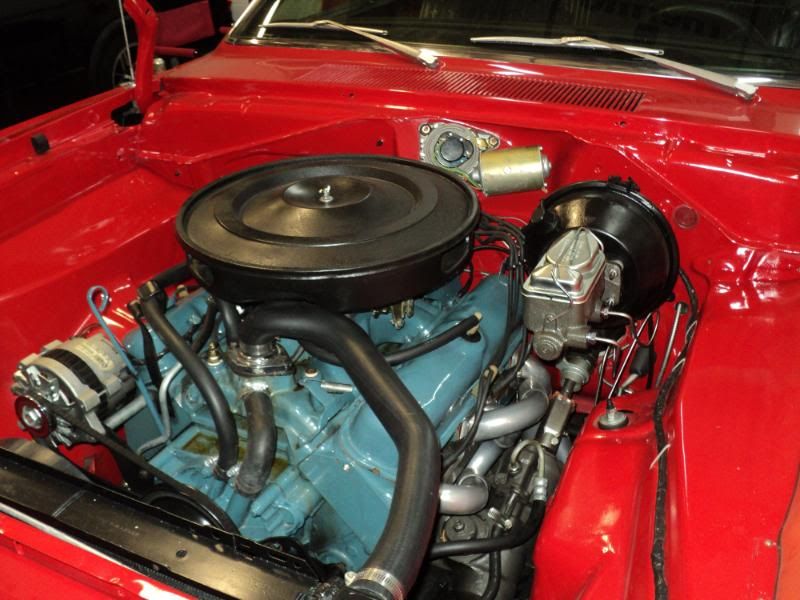
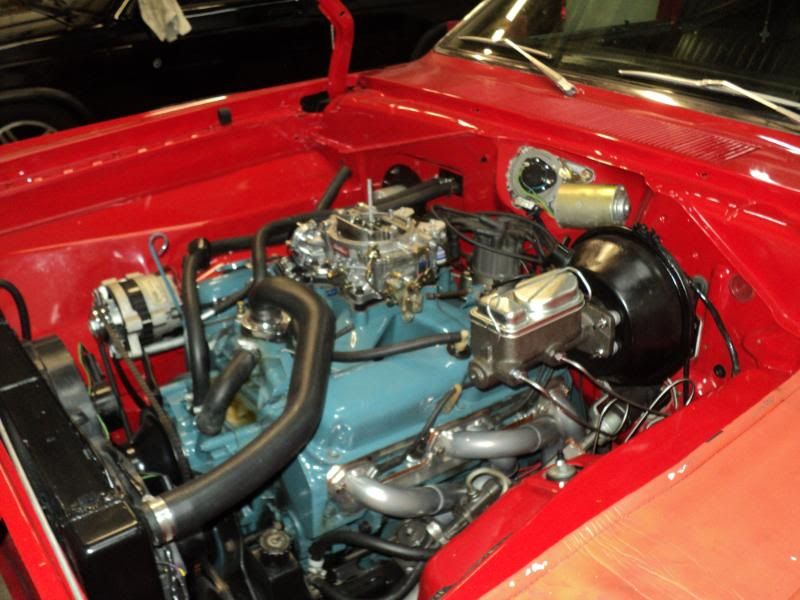
also, ive been working on my power brake cnversion. ive got my stainless lines (40)
Picture232-1.jpg

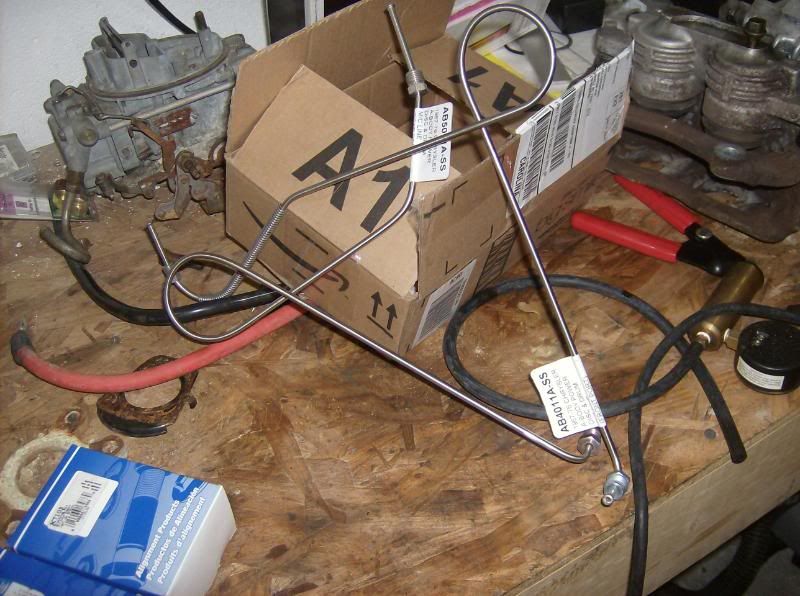
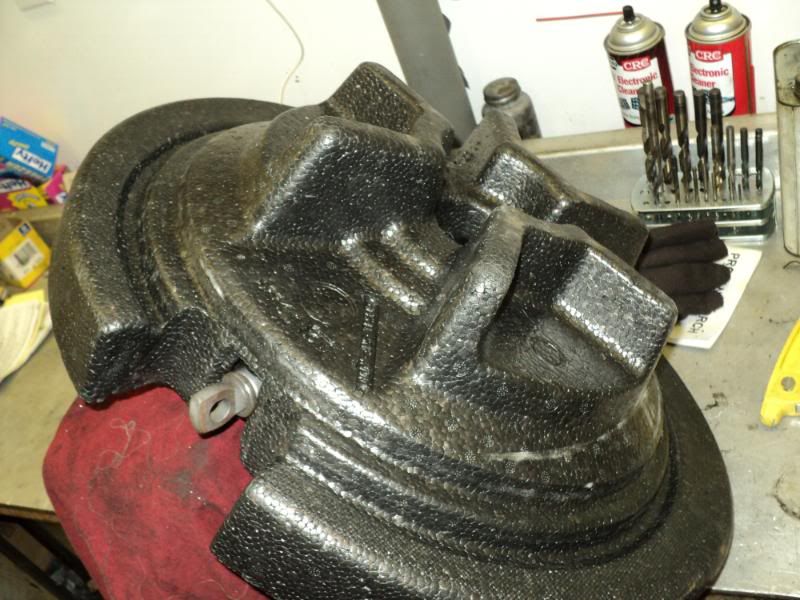
and verified that my junkyard booster was good. (35)
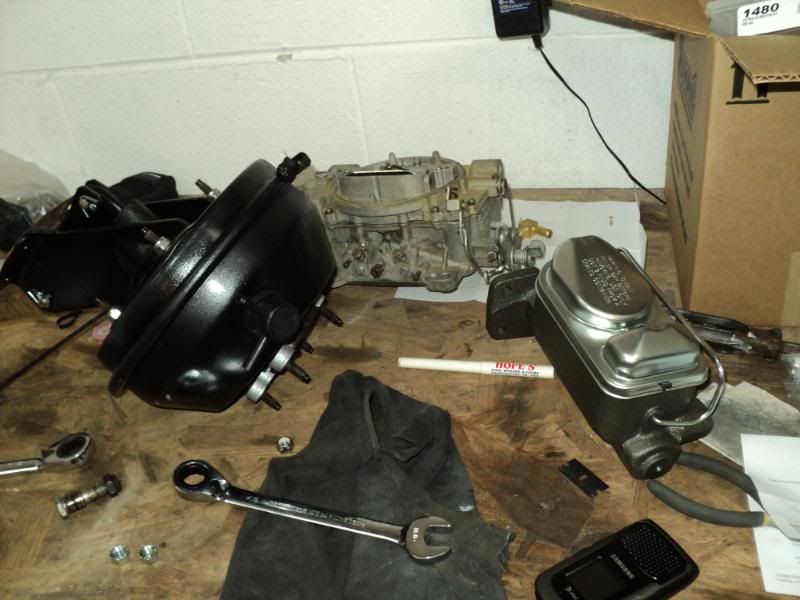
im in the process of cleaning up the booster. the master was a 4 wheel drum master, so im going to toss it on the shelf and keep it for if i ever go 4 wheel disc. for the conversion, im going to retain my 1 inch bore manual master. according to my FSM from 1970, manual and power used the same bore master cyl, so i see no reason to change it. an its already paid for!

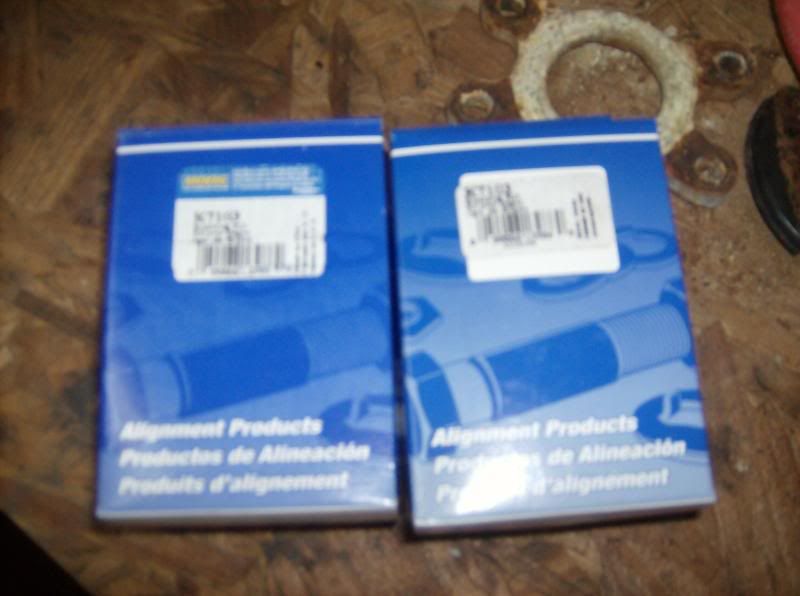
also, i ordered my new UCA bushings, moog K7103. got them for 52.74 from amazon.com. cheapest o could find them.
after i get the brakes sorted out, ill get those put in.

Picture230-1.jpg


so budget total is 1027.86

next stop is going to be getting the booster in, and finish my trunk.

michael
 
something for you to think abour while bucket seat shopping, i always wanted to get late model buckets covered to match the existing interior, so i did. stopped by an upholstery shop friday to get some ideas, the guy told me he cant do anything with those seats, like most other late model seats, the foam is blown into the cover in a mold. he said you cant totally remove the cover without ruining the foam. he insisted i get the correct seat for the car, when i told him they dont provide the same comfort, he said i can fix that, i said they are ugly, he said i can fix that too. i said they are over priced and need to totally be rebuilt and mosty likely shipepd to me, they dont recline, and they dont flip and slide foward in one operation to fit the kid seat in. he says oh well it sure would make things easier. i dont know if the guy was right or if he just wants to make easy money. ill have to try some other shops. i find it hard to believe yo uhave to throw the seat out and buy a new one when the cover is worn.
 
something for you to think abour while bucket seat shopping, i always wanted to get late model buckets covered to match the existing interior, so i did. stopped by an upholstery shop friday to get some ideas, the guy told me he cant do anything with those seats, like most other late model seats, the foam is blown into the cover in a mold. he said you cant totally remove the cover without ruining the foam. he insisted i get the correct seat for the car, when i told him they dont provide the same comfort, he said i can fix that, i said they are ugly, he said i can fix that too. i said they are over priced and need to totally be rebuilt and mosty likely shipepd to me, they dont recline, and they dont flip and slide foward in one operation to fit the kid seat in. he says oh well it sure would make things easier. i dont know if the guy was right or if he just wants to make easy money. ill have to try some other shops. i find it hard to believe yo uhave to throw the seat out and buy a new one when the cover is worn.

I used Sebring Convertable seats........ the gray just worked..... and for 250.00 well worth it to me anyway........

100_2497.jpg
 
Probably not something you're watching, but any idea what kind of mileage you are getting on your trips? Just curious.

Love the car, keep it up.
 
actually, im obsessed with fuel milage.

remember, this thing makes right at 400 to the wheels. the edelbrock has not been tuned at all, other than the idle and a little on the pump shot. 3.55 gears, 27 inch tall tires. im averaging 14-15 mixed. thats not all highway, or all hammering on it. little of both.

and i didnt even think about the seatbelt comment until you pointed it out. does sound a little....odd.

and have any more pictures of the sebring seats?
or the cavilear seats?

michael
 
thanks for the compliments. its nice to know somebody is watching and appreciating my incoherent, rambling, build thread/life and family blog.

michael
 
I have an '08 Civic daily driver / work car and immediately recognized the jack combo. It's a great layout, but absolutely sucks for actually jacking up the car.

I would try to get a 1st Gen Neon jack for that spot, or something equivalent with a 19mm / 3/4" screw end on the jack. 1000% easier to jack up a car than the Civic setup. The holder is the best though.

Also check the height on the jack to make sure you can get the car off the ground far enough. If I remember that jack doesn't have a ton of height.

Good luck and nice build.

Kevin Wesley
 
... so im going to find a donut spare from a 1998 mustang cobra. ...

BTW, at some point they went to aluminum rimmed donut spares. 8) I have one of those for my Cuda. You have to grind out the center register to have it go over large bolt pattern center registers.
 
thanks for the tip, Steve. ill look for the aluminum one. i like weight savings.

and thanks for the compliment, mopardude. hows it different in your opinion? i kinda figured it was the same old thing.
 
somehow my update and the replies were lost before i was able to see them.....
so im reposting

last budget total was 1027.86


Ive done a little more work since the last update. some on the list, some not.


on the list, I've continued to work on my trunk. got my bent wheel replaced with one a buddy gave me, and am using the bent as a spare. i really don't like how much room i lose with it.

the mustang spares that i was looking at are going for stupid money. like around 100 bucks in my area. I'm not about to pay that for a donut spare.

i did, however, find that the dodge charger uses a 17X4 spare with the correct bolt pattern. they go for about 35 around here. lot better price. ill find one on a free Saturday morning and see if it will fit.

Ive worked on the audio system some. i tried repositioning the origonal 10 that was in there. i tried two 10's in custom boxes, wired for a 2 ohm stable load. still was not what i was looking for. so i got to thinking about the old JL audio 12 in my truck. it was really too much bass for the little s10, and i had it dialed WAY back for sound quality. so i wired it to my old MOSFET power acoustik amp (may be older than dirt, but its always sounded good, and never let me down) and stuck it in the trunk. had to play with my amp and crossover settings some, but the system is much cleaner and has better sound quality than ever before.


here's what i wound up with. still a work in progress. i thing I'm going to modify my enclosure some so it will clear my battery cables on the passengers side and move it over there. also, I'm starting to mock up for my closeout panels for the trunk.


Picture241-1.jpg


next, I've got my booster completely redone. came out pretty nice for what i started with. not concourse correct, but neither is the car.

spent 7 on paint and tape, 8 in stainless nylock nuts.


Picture242-1.jpg


Picture243-1.jpg


the next project i the tackled was installing the center rear seat belt for Mary's car seat. that was a PITA. i bought a universal lap belt at Pep Boys over in Charlotte for 23. nice webbing and stitching, decent hardware, and i liked the latching operation. i had to enlarge the holes a bunch for using the TTI supplied seat belt anchoring bolts. and their directions for threading the webbing suck. i still have to pull the seat back out, remove the belts, and adjust them a bit before its usable. i run out of adjustment before Mary's seat is fully tight. they blend in though, and i tuck them back into the gap between the seat back and seat bottom when not in use.


Picture245-1.jpg


while i was installing the belt, i figured i would check out the noisy rear end. i found a couple of things that worry me.

1. a LOT of play in the rear u-joint (think 1/8 inch rotational)

2. debris build up on the fill plug in the hogshead


i haven't drained the hogshead yet, but am planning on doing the drain plug mod found here. http://www.moparmusclemagazine.com/...n_plug_in_the_differential_housing/index.html

any opinions on this?


for the u-joint, i originally thought i could get away with just putting a new one in. last time i put joints in this car was the late 90's. 2 motors ago, 2 rears ago, and a lot of abuse ago.

the new ten dollar joint rotated in the yoke. a lot. so i called my drive shaft guy, who told me that its a common problem. he also informed me that i would need to bring the shaft down to have him re-balance it and weld on a new yoke. so 140 later, i have this:

Picture240-1.jpg


i also spent 7 on new straps, figuring that its cheap insurance as they were done the last time i put a u-joint in the thing.


Picture244-1.jpg


on the debris end, I'm going to change the fluid and keep an eye on it. hopefully my noise will go away. if it doesn't, I'm researching doing a ford explorer 8.8 with 3.55 trak lok, rear disc, etc. ill go that route before dumping a bunch of money in my 8.75


lastly, i got center caps. a guy at the mopar show on our last family trip said that chain link fence post caps would slide right in and look cool. he was only partly right. i had to cut about 3/8 inch off every one, and put seven wraps of vinyl tape on the flange for a good friction fit. but they do fit, and they do look good. at 1.37 ea, i was willing to try.


Picture247-1.jpg


Picture246-1.jpg


so all this work totals up to:

1228.34


man this adds up quick.....


next trip is in a couple of weeks to banner elk, NC, for the woolly worm festival and driving part of the blue ridge parkway during leaf season.

the weekend after that is out 10 year high school reunion. were taking the car. I'm looking forward to showing up to my old high school in the same car that i drove through those years, but it looking a lot better.


anyway, that's it for now. this weekend I'm working on readjusting the seat belt and getting our Subaru running again.


michael
 
somehow my update and the replies were lost before i was able to see them.....
so im reposting


michael

Michael,
How do you insert the text between the photos? I have not been able (yet) to figure out how to do that. Thanks. L8r

Jim
 
i upload the pics to photobucket. then, copy and paste the image link to my post. hit return for the next line. after that, i insert the text where needed. or i insert the pictures into the text where needed. depends on the post.
 
well, another month and 600 miles (can you tell I'm really starting to enjoy driving this car?)

the weekend before the woolly worm festival, i had to go to Columbia SC and help a friend move. figured it was a nice day, and it would be a good shakedown run. (Columbia is 160 miles each way, all interstate). all things considered, it was a successful trip. the car hadn't left my state in over a decade, or really gone on any trips further than 50 miles each way since the resto. so, to put this into prospective: it was mostly untested, with a lot of used parts and "good enough" stuff.

i had some issues.

on the trip down, the wind whistle from the passengers side window about drove me nuts.
when i finally got there, one of my center caps popped off in the parking lot. just laying there by the car.
i lost left rear brake light, all exterior lighting, and charging system.
on the trip home, the axle got very, very, very noisy.
i figured out my trip odometer in the autometer speedo is not accurate. it changes anytime you turn the car off.

so, i was kinda bummed by all the problems my shakedown run revealed. left it parked for a couple of weeks while i went to the woolly worm festival, worked around the house, and went to my 10 year high school reunion.

When i diagnosed the rear axle noises, it became apparent that the wheel bearings were bad, and that the ring gear is what is making the router noises. i played with the idea of the 8.8 rear axle from the explorer. was actually starting to pull one down at pull-a-part. the truth of the matter is, i just couldn't bring myself to do it. i may have issues with my 8.75, but its the origonal axle housing to the car, and it actually has sentimental value to me.

the wheel bearings were the first thing to fix. i figured since they are the green type, if they fail i may have an axle come out of the car, with tire attached. no bueno.

after looking, and looking, and looking, i found jegs to have the cheapest price at 88.72 shipped. not bad.
spent a half day putting them in, and playing around in the ship.

Picture265.jpg

Picture260.jpg


the axle bearings alone reduced my noise by 60%. now all that's left is the pissed off router that appears any time its under acceleration load. gets really bad at highway speeds. so I'm saving my money to have that rebuilt.

also, i was able to find a spare from a charger. its a 17 inch donut, that clears everything perfectly. paid 28.34 from parker motors in oakboro.

Picture261-1.jpg


to make my spare tire jack tray fit some better, I've started cutting on it. I'm hoping to get it to be a low enough profile to barely come above the trunk floor.
Picture284-1.jpg

Picture286-1.jpg


Ive readjusted the passengers side window, and it has reduced the whistling by 50%. also, i shimmed the weatherstripping using some double sided moulding tape i had left over from my s10. little 1/8 thick tape made an incredible difference.
i couldn't figure out how to take an interesting picture of an adjusted window, so i didn't.

the center cap issue happened because when the tape shrank when it got hot. pulled half of it right off the one side of the cap. to fix this issue, i bonded some small sections of mountain bike inner tube to the cap. took two layers to get a good fit.

I've already shortened Mary's seat belt as well. have i mentioned that the pep-boys belt is a PITA?

the car is now up for the electrical and body work. i have the front bench out, and the dash all torn apart. found a couple of my crimps had come loose on my dash lights, had a bad weatherpack terminal on my turn signal/brake light connector, and a bad headlight switch. still haven't figured out the charging system, ut I'm leaning towards a loose connection in the bulkhead connector.

next up, ill take pictures of this stuff, and finish it up.

current total is.....
1345.40

michael
 
pictures from this weekend.

Friday, i went over to a friend of mines place. he runs a body shop. I do all his electrical work on the street rods/hot rods, (wired a 50 new yorker convertible, just fixed a lot of hacks on a 57 chevy convertible, waiting on him to drop off a 69 mach 1) and he sends me business.

well the 57 was warranty work. he had another guy wire it before him and i started working together, and needless to say it was a hack job. really quite scary. so i patched the worst of it, fixed the vintage air, and generally tidied and tightened everything up for him. in return, he helped me out some on the duster and put a back bumper on my Subaru. we both came out of this car happy.

on the duster, Bill cut my rear fender lips to keep them from rubbing, as well as touched up all my nicks and scratches. he also repainted all my under hood bolts from where they chipped when i assembled the car.
he cut a total of 1/2 inch from the fender lips by the way, leaving me about 1/4 between the tire sidewall and the fender. and it doesn't even look like it was cut at all.

pass side:
Picture292-1.jpg

drivers side
Picture293-1.jpg


fender bolt touch up:
Picture290-1.jpg

Picture291-1.jpg


i also spent most of the day working on the electrical.
pulled the bench, the e-brake lever, fuse panel, column cover, fresh air vent, and amp to get to the connections i need to re-do in the dash. also was able to swap my headlight switch out under warranty at advance. hopefully this week ill get some time to get all that back together, and start on figuring out my intermittent connection problems at the bulkhead.

Picture287-1.jpg

Picture294-1.jpg

Picture288.jpg


and i didn't realize how bad my carpets were until now. i may pull them out soon and re-dye them.

budget remains the same.

michael
 
i had some time Friday and Saturday to work on the car some.

started out by re-installing the headlight switch, after putting some electrical contact goo on it. tightened down the wiper switch that had worked loose as well. i also re-crimped all my connections under the dash. when i wired this car, i had used some really nifty ratcheting crimping pliers. apparently, sometime in the middle of the car, they had crapped out. half the crimps were plenty tight, half were able to be pulled apart with minimal force. so, while they were accessible, i redid them.

when i reinstalled the fuse panel, i re-made the mount, as the toe pf my boot always hit the circuit breaker for the lighting system when i power shifted. the new mount is a good 2 inches higher than before. the tail light and turn signal problem turned out to be bad connections in the weather pack between the column and dash harnesses. i cut it out, as the nearest place that has readily available small quantities of weather pack terminals is 40 miles away. also, the weather packs took up a LOT of real estate under there. i used a 9 pin "Power connector" from the black bins at radio shack. 9 bucks for the male and female sides. I've used these for a lot of aftermarket stereo installs into muscle cars, gauge clusters, etc. they work really well after you tweak the pins a hair for good connection. out of the package, only about 3/4 make good contact. but they're small, readily available, and cheap.

with the dash wiring out of the way, i moved onto other things.

one thing to remember before the next part. i built/assembled this car in a thrash to finish before my wedding. needless to say, i didn't make it. came close, but got taken out by a car accident. i finished the car shortly after being married, when time and money were extremely short. needless to say, I'm finding some things that should not have been done the way they were, or at all. also finding things that i should have noticed during assembly, but die to being in a hurry, i didn't.

i did a nut and bolt check while i was around the interior. most interior screws i got about 1/2 turn on. i found that the steering column bolts i got about 2 turns out of, and 3/4 of the door hinge bolts were barely touching the sheet metal.

after i got done with this, and got everything i had taken out of the dash put back together, i vacuumed the carped hoping it would help.
Picture306-1.jpg


it didn't.

pulled it out to vacuum it again and hit it with a leaf blower to get all the sand out that my shop vac didn't.

Picture307.jpg

Picture308-1.jpg


still did not help.
the carpets were purchased in 1996 at the metrolina swap meet for a total of 96 bucks. they may have fit better if i had known what i was doing back then, but they have always fit badly since i installed them. now, in addition, they are stained, have a few holes, are faded, and are getting a bit fuzzy from age. after realizing that I've got bigger fish to fry financially right now (rear axle, seat belts, etc), and that if i go with a T5 ill need to change them anyway, i went with the budget alternative.
i learned this while flipping some cars during college.

vacuumed the carpets again.
cut the strings, fuzzies, etc off of them. started putting repeated dustings on them with a can of Dupli-color vinyl and fabric dye. after a few dustings, they looked pretty even on color. so i waited for the paint to dry, and brushed them down with a stiff bristled brush. helps to break up the painted fibers and make it look more factory. more needed on the cut pile versus loop carpet, but i did it anyway.

here's what they looked like afterwards (7 dollars and an hour later)
Picture313-1.jpg

Picture314-1.jpg

i wouldn't go so far as to call them great, but i will say that they are good enough.

before reinstalling them, i looked to the foil backed jute job i did.
Picture309-1.jpg

Picture310.jpg


why i didn't go up the toe boards, i don't remember. probably ran out of materials, or was worried about it showing above the carpets.
so, 15 dollars of 3M spray adhesive, and a 20.99 roll of foil backed jute from pep-boys in Charlotte later, i covered the toe boards. my wife came down and helped with this, as i suck with fabrics and such.

i didn't take any pictures before carpet re-install, so here's after reassembly.

Picture316-1.jpg


put the amp back in (an old audiovox rampage amp i traded a pack of smokes for in 2001 while i was working at a gas station). took the time to tune in my gain frequencies and crossover points. sounds a lot better from the kick panel speakers now.

Picture315-1.jpg


Then i put the front bech back in, and put in Mary's car seat to double check the belt. belt is just right this time. (third try)
Picture318-1.jpg

Picture317-1.jpg

Picture319-1.jpg


i also started messing with getting my hood springs and splash shields in. used the springs from the hood hinges on a dodge daytona, as i read in another guys thread that that is what he used for his AAR hood. unfortunately, i am not as successful as him. i mounted them just like his picture, but they do not hold the hood up at all. they are only pre-loaded about 1/2 turn, so i think i may need to preload them more. which to do so will require me pulling the hood and hinges.

here's pics of the attempt.
Picture312-1.jpg


and my refinished splash shields that never made in in during the resto.
Picture311-1.jpg


took the family out to dinner Saturday night just to try it out. all the lights work properly, the gauges are more accurate and stable, there is less engine noise in the interior, and less squeaks and rattles.

also, we put a full tank of gas, Jenn, and Mary in the back seat, then went over some nasty dips in the road. the tires hit the wheel wells about the same time that the axle hits the bump stops.no fender contact though. YAY!!!

Jenn says its still too loud, though.


i guess you cant make her happy all the time.....

total as of now: 1397.39

more later, after i get some more time. got to pull the hood next for the springs, bulkhead connector, and booster.
 
if y'all cant tell, Friday nights are my nights in the shop. that's why i gibe an update at the end of the week most weeks. its my time to decompress and relax, as i have a pretty stressful job.

Tuesday night i went out to dinner for Mexican with a couple of buddies of mine form out of town. got to talking cars, marriage, religion, politics, etc. before this, we were helping Dallas clean some of his stuff out of his parents barn. while we were cleaning, we turned up a partial nitrous kit. solenoids and plate. Dustin, my other buddy, said that he had an MSD timing retard, bottle, and some other nitrous stuff that he had yanked off an old mustang coupe. so i paid for both their dinners in exchange for the nitrous stuff that they had. Mexican came up to a total of 40 bucks.
all I've managed to pick up so far is the plate and solenoids. Dustin's going in for hernia surgery next week, so when I'm over helping him out around the house ill grab the other stuff.

Picture326-1.jpg


Last night i pulled the hood off the duster, and put the front end up on stands so i could pull the wheels. Took a picture of the front end, just for reference later when i finish tweaking it.

Picture324-1.jpg


i then pulled the carb off for a little tweaking. installed an electric choke kit, and went a little richer with the metering rods. well see how it works when its back on the ground.
on the edelbrock parts, you'd think that for 106 bucks they'd send you a copy of there tuning guide. on the choke, you'd think that they'd use decent hardware and tap the holes for you. they don't. took me an hour just to do the choke.

Picture322-1.jpg

Picture323-1.jpg


i then moved on to the brake booster install. its funny, i started the process of upgrading the brakes months ago, and only managed to buy, clean, and paint parts. never got them on. i did buy a reman master, as the one that came with my booster assembly was for drums, and the manual cylinder was running out of fluid on full brake pedal depression. the reman unit came out at 24.67 with my commercial discount at autozone.

here's the parts shortly before install. you'll see in the picture a carter AFB that i just finished rebuilding. its going on Dustin's 331 powered 280Z project. really neat carb once i got inside of it. i have 20 bucks in it, and that's including a bigger accelerator pump, high flow needle and seats, blending in the venturis, etc. came out of Dallas's' barn as well. rebuilt it in exchange for my rear disc setup, which ill get pictures of when i pick it up.

Picture325-1.jpg


spent a while getting it all in. when i backed the car into he shop, i didn't pull far enough away from the workbench to open the drivers door fully. made it VERY difficult to get the brake push rod bolt out. after about an hour, though, the old manual setup was laying on the bench. put the new booster on, and decided that it is stable enough not to need any of the support brackets. (honestly, i cant figure out where they're supposed to go to, either. been way too long since I've pulled the unit.)

put my classic tube stainless lines in the prop valve after re bending them to make them clear the firewall, and installed the master. only got it bench bled last night, as my bleeder setup wont work on his type of master. have to get help from Jenn this week.

Picture329-1.jpg


then, i decided to play with the nitrous a little bit. i want a really clean install, and one that is almost unnoticeable. mounted the solenoids to the back of the carb, and plate underneath. using the same wiring lead that i had hooked up for my line lock to activate the solenoids. this will be operated by the old cuda flasher witch in the dash.

Picture327-1.jpg

Picture328-1.jpg

Picture331-1.jpg

Picture332-1.jpg


and one with the air cleaner on, just to prove that its hidden.

Picture330-1.jpg


ill be blacking out all the lines, probably by placing them inside of rubber hoses. that ought to finish the deception.

also worked on the hood hinges. now have the hood springs pre-loaded one full turn. well see if its too stiff or not for the glass hood.

grand total as of this weekend:
1568.06

finished out last night by working on getting the truck detailed so i can finally sell it.
Picture333-1.jpg


thanks for looking, and feedback, both positive and negative, is always appreciated. (helps to keep me motivated.)
 
so a month has gone by without an update. between the holidays, work, family, etc i haven't had much of a chance to mess with the car. o have gotten a little time here and there to tinker.

found the problem with my power brake conversion: something in the booster had gone bad, causing it to lock up when vacuum was applied. so 97 bones later, i had another one on order from my local advance. (they beat everyone else's price) shot some clear on it to keep that nice bare steel look it had going on.
Picture385-1.jpg

Picture384-1.jpg

also, notice the prop rod is finally gone! wound up pre-loading the hood hinge springs 1 full turn to get the right tension for the fiberglass hood.
once the brakes were working properly, i went to fire it up for a test drive. and smelled gas.
turned out that the regulator mount had vibrated one of the screws out that held the regulator on, causing the bracket to crack by the other screw. this allowed the brass fittings to smack against the block, causing them to leak. advance honored the one year warranty on the holley parts, and got me a new regulator, bracket, and screws under warranty. cool. also raided my coffee can of fitting to do away with the crush sleeve brass ones that were on there. i don't like having more rubber on the car, but for right now it works. maybe next fall when i pull the motor for the oil pan gasket and a fresh coat of color ill fix it.

so then i went on a test drive. the throttle hung on me, and i could not get it to idle at any LESS than 4500 RPM. couldn't get it fixed on the side of the road, so i limped it back home. pretty scary ride through the neighborhood....

what happened was that the 4 hole carb gasket used when i put the nitrous plate on was smaller than the throttle plates on the eddy carb. the butterflies went through the holes out, but wouldn't come back in. THAT one took me a while to figure out.

so today i had to run some errands for the wife (and decompress after a rough week at work) and decided to try it again. after adjusting the choke and setting the idle, she ran great. didn't leave my block until i KNEW it wouldn't hang up again. then i ran some errands, and went for some alone time at the top of morrow mountain. while i was up there, i snapped a couple of pictures. dont mind the car, its filthy.

Picture383-1.jpg

Picture378-1.jpg

Picture382-1.jpg

Picture386-1.jpg


gotta say the car ran and stopped great.

budget total is 1665.06

michael
 
Glad you figured out the brake problem finally.

Car looks nice, give's me an idea of what I would like mine to look like when I get it on the road.
 
Your progress, and presentation is truly TOP SHELF. I have enjoyed both this build update, and your build on the S10. Well done.
 
thanks!

i appreciate the compliments. i try to write things that i would want to read, as well as take pictures of stuff i would want to see.

and im suprised that someone from thsi board actually read the s10 build. im going to hate to see that truck go, but ive goty a new one now that fits the family better. anyone wanna buy it? 5300 OBO.
 
-
Back
Top