nice progress! keep the pics coming!
You are using an out of date browser. It may not display this or other websites correctly.
You should upgrade or use an alternative browser.
You should upgrade or use an alternative browser.
72 duster Build progress
- Thread starter Dusterdude72
- Start date
-
340sFastback
Well-Known Member
Nice work on that duster. Looking forward to some more progress shots.
Dusterdude72
IN MOPAR MUSCLE MAGAZINE
Slightly more progress (just got done working on the duster (3AM).....the entire car has a hard layer of paint which I would call tank paint lol....its tough stuff.
So after screwing around sanding on the engine bay and really getting nowhere....I dropped the sander and said SCREW IT.....got in my truck,went to the parts store, got some aircraft paint stripper,came back and started brushing it on and man was it SO MUCH easier....just waited for it to wrinkle and scraped it off.
I still have more to go but I got a good start on it anyways...I will bring it all down to metal and then sand it up and spot puddy and imperfections and I will then prime it and paint it.
The while I was stripping paint I was admiring the previous owners awesome welding skills!....the duster was a factory A/C car and the previous owner had a cut out the passenger side portion of the firewall and replaced it with one from a non a/c car and did a heck of a job....I will post a picture of an A/C firewall on the internet for comparison for those who may not think there is a difference.
anyways....back at it tomorrow and I will keep everyone posted on progress!
this is right after I started "stripping it"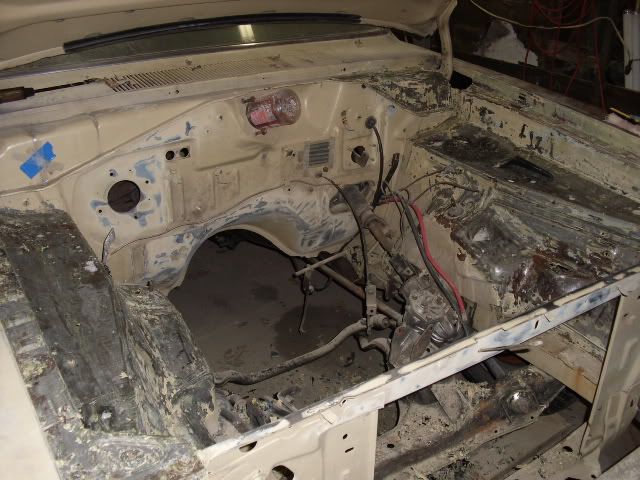
and again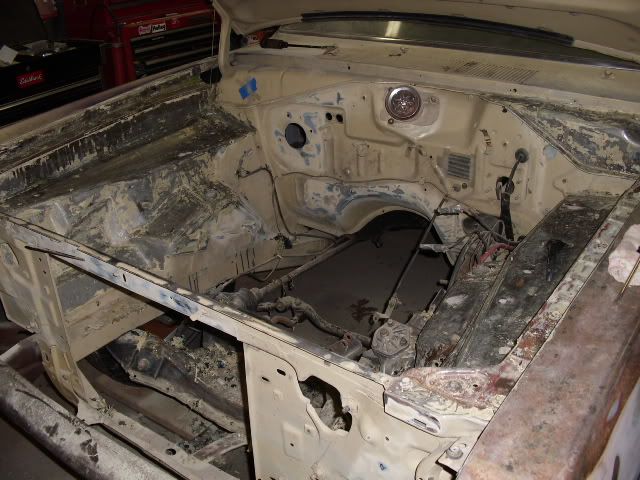
Nice shiny metal under there!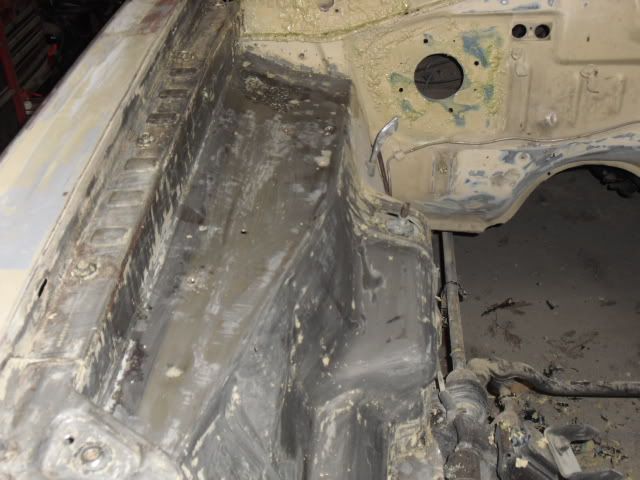
The parts car the firewall came out of was obviously blue,aswell as the decklid was blue and the hood was blue and a few other parts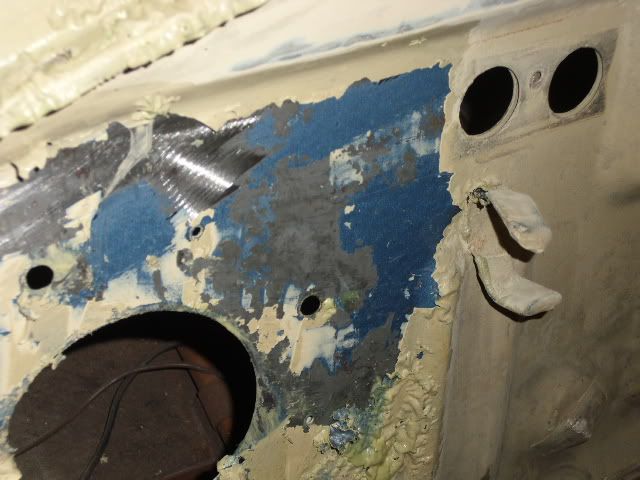
Gotta love that stuff! lol.....but that stuff REEKS you need plenty of ventilation if you plan on doing any stripping of paint!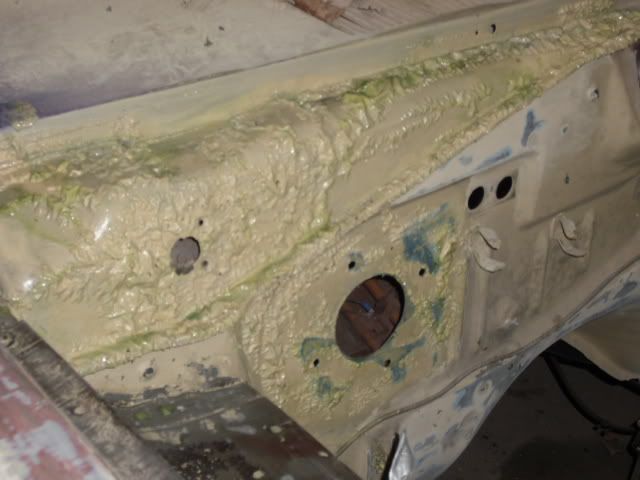
Ill try to get it all finished up by tomorrow
Getting there!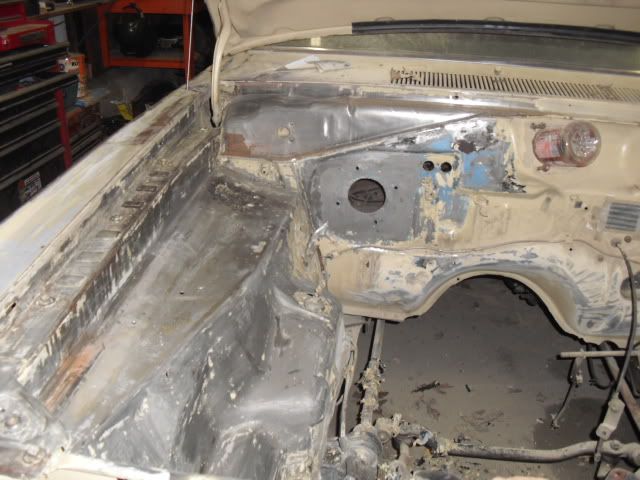
a picture of a fellow fabo members car I believe? I found it on the internet....Just using it to show the difference between the a/c and not a/c firewall, notice the extra holes in the a/c wall and shaped slightly different and a MUCH bigger fan motor hole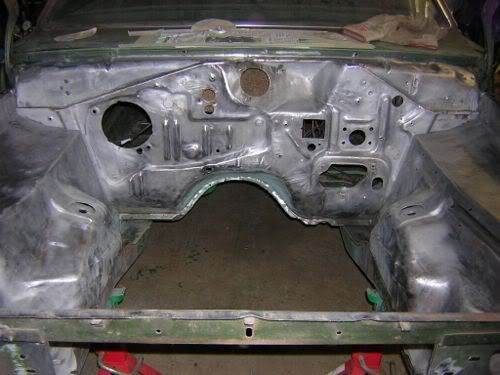
Ill keep everyone up to date as I go.
Sorry if i type to much I just get excited and cant stop typing LOL....I love seeing everyones good comments by the way...it makes the process alot funner knowing I am not the only one thinking it looks good...thank you all
So after screwing around sanding on the engine bay and really getting nowhere....I dropped the sander and said SCREW IT.....got in my truck,went to the parts store, got some aircraft paint stripper,came back and started brushing it on and man was it SO MUCH easier....just waited for it to wrinkle and scraped it off.
I still have more to go but I got a good start on it anyways...I will bring it all down to metal and then sand it up and spot puddy and imperfections and I will then prime it and paint it.
The while I was stripping paint I was admiring the previous owners awesome welding skills!....the duster was a factory A/C car and the previous owner had a cut out the passenger side portion of the firewall and replaced it with one from a non a/c car and did a heck of a job....I will post a picture of an A/C firewall on the internet for comparison for those who may not think there is a difference.
anyways....back at it tomorrow and I will keep everyone posted on progress!
this is right after I started "stripping it"

and again

Nice shiny metal under there!

The parts car the firewall came out of was obviously blue,aswell as the decklid was blue and the hood was blue and a few other parts

Gotta love that stuff! lol.....but that stuff REEKS you need plenty of ventilation if you plan on doing any stripping of paint!

Ill try to get it all finished up by tomorrow

Getting there!

a picture of a fellow fabo members car I believe? I found it on the internet....Just using it to show the difference between the a/c and not a/c firewall, notice the extra holes in the a/c wall and shaped slightly different and a MUCH bigger fan motor hole

Ill keep everyone up to date as I go.
Sorry if i type to much I just get excited and cant stop typing LOL....I love seeing everyones good comments by the way...it makes the process alot funner knowing I am not the only one thinking it looks good...thank you all
Dusterdude72
IN MOPAR MUSCLE MAGAZINE
Quick update,ran out of heat again ...its COLD today,feels like winter again.....just got back and Im going to get back at it and try to atleast get it all stripped tonight.
Dusterdude72
IN MOPAR MUSCLE MAGAZINE
ohh and today I welded a plate in over the top of the old battery mount hole and I striped all the old wire harness holders off the firewall and ground down the old spot welds and I am going to put in new loom holders after paint so it looks nice and fresh
dilley340
Well-Known Member
This is a fun thread DusterDude72! Very cool project. You have good taste and do nice work. I like the black woodgrain dash and the details that you're adding.
I wish I had some of your energy!
I wish I had some of your energy!
Dusterdude72
IN MOPAR MUSCLE MAGAZINE
This is a fun thread DusterDude72! Very cool project. You have good taste and do nice work. I like the black woodgrain dash and the details that you're adding.
I wish I had some of your energy!
Its funny that you mentioned energy lol because right now i have none....I decided to call it an early night so sorry everyone but I probably wont have any progress pictures untill tomorrow.
at the rate things are going I should have everything stripped by tomorrow.....and sanded and in primer by saturday or sunday and then paint soon there after.
Thanks for the nice comment I am glad you think its a fun thread!
Dusterdude72
IN MOPAR MUSCLE MAGAZINE
Been a few days since my last post.....it has either been to cold to work or I have been to busy working on the car to take pictures or there wasnt much noticable progress worthy of taking pictures....but I have something to tide everyone over until I can get around to getting more pictures.
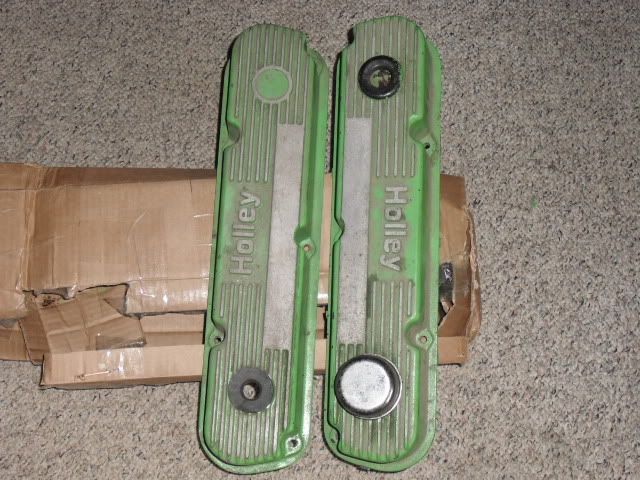
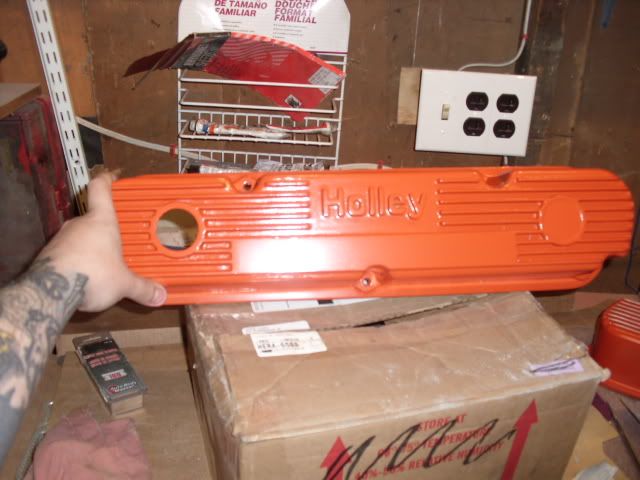
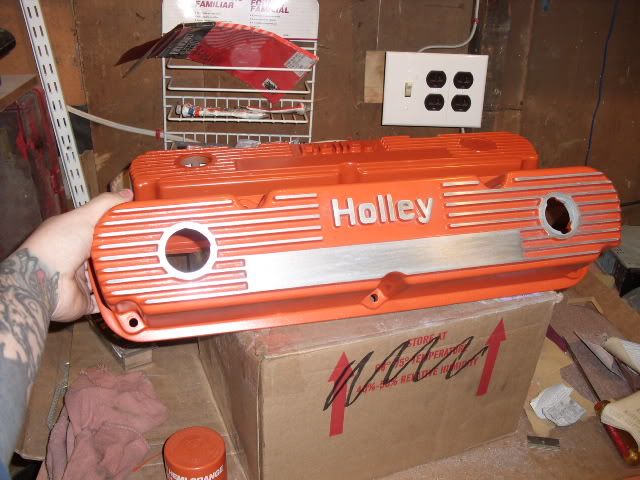
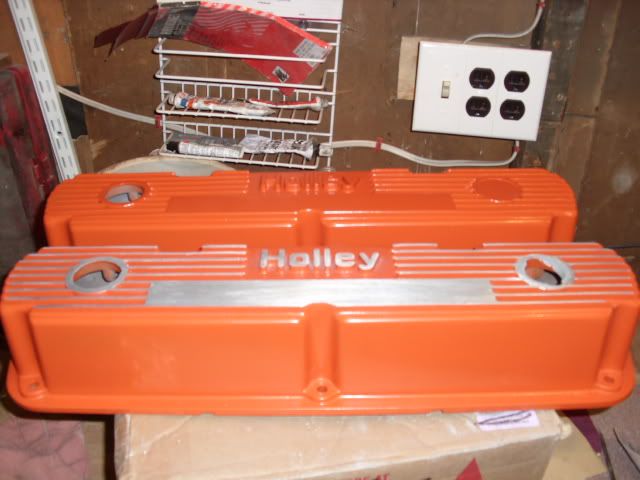
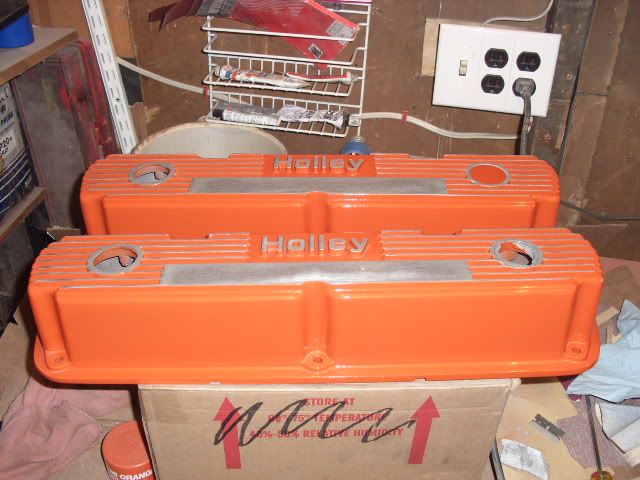
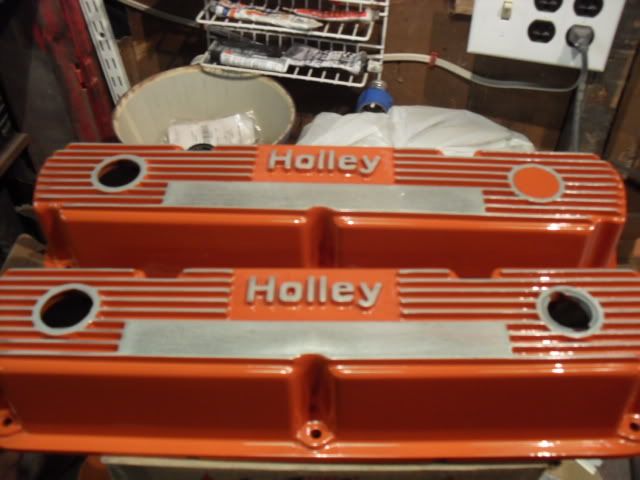
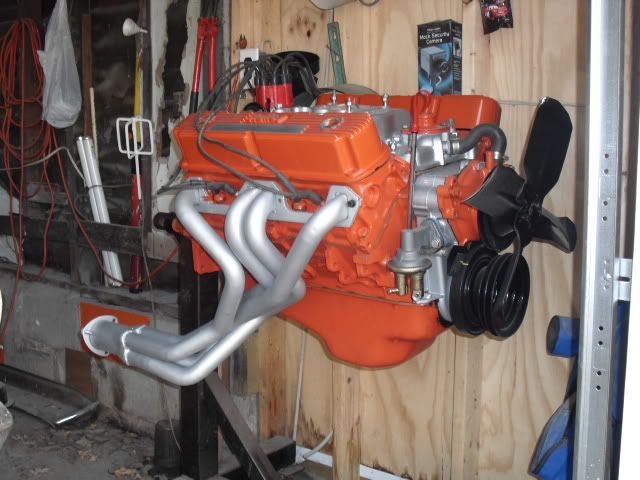
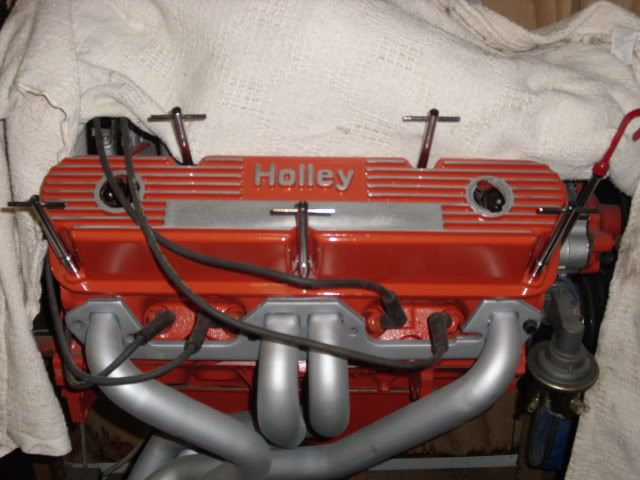
Picked up some holley valve covers off a fellow member for $25.00 shipped, they were painted green (which came off easily) but under the green was what appeared to be wrinkle powder coat black and MAN did that stuff take for ever to get off.....I am still holding out for some different covers at which time I will have them powder coated but for now I am painting them orange to match the engine with the fins and holley logo in the brushed aluminom look.
when I get them done I will take pictures of the finished product.
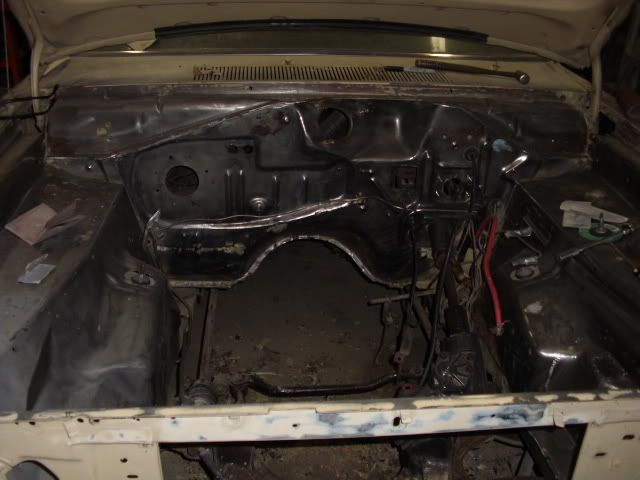
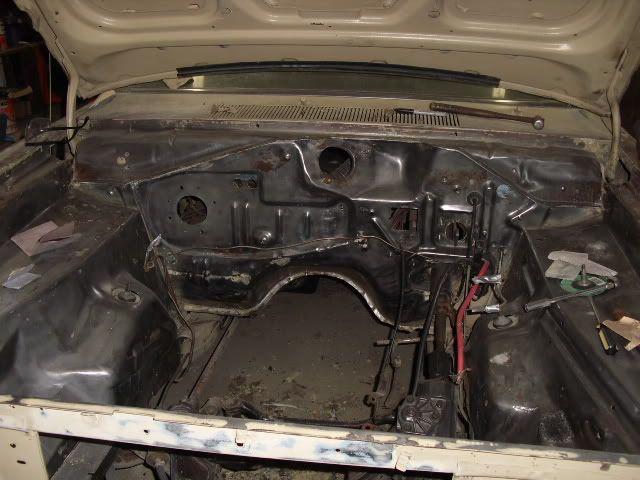
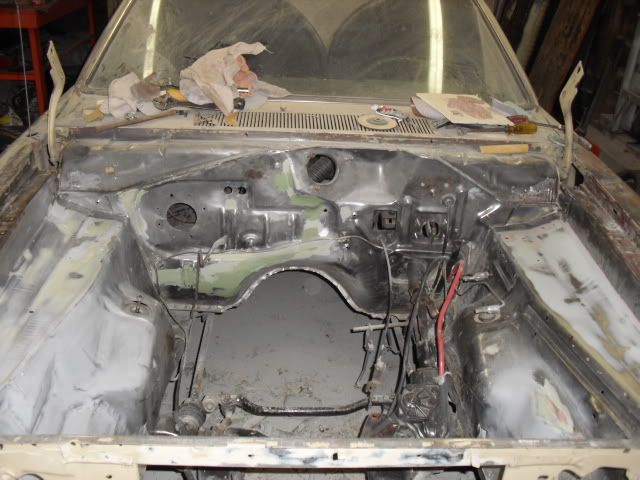
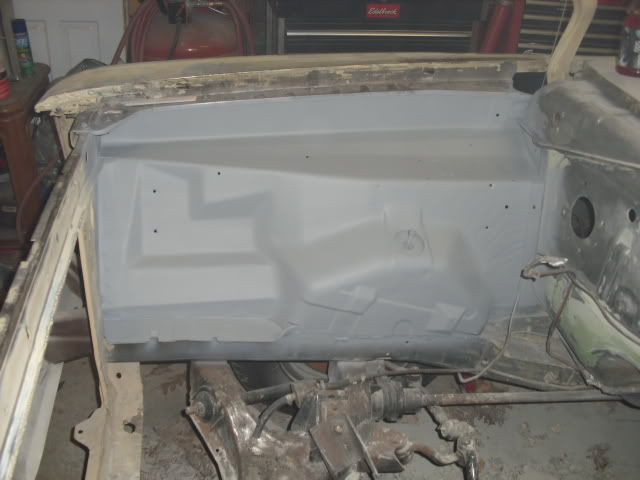
also, I FINALLY got the engine bay stripped of almost ALL the paint, took alot of paint stripper and alot of elbow grease but she is pretty darn clean.
not sure if you can make it out in the pictures but you can kind of see where the firewall was replaced with a non A/C firewall like I mentioned earlier in the thread.
I also did some patch panel work...I welded up patch panels over some holes I will not be needing such as the battery hold down hole and things like that (smoothing the engine bay for a tad cleaner flowing paint job)
let me know what you all think! ,Thanks!
covers when I got them
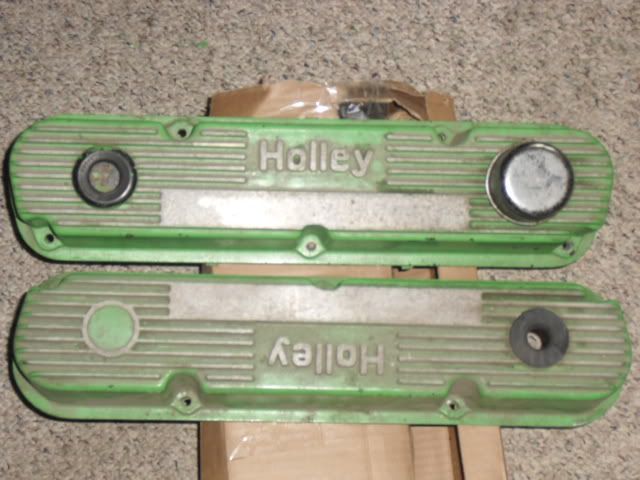
Again
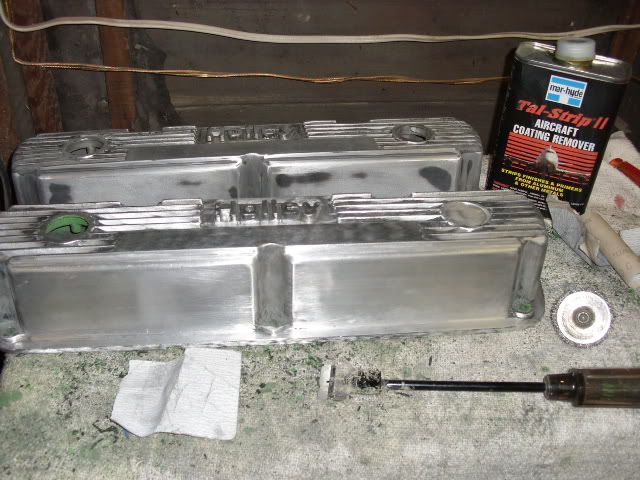
How they look after striping them and alot of sanding!
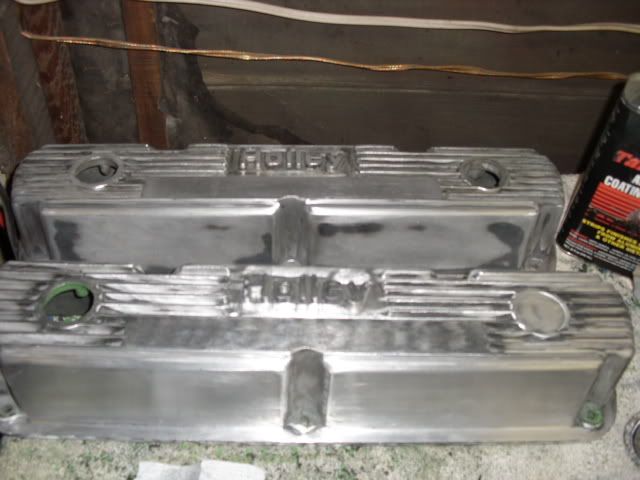
Again
Engine bay
And again!
Picked up some holley valve covers off a fellow member for $25.00 shipped, they were painted green (which came off easily) but under the green was what appeared to be wrinkle powder coat black and MAN did that stuff take for ever to get off.....I am still holding out for some different covers at which time I will have them powder coated but for now I am painting them orange to match the engine with the fins and holley logo in the brushed aluminom look.
when I get them done I will take pictures of the finished product.
also, I FINALLY got the engine bay stripped of almost ALL the paint, took alot of paint stripper and alot of elbow grease but she is pretty darn clean.
not sure if you can make it out in the pictures but you can kind of see where the firewall was replaced with a non A/C firewall like I mentioned earlier in the thread.
I also did some patch panel work...I welded up patch panels over some holes I will not be needing such as the battery hold down hole and things like that (smoothing the engine bay for a tad cleaner flowing paint job)
let me know what you all think! ,Thanks!
covers when I got them
Again
How they look after striping them and alot of sanding!
Again
Engine bay
And again!
Dusterdude72
IN MOPAR MUSCLE MAGAZINE
Finished the valve covers today!
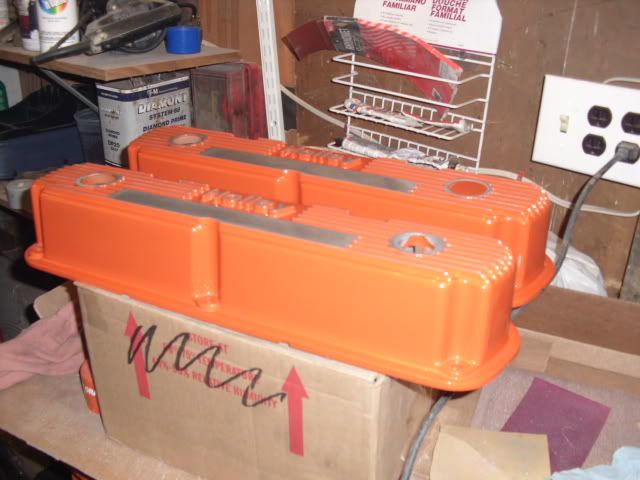
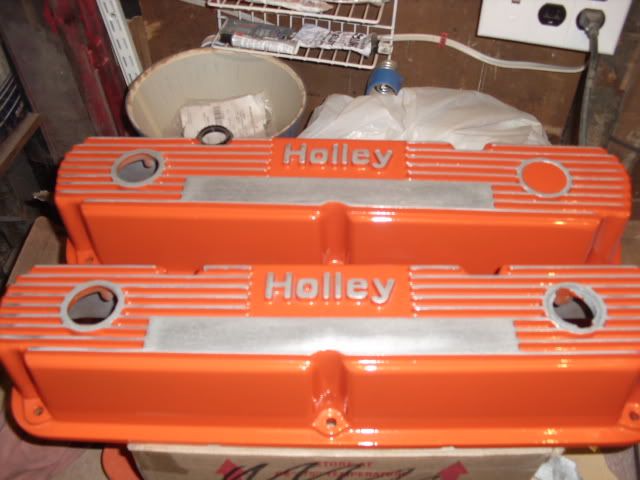
what I did was striped the covers,primed the covers,sanded the primer down,painted the covers,razer blades all the raised edges and fins that I wanted to show as aluminum so when I went to sand the paint the sander wouldnt ripp the paint off while sanding .....instead....razer blading before the sanding gave me a smooth surface to sand and left me with clean paint lines.
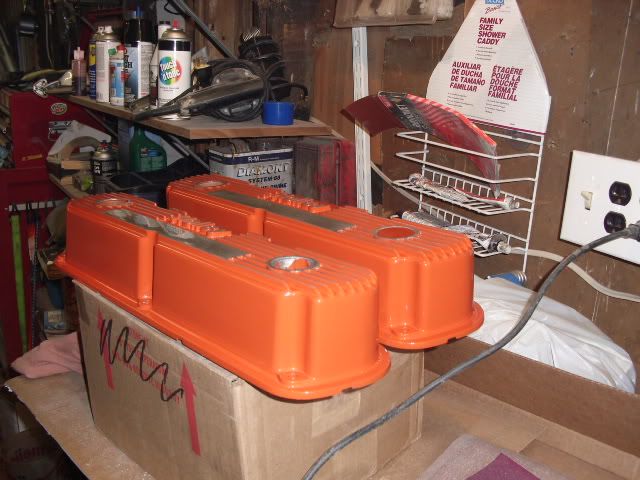
After all the hand sanding was done...I got out my electric palm sander with some 120 grit and ran the sander in a circular motion to give the aluminum a specific texture.
after all that was done I tack clothed them down and I sprayed them with clear to seal all the edges of the paint so they wont flake and also to stop the bare aluminum from oxidizing .
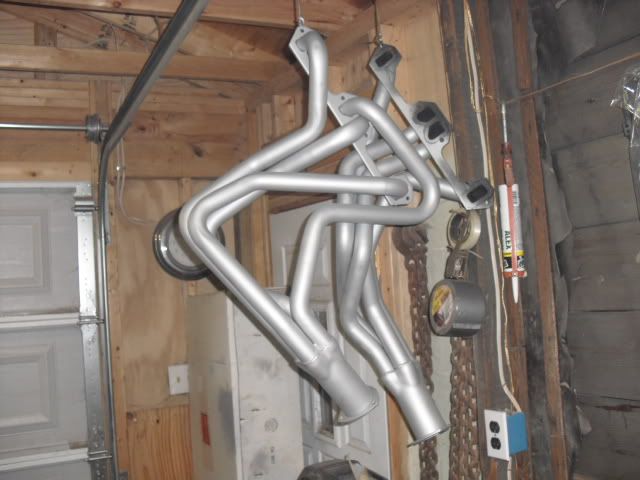
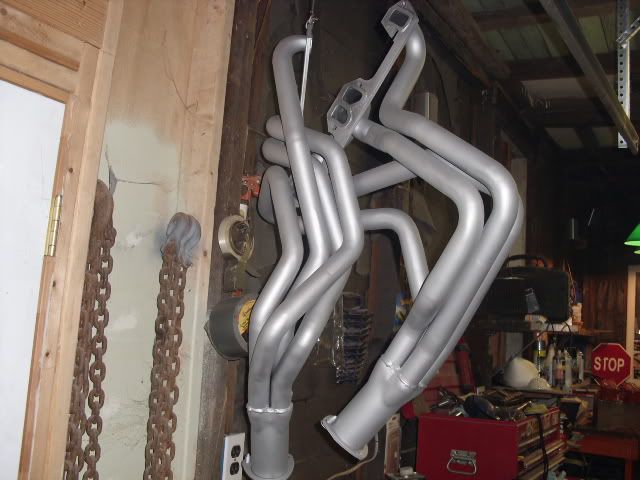
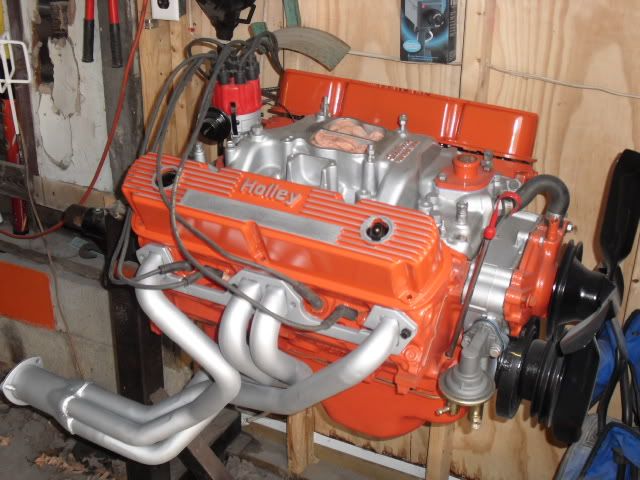
also I painted my headers in 2000 degree teflon header paint today....much better than the ceramic spray paint most people use,this stuff actually holds up to heat.
let me know what you all think!...PS. I am going to post a good bit of pictures to give everyone an idea of just how glossy these things came out but you really cant fully appreciate it from the pictures!
Just coated in orange
Just after razoring the first cover
just after sanding the first cover
Both sanded
Just after clear
You can see the reflection on the top LOL
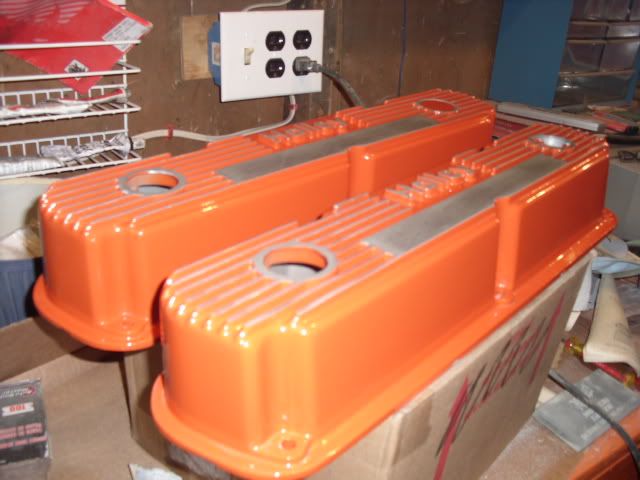
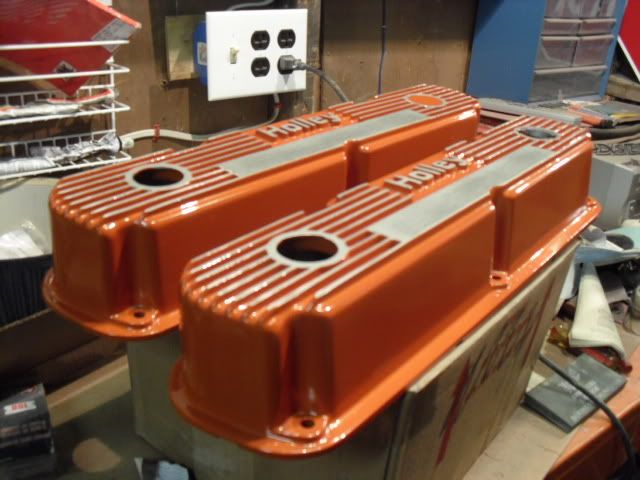
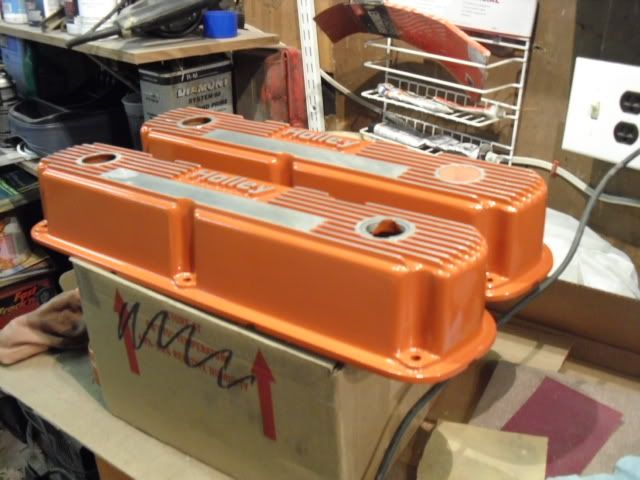
SHINY
Drying
Still need to do one more coat
what I did was striped the covers,primed the covers,sanded the primer down,painted the covers,razer blades all the raised edges and fins that I wanted to show as aluminum so when I went to sand the paint the sander wouldnt ripp the paint off while sanding .....instead....razer blading before the sanding gave me a smooth surface to sand and left me with clean paint lines.
After all the hand sanding was done...I got out my electric palm sander with some 120 grit and ran the sander in a circular motion to give the aluminum a specific texture.
after all that was done I tack clothed them down and I sprayed them with clear to seal all the edges of the paint so they wont flake and also to stop the bare aluminum from oxidizing .
also I painted my headers in 2000 degree teflon header paint today....much better than the ceramic spray paint most people use,this stuff actually holds up to heat.
let me know what you all think!...PS. I am going to post a good bit of pictures to give everyone an idea of just how glossy these things came out but you really cant fully appreciate it from the pictures!
Just coated in orange
Just after razoring the first cover
just after sanding the first cover
Both sanded
Just after clear
You can see the reflection on the top LOL
SHINY
Drying
Still need to do one more coat
Dusterdude72
IN MOPAR MUSCLE MAGAZINE
also I am still looking for some parts...I have a couple of threads psoted here and there with things I need if someone wants to click on my user name and explore my recent threads I created.
Trying to stay busy on the project
Trying to stay busy on the project
danielb927
Well-Known Member
This thread rocks! I can only dream of building a car from the ground up with a dedicated garage for it and all. Hopefully it's in my future somewhere. Nice progress and it looks great! I like the intake particularly, the orange lettering looks excellent. Good luck with the rest of the build!
Dusterdude72
IN MOPAR MUSCLE MAGAZINE
Thanks, I like putting the little touching in places.
I get a kick out of it when people are checking it out and point and say did you see he did that there? look he even took the time to do that!.
just funny to see how a bit of extra time and thought can get a pretty good expression out of on lookers
I get a kick out of it when people are checking it out and point and say did you see he did that there? look he even took the time to do that!.
just funny to see how a bit of extra time and thought can get a pretty good expression out of on lookers
Dusterdude72
IN MOPAR MUSCLE MAGAZINE
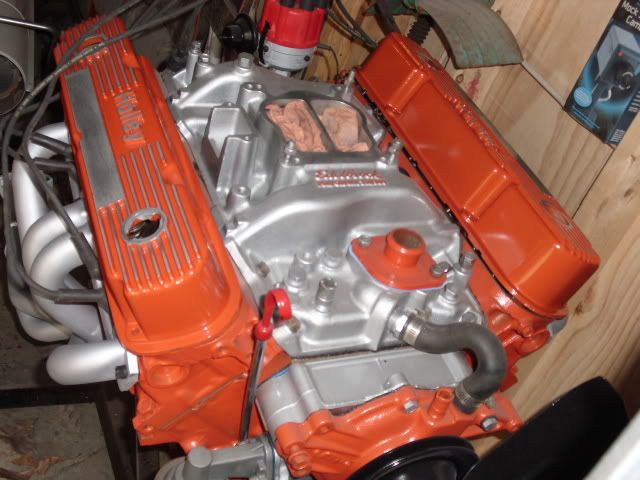
got my headers and valve covers sitting on the engine and thought it was a good time to take some pictures lol.
while I was at it I took a picture of the set of sun visors for the duster that i refurbished and changed to black instead of the tan....a little dusty from sitting but they look like new.
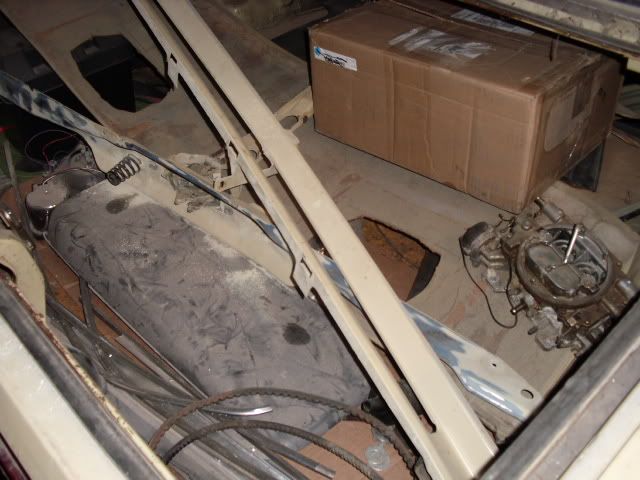
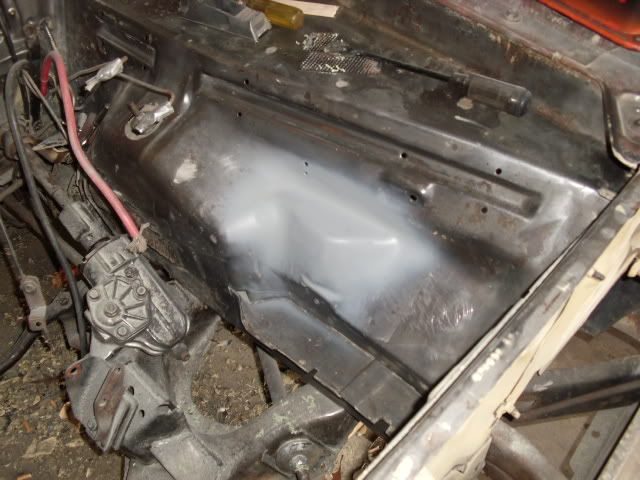
also a picture of the engine bay.....I welded in a patch panel where the hole for the battery try was...( I relocated mine to the trunk so i figured I dont need the hole anymore lol) I then put some body filler on it and sanded it down and sprayed some primer on it so I can sand it one more time and chack for any high and low spots real quick (not done yet but wont take long)
I also took a picture of my parts vault (better known as the trunk lol) and there is still more in the loft of my garage and scattered all around the garage too.
and I figured while I was at it I would take a few pictures of some parts that a fellow member here ( limelite70 ) hooked me up with some great deals on!
enjoy and tell me what ya think
Trunk full of parts
Sun visors like new again

Thanks limelite70
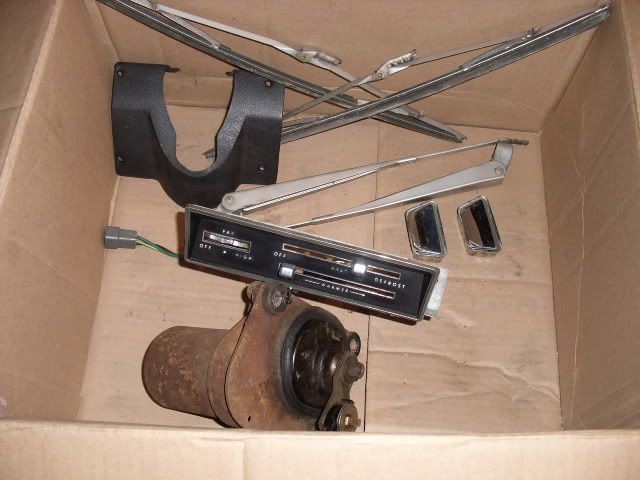
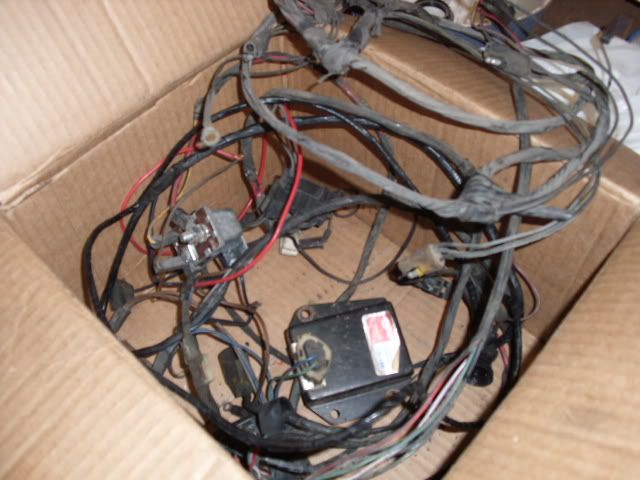
And thanks again!!!! full firewall forward wire harness!!!!
Almost done
Top side
Profile
I personally think it came out really nice
while I was at it I took a picture of the set of sun visors for the duster that i refurbished and changed to black instead of the tan....a little dusty from sitting but they look like new.
also a picture of the engine bay.....I welded in a patch panel where the hole for the battery try was...( I relocated mine to the trunk so i figured I dont need the hole anymore lol) I then put some body filler on it and sanded it down and sprayed some primer on it so I can sand it one more time and chack for any high and low spots real quick (not done yet but wont take long)
I also took a picture of my parts vault (better known as the trunk lol) and there is still more in the loft of my garage and scattered all around the garage too.
and I figured while I was at it I would take a few pictures of some parts that a fellow member here ( limelite70 ) hooked me up with some great deals on!
enjoy and tell me what ya think
Trunk full of parts
Sun visors like new again
Thanks limelite70
And thanks again!!!! full firewall forward wire harness!!!!
Almost done
Top side
Profile
I personally think it came out really nice
danielb927
Well-Known Member
The orange valve covers with silver lettering vs. the silver intake with orange letters looks sweet!
Dusterdude72
IN MOPAR MUSCLE MAGAZINE
The orange valve covers with silver lettering vs. the silver intake with orange letters looks sweet!
Thanks, I have a specific idea for an aircleaner also that I think will tie it togeather even nicer.
stay tuned lol
Dusterdude72
IN MOPAR MUSCLE MAGAZINE
PROGRESS UPDATE!!!!
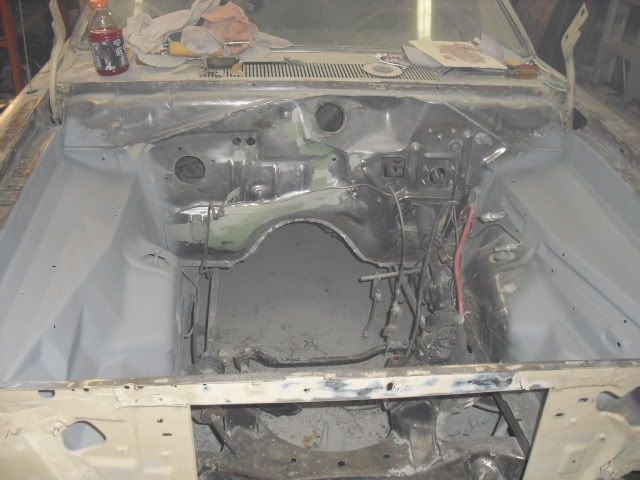
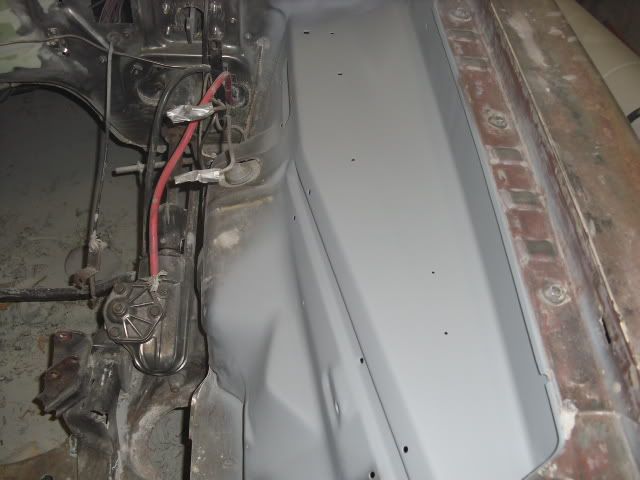
OK so.....yesterday I didnt get much done on the duster but today I did alot of "mudding" ,hand sanding,blocking and priming.
I filled in any imperfections in the metal with a smear of light bondo and sanded it out smooth....I hammered out the factory warps in the metal from the spot welds on the inner fenders so now its all nice and smooth.
I sprayed with rattle can primer and used it as a tracer for my block sanding so I could see all the high and low spots.....I re chamfered all the factory holes in the body panels so they are all nice and clean with a gradual tapper instead of the factory jagged edges.
I then FINALLY got to try out my new paint gone I bought last summer.
normally when I sprayed before I would spray with a syphon feed paint gun....but my new gravity feed hvlp gun is SOOOO much nicer.....I can run on minimal air pressure and I get nice smooth even coats of paint and it looks very nice.....the pictures (below) dont do it as much justice as in person!.
after priming it I then re sanded it out with 400.
I still have to finish smoothing out the firewall as well as a few other areas (tomorrow) and then prime it up again......but this is what I accomplished today anyhow.
AND I picked up a nice new set of valve cover T-bars!!!!
of course ...I have mopar 5 bolt valve covers and everyone only cars about chevy and sells 4 t-bars in a package...so I had to buy 3 packages just to get the 10 I needed (with two spares left over) but it looks nice and was worth the $50.00 I suppose.
tell me what you guys think so far!
Nice shiny new t-bars
during body work
after priming
side shot at that super clean steel (fresh off the stamping press clean lines!)
drivers side inner fender top...also you can see how clean the spot where I welded in a patch panel to cover the old battery tray hole was
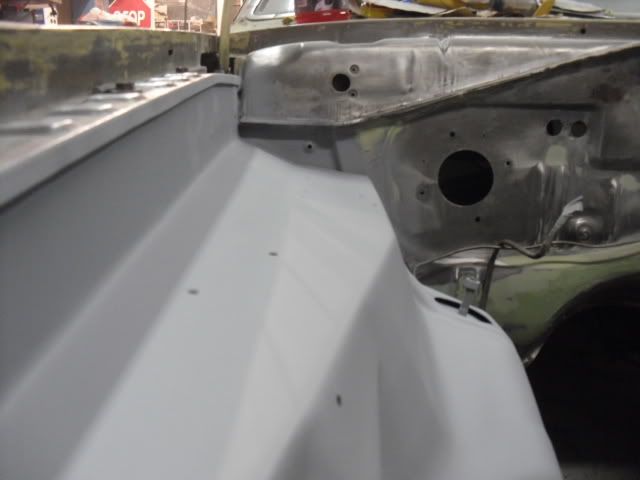
and a couple of pictures sighting down the passenger side top to give everyone and idea at just how "crisp" looking it came out
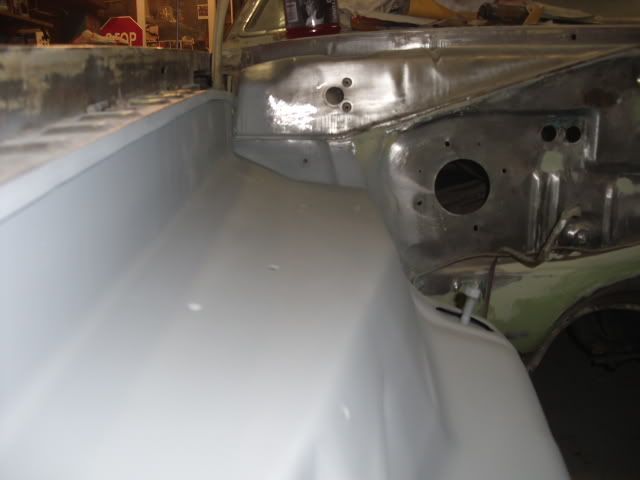
another
OK so.....yesterday I didnt get much done on the duster but today I did alot of "mudding" ,hand sanding,blocking and priming.
I filled in any imperfections in the metal with a smear of light bondo and sanded it out smooth....I hammered out the factory warps in the metal from the spot welds on the inner fenders so now its all nice and smooth.
I sprayed with rattle can primer and used it as a tracer for my block sanding so I could see all the high and low spots.....I re chamfered all the factory holes in the body panels so they are all nice and clean with a gradual tapper instead of the factory jagged edges.
I then FINALLY got to try out my new paint gone I bought last summer.
normally when I sprayed before I would spray with a syphon feed paint gun....but my new gravity feed hvlp gun is SOOOO much nicer.....I can run on minimal air pressure and I get nice smooth even coats of paint and it looks very nice.....the pictures (below) dont do it as much justice as in person!.
after priming it I then re sanded it out with 400.
I still have to finish smoothing out the firewall as well as a few other areas (tomorrow) and then prime it up again......but this is what I accomplished today anyhow.
AND I picked up a nice new set of valve cover T-bars!!!!
of course ...I have mopar 5 bolt valve covers and everyone only cars about chevy and sells 4 t-bars in a package...so I had to buy 3 packages just to get the 10 I needed (with two spares left over) but it looks nice and was worth the $50.00 I suppose.
tell me what you guys think so far!
Nice shiny new t-bars
during body work
after priming
side shot at that super clean steel (fresh off the stamping press clean lines!)
drivers side inner fender top...also you can see how clean the spot where I welded in a patch panel to cover the old battery tray hole was
and a couple of pictures sighting down the passenger side top to give everyone and idea at just how "crisp" looking it came out
another
Dusterdude72
IN MOPAR MUSCLE MAGAZINE
also....I dont know if it was the fumes getting to me or what lol but when sanding the factory paint....it smelled exactly like bananas LOL
Dusterdude72
IN MOPAR MUSCLE MAGAZINE
going to get a late start today so I probably wont have progress pictures today....been cold and rainy and been doing some easter shopping
Dusterdude72
IN MOPAR MUSCLE MAGAZINE
Bump for those who missed this thread
a68postcar
Well-Known Member
i'll see your bump.and i'll raise you one.
Dusterdude72
IN MOPAR MUSCLE MAGAZINE
thanksi'll see your bump.and i'll raise you one.
a68postcar
Well-Known Member
once you have color in there you will be glad you dit it. nice job btw!!!
Cobra75
Member
Looking great, keep those pics coming!
Dusterdude72
IN MOPAR MUSCLE MAGAZINE
once you have color in there you will be glad you dit it. nice job btw!!!
Thanks.....I have always been told that your paint is only as good as your body work.....so now is no time to skimp out I figure.
Sorry for not much progress updates everyone, it was 70's and 80's all last week and this week has been 40's and 50's and rain....and im waiting for it to warm up a bit before I think about doing any painting.
Plus I got my vinyl cutting machine the other day and I have been making a bunch of custom decals!
Rengo
Well-Known Member
I know this has nothing to do with your thread, but does anyone know what type of paint I would use to paint a grill with?
I use light argent metallic paint from east wood, but I am not sure what black to use, also do I apply a clear coat afterwards?
I use light argent metallic paint from east wood, but I am not sure what black to use, also do I apply a clear coat afterwards?
-
Similar threads
- Replies
- 137
- Views
- 4K


