Riddler
Project EH-Body
Right now I used the screws with my dash but I'm thinking of using some liquid metal to cover then and smooth it all out for powdercoating. But those black screws look great.
Riddler
Riddler
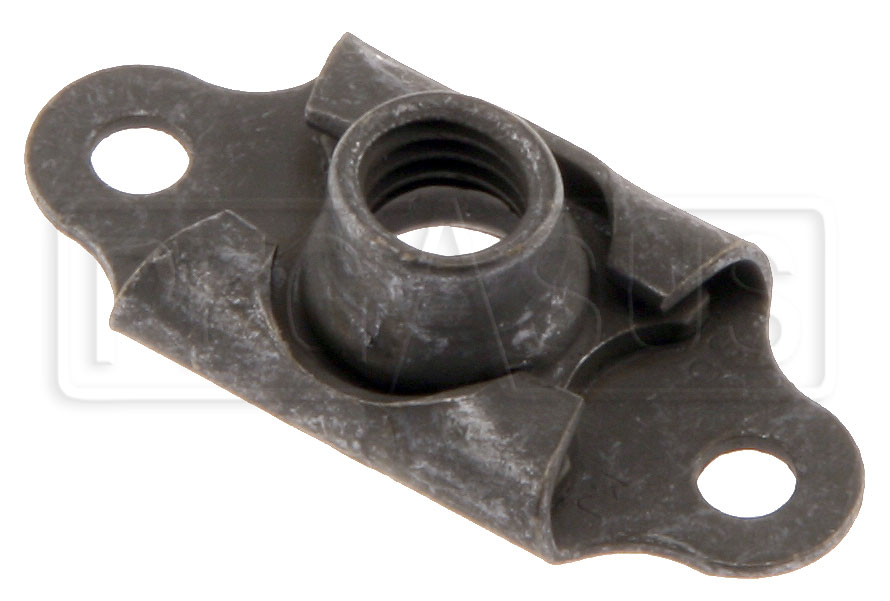
The nice thing is that the "Floating" nut will move around inside it's cage and give you some free play if your holes don't perfectly line up. The two non threaded holes are for rivets that hold them to the panel you want to attach the nut plate to.
Right now I used the screws with my dash but I'm thinking of using some liquid metal to cover then and smooth it all out for powdercoating. But those black screws look great.
Riddler
The nice thing is that the "Floating" nut will move around inside it's cage and give you some free play if your holes don't perfectly line up. The two non threaded holes are for rivets that hold them to the panel you want to attach the nut plate to.
Are you discussing attaching the gauge cluster assy to the dash frame?
how are you securing the dash frame to the car? I was considering different options to eliminate the need to remove the windshield to get to the bolts
I'm just going to bolt it in the conventional "Factory" way.
What?!?!? What did you say???
:shock:
Ha Ha...I cant screw with everything on this car now can I.
Why yes you can. lol
And very well I might add.
Very nice.
On the valve covers, my thought would be either mill off the fins on the ends, or incorporate something that extends them onto the top surface somehow.
There are not finished yet...I have to hand sand the fins on the ends off totally just haven't got that far yet...maybe tomorrow. They will look like the ones in the picture only with the TWISTER emblem cut in.
They look F'n great!
There are not finished yet...I have to hand sand the fins on the ends off totally just haven't got that far yet...maybe tomorrow. They will look like the ones in the picture only with the TWISTER emblem cut in.
")
Shoulda known


