SB engine rebuilding got ya! School is Open!

-

my5thmopar

Life Long MOPAR Owner
FABO Gold Member
Joined
Jul 15, 2011
Messages
1,474
Reaction score
869
Location
Tennessee
I would like some of the got ya's during rebuilding. This may seem like common engine building but, with the numerous posts lately about build issues, I thought this might be a helpful post. This might save some of use from pain. I have 3 rebuilding books and one hod rodding book for small blocks. Even with that, I know that some things could be over looked. Check lists and tips appreciated.

Like 340sFastback said in a post I read "Make sure that oil plug is installed and is tight on the rear of the driver's side lifter oil gallery back there by the distributor."

Great tip! And if further info is needed, give it because it might not make since to others.

Craig
 
I got one for ya. This happened to me on my 360. I had the machine shop assemble the long block. I get the thing home get all the bolt ons on and get it in the car. Everything was going great. We fired up for break in, about half way through we notice a small steady oil leak. No big deal it looked like the pan gasket was leaking. I had a set of el cheapo headers and a Milodon pan so it was almost impossible to pin point the leak. Ya can't see much up in there. Anyways we watched the leak like a hawk and continued the break in. After the break in I set out to do the near impossible task of pulling then sealing up the pan with the motor in the car. Yeah I know a dumb pain in the a$$ idea lol. It still leaked. Everyone I told about it and showed the problem to would swear it was the pan. I then pulled the motor and sealed the pan up good this time. Motor is in the car I fire it up and the leak is worse. That thing puked out 3-4 quarts in about 30 seconds. I was ready to sell the darn thing. Underneath the oil filter there is a stamped steel plate. Underneath that there is a paper gasket. Im not sure of the torque specs but the "nut-coupler thing" that the oil filter screws down to needs to be wicked tight to keep from leaking then eventually spraying between that stamped plate and the block.

That was a little drawn out lol believe it or not I left out several details lol. It was definitely a traumatizing event:banghead:. Lots of headache but now I know.
 
I had the same thing happen to me when i installed my stroker.I was missing the gasket between the block and the hex bolt/plate,pissed oil all over the ground.Went to Home Depot plumbing section(was late on a sunday)and bought a multi sink gasket kit just for the cork gasket.Had it fixed by late evening.:violent1:
 
I have noticed that people take the hollow bolt that oils the timing chain and replace it with a regular bolt thinking that it is defective or something. I tore down 3 small blocks lately and all of them did not have the bolt or a crank slinger. The teen that was in my car actually had surface rust on the block, behind the chain. The chain must have been screaming and no wonder the gears were all chewed up.
 
Some of the most common mistakes are the result of not refering to a book. rocker shafts installed backward, cam plate bolt with a hole drilled through wrong, etc..
Rule #1 read the book.
The faults in aftermarket parts or warnings about wont be found in most books. That's where this thread will help.
How the oil pump driver fits the oil pump can effect the life of the pump.
Never trust a replacement dipstick and/or tube. Pour 5 quarts in and check. Adjust whatever it takes to get accurate reading.
Check flexplate to torque converter bolt length. If the bolts are long enough to dimple the converters shell, the converter can be damaged internally.
Common practice is to run the engine before accesory belts are installed. Advance auto parts for example will sell you a lower radiator hose that is too short. All good initially but. Installing the power steering belt then cuts a hole through that hose.
A new mechanical fuel pump should have a small amount of grease at the actuators pivot pin. I wont depend on the timing chain to throw motor oil at the pump in a timely manner. I pre oil that and the timing chain. There is nothing at the other end of the actuator arm.. A bit of your cam/lifter break in lube there is wise.
 
If you use an AirGap intake, make sure the valve cover rails clear the ports. You may have to trim the rail around the ports of the manifold or the valve cover wont sit on the head.
 
When you install the oil pump you fill with oil and turn it and all looks peachy. When you install the oil pump on your engine and torqued down make sure you drop a priming shaft in and it spins free. I installed a bad pump which would turn freely in your hand but when torgued down in engine would bind up. I found this problem when ready to fire engine and had to drop the pan in the car with headers installed. I won't make this misstake again.
 
Keep it CLEAN! Bag it when you aren't working on it.

Always degree the cam, even the cheap streeter engines. Timing sets, dot to dot, can and frequently are WAY off.
 
Machine shop was in a hurry and didn't install camshaft bearings square = cam bound up and stuck during assembly. They didn't even get the oil holes lined up well. Bought the tool (over $200) and did it myself. Buttery smooth after my amateur install but I almost cut a fingertip off when the stuck cam finally slipped back out :p
 
make sure the oil pump shaft is seated properly in the oil pump or you will shear it off.happened once with me and a buddy of mine om the road happened 4 times before he called me to find out what he was doing wrong.
 
always use a brand new oil pump if you have the $50 to spend. it will pay for itself.
use a high volume pump if it's a performance engine. high pressure pumps can lead to troubles if it's a stock-type oiling system and not an all out race build with external oiling, restrictors etc... a high volume pump is generally sufficient. use a good oil pan with extra capacity and matching pickup if you can afford it.

all clearances should be checked. every bearing. learn to love plastigauge. all bearings should be pre lubed, preferably with white lube before initial startup. fill the oil filter with oil. use a distributor shaft to prime the oil system as well.

use good gaskets. cheap ones will end up having you tear things apart to replace them. such a pain in the butt just to save a few bucks.

everything should be clean and oiled as you assemble. ring end gaps should be checked.

everything has a torque specification... follow them to the T. use a good torque wrench.

your rods and pistons should all be weight checked and balanced with your crank.

use new head bolts and rod bolts if possible. especially if you dont know the history of some of the bolts you dont know if someone overtorqued them or ran the engine like crazy etc.
 
Always clean your Deck & Head Surfaces before setting the Head Gaskets and the Heads. Any Oil from setting the pistons in the cylinders needs to be cleaned off all surfaces. Torque your heads correctly and in sequence.

Don't forget to put that RTV in the corners on the Pan & the Intake Gaskets before setting them to ensure a good seal and no leaks.

Use a little RTV or thread sealer on the Timing Cover/Water Pump bolt threads so there are no water leaks.
 
..wise words from a good friend/mechanic
..work alone..no radio no distractions no well meaning friends
..double check everything.
 
How about TAKE YOUR TIME!!!

Every mistake I have made was when something didn't go right as planned and I rushed myself, forgot something or damaged something. Take a break, take a breath, and rethink what the hell your doing before grabbing the BF'ing Hammer.
 
Anytime you deviate from original,measure and mock it up.If still not sorted,ask questions......
 
...................and there seems to be a number of oil pump/ oil pan combinations where the pump hits the pan. I've got one I'm gonna have to do some welding on to "cure" it. I bought a new Milodon "stock replacement" pan, and even IT is marginal clearance. 360 specifically, don't know if the other CID's have this problem

Make SURE you get a new distributor drive bushing and installed properly

Make SURE you clean out ALL the block oil passages, and make SURE you get all the plugs in.

Prime the oil pump with the proper shaft and drill. Turn the crank so you get oil out all the rocker supply holes. If you have trouble, remove the sender and the filter. You should get oil out the filter almost instantly, and reinstall it. Prime until you get oil out the sender and reinstall the sender. Then prime until you see oil and feel backpressure on the drill, then turn the crank.


Degree your cam if you have the specs, and consider checking piston to valve clearance HINT minimum clearance does NOT happen at TDC

Take extra care with the rear main seal, and I've had much better luck NOT using the oil pan and intake end seals, use silicone instead. VERY important to get the surfaces absolutely clean and dry before applying.

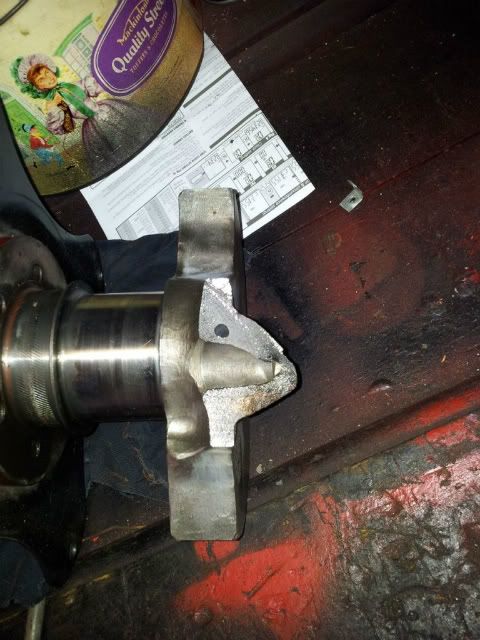
Don't forget to check the timing marks with a piston stop (balancer can be slipped or wrong) and consider degreeing the balancer before you put it on. Check the oil seal surface of the balancer, and if worn, either replace the balancer or buy a "speedy sleeve" or other brand name shaft repair sleeve.

Last time I did so, it was cheaper to buy a timing set with the sleeve in it, rather than buy the sleeve/ seal separately

Make sure you lube the cam with proper break in lube, and LEARN HOW to time the engine "static" so it will fire right up. If you do this right, the engine will fire INSTANTLY with gas in the carb. If you have a mechanical pump, you can apply a "solvent gun" with air to the fuel line and prime the fuel up to the carb fitting. Take some clean gas in a container, and hang it above to prime the float bowl of the carb.

That way you can start the engine with a bunch of cranking on the starter--very hard on a new cam.

Make ABSOLUTELY sure you "burp" the engine coolant. Drill a small hole in the flange of the T stat, and remove the heater hose which connects up by the T stat AT THE HEATER. Lower the hose end so you can "see" and fill until you get coolant out the hose. Then raise the hose up high, and continue filling. This will vent the block and help prevent airlocks in the coolant.
 
How about using a GOOD four legged engine stand. Don't put your $7k stroker motor on a used Craigslist engine stand. This is a little overkill, but I bought this one on CL for $75. I feel pretty confident that it's not going to tip!!!

enginestand001Medium.jpg
 
Make sure your machinist has experience with Mopar engines... I read so many threads about guys who got their engines FUBAR'd because they had a dumb Chivvy guy put the short-block together. For my 360 build I found a machine shop in Colorado Springs that built circle-track racing Mopar engines and after attempting to pick the guy's brain a little bit I quickly found out he knew WAY more than I did... Very reassuring!

Only thing I didn't like was he didn't act like balancing the rotating assembly was a big deal for a street engine, even though everywhere I've read says it's a 'must-do' for any decent performance engine. He still balanced mine upon request though.
 
Make sure the oil slinger is in it, and pointed correctly, along with the big felt seal some people just toss to the side. You can't believe the leaks you can get. Acetone, xylene, mek. Old sillycone residue is hard to get off, it may look clean, but feel it....

Problem areas; rear main, clean (use permatex right stuff in problem areas), make sure the seals aren't flush with the cap, rotate both 1/4" into the cap and block; timing cover/oil pan, sealant; front and rear of intake-toss the cork, use big bead of right stuff(not into the valley). Right stuff on front and rear exhaust studs.

Get a Harbor FR infra temp gun, check each exhaust tube on brek-in; stop if it shows carb is lean; rich is better, lean raises the temp. Degree the cam twice. B#tch to take front apart again. prime, then spin it over until lifters pumped up. No retarded timing, hot.

Coppercoat head gaskets, We all have different ways, but what everyone has said so far, I completely agree.
 
-
Back
Top