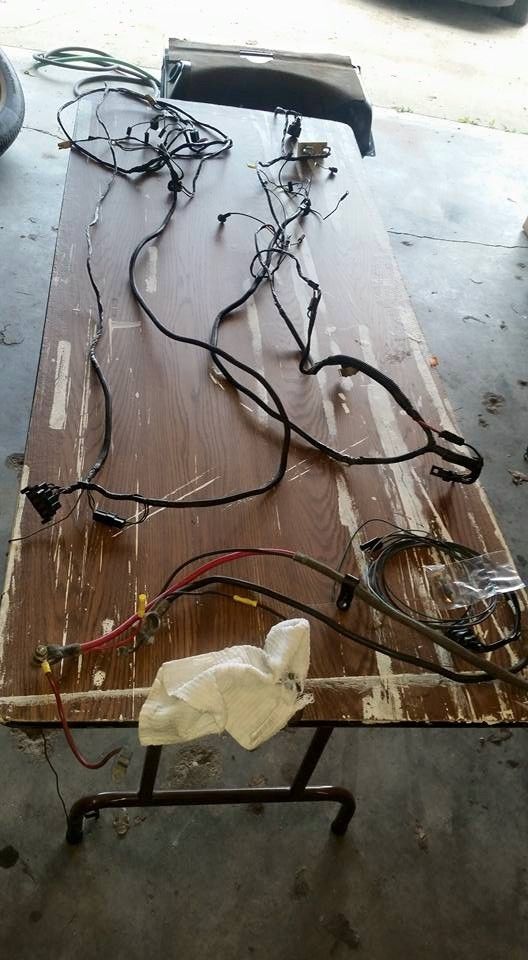
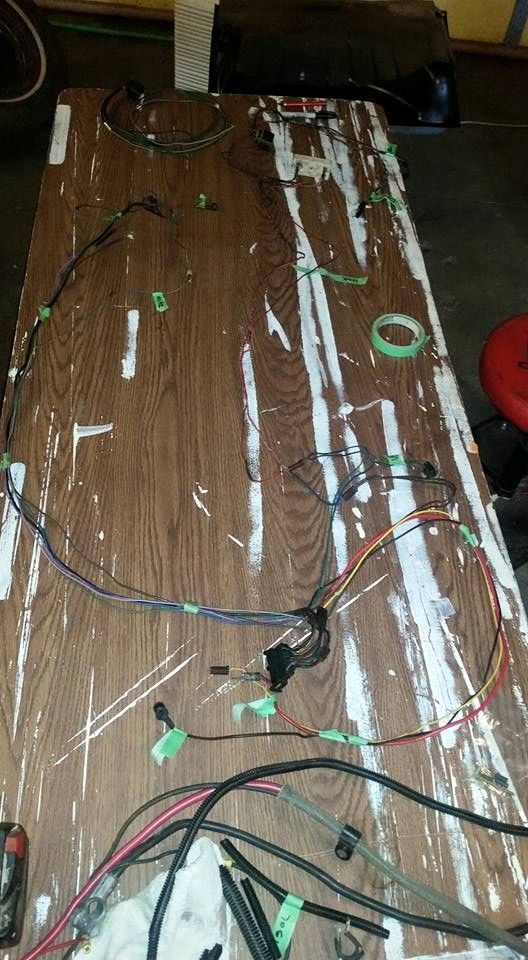
Starting to go through my wiring!

-

zac_F71

Well-Known Member
Joined
May 4, 2011
Messages
1,367
Reaction score
100
Location
Clitherall MN 56524
Hey guys, going out in a bit to start in on cleaning up my the under hood wiring in my 71 Demon. I did a few searches and came up with nothing..

Here is a list of things I want/need to do

Relay the head lights - which wires are the high/low head light wires in the harness
Rewire factory electronic ignition - mine was wired with all the same color wire - it currently works but I want to redo it with proper color coded wires
Wire in a Toyota 120amp alternator - I get the just of this as the bracket came with a wiring diagram, but where can I tap in for 12v switched power (key off = no power/ key on power)

Any help is greatly appreciated - I am going out now to inspect it and remove the convoluted tubing in put on it 10 years ago ahaha - will report back

Forgot to add car is a no option 6cyl car, being converted to a big block using the 6 wiring.. that has already had electronic ign. in it..
 
Get out your DVM. Be careful with the high output alternator. The original wiring was gaged for a 40 amp alternator.
 
DO NOT put in a Great Big Alternator before you read and heed this:

http://www.madelectrical.com/electricaltech/amp-gauges.shtml

There is only one source "under the hood" for switched 12V "run"........and that is the "ignition run" line, known also as "IGN 1". This is what the alternator field (blue), the original VR power (blue) and ignition power, as well as electric choke if used, and on some cars, "smog doo dads" such as idle solenoid or distributor retard solenoid.
 
The alt only needs a 12v switched power as it is internally regulated - the stock regulator on the firewall is left unplugged, I plan on sealing off the plug - the charge wire goes straight from the alt to the batt with a inline fuse, and a charging sense wire from the alt goes to the starter solenoid - no wiring goes in the car.. and I am wiring in a volt gauge as well so that will go in the car, but so will the aftermarket tach, and AEM wideband o2 wiring..

That is how I did my 83 Ford Mustang - put a 3G alt from a 98 3.8L mustang in it

I'm more concerned about the electronic ign. wiring and headlight relaying

I'm going to a big alt for electric fans, relayed head lights, and future electric fuel pump (A1000 hehe)
 
DO NOT put in a Great Big Alternator before you read and heed this:

http://www.madelectrical.com/electricaltech/amp-gauges.shtml

There is only one source "under the hood" for switched 12V "run"........and that is the "ignition run" line, known also as "IGN 1". This is what the alternator field (blue), the original VR power (blue) and ignition power, as well as electric choke if used, and on some cars, "smog doo dads" such as idle solenoid or distributor retard solenoid.

I read that tech article I'm not sure how it will apply, as I'm bypassing all the the amp gauge and stock alternator wiring and also removing the factory voltage regulator
 
The voltage regulator has NOTHING to do with what I'm trying to point out to you. You NEED to read and understand that article. Otherwise, you may very well inherit problems due to the alternator original OUTPUT wiring AKA "charging line."

You say you are bypassing the ammeter, but "how?" You still need to get power INTO the interior of the car and if the bulkhead connector is damaged, EVEN THOUGH you wire the alternator output direct to the battery, you can still run into trouble.

Please take the time to read and understand what they are telling you, there

On the other hand is this a stripped race only deal? You said something about "nothing goes in the car."

Look. We cannot imagine what you are doing. If you don't have a factory stock car, no one can know "whut it iz" unless you detail it
 
I see what you're saying - but that the point of that article I would have 2 separate charge wires and the one built in that article would likely not handle 100amps..

I plan to run a 4ga charge wire w/ a 125amp fuse no less than 12" from the battery

My car is essentially untouched bone stock - 0 electrical problems as it sits had electronic ign. wired in at some point is about it.. other than that I will not be drilling the bulkhead connectors either.. have to find another way to eliminate them..

My mustang I just spliced in on the VR 12v switched power - ran that to the 12v terminal on the alt, ran a charge sense wire to the starter solenoid, and ran a 4ga fused wire to the battery, left the dash alone, and sealed the VR + alt charge plugs/wiring - I did the swap in that as the 1G alt it had self destructed.. fixed it was up and running the same day..
 
Don't get me wrong I'm not trying to argue or worse burn my car down, isn't there a more simple way to eliminate the stock alternator wiring (besides ditching all the stock wiring LOL)
 
The electronic ignition must be factory as the wiring was under the factory wrap, what is outside the wrap though has seen better days - it gets power from the coil, taps into the VR, sends power to a field post on the alt, and runs to the pass fender well to the box, then to the resistor right behind the box

I had to unwrap it so I can test fit it and shorten/lengthen the necessary wires for the big block

The new Mancini electronic harness I bought didn't come with instructions on how to wire it.. has 2 large grey wires for the dost, 1 small Green, 1 small Blue, and 1 small Black - none of the wires on my harness match but the Green
 
Ok after studying a few wiring diagrams online to learn the wire colors - and studying the harness I have -

I figured out the electronic ignition wiring - it has a TON of splices so I need to buy some specific color wire to match the factory harness and splice the new EI (electronic ign) harness I bought in

Next is to eliminate and bypass the voltage reg. and amp gauge.. here is my idea -

Cut the alt charge wire from the stock alt a few inches from the bulkhead plug (so can be respliced back in for returning to stock)

Cut the large Ga red wire from the back of the instrument cluster - wrap in/insulate from/with harness - with that done the amp gauge should be bypassed - note not to cut the large red wire w/ fuse link on engine side harness as it is the main feed for inside car power -

Eliminating the VR is done by eliminating the green wire altogether (nolonger used with modern internal reg alt), blue wire off VR is spliced in with EI and runs inside the car to the ign switch I assume so again you eliminate that blue wire from the VR

Someone want to confirm this for me? Will the above idea work?

This seems easier to me than wrecking both harness bulkhead connectors drilling and running a frankly TINY charge wire that isn't needed with a modern alternator - I would even re-run a new 8-4Ga fused charge wire for the stocker and not use the factory charge wire at all

The Toyota alt after looking at the plug and the wiring diagram I have for that -

Has 3 wires in the plug - Green - 12v switched not hard to find in stock harness
Blue - 12v sense (to see a charge current - it's own wire to starter solenoid)
Red - charge lamp if it has one (may use this as a feed for my volt gauge)
Charge wire 4Ga straight to battery + w/ 125amp fuse
 
Again -

Cut large black wire from alt @ bulkhead
Cut large red wire right off the instrument cluster
(The write up wants you to depin^ the bulkheads and drill it to accept a large wire ran threw both)
That should isolate the AMP gauge but keep the main feed going inside the car?

Cut blue wire coming off the alt and voltage reg. so it goes from the ign. switch to the ballast/electronic ign box
Green wire from alt to voltage reg. is eliminated by default

That should eliminate the external voltage reg. allowing me to run new wire for the Toyota alt?

Here is a diagram I drew up in MS paint -

[ame="http://s295.photobucket.com/user/1fast96gti/media/1971%20Dodge%20Demon/demon%20wiring%20diagram_zpsgw0dnxhj.png.html"]demon wiring diagram_zpsgw0dnxhj.png Photo by 1fast96gti | Photobucket[/ame]
 
here is a new version with the proposed cuts shown

[ame="http://s295.photobucket.com/user/1fast96gti/media/1971%20Dodge%20Demon/demon%20wiring%20diagram_zpsjc21yn9l.png.html"]demon wiring diagram_zpsjc21yn9l.png Photo by 1fast96gti | Photobucket[/ame]
 
This may be long winded. 71 Demon big block. I've bought all new wiring harnesses. I personally did not want any heavy loads going thru the bulk head connector so under the dash I removed (de pinned) the black and red from the bulkhead connector. I did away with the ammeter and installed a a sun pro volt gauges guts with the ammeter face, I adjusted the volt gauge to show half scale at 12.5 volts. The black and red going to the ammeter I cut, crimped, soldered, and protected with heat shrink the two wires together just distribute the dash load better. I am running the denso 60 alternator. To feed the inside fuse panel I ran a 8guage wire from the starter solenoid fused at solenoid. Mine has electric windshield washer pump, so I bought a grommet for the foot pump and ran the heavy wire thru the hole in it and tied it into the black and red under the dash, again spliced and soldered the connection with heat shrink over it. The blue wire on the engine side feeds alternator, electronic ignition, ballast resistor and voltage regulator, this is your switched 12 volts. I used ithe existing blue at the alternator for the denso switched ignition source, I completely removed the connector for the external voltage regulator including the green wire to alternator from the harness as well as the black wire from the alternator to the bulkhead and the red (de pinned at bulk head) from the starter solenoid. There is a splice area where the blue vr wire ties in, this is where I removed the blue for the vr and again crimped soldered and heat shrinked this splice, and to be honest this splice was cheesy because it was only crimped. I ran a 6guage wire from the alternator to starter solenoid and fused it at the solenoid. I ran a sense wire from the alternator to the starter solenoid and fused it at the solenoid. I'm using a FBO ignition box which uses a full 12 volts so I jumpered the blue and brown of the ballast together, this powers ignition 1 and 2 (with the orange box you will still need the ballast). I may run a designated ground into the dash thru the washer grommet. I welded a piece of "L" angle to the bottom of my battery tray to mount my fan relays to, and also put a common ground stud in it which I ran the negative battery cable auxiliary lead to. I ran a designated ground from this stud to my ignition box and will probably mount my headlight relays to this same angle and the headlight grounds to this stud. If this all makes sense so far. The open spots in the bulkhead connector I bought some Packard 56 terminals to use for extra gauges etc so I can disconnect the connector and remove harnesses for what ever. I've got the ford contour fans on a champion radiator, the control wires are run thru the bulkhead connector as well. The output at the alternator is 14.3 volts and I have 14.3 at the battery so the wire is heavy enough to not cause a drop. All the terminals and connections were crimped and soldered. I used a factory connector(for the denso) at the alternator, I just removed the terminals that came with the connector and used the Packard 56's installed to the wires I needed and plugged back into the factory style connector which are the 12 volt switched and the sense wire.
Hope this helps you out. Here's a how to on the alternator

http://www.forabodiesonly.com/mopar/showthread.php?t=97736

This will help with ignition box
http://www.forabodiesonly.com/mopar/showthread.php?t=238870
 
Thank you for that! Hope my pics showed up - they don't on my screen..

So I can use the Blu wire from the stock alt to excite the new Denso alt sweet!

See the reason I'm not wanting to depin the bulkhead is cause I don't feel it's necessary the Red wire from the solenoid going into the car (amp gauge) is also the main feed for everything else (plus it's thicker than the Black wire) = eliminate the feed to the amp gauge

I understand everything now except why to loop the red/black wires from the amp gauge under the dash... makes no sense to me when you're running a completely separate charge wire
 
Try the direct link - I added a space after the http://

http:// s295.photobucket.com/user/1fast96gti/media/1971%20Dodge%20Demon/demon%20wiring%20diagram_zpsjc21yn9l.png.html
 
You've got the jest of it, however is there a reason you want to maintain the load carrying wires thru the bulk head? Not trying to be smart the wires to begin with were marginal at best from the factory, they are way under gauged, mine were like 12 gauge. The terminals them selves are only a 1/4" wide and they neck down to the crimp. What 67 Dart was getting at is to make the system as bullet proof as you can. Anything in an electrical system that creates a bottle neck is creating resistance and this is heat, every crimp, splice and connection. There's is a point where this becomes a continuous loop that keeps breaking down. I know your probably on a budget, I've been four years just getting mine to move on its own, but electrical isn't somewhere to rush. I understand the bulk of the electrical load won't be going thru the connector, but your installing an alternator that has 4 times the out put capability of the factory. Dodge did have a problem in the 80's on the trucks with dash fires due to the ammeter system and bulkhead connection. They started adding more accessories into the system which used more power and created issues. I worked in a family auto parts store during this time and saw a lot of things that shouldn't have been. We kept spare gauges from Dodge to resell. I'd make the system as good as I could. It will save you some money and head aches down the road. Plus it will give you some extra space in the connector to install accessories without making new holes. Just my opinion on it.
 
I left the Red wire from the solenoid to the bulkhead/ where it branches out to the key/fuse/light switch cause mine wasn't/isn't melted - it's 8ga in my car should handle it ok - in all honesty I haven't touched the under dash wiring yet - only the engine harness - which is basically ready to rewrap
 
-
Back
Top