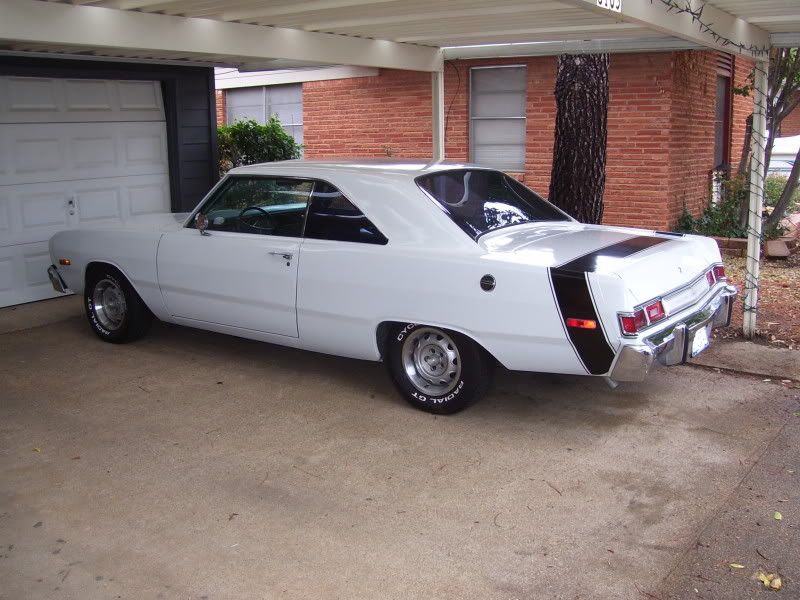
Swingin' '73 Dart

-
Very nice Red! You wanna send me some of those left over springs? :D

The only minor issue is that the Parchment seat cover is almost $500, vs $300 for black. I don't mind replacing springs myself, I don't mind installing the springs, but I know that making the cover is beyond my skill (I've done some minor upholstery but this is beyond my skill level). The other issue is my headrests are in really bad shape, and so far all I've found as replacements are black. Of course, I could change the interior to black...
Anyway, I may go the Legendary way eventually, but for now I just need something to sit on. Remember, I'm currently un-employed so I'm limited as to how much cash I can blow.
 
Thanks HG800. My avatar is also my tattoo.

We woke up this morning to a duster-ing of snow.

DSCI0233small.jpg

Time to make room in the garage.

Since the seat is out and torn apart, I found a box to sit on. It's kind of a funny box, because it's an old copier toner box that says "USED" on it and next to that says "WINE", because well the box came from my wife's office and had the "USED" on it and we used it to move, hence the "WINE". It's all cheep white wine and has been in this box since we moved in here in Dec of '05. When I told her I used the "USED WINE" box for a seat, she knew exactly what I was talking about. But, I digress.

I started the day taking Mrs. Frogpirate to work, and then coming back to the house for breaky. I loaded up the seat frame and took it up to the auto upholstery shop to get an estimate. Right at $600 including spring repair. More that I can spend right now, but really not that bad considering Legandary wants almost $500 just for the cover.

DSCI0234small.jpg

Dirty door panel.

Time to start cleaning up front. I removed the arm rest, window & door knob, and lock button and scrubbed the door panel. The sill and jamb got the same treatment, and the hinges got soaked in oil.

DSCI0238small.jpg

Yucky.

I also got the foot well panel cleaned up and scrubbed the dash. I took out the crap radio, and got a rude shock.

DSCI0239small.jpg

Some rat bast*rd hacked the dash.

I probably should have know this was there, but for some reason I'd hoped the dash was virgin. I guess it's Karmic payback for the dashes *I* hacked when I was a kid. :munky2:

Ok, so here is the door panel all cleaned up.

DSCI0240small.jpg

Much nicer.

I need to take the panel off and glue down that little tear, and see if I can get one of those vinyl repair kits to hide it as best as possible. I got the dash scrubbed and broke for lunch (and another episode of Top Gear; I'm addicted). The dash really needs painted, so I'm going to pull it and take it down to my friend's to see if we can just weld up the radio hole. Later I'll cut a DIN hole for a modern radio.

I decided to see of I could find some springs online, as the side 'S' springs are standard items. A quick search turned them up and I headed out to home upholstery shop to see if they sold them locally. He does, and has it "by the roll" and will cut and bend them for me. Whoo hoo! So I came home and took the broken springs off the frame.

DSCI0245small.jpg

Yep, that spring is broken.

So not a lot of progress today, but hey at least "Homer" (Mrs. Frogpirate has named him) is in the garage dry and warm.

DSCI0244small.jpg

Toys, toys, toys. Necky Kayak, motorcycles, Homer.

DSCI0242small.jpg

Aprilia Tuono (RED), Suzuki V-Strom 650 (flat black), Homer
 
Looking good!

As you can see, I'm following along with your project! :read2:
 
Looking good!

As you can see, I'm following along with your project! :read2:

Thanks Sneke_eyez!

I went up to the furniture upholstery shop Friday AM to get the springs. They were able to make the side springs, but not the seat spring. They were not able to make the bends as sharp. Actually, the guy had a really hard time bending the springs to the shape that MoPar did in the first place. At any rate, they are better than the broken ones!

DSCI0248small.jpg

New springs beside pieces of the old one. They charged me $20 for the pair, and I think that was probably cheep!

DSCI0249small.jpg

New spring in place.

I installed the new springs with the old clips. I moved one of the un-broken seat springs from the passenger's side to replace the broken one. I bent up a piece of chain-link fence tension wire to sister the broken spring and installed it temporarily with electrical tape, and then with a bunch of stainless-steel safety wire. Finally, I taped over the SS wire with more electrical tape after sticking an end in my hand and bleeding all over the spings.

DSCI0250small.jpg

Passenger side spring taking the place of the broken driver's side spring.
DSCI0251small.jpg

"Sister" made of chain-link tension wire. Held in place temporarily with 'lectric tape.
DSCI0254small.jpg

"Sister" safety-wired down and covered with 'lectric tape.
DSCI0255small.jpg

Another view.

This is obviously a temporary fix. I'm just trying to get the car road-worthy so I can drive it this summer. I'll be totally re-doing the interior sometime in the future.

DSCI0256small.jpg

I made new cross-spring braces using the tension wire, and tied each spring with twine. In all, I put 4 of these stiff cross braces in.

At the end of Friday, this is where I am.

DSCI0257small.jpg


I'm mostly taking the weekend off to hang with the wife, but we did go for a motorcycle ride to Fabric Depot where I picked up some burlap to go over the springs, and some smaller hog rings. I've added more cross braces using the small safety wire between the tension wire braces, and tied them to every-other spring. Finally, I did a preliminary scrubbing on the cover to clean it up so I can do some mending on it.
 
THAT's "dedication"!!!

I totally admire your patience and exemplary work-ethic with this project.

I'd be willing to bet anyone next week's paycheck that this car is going to be a guaranteed show winner when you're done with it!

You've obviously got "what it takes" in the important areas of skill and determination.

You go, guy.... this is going to be ONE COOL RIDE, when you're finished working your magic on it!!!

I'm jealous of your abilities... and, perseverence... but, that's okay; if it were easy, everybody would do it!!! :happy10:

Keep on keepin' on!

Bill, in Conway, Arkansas
 
It,s a damn shame your so far away Frogpirate cause I,ve got this 73 Swinger seat with good springs for a whole $100.It,s just waiting for car shows and swap meets to be put back in a needed car(maybe a red one)LOL!!Here it is..

73 dart special 005.jpg
 
It,s a damn shame your so far away Frogpirate cause I,ve got this 73 Swinger seat with good springs for a whole $100.It,s just waiting for car shows and swap meets to be put back in a needed car(maybe a red one)LOL!!Here it is..

Doh! I'd love to have that seat. Hmm, we have a friend in Toronto we've been meaning to visit... :D

Bill - I don't think it will ever be a "show winner" but I do believe it will be a FUN ride! That's the goal anyway. Just a fun ride for the wife and I to cruise in..and maybe take down the 1/4 mile once in a while! :thumrigh:

Ken
 
Nice car. My first car was a lime green 73 dart swinger got it at the age of 14. It needed some work under the hood. But by the time I was 16 it was running and ready to go. Since then it has gone to the recycler sorry to say but it was rotted through the frame at the sill plate. I do have a dash the is not chopped if your looking for one, its blue just need to be striped and painted or powder coated your color. I still have the am radio out of my 73 swinger at my parents. and the rear seat back and cushion black covers in great shape seen one very very small tear in the bottom cover if anyone is interested.. I love the a-bodies. I ended up getting my like long dream car a 1970 lime green dart, it is a clone 340 car but still its what I wanted. First time ever to a local mopar show and I took home 1st place in a-body stock class it blew my mind.
 
Thanks for the comments jtisdale. pettybluedart - I've done longer road trips, although usually on my motorcycle. I did a 15,000 mile 18 day trip in '07 on my motorcycle, and went through Montreal.

Today started too early, 4AM! My wife had to go to China Lake Navel Station on business, and had an early flight.

More seat work, please remember this is temporary!

DSCI0257small.jpg


Drivers side. The listing was rotted away, and the vinyl seat cover had torn at the seam. I added a piece of vinyl (maroon, because I had it) and made a new listing out of a doubled over piece of cotton fabric (again, because we had it). My wife and I both quilt (her more than I) and we have a HD sewing machine that we use for quilting. It also works pretty well for the occasional upholstery project.

DSCI0259small.jpg


Here is the new piece of vinyl sewn in to replace the missing seam.

I sewed a couple patches over some tears on the drivers side, again using the maroon vinyl.

DSCI0260small.jpg


Back side of patches.

DSCI0261small.jpg


Front side of patches.

As you can imagine, wrestling the cover around to sew this on the machine was a PAIN IN THE A**! :-D I chucked a small wire brush in the drill and took care of the worst of the rust on the frame and hit it with some primer and then some metal flake black spray paint (I think my son bought this can years ago...) Sorry, no pictures of that yet.

Someone called yesterday about the wheels and tires, so I decided to pull them off. I could only fnd 3 of my 4 jack stands (to be honest I cannot remember the last time I saw all 4 at the same time) so I ran up to WallyWorld and bought another set. $20 for a set of jack stands seemed a better idea that a stack of wood... :toothy10:

DSCI0271small.jpg


Dude, where are your wheels? That's on of the 3-pack of jack stands I've had since circle track race days (early 90's).

As you can see in that picture, I also pulled the bright wheel molding off all 4 wheels (it's for sale in the sale area). The fender trim molding with black insert is going away as well; I'm not sure about the lower rocker molding yet.

With the car up on stands, I crawled underneath to look at some stuff. I wasn't sure which trans I had, but with some input from this board I now know I have a TF904.

DSCI0263small.jpg


A leaky TF904 it looks like, one that needs a skid plate!

And the rear is a 2.76 7 1/4".

DSCI0273small.jpg


Nothing but junk yard fodder here.

Also, the "new" exhaust on the car was done in the usual low-buck way. Notice the weld closest to the camera, with the blow-thru. The back weld (to the floor pan) has broken.

DSCI0267small.jpg

Ah yes, this is what we love about old cars!

Over the weekend, I decided the direction I'm taking this; old Trans AM race car returned to the street. Racing bucket seats, 8 point cage, plain painted door panels, no rear seat, painted floors, full Auto-Meter gauges, eventually a 4 or 5 speed manual (or maybe just a floor shifted auto with one of the shifters that look like a 4 speed). Stiff suspension, with roll bars front & rear with 15" 50 or 60 series on rally wheels with no trim rings..... Of course, this is not going to happen overnight, but at least I'm starting to get a vision of what i want it to turn out like. I blame autoxcuda. :D And my Dad, who took me to the '77 Trans-Am race at Seattle International Raceway (now Pacific Raceway). Dad was a big fan of Bob Tullius who was in a Jag that year. The jag and the american iron pretty much got whooped by the Porsche's at that race. Still, dad and I had a great day watching turn 3A, and it introduced me to racing that wasn't in a straight line.

Ken
 
Whew, that took forever. I put the seat back in the car yesterday afternoon, and bolted it down for now.

DSCI0287small.jpg


Back in the car! I swapped headrest's left for right so that the sun-baked parts (as you can see on the passenger's side) get a little break. If your wondering, the axle clips are 3/8" and in Portland, they cost < .50 at Parkrose Hardware. They also had the right size nylon washers to replace the very dried out fiber ones for the backs.

But wait, I got a little ahead of myself. First I covered the springs with burlap.

DSCI0277small.jpg


I sewed the burlap down to the springs with polyester thread. I added cotton batting around the edges, and a strip in the middle to make it a little higher. We aren't going to talk about me putting the cover completely on and then realizing the foam was sitting on the floor. No, we are not going to discuss putting all those hog rings on just to take them back off again! #-o

DSCI0278small.jpg


Cotton batting on edges and in middle to create "bucket" area's.

DSCI0281small.jpg


The bottom looks really good!

On Wednesday, my friend Sam brought up some MoPar parts he has been hording for many, many years. He figured he's never going to use them, so he donated them to my project. Sam is a _great_ guy! :love7:

DSCI0283small.jpg


Mmm, goodies!

I decided to poke around under the vinyl top where I thought there was rust under it. As expected, there was rust..a hole in fact.

DSCI0282small.jpg


Yeah, that's not going to buff out. I guess I'll be welding a patch over that.

I sold the wheels that came on the car Wednesday afternoon, and while waiting for him to come pick them up, I started cleaning under the hood a little.
DSCI0288small.jpg


It actually looks better in person!

Today, my order from Rock Auto came in. I ordered it Friday, so it took 1 day less than a week via ground. I was a little unhappy with how much shipping was, but shopping on-line is way easier than calling 3 shops to see who has the best price.

I posted a poll over in Tires & Wheels - go check it out and let me know your opinion.

Ken 8)
 
love this thread but i gotta ask why did you decide to remove the wheel well mouldings? you could have buffed those things out and it would have looked great against the red(car) and new wheels....just my opinion
 
I removed the molding just because I like the look a little better. Your right, they would buff up really nice. I will probably take off the upper body molding as well by the time I get around to paint (well down the road!) Just not a big fan of side moldings on these cars; I think it's the old racer in me. 8)
 
With Sam bringing me the 2 14" rally's and a member here offering me a 3rd, I had to make my wheel choice. I was thinking about cop rally's or plain steel wheels w/dog dish's, but I finally decided to go ahead and use the rally's. I am going to use the 14x5.5" on the front and 15" x 7" on the rear, probably with 205/60R14's and 235/60R15's T/A's. I was having trouble finding 15 X 7" rally's that did not cost 2 arms and a leg, when I was an ad in Mopar Action for Specialty Wheel's Ltd in Portland, OR, right across the river from me! I called than to ask if they sell their wheel's "raw" so that I can paint all 4 the same. "Sure," the nice lady said, "but I'm not sure of the pricing and out salesman is out today." Kelly the salesman was nice enough to e-mail me back Friday with a price of $90 each for MoPar 15 x 7" rally's and he could make them today! I placed my order, but since I did'nt have the car yesterday (Friday) I'm going to pick them up Monday.

Meanwhile, the 14's need sandblasted, so I ran them up to Vancouver Powder Coat to get them blasted:

DSCI0305small.jpg


High-speed wheel delivery vehicle.

My bunge-foo was good, and I made it across town with little more than a few oddball looks. After dropping the wheels off, I went and had lunch with a couple motorcycle buddies. I let my friend Ted ride this bike (Aprilia Tuono - 1000cc's V-Twin, 125 HP at the rear wheel, about 425lbs) and he was impressed to say the least. Ted and I also own Suzuki V-Strom 650's, with about 1/2 that horsepower. It is a very fun bike, and sounds like a cammy V-8 at idle and has a nice bark when you crack the throttle. And bite. :snakeman: I tend to wear out back tires pretty quick, and front's not at all.
 
Not a lot done this week. Monday I went to Specialty Wheels LTD and picked up my two 15"x7" Rally's and ran them over to the powder-coater. He called this morning (Friday) and my wheels are ready, but Mrs. Frogpirate has the Forrester and I don't want to make 2 trips on the motorcycle, so I'm going to pick them up Monday.

DSCI0361small.jpg


RAW steel 15" x 7" Rally wheel, brand spankin' new!

Tuesday I stripped the rust and seam sealer from the spare tire well, and sprayed it with 3-M Rubber Undercoating. I did not take any pictures before undercoating, but the steal was nice and solid under just a little surface rust.

DSCI0365small.jpg


Undercoating applied. I taped off where the body plugs go so that I don't end up with the lip being too thick for the plugs.

I had a little bit of "fish eye" even though I wiped everything down with laquer thinner first. This morning, I hit it with my heat gun to burn anything off and sprayed it again.

DSCI0366small.jpg


You can see the "fish eye" just above the spare bolt bracket.

Wednesday I hopped on my Suzuki and rode up to Olympia and picked up a spare 14" x 5.5" rally from 65barracudadude. Thanks again Matt! I just missed Matt, but he'd left the wheel out for me. I was shivering (it was beautiful but cold. I have a heated jacket, but it goes off when I'm stopped and I get COLD) so I loaded up and headed back down south to my Mom's. I spent Thursday being sick; the only thing I did was gear up and ride home in the afternoon.

DSCI0364small.jpg


Spare wheel + Suzuki.

Monday I'll pick up the powder coated wheels, and hopefully get some tires so I can make this thing mobile again! Oh, yeah, I also bought a left front fender on Monday. I bought it more or less sight unseen ($75) and I'm not super happy with it. It's rustier than the seller said, and it looks like someone jacked the car up from the bottom rear of the fender at some point. At that, it IS straighter than mine, so I may clean it up and put it on for now.

Ken
 
Some days your the windshield, some days your the Bug. Today, I was a bug.

Ok, 3 hours of sleep didn't help. No reason for it, I just had insomnia last night. I took my wife to work so I could go pick up the wheels from the powder coater. When I grabbed them, I thought the powder looked really thin in the middle, but figured it would be inside the tire so I could spray some paint over it, but it bothered me.
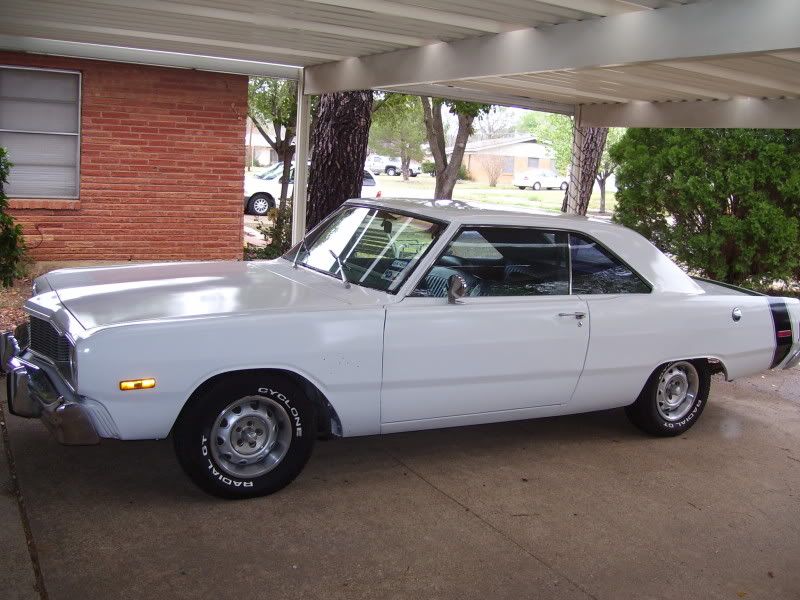
I'd called on some tires on Saturday, but was feeling a little to sickly to run out and look at them. It's a Bow-Tie store that has a bunch of BFG take-off's, and the owner told me he'd be out of town today, but someone at the shop could probably help. Uhh, not. The guy at the shop hadn't a clue, and told me the owner will be back tomorrow of Wednesday. I went by a 'used' tire shop close to home, and they had all junk. (Well, at least nothing *I* wanted). On the way home, I stopped at the Auto-parts to pick up a windsheild trim removal tool, and got a call from a guy on Craig's list that had some tires. We made agreed to meet later in the afternoon.

At home, I looked at the wheels closer. Holy fsk! there are big voids in the powder on the FRONT of the wheels at the joint between the center and rim. I'm talking 1/2" wide stripe of bare steel. I called the powder coater, and to his credit he said bring them back and was very nice when I did. So I ran them back across town and dropped them off. I'm hoping when I get them back later in the week the powder covers better, because the color looks really good.

So, to recap, I drove about 50 miles this morning, and had nothing to show for it. This afternoon a buddy wanted to borrow my neighbors motorcycle ramp, so between running out to look at the other tires, I took it to him. The good news were the tires - almost brand new pair of BFG Radial T/A's for the front in 215-70R15 for $40. That's $40 for the PAIR. He had them on the front of his '32 Ford street rod for ~200 miles but didn't like the looks. They still have nubs in the center of the tread! I wish his rears would have fit (also $40/pair) but I don't think I can stuff 275-60R15's under the stock wheel wells! Those things are huge!

Not much else done today, but I did put the new wiper blades on and washed the wind shield inside and out. Oh, and I put the wiper fluid jug back on (with it's new pump) and it works! Yay!

Pictures again soon.
 
That is a SWEET '75. I really like the white with black bumble-bee stripe.

Here are the tires I picked up yesterday for $40.

DSCI0368small.jpg


Don't you just love a smokin' deal?

DSCI0367small.jpg


I think something is missing here..but it looks like the tires are going to fit the wheel wells a little better than the 235/60-15's did.

I decided to paint the trunk today, despite it technically being too cold.The paint I'm using says to apply in 50-80 degree weather (that's F; 10-26C for our over-the-pond viewers) and it was high 40's today. Here is what I'm using:

DSCI0370small.jpg


I also have the catalyzer which I used at 8:1 today. The catalyzer makes the paint a little shinier and a little harder. I'm using FMF Gray.

And I decided to clean up the brake drums since I didn't want to put my pretty (I hope, I hope, I hope) powder-coated wheels against the rusty drums. A little work with the angle grinder with a stripping wheel and the drill with a wire brush and they look much better.

DSCI0369small.jpg


Pretty shiny steal.

I wiped the drums down with a little lacquer thinner to get the dust off. I mixed up my paint in a mixing cup and and started in the trunk. I found some little disposable roller with built in pan and tried it out. It worked OK, but I had to cut some in with a disposable chip brush.

DSCI0374small.jpg


Hey, that's looking better!

And then I used up the paint on the brake drums:


DSCI0376small.jpg


I may add a second coat to the trunk. I cannot decide if I should paint the whole trunk gray, get the same paint in red, or just leave the bottom of the wheel well gray and the rest of the trunk factory. If I do that, I have a couple of small spots I'll need to spot primer and paint. At any rate, it's looking a LOT nicer!

Has anyone either left the big lower plug out, or maybe put a small hole in it to let leakage out of the trunk? As bad as the things rust, I think leaving a drain would be a Good Idea (tm).
 
WHERE do you get all that energy??? Are you about 18 years old???

I want you to come and work on my car when you're finished with that one...
Man..... I envy you all that ENERGY!!!!!!!!!!

It's looking great! Keep up the good work. I'll bet this is going to end up being your favorite car of all time!

So nice...8)
 
Holy fsk! there are big voids in the powder on the FRONT of the wheels at the joint between the center and rim. I'm talking 1/2" wide stripe of bare steel. I called the powder coater, and to his credit he said bring them back and was very nice when I did. So I ran them back across town and dropped them off. I'm hoping when I get them back later in the week the powder covers better, because the color looks really good.


YIKES! If that's the kind of results he got the first time, I wouldn't hold my breath. Hopefully it will work out for you and they'll be everything you hope.
 
No Bill, I'm not young. Well, maybe compared to some here, but I have a 21 year old son!

CudaChick - In hindsight, I should have taken the wheels to my buddy Bob. But, Bob does mostly commercial stuff (government and industry) and I like to help local "little" guys when I can. That said, JR did a good job re-coating the wheels, and I am very pleased with how he handled everything. Everyone makes mistakes, what separates the good guys from the chaff is how they handle the mistakes they make.

After I made that last post I wandered down to the garage and used up a little more of the 'pot' of paint I'd mixed touching up the brake drums and trunk and painting the axel ends.

BrakeAxel.jpg


Yesterday I was digging in a steel storage bin that I've been packing around for 15 years and came across a set of door lock handles that I've had forever. I bought these in 1980 for my '67 Impala (2 dr, fastback, 327 PowerGlide, Thrush Side Pipes aka leg burners, burned oil like crazy). They'd been in the bottom of this rusty steel bin for years, but with a little stainless steel brush cleaning, they look pretty good. Plus, they have that period "look".

DSCI0388small.jpg


Sure, I could by new ones, but I love the idea of having these back on a car after all these years. And people say I'll never use all this junk I've been hauling around forever!

I put the plugs back in the trunk floow after drilling 4 - 1/4" holes in the one over the tank. I don't know if it will drain the water out or not, but it should help.

DSCI0377small.jpg


I scrubbed the trunk interior and got rid of most of those rust stains you can see in the top of this picture.

Lisa came home at lunch, so I went and picked up my wheels. Like I said, I'm much happier with them now, even the center inside is coated. I stuck one on with no center to see how I liked the look.

DSCI0380small.jpg


It's OK, but let's see what they look like with centers on them.

DSCI0382small.jpg


OK, that is a '70 Argent center. Although I usually like a lot of contrast, this didn't really tickle my fancy.
 
Today was a very good day!

Have I ever mentioned that I hate Washington DOL? In Washington you can either go to a government office to get license plates, or an agency. The Gov't office saves the agency fee of $10, but you have to deal with gov't workers. Let's just say the trip yesterday did not work out well (they wanted to charge me sales tax on fair market value which according to them was $4000! Of course, she had the wrong year ('70 vs '73) and used an Aug '08 Old Car's price guide to come uo with that!

Today, I went to the agency with my bill of sale, and walked out 15 minutes later with Washington license plates. So much easier, well worth the $10 fee. And yes, I paid tax - on the amount I paid for the car though! (Don't even get me started about having to pay SALES tax on a 36 year old car!)

With my license plates in hand, I stopped at the local Shell service station and had the front tires mounted & balanced. Ray is a great old-school service station guy - he's been working for the same people for 30+ years. He wasn't fast, but then we were visiting a lot, as he told me "sea" stories of his 31 year (8 active, the rest reserve) Navy carrer. It was a lot of fun walking around the station when he got called to provide full-service and remembering what service stations were like when I was a kid.

DSCI0387small.jpg


I took the center caps off the rally centers and cleaned all the glue off. This took 1) a heat gun to loosen the glue 2) a razor blade and butter knife to gently pop the center off and 3) lacquer thinner to clean the glue reidue off. I polished all the chrome with a 3M green pad.

In the afternoon, I managed to get ahold of Mark @ Chev Connection in Portland. He had some BFG tires on CraigsList and had told me he had some more in storage. Sure enough he had a pair of 245/60-15's, just what I needed for the back tires. $100 for the pair, plus another $40 to get them mounted at Les Schwab.

So after three weeks, the car is mobile again! Here is Homer at the end of our cul-de-sac this afternoon.

DSCI0394small.jpg


And a close up; as you can tell, I went with the '71 dark rally caps. I really like the look, it reminds me of bottle caps on steelies, but with a little NASCAR flavor. It's just a little different, just like me.

DSCI0396small.jpg


Tires clear the springs.

DSCI0401small.jpg


And clear the wheel openings.

DSCI0402small.jpg


I can tell I really need new rear springs. Or at the very least, I'm going to add some 'helper' springs as a stop-gap. OR, maybe just drop the front end down 1/2"-3/4"!

I was so happy to have Homer plated and tired, I terrorized the neighborhood a little. 8) He drives MUCH better now, with many less bumps and groans. The steering is lighter, if a bit over-powered as Chrysler's tend to be. Bonus I can make U-turns without the tires scraping the front fenders!

Of course, now I need to get a tune up done, as there is a bad bog off the line, and really he makes more noise through the glass packs than movement. :toothy10: But who cares, HOMER IS MOBILE!!!
 
-
Back
Top