Biohazard

-
2 days ago - POR-15'd my suspension's moving parts.

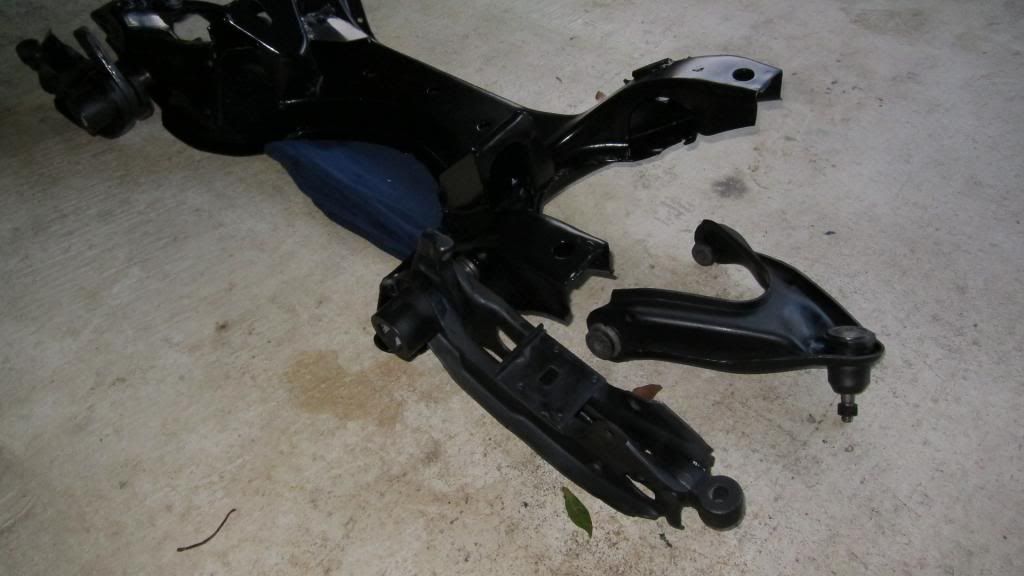
Yesterday - Picked up my powder coated K frame, got the bushings pressed into the upper and lower control arms and had the upper ball joints installed. Then I did some touch up paint work on those parts that needed it plus brushed some onto the bushing sleeves.

Here's the main suspension parts laid out.


Today - K-frame installed (yippee!) Would have gone further but even after doing some more cleaning in the area where all the suspension bits connect, I decided it still looked like crap up in there. So, I busted out the VHT epoxy and turned this....
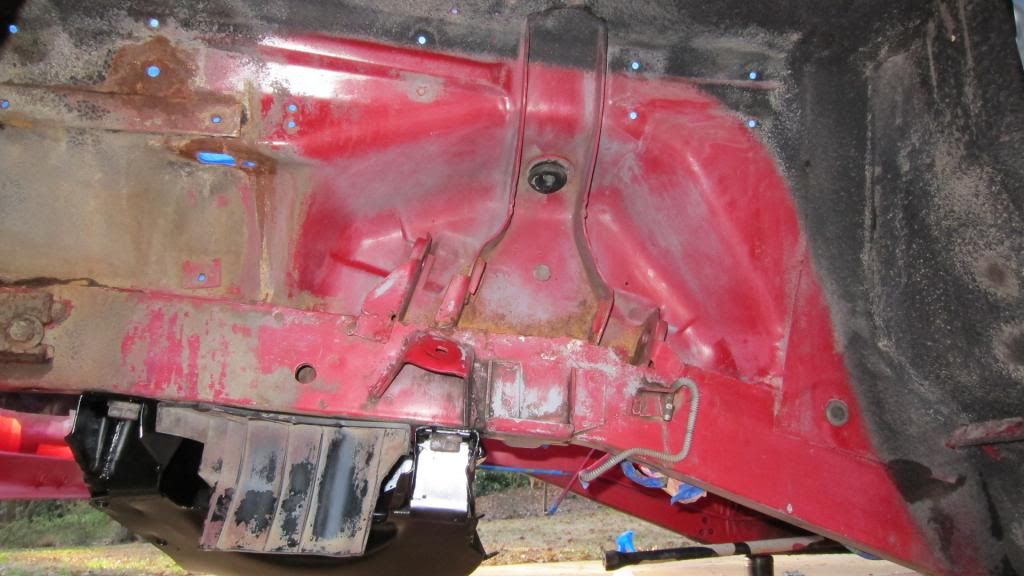


...into this...


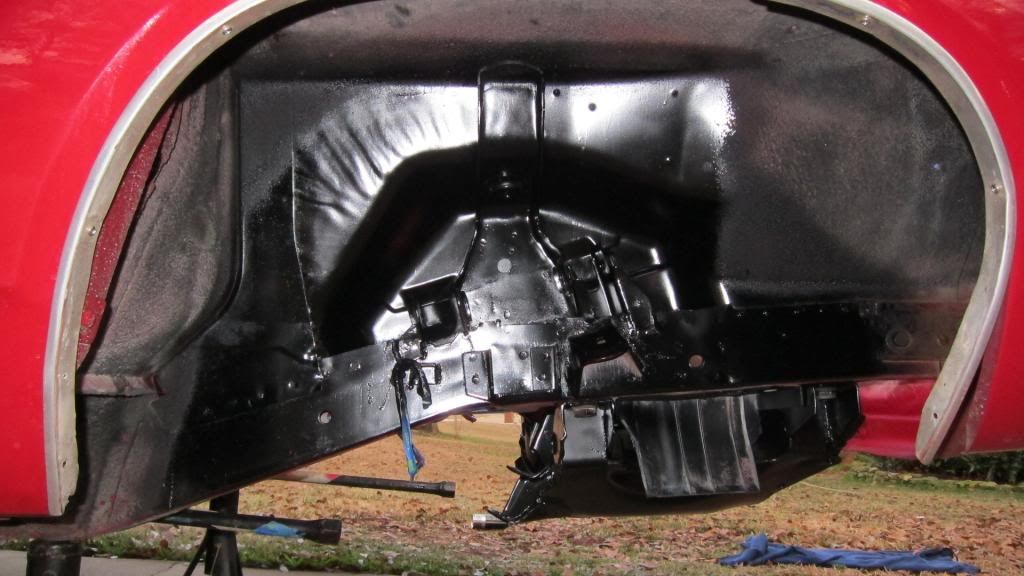
Tomorrow will be nice weather. I'll finish putting the suspension together and spray some more black into the wheel wells. I kinda ran out of paint but I managed to do the areas where I'll be working so it's all good.

Not looking forward to repacking the grease in the front wheel bearings but...gots to be done.
 
Nice work, I used the POR on my kframe after I sandblasted it, only used about 4 tablespoons and turned out smooth as glass. Stuff is amazing.
 
Today was good. Very good.

I got the suspension together up to the point of having the brake assemblies mounted. Didn't get the shocks in or the sway bar installed but the sway bar still needs to be scrubbed and painted.

Some of the fun was cleaning the 8 nut/bolt sets that secure the brake backing plates to the spindle. Decades of grease and brake dust accumulation - ugh.

Fab'd up some made-from-scratch backing plate seals from a sheet of non-slip shelf liner. Pretty proud of those, I am, and I'll post tomorrow a little peek at how I made them.

Also did some more spray-bombing inside the wheel arches taking the epoxy black all the way to the creases. I'm going to hit the aft portions with rubberized undercoating but will do more black everywhere else.
 
Alright, so making your own spindle seals...I started with a sheet of non-slip shelf liner. I used a bearing cap to punch out the center and the roll of tape for the outer circumference. After that, I just trimmed the top flat and around where the bolts go. Check it, yo.


I really love the second pic...you can just see what a perfect day it was to be working on the car out in the driveway...nirvana. Plus I'm sure that all my neighbors driving by were like, "good, maybe he'll get it down off the jacks soon so it doesn't look so trashy on our street".
 
L.O.L!
You crack me up with the heighbor complaint comment.
Now a days, most people don't know how to change their own oil, much less figure out how the car got up on jack stands.
Your seals look great!
 
Yeah, I started feeling kinda bad when it went up on jackstands but, what's funny is the men who are walking or driving by have always stopped whenever I would be out there with the cover off and want to chat me up about it. Maybe its not as bad as I think but I'm still pretty sure that some of the neighborhood wives are displeased. It'll be in the garage, soon.
 
A. Its a gorgeous car. B. Your doing a kick azz job. C. Us guys need a chance to gather and talk about cars so you got nuthin to feel bad about! Keep up the good work.
 
Thanks to you'ze guys for the words of support!
Gonna be a slight delay getting her on the ground and into the garage, though. I hadn't really looked too closely at my hubs until today and it would appear that someone installed one of the wheel seals upside down. Rock Auto to the rescue!

So I only got a few things done today. I placed that rockauto order, installed my shocks, cleaned the sway bar and center link, and called to whine at my paint provider about still not having a final product to spray.

Y'know, its funny: Whenever I get around the car, the idea of it smelling foul just doesn't even cross my mind now. At times I doubted I would ever get it clean enough to not smell it but I guess the hours I spent scrubbing bolt heads with a scotch brite pad have paid off. I knew that, one day, my anal retentiveness would prove valuable.
 
Forgot to mention: The shocks on the car...yeah, Sears Steady Riders. I'll need to carbon-date these. I am going to replace them but that's on the back-burner until some higher priority matters get sorted.
 
Your doing a great job! I have been doing stuff for my kid worng make and model to mention here :D. Glad to see you shared all the cleaning methods chemicals tools and how to. I love the smell of the old cars dont get me wrong, but mold is not something you want to ride around in or dirt. Better to get it right get it all out and improve upon what you find lurking. My favorite A body is this very car and color. NICE WORK!!
 
So now I have a job offer in New Mexico.

Hmmmm....plot complication.


Thus begins a mad scramble to get this project generally reassembled so it can be moved. Sigh. Sure would be nice if I had some damn paint. :banghead:
 
No pics today, folks. Too much work to do, no time to document it all.
Focus now is prepping the car to move it around. Need to have all the big pieces in it so I can trailer it out west. Can't very well expect a moving company to box up a V8 so, motor needs to go back in even if it's not running and all the suspension and steering gear needs to be torqued down and greased up.

I got all the steering linkage in place, painted most of it with POR15. Steering box went in today - waiting on a new idler arm.

Engine got bored .030 over. One cylinder was grooved on the wall - the same cylinder that failed the compression test. I'm told it will be done Thursday.

I started loading larger pieces into the car like the spare, the cargo floor and sidewalls, and the seat frames.
 
Good luck with your big move!
I hope you get a chance to get back on the project once you guys settle into your now location.
You've done great work on the car and I'd hate to see it get put into a corner somewhere and forgotten, like i've seen happen so many times I lost count.
Best of luck to you and your family!
 
Thanks! Its a VERY big move for us.


Torqued all the suspension parts; ball joints, tie rod ends, etc.
Installed the sway bar with new poly bushings. I bled getting the bushings in place.
Have to finish fastening the end links, then I can lower her to the wheels.
 
I'm expecting good things to happen for you and your family. Don't be off the air too long lol. All the best
 
I'll shoot up the car, the trailer, the mule, random on-road shots...it'll be sort of a restoration intermission.
 
put a oscillating fan in it overnight. let it run, should help out in the tight spots.
 
put a oscillating fan in it overnight. let it run, should help out in the tight spots.

what?

I got the end links fastened down, inserted all the cotter pins, put the wheels back on, and lowered her down. Still have a prop under the K since the torsion bars aren't clocked-in yet.

By the way: In the above picture of the passenger side wheel well, you can see the flat metal mounting points for the idler arm. The idler arm that I took out has a threaded bolt for connecting to the center link and the other end is hollow - it goes between those flat tabs at the back of the K frame and a nut-n-bolt runs through it to secure it. Is this correct for this car?? PST has sent me two different idler arms, neither of which are the same as what I took out. I'll post a pic of what I'm talking about. Input appreciated.

To all the well-wishers: Thanks! I appreciate the good vibes. Still have one month to get some work done. I have to get the big parts all clustered together into the shape of a car but I also have a lot of house, yard, and packing work to do plus job, house hunt...ugh. Going home to put some coffee on...........
 
So here's the moog idler for 68-69 cudas...


And here is my link and the [second] one from PST....

 
Simple screw up; simple fix. Whoever picked the order from PST grabbed the wrong part for the kit - blah blah blah...its all sorted now and the correct idler is underway.

I got to see the block at the machine shop yesterday: my crank bearings were down to nothing but brass, the one cylinder that was soft on the compression test had a groove worn in the cylinder wall so everything got bored 30 over. Crank polished, block tanked and painted with a primer so I can apply the Eastwood red when I get it home. Lots of crud pulled out of the oil pan around the pickup tube for the oil pump including some of the plastic coating from the original timing gear teeth. Sitting on the stand all clean and grey with shiny brass plugs in it....I was like, " nice motor. Who's is it?"
 
Spent entire weekend organizing for the move. Reserved a trailer for the fish, changed the oil in my tow mule.
 
-
Back
Top