The Brick, 1972 Dodge Dart Custom

-
How about a picture of your gauges mounted. Just read thru your build. Keep it going so the wife will be happy.
Be sure to keep us posted the next time you and your buds take a CRACK at it. lol
 
Well spent today trying to just get LCA's and idler arm off the car. *sigh* The idler arm bolt is a Torx head, and is rounded, so no grabby with a wrench. The nut that is on it looks like it was spot welded so have to take the grinder to it. Getting the strut rods loos is being a pain because of the roll pins.....*sigh* at least I got the Torsion bars loos and the tie rods and sleeves out for replacement. Looks like I am back at it tomorrow.

@ Jeff - I'll snap a pic of the mounted tach, still working on getting the oil pressure water temp gauges in.
 
So it was a car parts Christmas! I got a nice Grant GT steering wheel, install kit and Mopar horn button. These get installed next weekend when I am over at Joe's working on the rest of the front end. I also got a slick creeper/floor jack/jack stand set from my Sister in Law......Okay, so it says GM performance on it, but hey, it's all Craftsman stuff and the creeper will beat the hell out of sliding over the concrete to work under the car. OOOO And also got me a Rat Fink Coffee Cup!

Going to try to do a step by step on steering wheel removal and Grant wheel installation.
 
Okay so the LCA's are out.

Here are the steps I took to remove:

1. Disconnect the out tie rod ends.
2. Unbolt and seperate the lower ball joints.
3. Using a cargo strap, suspend the upper control arm, knuckle, and brake assembly up and out of the way.
4. Drive out the roll pins in the strut rods.
5. Back the Torsion bar adjustment bolts all the way out.
6. using a Testors (model paint) paint pen, mark the torsion bars and sockets on the LCAs (you will need to scribe the LCA if you are going to sandblast the LCA)
7. Unbolt the strut rods from the front and then break the back strut rod bolt loose on the LCA.
8. Unbolt the LCA pivot shaft nut.
9. Using a flat pry bar, pull between the LCA and the K member until the LCA pops loose.
10. Slide the Torsion bars back and pull the LCA out.

Easy as pie. Took me about 3 hours to get them out, but that is just because the poll pins were being a *****.

Happy New Year you guys!
 
Hey dude, sorry I haven't sent you that warhammer stuff. It turns out I have a bunch of sprues to send with it, so next time I am near it, I will get some pics of it and send it off to you

On the note of a creeper. Harbor Freight has an actual nice injection molded one with wrench holders for like $25 constantly. I bought one and have really liked it better than the Snap-On creepers made of metal.:-D
 
@DarTT - no worries man. The creeper I got is pretty cool, and it really saved my back today, laying on the cold AZ concrete.

Tomorrow I get to run the LCAs down and have the bushings pressed out and new ones pressed in. While that is going on, getting that damned idler arm out. Still can't believe that the top part of the bolt is a torx button top....and rounded to boot.

Really hoping that I do not have to pull the whole center link down.
 
Great job so far. I just love budget builds. Your car seams to be like mine, every time I go to fix one thing, 3 more pop up. Good luck.
 
@Hemipar - yeah, well that is what we get when we own 40 year old cars :) - it's part of the love.

Had to use the grinder to cut the weld off the idler arm bolt. Grabbed my Torx head (T60) to break the bolt loose. Using a puller I grabbed from Poop Boyz - the small import one - and popped the idler arm out. Installed the new one, easy as pie.

I got one out, easy as pie. Used a cold chisel (by hand) to run a groove down one side and then pounded on it until it split.

Sweet Omnissiah, those outer bushing sleeves are a major ball buster. Tool the LCas to Poop Boyz and they popped the pivot pins out - for free I might add. Got the rubber bushing out with a screw driver and then set about getting the outer sleeves out.

Sweet Omnissiah, those outer bushing sleeves are a major ball buster. Using a chisel, by hand, I cut a groove down one side and was able to bend the sleeve inward until it popped free. The second one, OMFG - I beat on that thing for 2.5 hours. I chiseled the groove down one side, but that ***** refuses to come out. I ran out of daylight, so I will be back at it next weekend. Hopefully, I will be able to get it all buttoned back up again.

On a side note - today I had an epiphany. Literally a lightbulb went off. The whole time I was adjusting the UCAs, I was rotating the eccentrics to point outward and wondering why I could not get the wheels to stay straight up and down. DUH - I need to adjust them outward....That will be next weekend.

Sorry about the lack of pictures. Keep forgetting to take my camera.
 
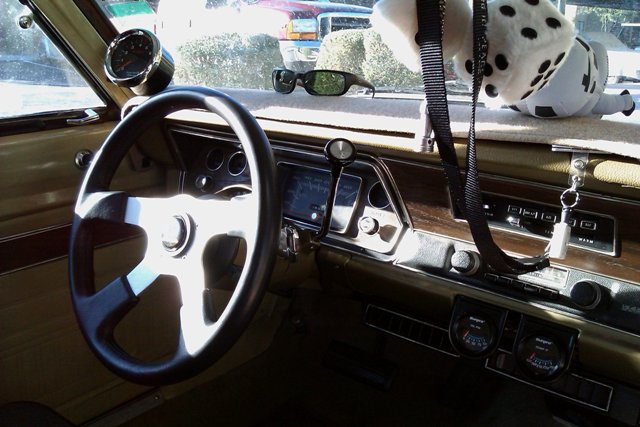
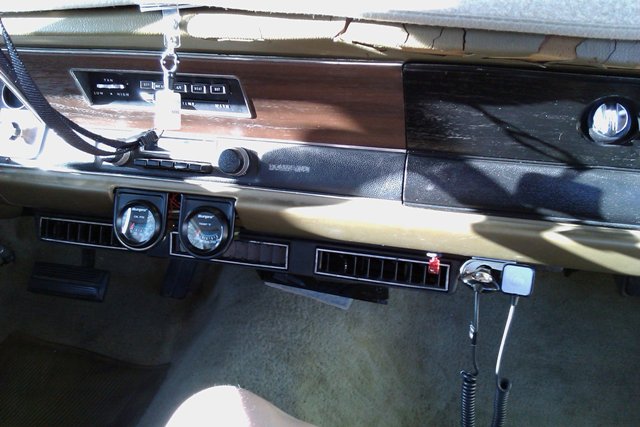
Okay, so 2011 is starting off pretty good. Got the LCA bushings swapped out, and the front end is back together. Alignment is done, and it drives smooth and straight as an arrow.

So for Christmas my wife got me a nice Grant steering wheel with install kit and Mopar horn button.

This post is going to be a walk through with pictures for removing and installing a Grant wheel.

Step 1 - removing the factory wheel. Make sure the wheels are straight ahead.

On my 1972 Dart, the center section just pops off with a little prying action from a flat blade screw driver.

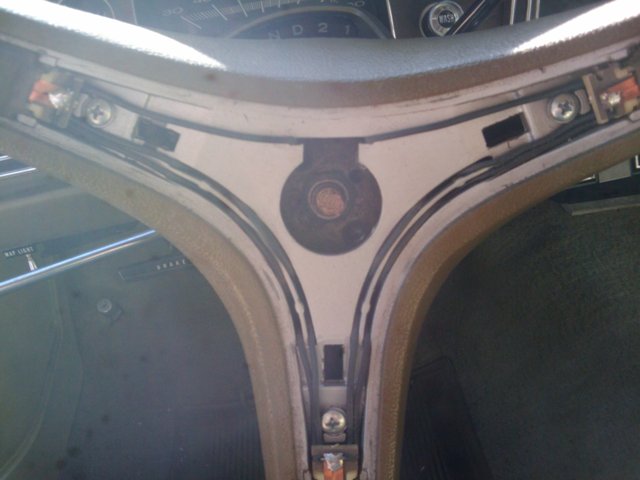
Underneath, the main wheel cover and horn buttons are affixed to with 3 phillips screws.

wheelremove1.jpg


Remove those three screws and the connections for the horn (power and ground) are visible. Unscrew the ground and unplug the power wire.

wheelremove2.jpg


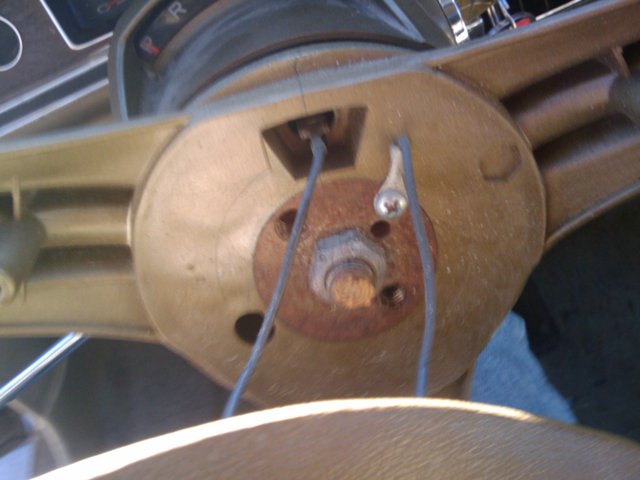
Loosen the center bolt (3/4 socket) Mark the center shaft marking the straight up position. I used the letters on the shift selection indicator.

Using a steering wheel puller (I use a combo steering wheel/vibration damper puller). It pops right off.

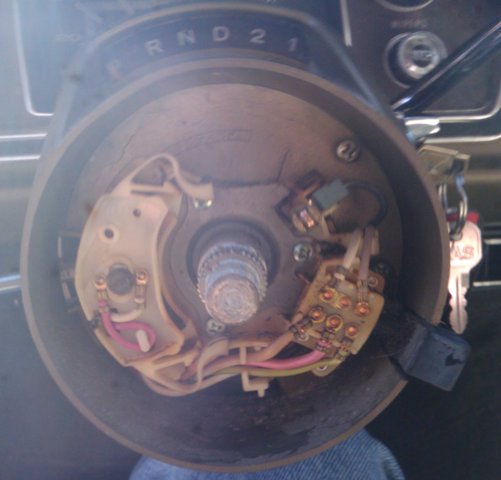
Underneath, you will see the turn signal cam. If you need to replace it, now is a good time.

wheelremove3.jpg


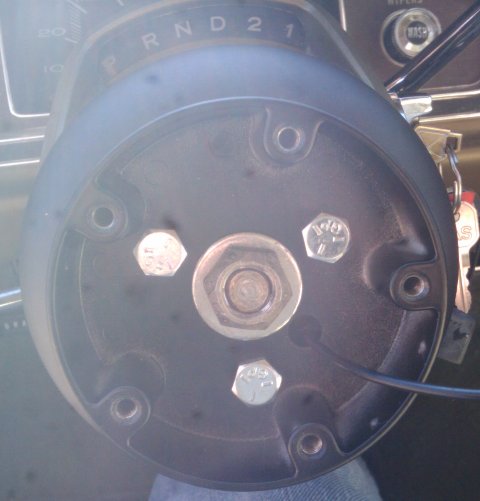
Following the supplied instructions in the Grant install kit, push the metal sleev all the way onto the shaft. Place the wheel mount onto the shaft. Use the marking on the adapter and place it in line with mark on the shaft. The adapter has a conductor ring that will pass power to the horn. Take the black supplied column cover and line it up on the adapter. Draw the adapter onto the shaft with the original nut and the supplied washer. For the classic style wheels, now is when you would bolt the new wheel up and follow the directions for the horn.

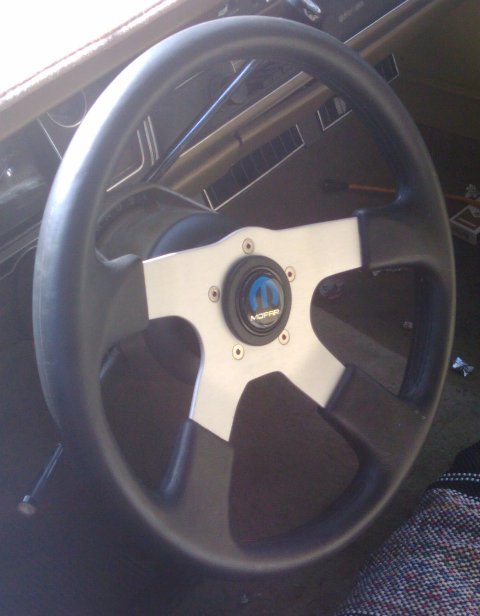
I installed a Grant GT wheel, so using the supplied mount, I bolted this onto the center shaft, and bolted the three mounting bolts up.

wheel+install1.jpg


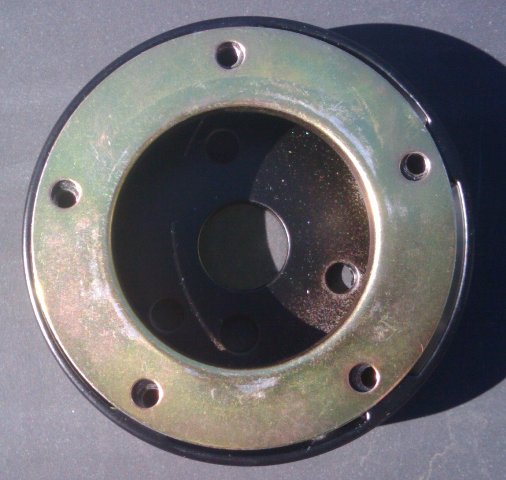
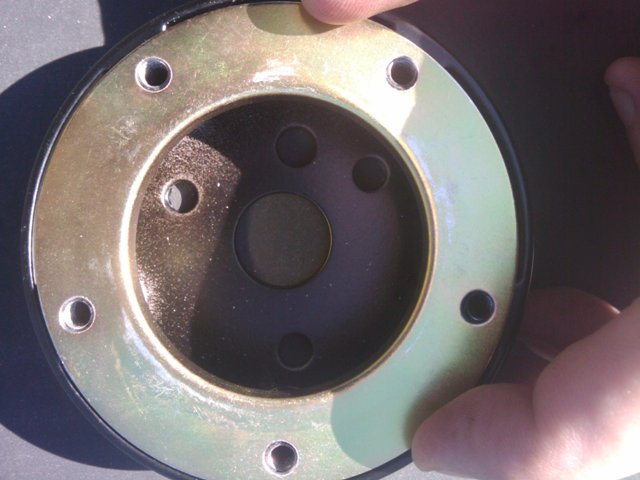
For GT wheels, you can install a center horn button with a Mopar "M" button. It comes with a mounting ring that must mount between the GT adapter and the wheel. When mocking it up, I found that the mounting holes did not match up completely.

hornbuttonring.jpg


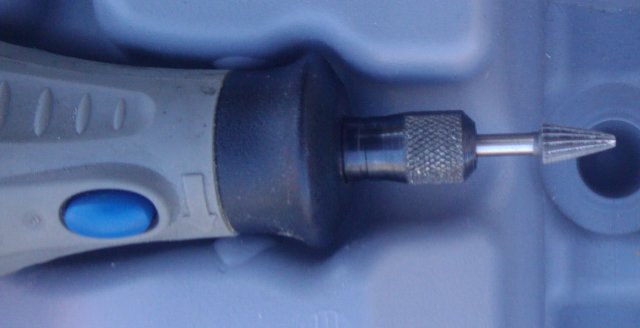
I busted out my handy Dremel tool with a cutting bit and used this to elongated the holes just a bit.

Dremel+tool+used.jpg


hornbuttonring2.jpg


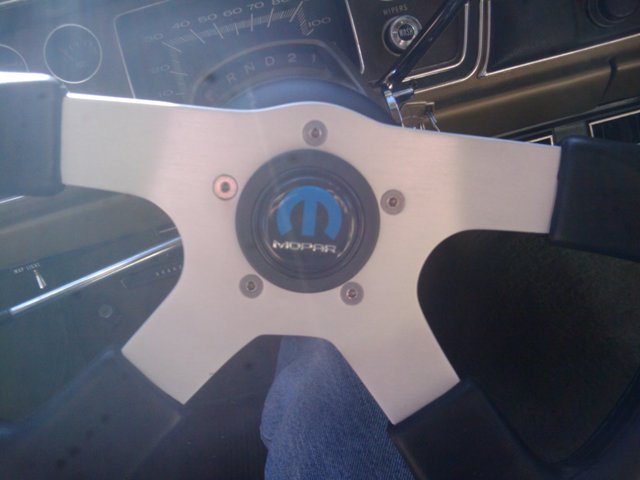
Now bolt up the wheel and connect the power wire to the horn button and push into place.

wheel+install2.jpg


And the finished product:

wheel+final.jpg


It is worth noting that if you are installing a Grant GT style wheel, make sure to set the adapter to have one of the mounting holes at the 12 o'clock position. The GT wheel adapter has a wheel bolt hole lined up with one of the adapter mounting bolt holes, so it makes it easy to ensure you are getting your wheel lined up.

All in all, took me an hour to install. Took my time and it went together really easy.
 
Well took the kids for their first ride in the Dart after brake and suspension upgrades. They had a blast as always.

Snapped a quick picture while waiting for my oldest to get out of school.
 

Attachments

  • 2011-01-19 12.20.12.jpg
    66.3 KB · Views: 1,198
Well took the kids for their first ride in the Dart after brake and suspension upgrades. They had a blast as always.

Snapped a quick picture while waiting for my oldest to get out of school.
That is too cool man:thumbrig: Glad to hear they had fun. :cheers: Your Dart is looking very cool8)
 
Will be getting some better pictures, especially of the rear setup with the new springs, diff, and other stuff. Also, got to start planning this years budget destruction.....LMFAO.

Got to get the transmission looked at (never rebuilt one and really don't have anyplace to do it), replace the A/C clutch, and then get the cooling system done up prior to it getting hot.
 
So this weekend, seeing as I have a distinct lack of funds (recovering from DisneyLand) I am planning some low or no dollar work on the Brick.

I have Sunpro gauges to put in and I am looking at "refurbishing" the dash. Plan is to clean it up, replace bulbs, bypass the ammeter, install the gauges, and then recover the dash pad, all while getting the plastic to look the way I want it, plus painting the dash in the projected car color of graphite grey metallic.

I am hoping to have a bunch of pics to show you guys Saturday night!
 
:headbang: Wow Mike, you've been busy!

looking good :thumbup:


I gotta return Gene's call this weekend :D
 
Will be getting some better pictures, especially of the rear setup with the new springs, diff, and other stuff. Also, got to start planning this years budget destruction.....LMFAO.

Got to get the transmission looked at (never rebuilt one and really don't have anyplace to do it), replace the A/C clutch, and then get the cooling system done up prior to it getting hot.
I got a buddy that owns a trans shop in Apache Junction.....
 
Ink - where is that shop at?

I am heading to Palm springs to get a set of seats (bench, but hey, nicer than mine) and will be using the bay at Audio Express to get the interior rolling.

I still need to get pics of the dash setup with the new gauges installed.....damn all this school work!
 
Woot heading to Palm Springs to grab seats and some exhaust, floor shifter, shift kit, trans pan and selector seal are on their way, interior tear down is imminent....
 
Oh, and just so everyone knows where I am at with the $5k budget build - Updated numbers - I went through all the receipts

Parts Price
Steering Wheel FREE (Christmas)
Rear End hard parts $150
Front end rebuild $250
Brakes $150
Rear end swap and Suspension $500
gauges $80
cooling system $120
Tune up $50
Drive Shaft $160
Misc work with Paul $180
Misc work with Paul $370
Total $2010

Total including buying the car $3210

Still well within budget.

The cost of redoing the interior - roughly $500
 
don't 4 get who is taking you 2 palm springs. we gonna be cruising in my CHEVY SILVERADO CREW CAB and we will be leaving at o'dark 30... NOT!!!! we need 2 b ready 4 me 2 pick u up 2 5am
 
Okay, got the seats in, rears are a bit different. Will have to custom fab the rear seatbelt brackets, but it looks great.

frontseat.jpg


Here is the front seat. Gained about 3 or 4 inches of leg room and lost a center arm rest. Really comfy though

Rearseat.jpg


The back seat really fills the area up, but the bottom seat will need fabricated risers to make them really secure. Will also need to refab some seat belt brackets, as the old belts don't fit in the old locations, and I will be looking for alternatives to the current setup.

driversdash.jpg


Drivers side Dash setup. Nice Grant wheel with Mopar horn button the wife got me for christmas, a SunPro Super Tach on the A pillar. Dash refurn coming soon....really soon.

passdash.jpg


Passenger side Dash setup. I mounted a dual 12v accessory pod, but I am going to move it to the right side of the gauges. I hooked the power to the old cigarette lighter power and had to hook the new 12v pod to a switch. For now, it works.

gaugeinstall.jpg


Here is the Oil Pressure and Water Temp gauge install I did a few weeks ago. Drop the AC vents, take the stereo loose and drop the ashtray / cigar lighter mount out. Wired the lights on the gauges to the light wire from the ashtray, and used the factory holes for the gauge panel. Went with the 2 single panels since I could not find a 2 gauge pod anywhere local. Ran the lines for the gauges through a hole popped into the firewall below the AC setup, ran a grommet and then filled the grommet with expanding foam. It turned out pretty clean. I did this on my Duster years ago and I like the fact that they are right there.

Christmas in March - Floor shifter, shift kit, and new glove box liner. I have tons of little stuff done. Within the next 2 weeks - interior refurb and stereo system!
 
Well, front sway bar got delivered, as well as all of the stuff for my stereo system. looks like I am going to be busy this weekend.

All the trans stuff has to wait until the new speedo driven gear arrives from loco - really looking forward to that whole process!
 
So it seems Saturday was a total waste. Started out figuring that the front mounted brake calipers would contact the sway bar so I had to swap them to the back. Then after a few hours of trying to get the sway bar in, realised that it just would not go in. Bar is not belt to clear the front steering.
 
-
Back
Top