The Other 68 Dart Resto Project

-
Flying right along flyboy01. :thumbup:

The truck looks perfect :salute:


This is going to be another great A bodie. :blob:
 
OK, since you asked, here are some more boring pictures:

Here are my wheelwell lips, trimmed down, still need to be spot welded and filled with seam sealer, but now I have about 5/8" clearance between the sidewall and the lip. I will probably hit them with my D/A and some 80 grit to smooth them out.
100_0563.jpg


Here are my **** welds, I welded up about 13 holes, I only have about 50 more to go. Hopefully my welds will get better.
100_0554.jpg


Here is the completed rearend, all done and ready to go. Now all I need is a 3.23 sure-grip to finish it off. Don't worry the crappy exhaust will be replaced soon, I am just keeping it so I can drive the car a little. As soon as the 383 goes in, its gone.
100_0566.jpg


Here is how much clearance I have, I have about 5/8" from the sidewall to the outer lip. I have about 1" from the inside wheel well to the sidewall, I have about 1/2" from the sidewall to the spring. I'm sure that if I move the springs in 3/4" with relocation brackets and pick my backspacing very carefully, I can easily get 275/50 or 60 in there.
100_0570.jpg


Here is what my front brakes looked like AFTER I cleaned out all the cobwebs, spider webs, and dessicated bug carcasses. Overall everything looked good, all the bushing in the suspension are solid, no slop, so I am going to wait to rebuild the suspension until maybe next winter. The spindles were pefect, no scoring, and the bearing are re-usable, the rotors however are junk, they are straight, but whoever last turned them took them down to the minimum, .94", so now they are junk. Oh well, I can get new rotors for $76 a pair. I am replacing the front lines with RMS braided stainless. I have new calipers for the front. I also drained all the old brake fluid outof the system, I flushed about a pint of fluid for the rear half, I might do even more in the front. I was shocked at how dark the old fluid was, and how much setiment there was in the bottom of my dump can when I was done. More to come.
100_0574.jpg


100_0573.jpg
 
You got a very nice project going there and your doing it right. Always finish one section or part before moving to another. It keeps pieces together and your mind fresh on what you’re doing. Also photograph everything. I can’t tell you how many photos I have of others and mine projects. It gets to the point of people always seeing you with the camera. But guess who they ask when they need reference photos or they can’t remember “where does this go”.
Keep it up “Nice work”.

Maynard
 
Very nice man. I gotta clean up my 64s underside this year, and youve given me hope it can be done. Ill need some lower quater panel work on mine and my rear valance needs a dent pulled out of it, but the rear valance is spot welded on. I think when i get going with the welder i bought, i might be able to remove it myself and get the dent out, but the rear quarters, i just dont know if i can do. Your project is looking nice, keep it coming.
 
Thanks for the support. This is the order I am planning to do the work:

1. I am going to finish up the front brakes next, all I need is a set of rotors.

2. Get some gas in tank and install my new Edelbrock 650cfm carb.

3. Install my wideband O2 A/F meter (need to weld in bung to exhaust pipe)

4. finish the bodywork on the left rear quarter, then weld up all the trim holes.

5. Primer the whole car.

6. Paint the car.

This should keep me busy through the spring.
 
Are you sure those rims have 4.5" backspacing ? They look pretty deep and thats a lot more clearance to the springs then I would have though.
 
I'm positive its 4.5" BS 8" wheels. I have some 5.5" BS wheels before that did not fit. I also have some 4" BS 7" front wheels that I tried. Its strange that everyone with an A-body has different measurements.
 
I finished up the front brakes today, I had the rears done weeks ago, but I started on the fronts last Monday, finished today.

I replaced the front rotors with a new set because the old rotors were below minimum thickness, I also got the RMS Braided front lines installed too. I decided that I could not just put the parts on as-is. I coated the nice clean, new calipers with Eastwoods Diamond clear, I painted the centers of the rotor hubs with Duplicolor Cast Gray to keep them from rusting. I also scrubbed the backing plates (dust shields) with a soft wire brush after soaking them overnight in degreaser. I did end up going with the good Raybestos Pro-Stop pads.

It was a bit of a pain to get them bled because the whole system was dry in front, so I flushed the whole brake system with a quart of fluid front and rear, you would be surprised how much dirt there is in old brake fluid. I finished up by cranking up the torsion bars 1 1/2 turns so I could get the jack under the k-member (talk about low!).

I inspected the front suspension and all the joins and bushing are tight and should last a while longer, a few of the boots were cracked, but everything else was good. I will eventually rebuild the front suspension with poly bushings and much bigger torsion bars (have .870 now).

100_0573.jpg


100_0575.jpg


100_0580.jpg


100_0578.jpg


100_0574.jpg


100_0584.jpg
 
Looks good.

I guess I will be able to fit a 275-50-15s on my car after moving the springs.
 
I finally got the Dart running after 5 months, In December I had a lot of problems with the engine, I could not keep it running, it would run over 1500 rpm, but would not idle. I took the Gas tank out and found this:

100_0162.jpg


I figured the tarnished fuel might have something to do with it. I bought a used Edelbrock 1406 carb (600cfm) a while back but I did not bother replacing it until I got a new fuel tank and pickup (got this in a few weeks ago). I took the old carb off today and was shocked at what I found inside my mystery engine:

100_0592.jpg


100_0589.jpg


:eek: I was amazed at how hard this stuff is, its shiny and rock hard, I could not scrape it with my fingernail! I installed a new fuel filter (clear so I could keep my eye on it) Installed the Edelbrock carb and new gasket, but then I tried to hook up the throttle and kickdown. Time for a trip to the parts store, luckily one of my local Pep Boys carries a lot of Edelbrock stuff, and they actually had the Mopar linkage in stock, on my way back home.

Hmm...I'm hungry, stop at Taco Bell...10 minutes later, starting to drive fast...its making a run for the the border...must...get...home...to...bathroom...FAST!

Ok, back in the garage now, feeling much better. I installed a new set of plugs, I poured in 2 gallons of gas in it, cranked for about 15 seconds, VROOM! It started! WOO HOO! I love Edelbrock carbs, they always start the first time!

CRAP! The radiator is leaking water from somewhere in the middle of the core...%$#&@

I shut it off, giving up for today...I will work on it tomorrow.


Woah, what's the story behind the tank? Do you know if the car sat for a decade or two? That's one brutal tank!
 
I actually started the body work a few weks ago, but it was more exploratory surgery. I started by doing a little sanding and breaking in my new D/A. I strated out by trying to see how deep the filler was, I cut a groove in the side with my D/A throught the filler fron under the gas filler back to the rear corner, I estimate that toward the rear it was about 3/16" thick. The quality of the repair was pretty good, but I was concerned that the whole 1/4 was covered by at least some filler. It had to go, I need to know what was under it.

This was the first step, after cutting the line through the filler, I decided to start sanding down with 80 grit, this was the result after 3 hours with a D/A.
100_0551.jpg


I needed to fill the holes, I started out welding the holes shut for the "DART" emblem and all those damn holes for the GT side trim:
100_0554.jpg


Today I decided to attack the filler with a stripping wheel (on the trunk), it definately works better without damaging the metal. The very back of the quarter had a lot more than I thought, but on the plus side, the damage underneath was not all that bad. I took about 2 hours, but I got the thick stuff off, I was really happy that the fender lines were straight and true. These will be use to restore the "character" of the rear fender.
100_0599.jpg


How many of the A-body guys wish your metal looked like this under the paint? ;D The only rust was a pinhole where you see the hole at the bottom. I determined that the pinhole was tiny, so I drilled it out to about 3/8" to get to undamaged metal, which I am going to weld shut later.
100_0600.jpg


After welding up the holes, I ground them flat with my grinder, actually they are cocave, which I will smooth with filler later. You can see a little of the damage at the back end of the fender.
100_0601.jpg


Here is a better shot showing the mostly undamaged character lines.
100_0602.jpg


Here is the fender after giving it a coat of self etching primer, you can see the damage a little beter with primer, next weekend I am going to start knocking down the high spots and getting the fender back in shape before adding filler.
100_0605.jpg
 
This a continuation of the bodywork I started a few weeks ago by stripping all the old filler down to the metal. I have to add, this is the first major bodywork I have ever done, before it had been limited to door dings and a little bit of painting, so if you see me doing something wrong, let me know.

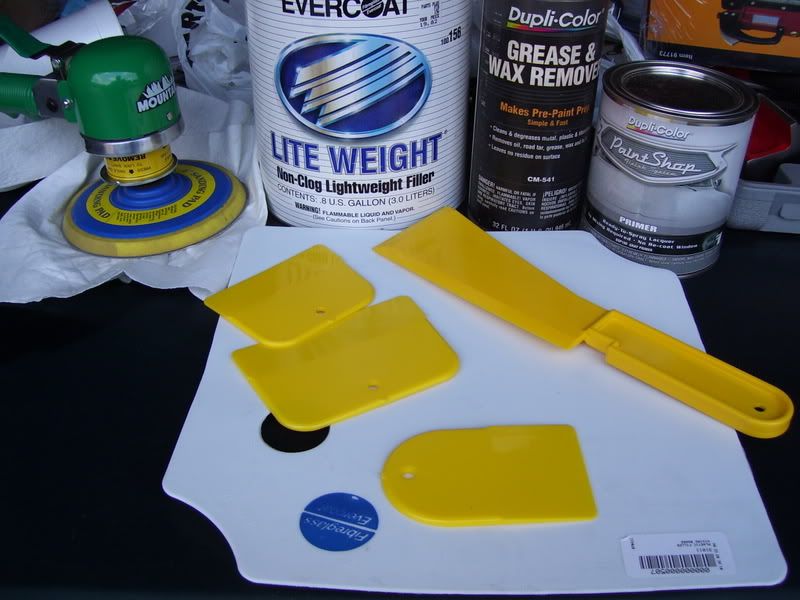
Just enough tools to make me dangerous. I have my D/A sander, a 17" air board sander, a 17" hand board sander, a 6" block sander, a grater for shaping bodywork, Evercoat filler, mixing board and an assortment of speaders.
100_0607.jpg


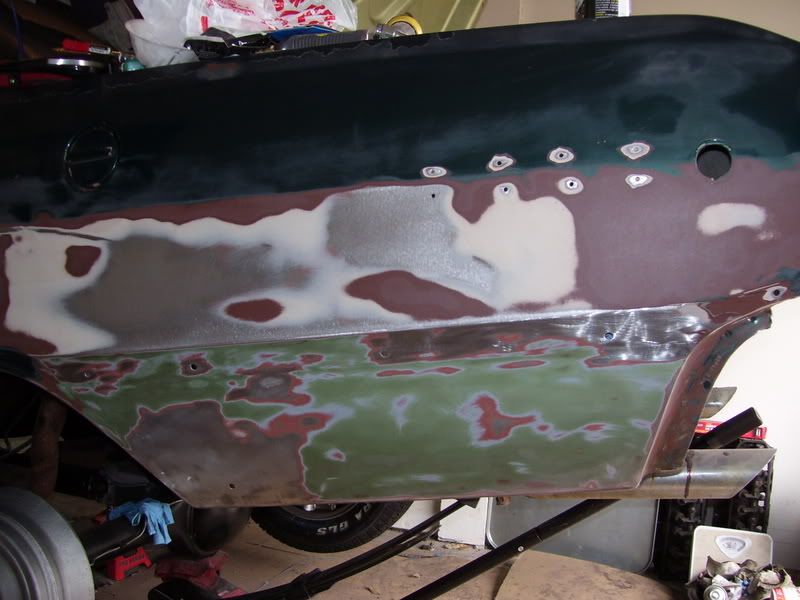
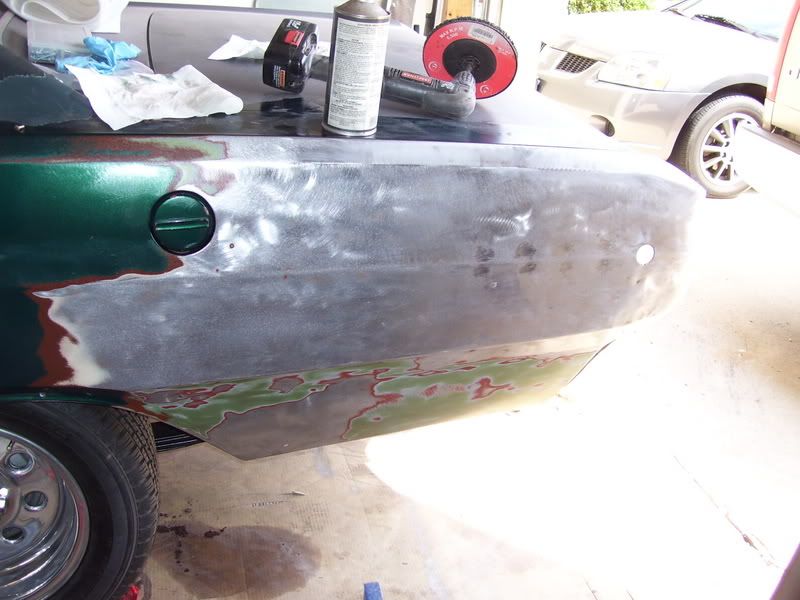
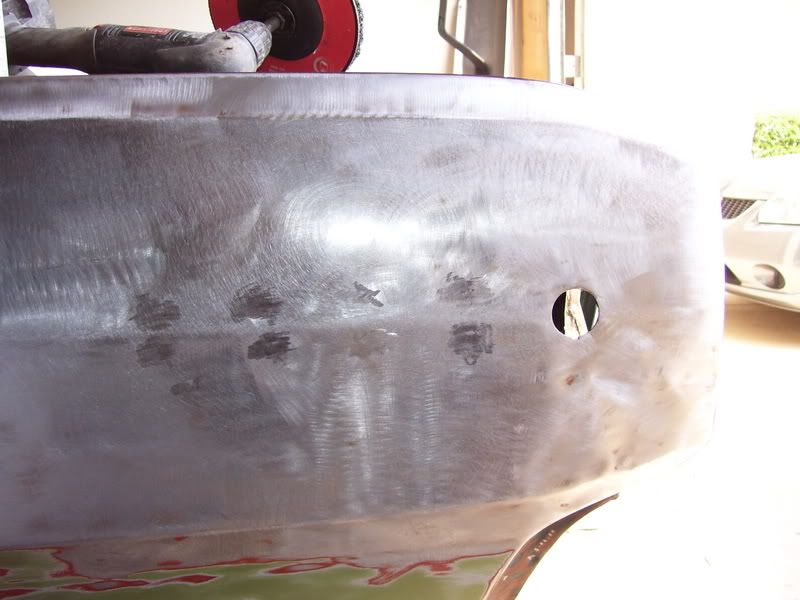
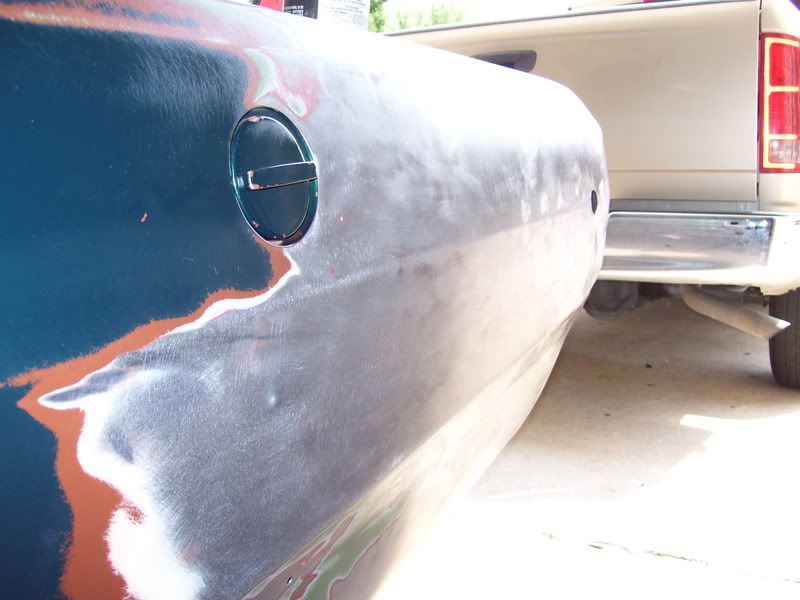
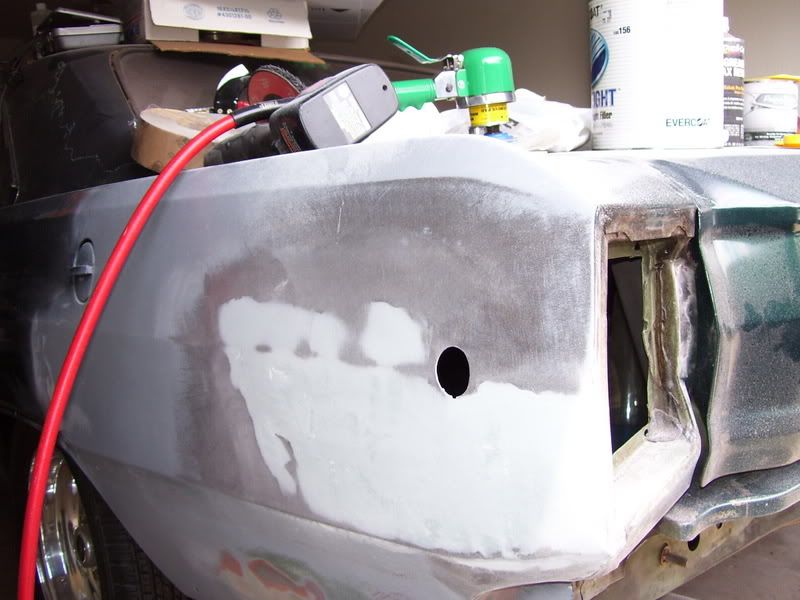
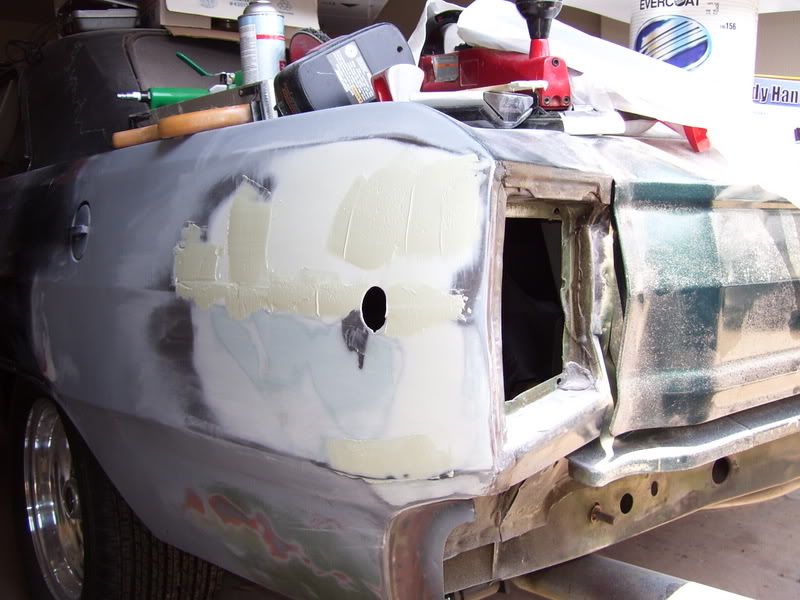
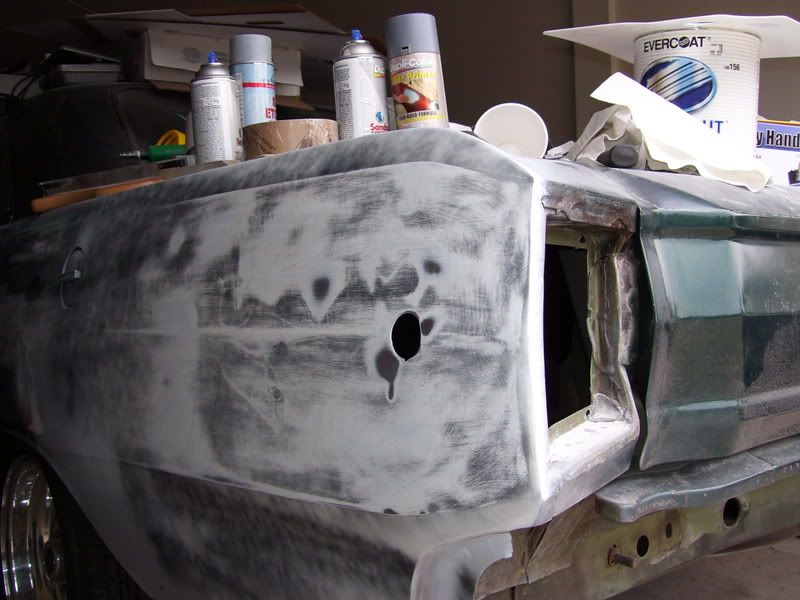
Here is the uglyness I found under the filler, in retrospect I could have left it alone, but I just didn't know what was going on underneath, plus the rear body crease was pretty soft, I wanted to sharpen it up a bit. All the holes are being welded up, I started with the rear quarter. I also knocked down most of the high spots with a hammer and dolly (I still missed a few).
100_0608.jpg


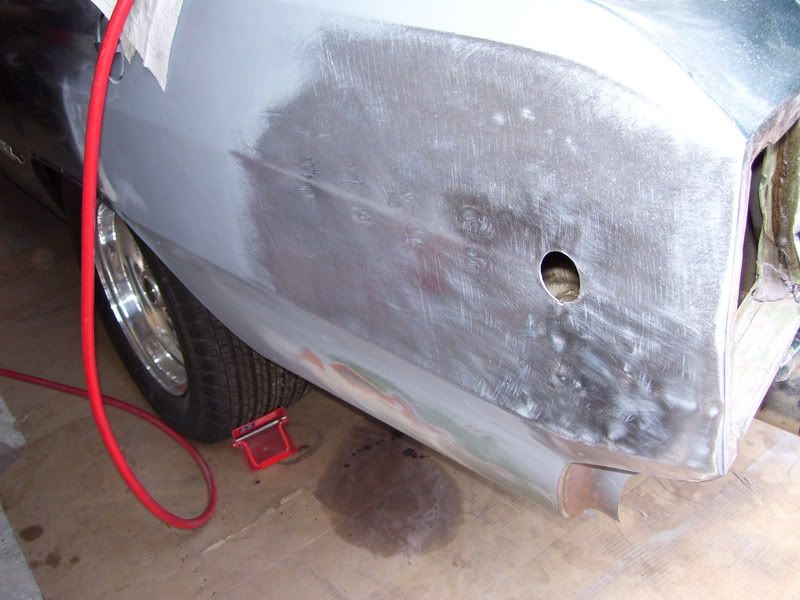
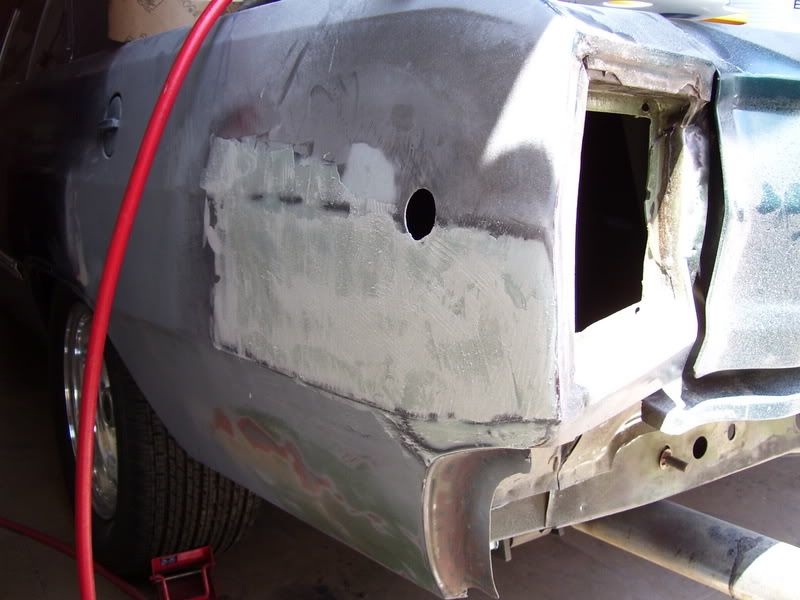
The start of the filler, I started with the lower half, I was concerned that the creases would be soft so I paid the most attention to them. I already made a pass with the D/A to knock down the first layer. Its a ***** getting the hardener to filler ratio just right, you will see by all the different colors of the filler.
100_0612.jpg


This is the second coat, knocked down with the grater.
100_0619.jpg


Coat number 3, filling in the low spots.
100_0625.jpg


Sanded down with the D/A, I then hit all the bare metal with etching primer.
100_0632.jpg


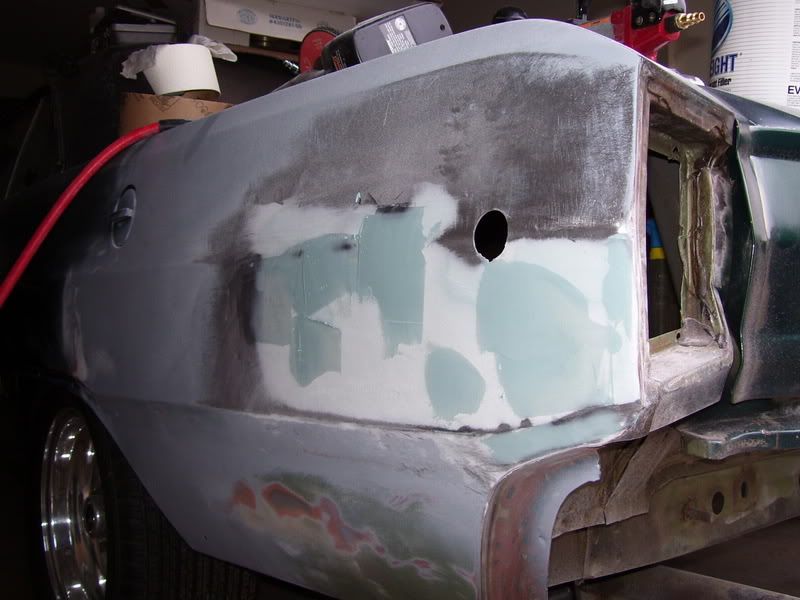
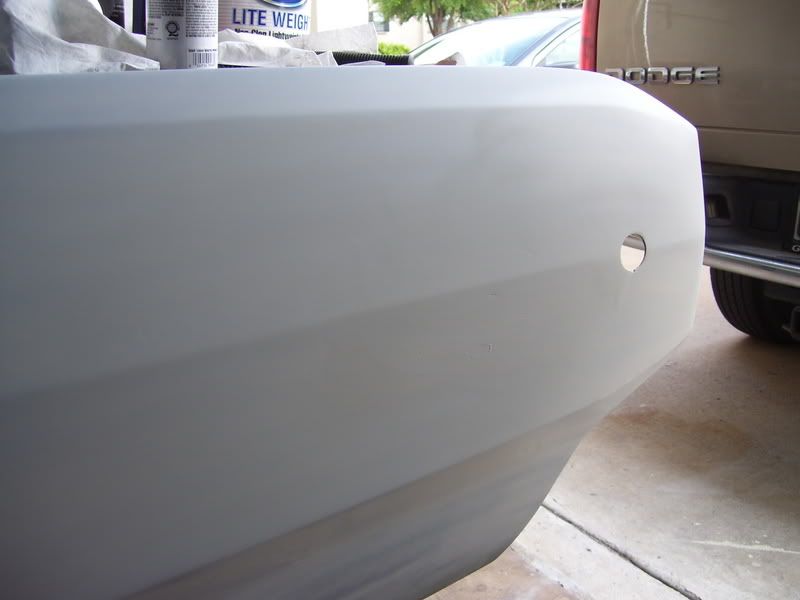
The next day, I did the top half, now I am applying a layer of glazing putty, I built up the center crease so when I sand it down I can get a nice shap line.
100_0636.jpg


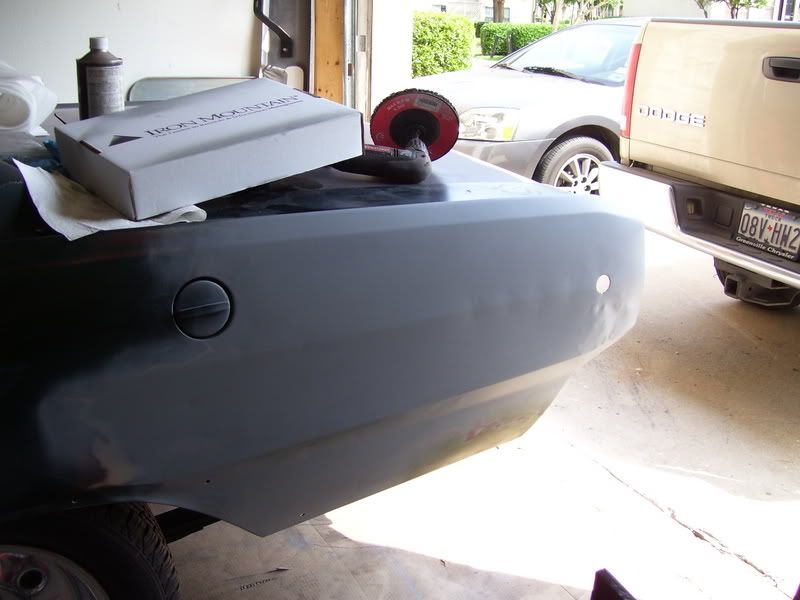
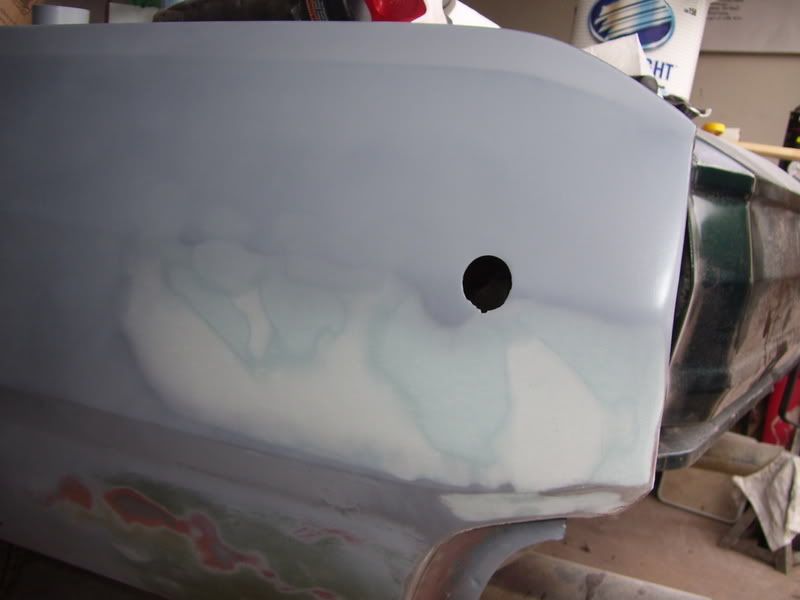
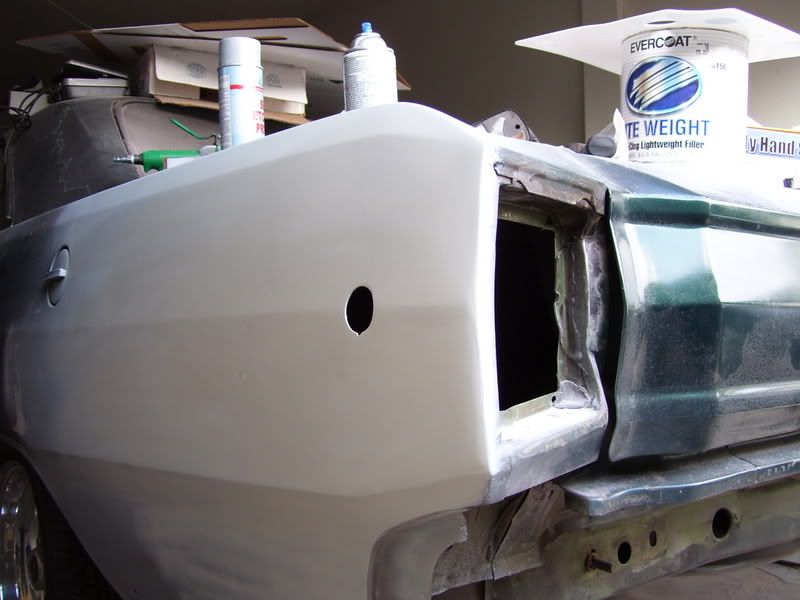
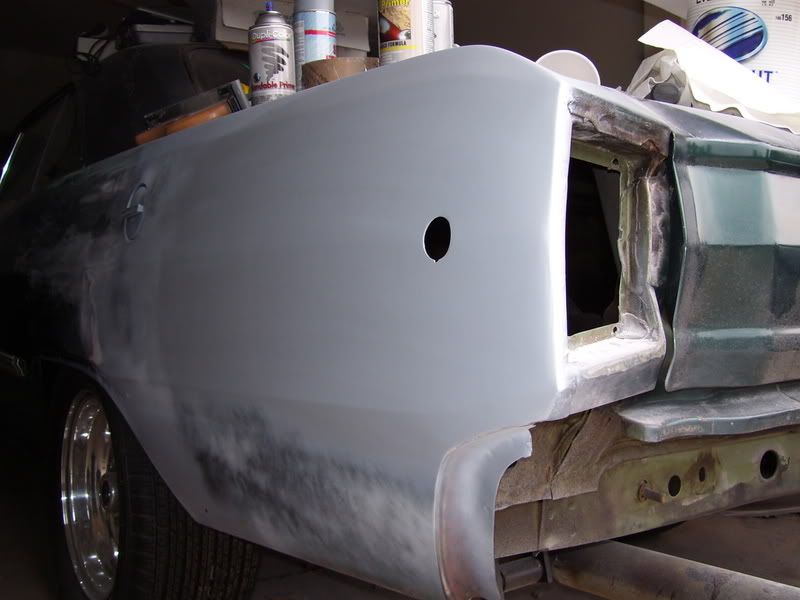
Here is my first coat of primer over the intitial filler work, look at that nice sharp crease!
100_0642.jpg


Here is another look at the crease, straight as an arrow! I love it when a plan comes together.
100_0639.jpg


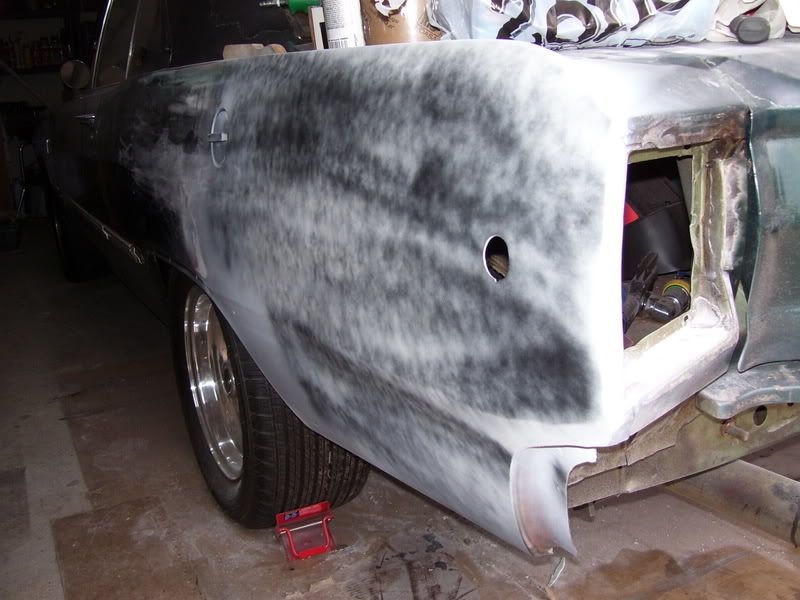
To find the low spots, I sprayed a light coat of black primer.
100_0643.jpg


I then blocked it to find all the high and low spots, still needs some work, I found a few high spots I need to knock down some more.
100_0646.jpg


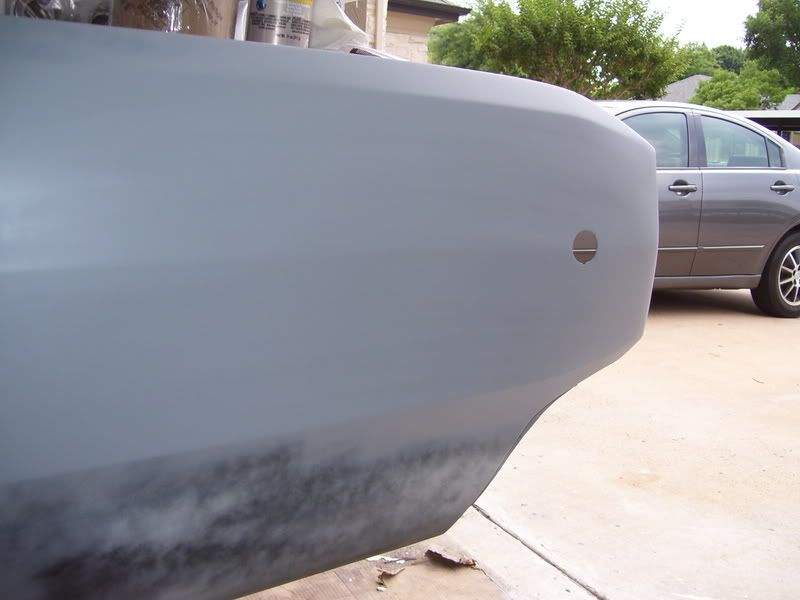
Afterwards I put down several coats of high build primer, I am going to block it one more time, if I still have high spots, I am going to knock them down, them I am going to fill in the low spots with some glazing putty.
100_0649.jpg


Another angle of the work. I think its starting to look better. The streaking is actually from the high build primer still being wet.
100_0648.jpg


More to come next weekend...
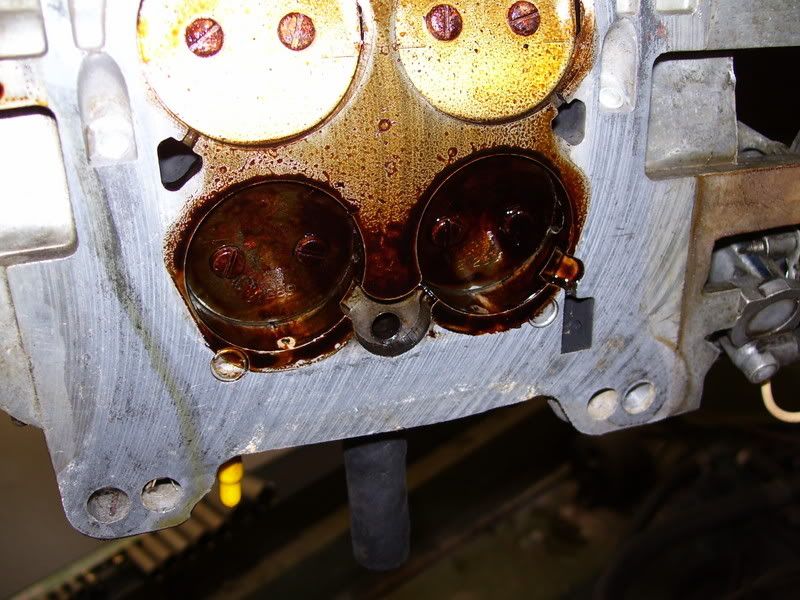
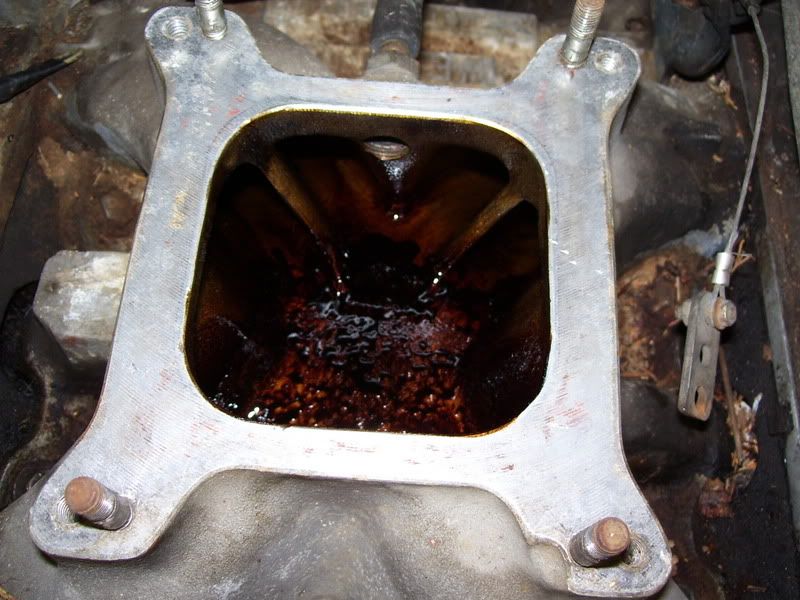
 
nice work dude. looking good. I like how you take your time and do it right.
 
Looks good, Run a line of tape along the body line then block the panel up to the tape. Pull the tape and retape on the other side of the body line, then block the other side. This should give you good strong, crisp body lines.
 
Looks good man! I can really appreciate your work underneath the car and all that rust prevention/preservation/removal. I love the idea of the Evapo-rust pumped into an area with the pump..wicked idea! I'll have to try that sometime. Keeping things wet is the problem with that stuff, but you seem to have solved the problem. Theoretically you could do the whole inside of a frame like that.....just plug the big holes and let her rip with a long drain pan underneath......the possibilities are endless!
 
Well, yesterday was a big setback, I thought I would fill a few pinholes with spot putty instead of the high-build primer I had been using. BIG MISTAKE! The putty attacked the primer, it wrinkled , shrank, and cracked, and I had to strip it all back down to metal and Evercoat, so I knocked down all the high spots again and had to redo the glazing putty and finish, this time I used the high build primer to fill any pinholes. I am back to where I started, but I do feel that my second attempt was even better, so I have now finished the back of the quarter and I am going to move to the front half of the quarter now. Hopefully the whole car will be in primer in the next few weeks.
 
Anyone want to make $100?

I need to rent a garage from somebody for a weekend so I can paint my car, I will put up plastic sheeting on the walls and floor to keep things clean.

Its preferable that the garage be within 70 miles of Dallas TX, the garage needs to have 110 vdc with a 20 amp breaker (for my compressor), some lighting (I can bring my florescents to hang), and I would need it from Saturday through Monday. Can anyone help?

I have been trying to do it in my apartment garage, but my neighbor parks his car so close that I worry about overspray getting on his car (some did last week, but it was dry, thankfully). I have tried in vain to find any space that can be rented to work on my car, but the best I could find was a shop for $750 a month about 60 miles away.

So, is there anyone out there that can help me out and rent their garage to me for a weekend?
 
The Dart is running again. Well, it ran for about 20 minutes after I replaced the fuel tank, pickup, filter and carb, then it died. I thought it was bad wiring to the ECU, so I replaced all that, put in a new OrangE Box Mopar ECU and cleaned up the wiring, no dice. I next thought it was a clogged fuel line, but when I pulled the off the fuel pump, fuel ran out, it had to be the fuel pump, so I replaced that, and it started! I drove it around the p[arking lot a bit, could not take it on the road, since I have no tail lights in it. The tHrottle cable is sticky, I am overcoming it with a heavy spring, but I need to get that fixed.

When I finally got the Dart out of the garage under its own power last Sunday, I decided I need to take a few updated pics. This one has been slightly photo-shopped, I took out the side trim on the door and pasted in a bumper, but otherwise, its pretty accurate, but this is the good side, you can see the peeling paint on the hood, roof, and trunk. I want to get it painted by the end of summer.

100_06623.jpg
 
I LIKE it! You're making great progress.

$100 for a weekend? You could probably find a body shop near you that will rent their booth out to you for $150. Walk in with your own materials and go to town.
 
-
Back
Top