Hughesy's 1973 Valiant Charger - New Hemi 5.7 swap

-

Boony405hp

Well-Known Member
Joined
Mar 12, 2007
Messages
239
Reaction score
10
Location
Brisbane, Australia
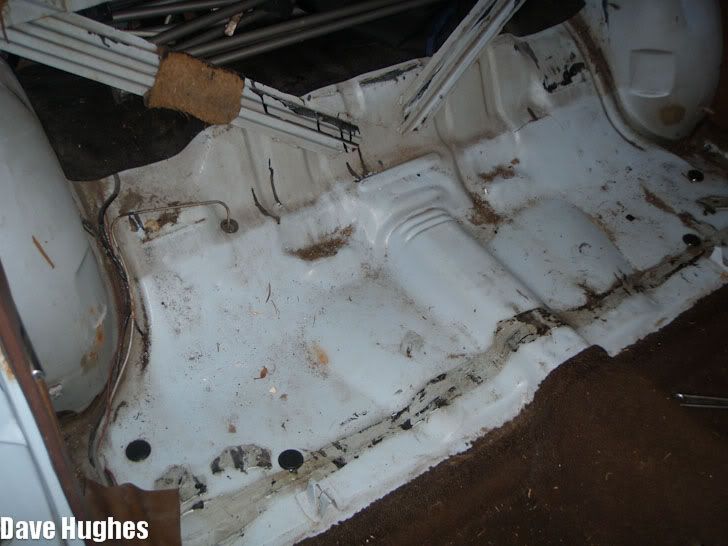
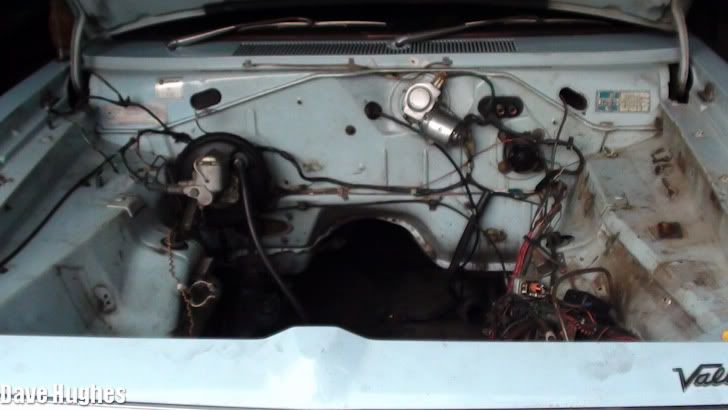
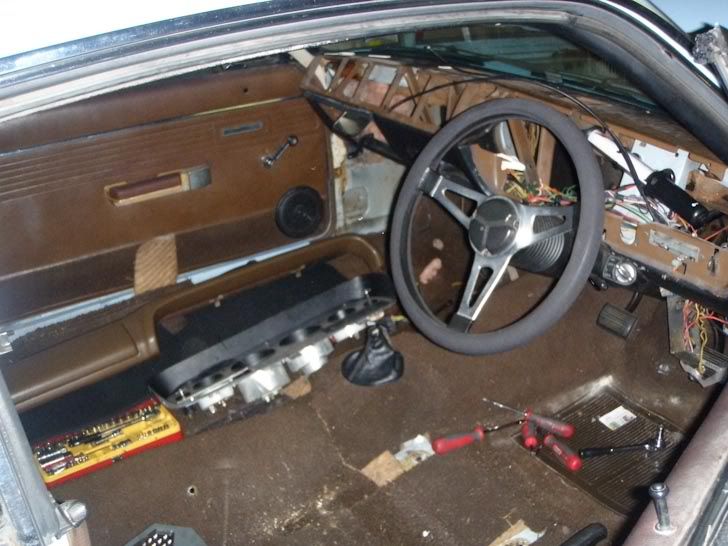
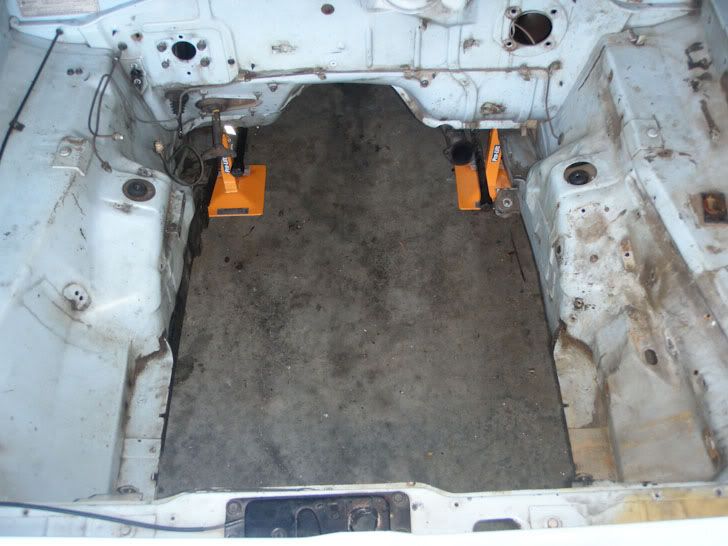
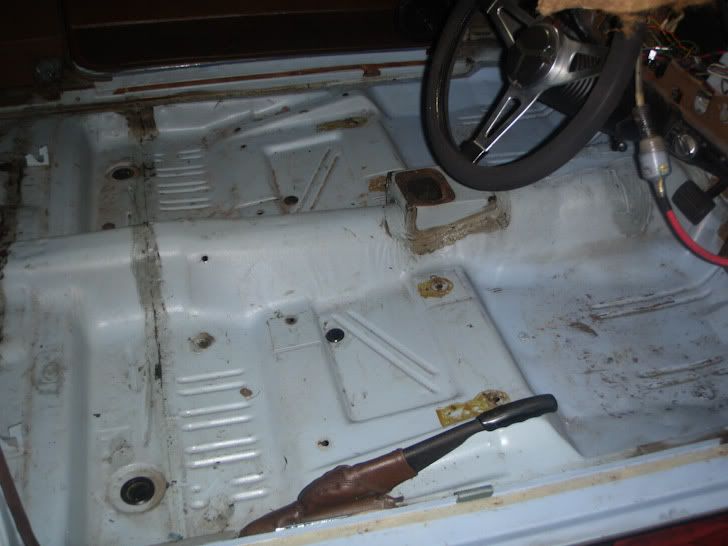
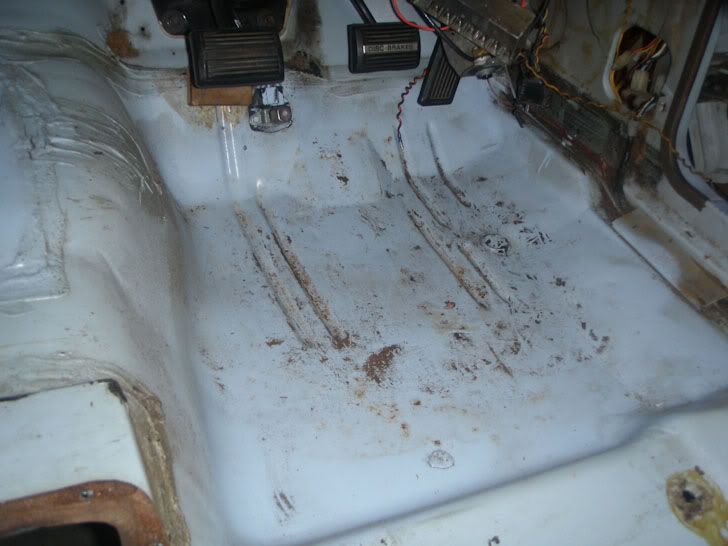
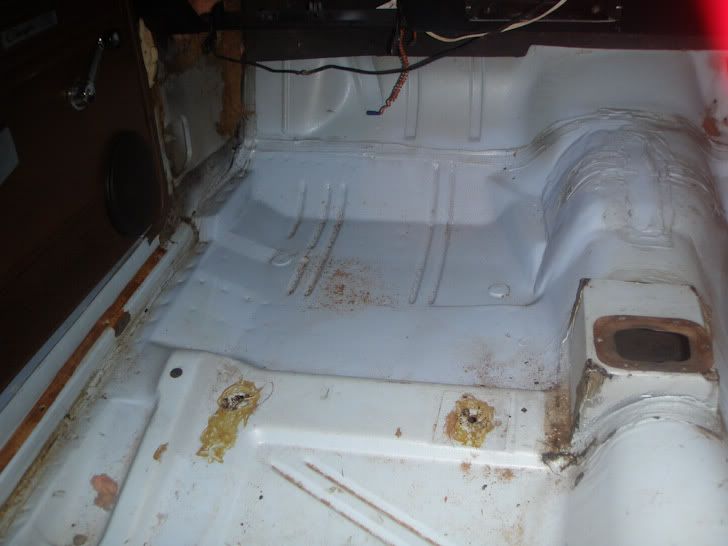
Well the time has come to finally pull the old blue whale off the road and give her the treatment she deserves. Firstly a little bit of background history.

2005_0115Image0046.jpg
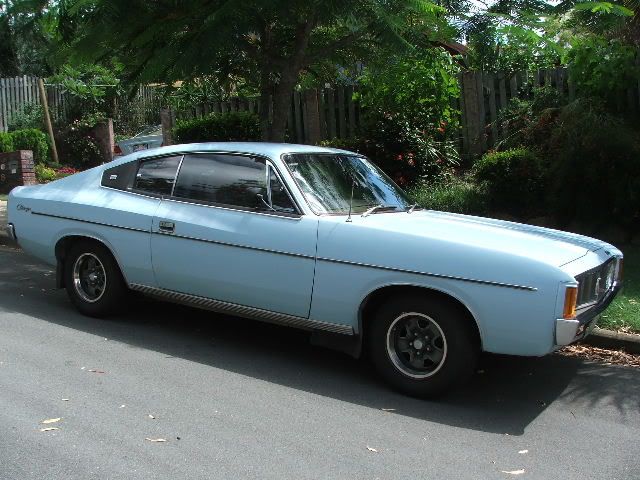
(First time I saw the car)


2005_0115Image0045.jpg


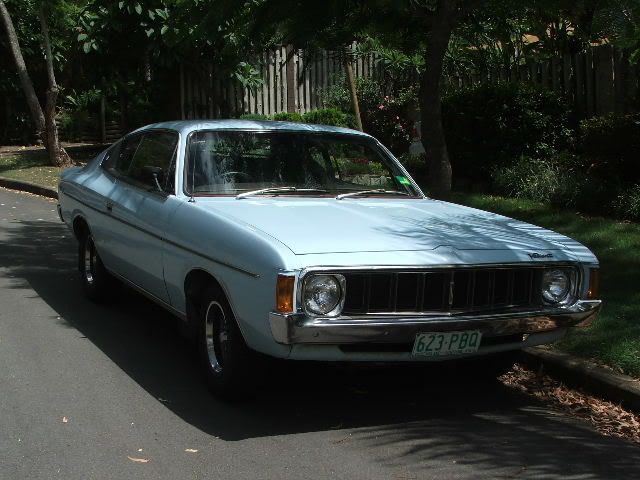
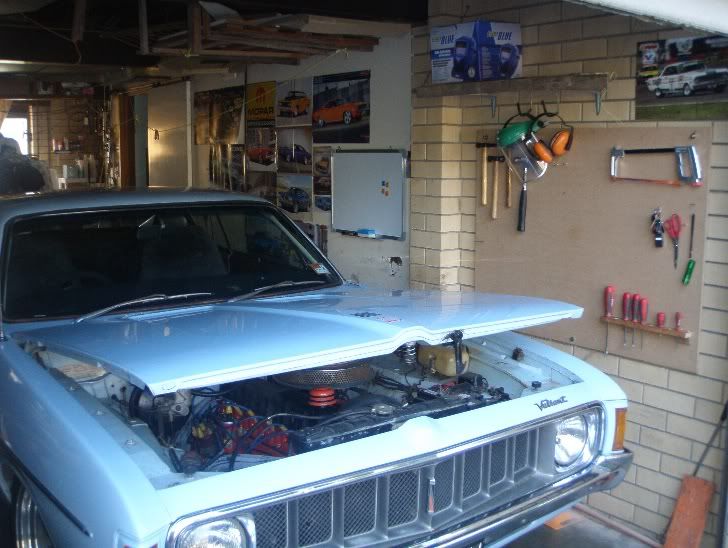
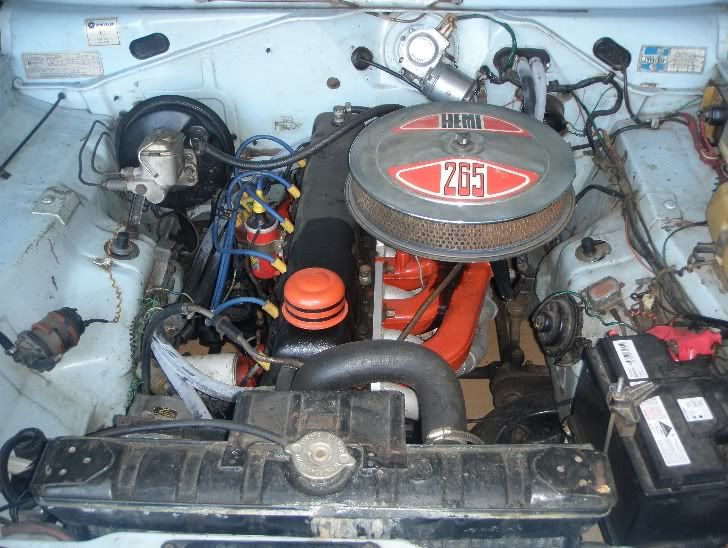
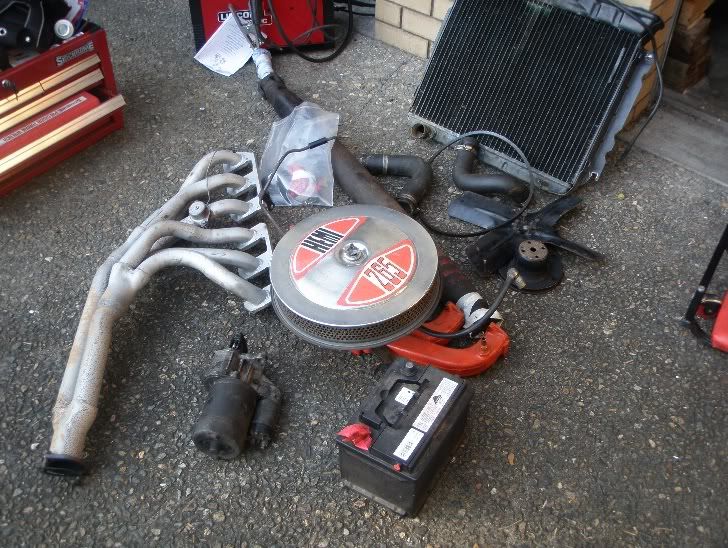
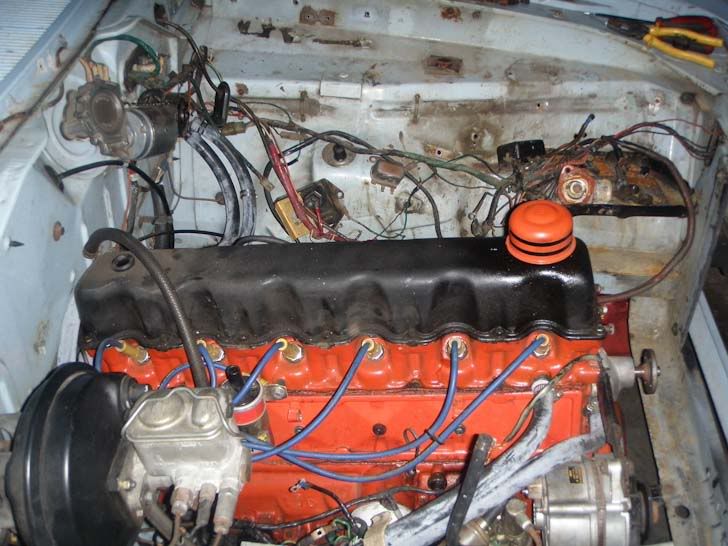
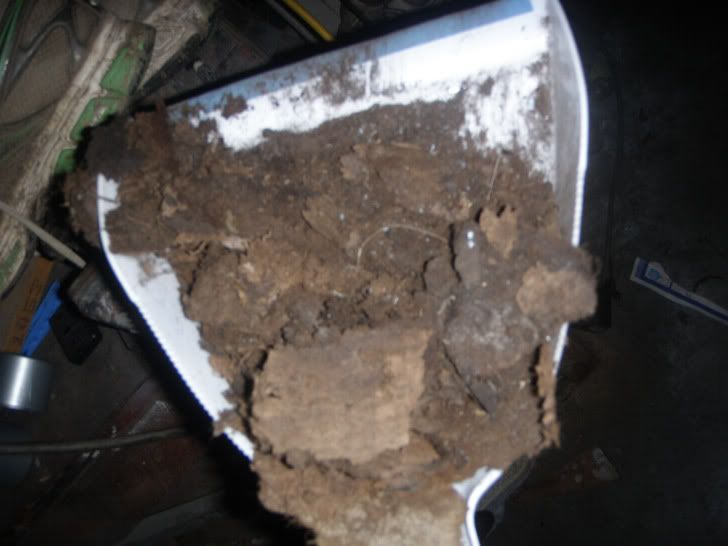
Originally a 265 - 4spd, in fountain blue bought it back in 2005 - one family owner car. Fairly straight and only minimal surface rust, I gave it a bit of a rub back and the typical supercrap spraycan touch up's and drove it as it was. After a while I bought the American racing torque thrusts (17x7 and 8 on the rear) swaybars, koni shocks, new bushings, stiffened rear springs. The plan was always to do it up but have fun in the meantime. Raced it a few times at lakeside and QR and had a ball.

2005_0115Image0051.jpg


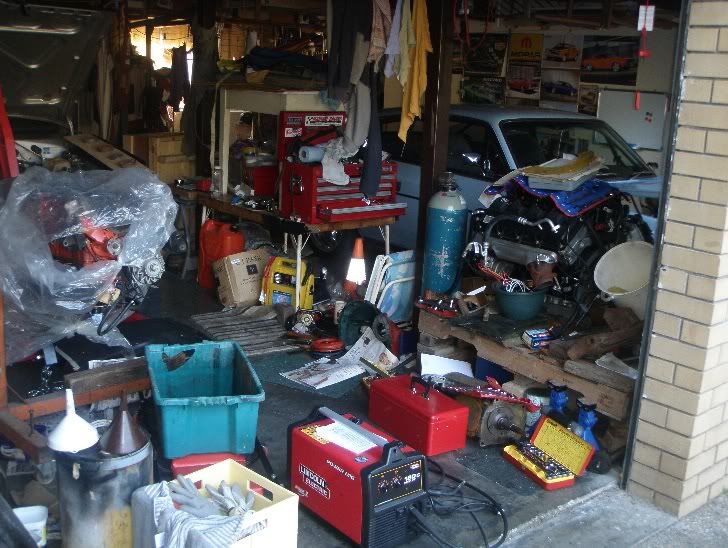
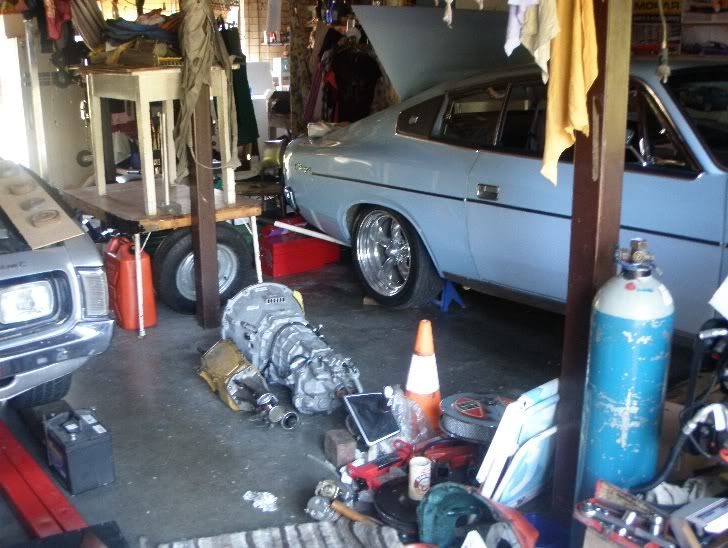
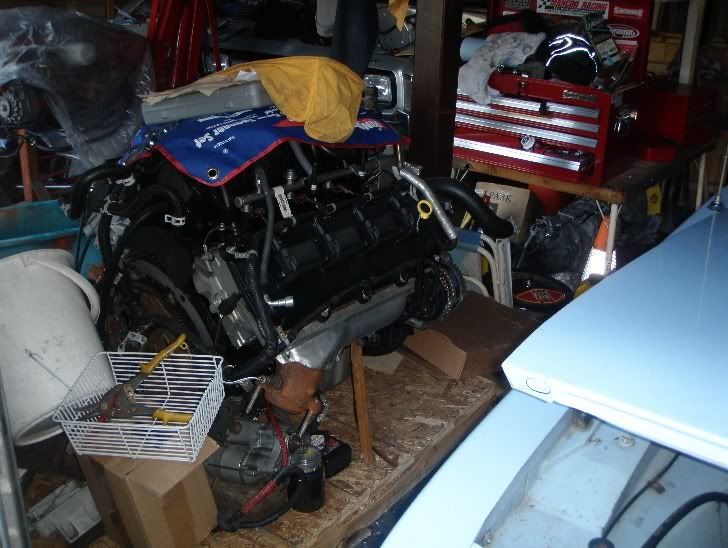
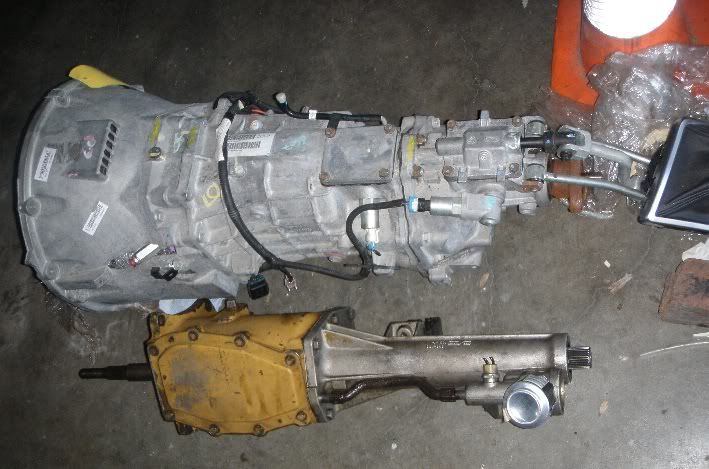
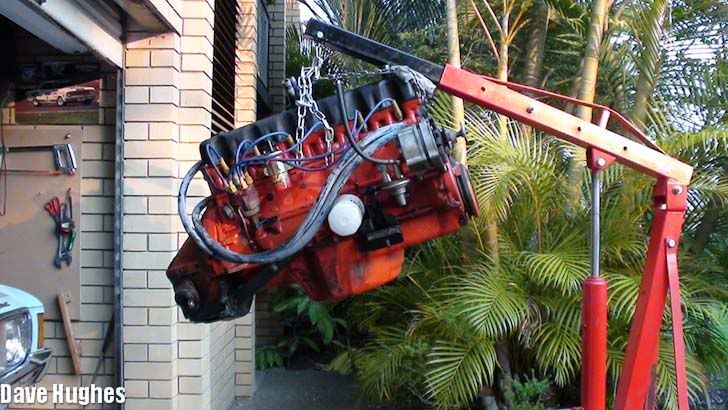
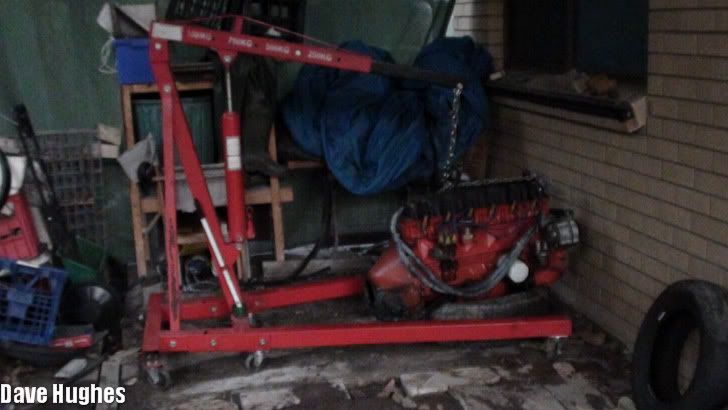
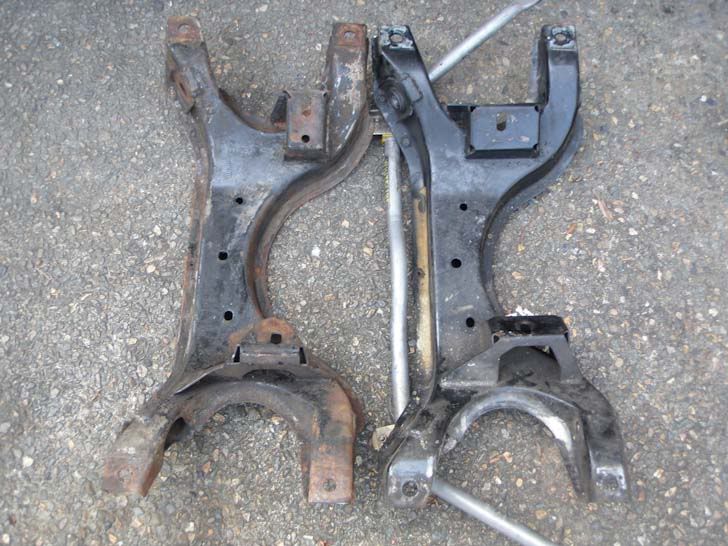
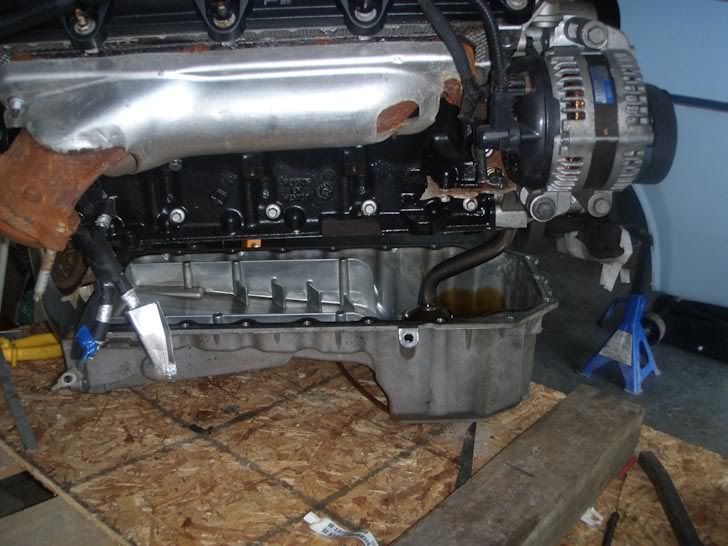
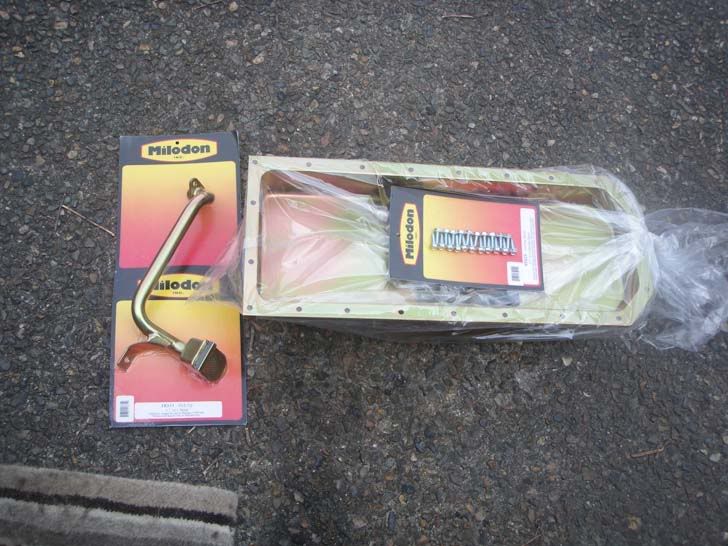
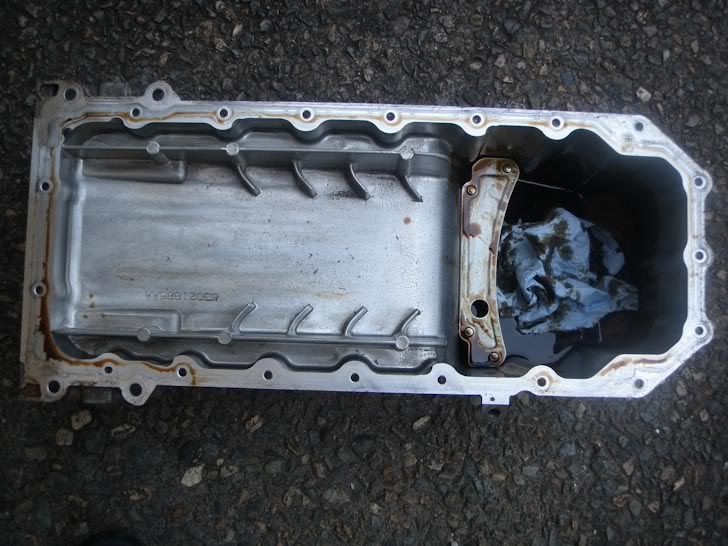
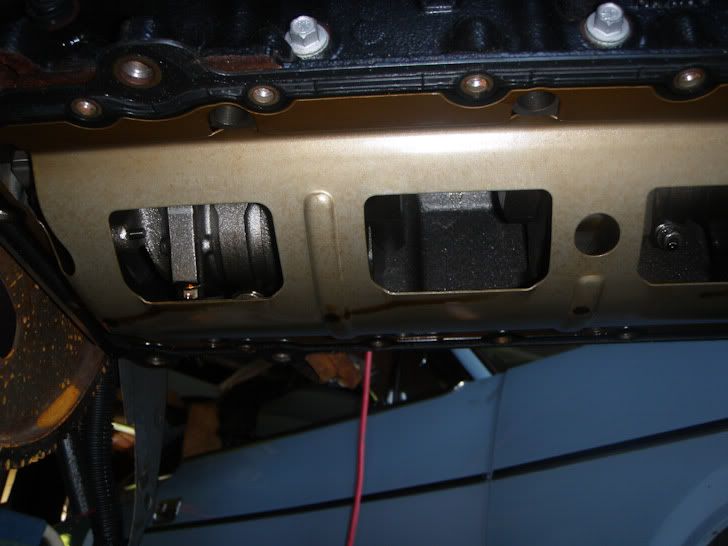
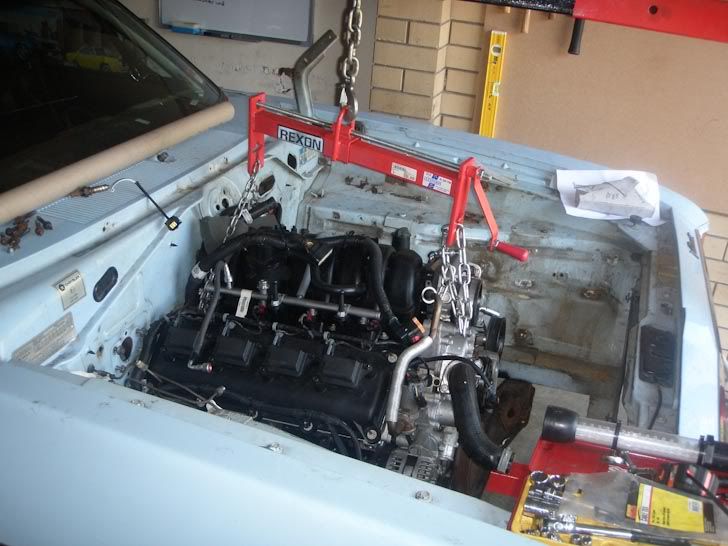
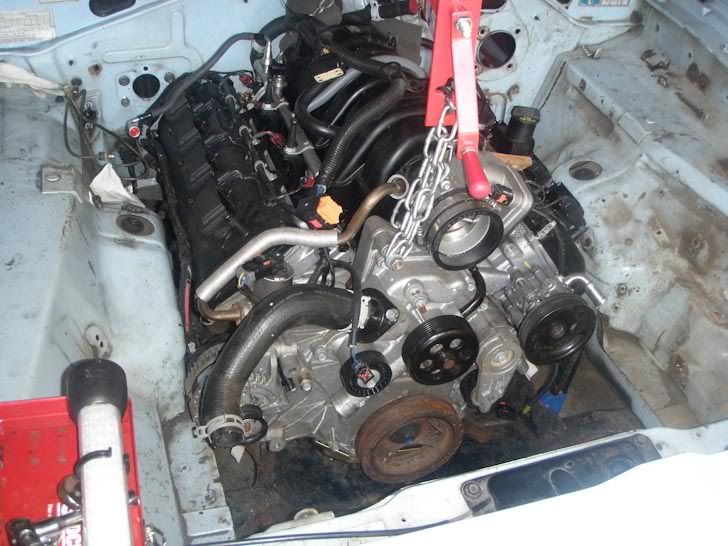
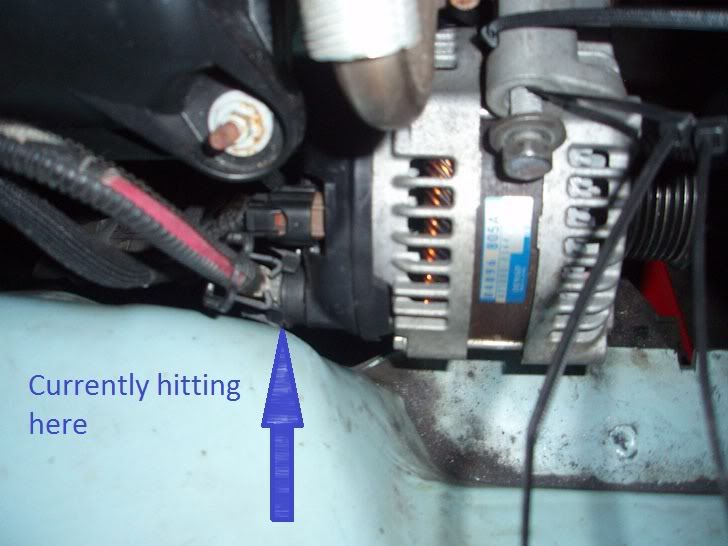
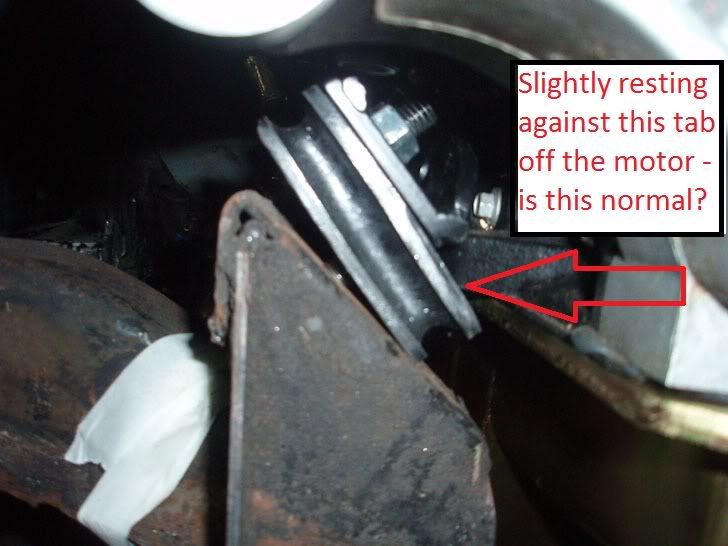
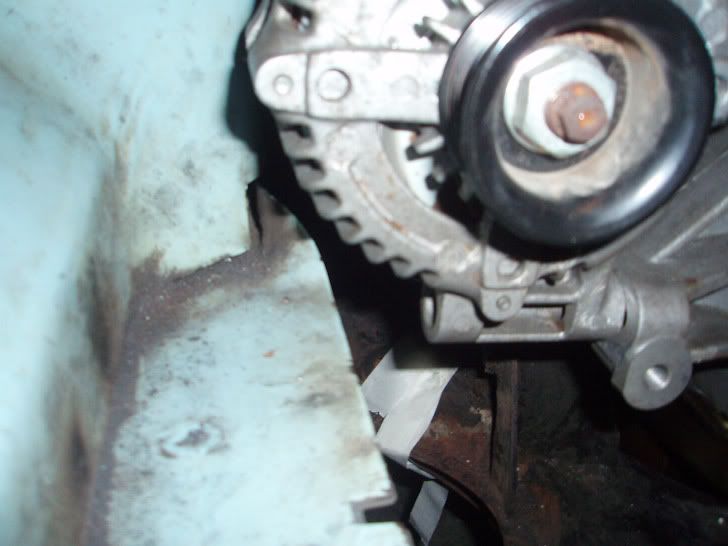
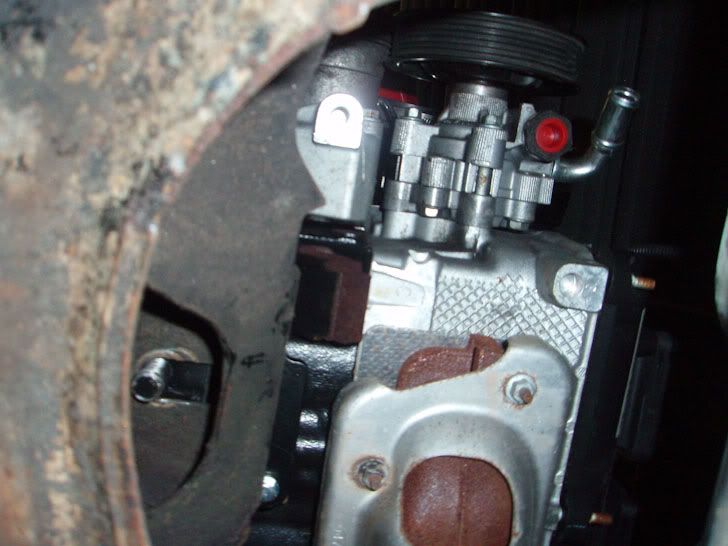
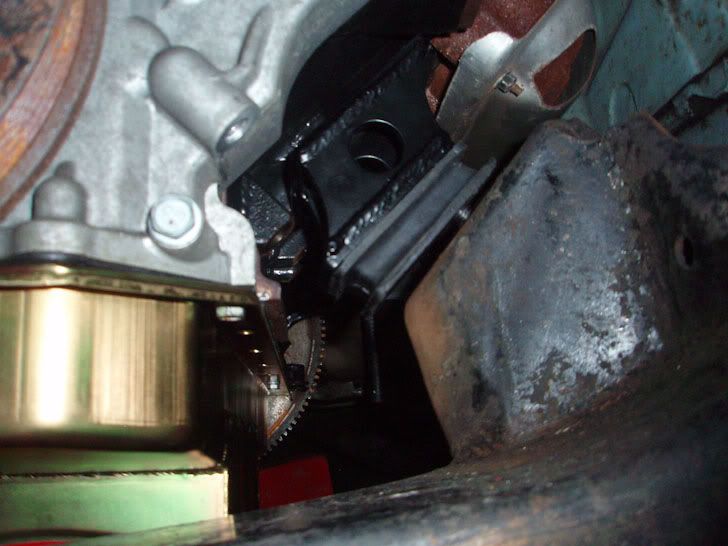
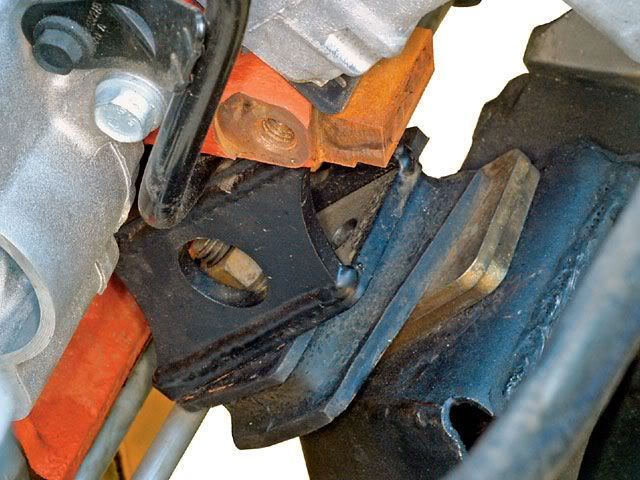
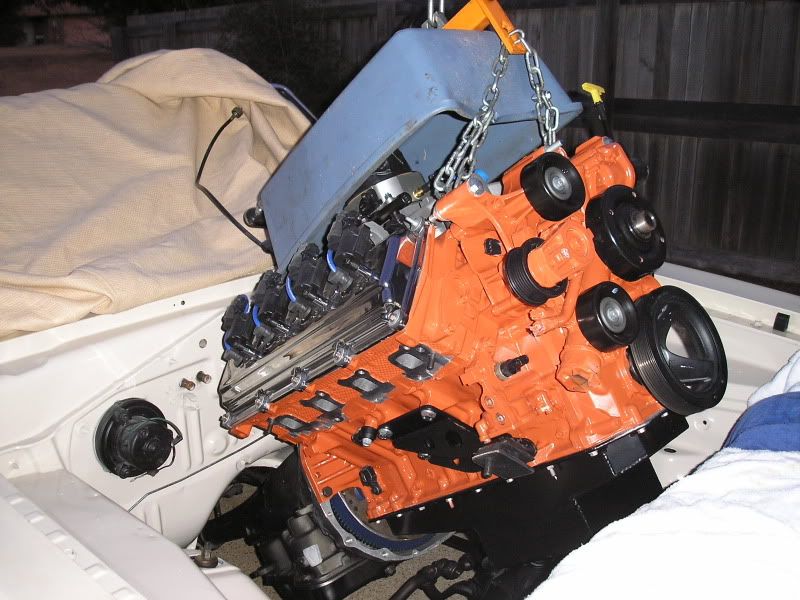
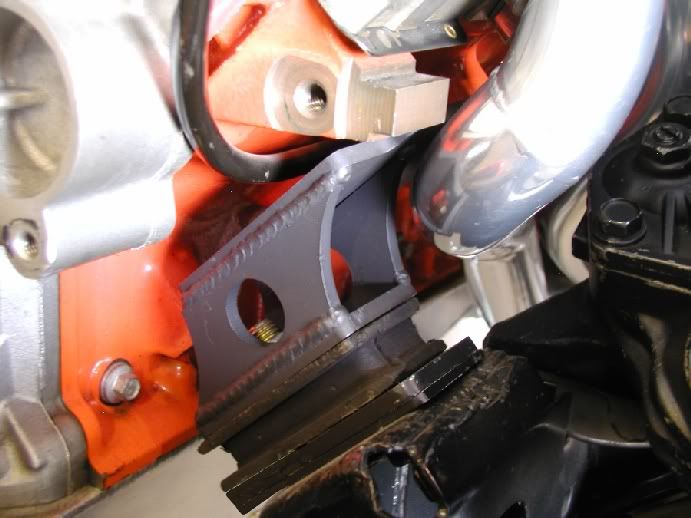
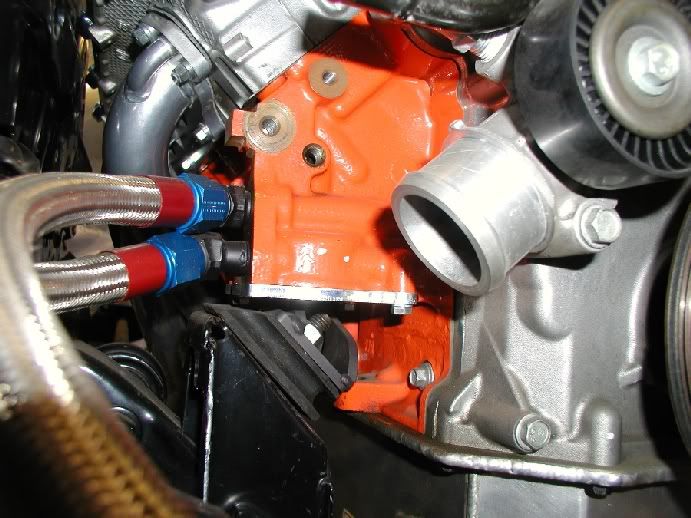
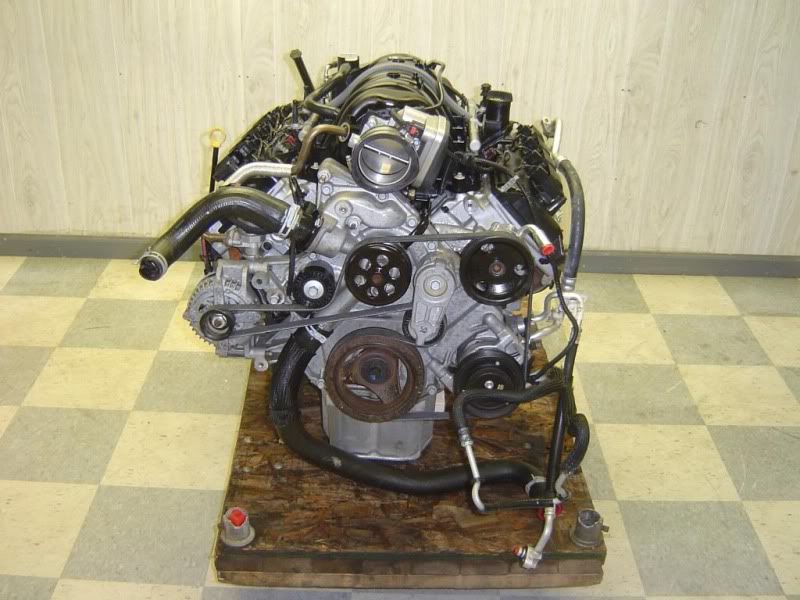
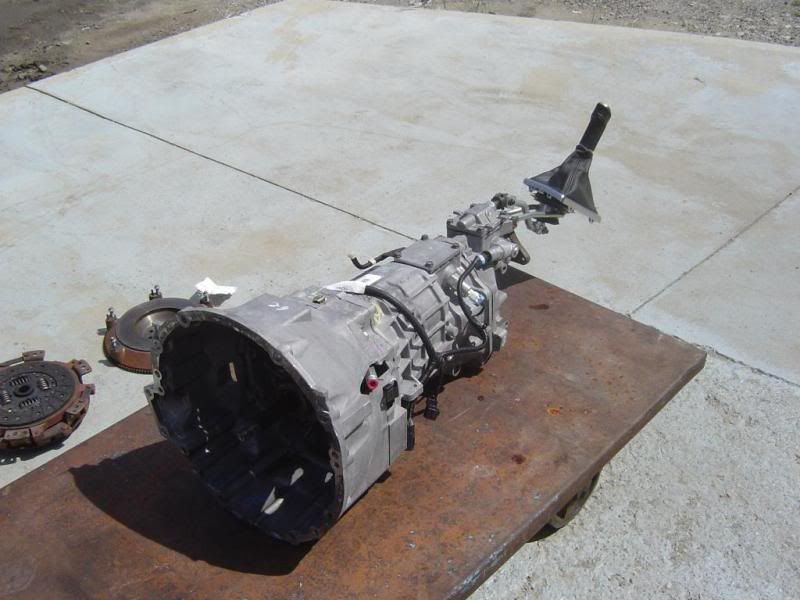
I've now got a 2007 Dodge Charger 5.7L hemi V8, 6spd from a 2009 dodge challenger and a host of other parts for her to do the conversion.

DSC04235.jpg

DSC01621.jpg
 
Well Day 1 - drained all the fluids, removed the driveshaft, gearbox, radiator, carby and manfold, extractors, battery, disconnected wiring harness ready and awaiting for the old girls heart to be plucked.

Day1.jpg

This is the initial **** fight I have to work with, currently having the other Charger off the road makes for a cluttered work space (my pet hate) and mum's mazda has been relegated to outdoor living for the time being....(at least we got the priorities and the pecking order right for the cars!)

day1d.jpg


With a bit of relocating I can now open the Charger doors fully and save myself from being a contorsionist getting in and out of the car and now we have so much more room for activities!

day1a.jpg

This is where the magic has to happen, a bit of inspiration from the Chrysler wall in the background

day1b.jpg

Not too long now before we attempt to get this badboy breathing again

day1c.jpg

As she is at the moment

day1e.jpg

The new 6 spd next to the old 4 spd, who said size didn't matter
Just out of interest, I weighed the two boxes, the 4spd with bellhousing and shifter was about 51kg, and the 6spd with bellhousing and shifter was about 66kg.

day1g.jpg


day1f.jpg

The stockpile of old parts begins.

Day 2 I plan to take the engine out, take off the old k-frame and whack the v8 one in and dummy fit up the rack and pinion setup I modelled off an existing setup.
 
I really like your build. The 6 speed trans is especially interresting as it will need so much to make it work. Ill be following along.

Keep us posted and thanks for sharing.
 
Wow....Sweet project! Can't wait to see more progress!
 
Not much happened the next day, just removed a pile of junk (excessive horns and relays)

P9180111.jpg


P9180113.jpg


P9180114.jpg


Got bored so I started ripping out the seats and kickboards. The floors are so clean, they have a couple cracks however where the seats bolt down. One nasty one on the drivers side and one straight crack about 10cm long on the passenger side. So I relocated the seats to the boot for those backseat drivers, those b@stards are heavier then I thought. I am replacing these with some factory Recaro's out of a Honda Integra which in comparison the seats weigh about 13kg and then with the Valiant bases come to about 17kg as opposed to the 23kg of the standard ones, so 6kg a seat almost making up the gearbox weight difference.

P9180115.jpg


P9180116.jpg


P9180117.jpg


P9190125-1.jpg


P9190126-1.jpg


Day 4: Got home from work and thought I better keep getting a move on, so out came the old girl - came straight out no worries. Should make a nice coffee table.

DSC00050.jpg
DSC00053.jpg
DSC00051.jpg


Not a great deal of progress but my theory which I got off another mate of mine into Chargers, try do an hour or more a night if you can just to keep it ticking over - so that's what I have been doing.

This afternoon I got the front suspension all out

P9230141.jpg

This stuff never seems to get any lighter!

P9230148.jpg


P9210134.jpg

Didn't realise when I was removing the instrument cluster that I was bleeding -ended up on my legs, head liner and the floor, unless the car is feeling the pain of deconstruction?

P9210138.jpg

As far as I can really go before removing the front screen to get the dash frame out - think I'll repaint it like the E38/49's with the gun metal lower section and the interior will end up all black.


P9200127-1.jpg


The old heater box out, obviously it had been out at some stage as old mate had labelled the wires on the heater. This box will be going and being replaced with a brand new vintage air gen IV climate system. In comparison the new unit is 1kg lighter then the old box. No more winters with a terrible heater, and no more summers peeling myself of the vinyl seats :cheers:

Tomorrow morning I'll remove the wiring loom, battery tray (relocate battery to the boot), brake booster/master cylinder out and the wiper motor and I'll be set ready to fit the v8 k-frame. More to come soon....:supz:
 
Well been a few slow days, had a big w/e - sunday was a write off and today I had to help a mate pull his engine/gearbox out. At the moment I've got everything out of the engine bay and bolted up the v8 k-frame and pulled out the carpets.

P9240156.jpg
P9240169.jpg

v8 vs 6

P9260247.jpg

Wet remains on the driver side floor

P9260254.jpg
P9260253.jpg

P9260252.jpg
P9260249.jpg

A slight bit of surface rust, but overall I am extremely happy with the condition of the floors!

P9250239.jpg

Stock dash, soon to be retro fitted with some more modern gauges, shame about the big hole that's been hacked for a CD player....
 
PA010265-1.jpg


PA010266.jpg

There are a heap of bolts on these oil pans, about 20 little ones and 4 larger ones, a couple hidden proved for confusion as to why the sump wouldn't drop. Once I got past that she dropped right off. Very nice design for a factory engine with built in fins/baffles to me seems better then the aftermarket option but this needs to be changed in order to clear the k-frame.

PA010264.jpg

Milodon pickup and sump

PA010267.jpg

Factory sump

PA010270.jpg


PA010271.jpg


PA010272.jpg


The back of the alternator (connections) are pretty much flush up againt the inner guard. Next to no room behing the engine and firewall. The engine isn't sitting perfectly in there, having a little drama with the drivers side engine mount and rubber insulator not sitting correctly. Had to take off the standard LX car exhaust manifold on the driver side to get enough clearance to drop it in (these would have had to been changed anyway) as they just dump onto the side of the chassis rails.

I've had enough for one day....I'm worried that there won't be enough clearance for a rack conversion as the sump sits too far towards the back of the car, height can be negotiated with spacer plates under the engine mounts, the only other way would be to cut and modify the sump. A custom front end like an alterktion looks like a better option for ease and mainly 'clearance' but that is an expensive option!
 
Is there any trick with the engine mount 'sandwich' insulators? The way it is sitting now, it seems like the threads of the bolts on the insulators are hard up (Dragging a bit) on the hole's they slot into on the k-frame. Also the drivers side (right hand drive car) looks like it's at the wrong angle in comparison to the k-frame mount. It seems the alternator was also hitting further back on the inner guard, not in the typical spot you see on these conversions which makes me thinkg something is off?? See the pics below.

P10101112a.jpg


P1010099a.jpg

This is the funky angle I am talking about, also the insulator seems to be resting against that little tab on the motor, is that normal?

P1010112.jpg

Clearance seems fine here (even once the engine will drop when the engine mount seats properly in the k-frame)

P1010104.jpg


P1010103.jpg

MY DRIVERS SIDE

P1010100.jpg

Drivers side

P1010118.jpg

Passenger side

P1010117.jpg

Passenger side also awkward angle

 
No real progress in the last 10 or so days as I was on vacation with the boys in Thailand, but now I am back to reality.

Due to the tight clearances on the drivers side I'm going to center the engine to allow clearance for the alternator on the frame, and room for headers and steering. As for rack and pinion I have to see once I center the engine and possibly move it forward or backwards as to where the rack will sit and may have to modify the sump.
 
Bonny,
Apologies for My ancient memory here...I vaguely (lol) remember
fighting this issue.
Flip the mounts (rubber) 180 deg. I.e., center stud on the mount
into the 'k' frame. offset stud into the block metal adapter mount.

Again APOLOGIES for the input but the angles in the pics touched a 'chord'
in the memory.

mech1.
 
Does anybody have pictures of how the rubber insulators go on, the studs are set at different distances from the edge as mentioned by mech1, I think the Left side of the car has a little hole in the engine mount for the bump on the rubber insulator to seat itself, and the right hand side can only go a couple ways as it either hits on the bottom of the block or is hard up against where the oil filter would go and it wouldn't allow me to put the block off plate on. If anybody has some pictures of both sides that would be great. Do you have to turn them sideways like mentioned in the article http://www.hotrod.com/howto/hrdp_0706_hemi_swap/

hrdp_0706_05_zhemi_swap318_340_sandwich_style_insulator.jpg


I thought this was meant to be the easy part but it is starting to frustrate me big time.
 
I had a look @ Daty's install and I don't see where he mentioned any problem with the mounts/insulators and they look unmodified.

2268158-PC310019.jpg


I had another look on TTI's website and they mention to use 'FACTORY RUBBER INSULATORS' modification is required to the DRIVERS side insulator, however looking at the pictures they provide the drivers side looks unaltered other then the addition of a couple of spacer plates. The passenger side however looks modified to me, it looks as though the top of the rubber insulator has been cut at about 45 degrees to allow it to be installed that way and not make contact with where the oil filter block off plate goes.

57MMA-LH1.jpg

Driver side

57MMA-RH2.jpg

Passenger side

Can anyone confirm that you need to cut the rubber insulator??????
 
I cut mine to fit on the passenger side (similar to picture) but I also modified my K-frame to use the 45 degree oil filter adapter so I had to do some extra grinding to get the insulator to fit. I made the driver side thicker similar to the picture, but instead of shims I had a truck insulator that I modified for use.

If you have not done so check out the new hemi swap forum.
http://www.forabodiesonly.com/mopar/forumdisplay.php?f=83
It is also a geat place to ask questions.
 
-
Back
Top