1970 Dart Swinger FINALLY UNDERWAY

-
Haha, yes I have! It's been sitting for over 2 years while I've slowly been collecting pars, figured it was about damn time to really get underway with my project!

Yeah I was worried something like that might happen if I layed it on the curved side, I took an extra step and put it on top of plywood so the edge wasn't on the hard concrete in my garage.
 
Nice, well thought out, organized. Nice job
 
Ya know for a Ford guy you are doing a dang good job on that Mopar. Nice work and well thought out plan. Going to be a sweet car and represent the brand well. :cheers:

Don't tell anyone, but I run a Ford 9" in my dart. shhhh
 
Haha thanks, working in fords for so long makes dealing with a mopar seem like a cake walk. I just spent the past 3 days trying to fix my exploder's rear brakes because I went in to change parking brake shoes and ended up rebuilding them, new rotors, pads, new calipers because mine were CRACKED, and a whole lot of beating with a mini sledge. :mumum:
Seriously it looked like someone threw a frag grenade into the passenger rear brake...

IN BETTER NEWS,
Going to go get my axle tomorrow for the 8.8 swap, guy at the yard told me "axle? $100 i dont care what you pull it from." So I found myself a not-even-rusty 8.8 under a wrecked exploder. 3.73 geared, limited slip, with discs and a swaybar, gonna go pull the whole thing along with a passenger axle shaft.
 
Well after two days of beating the ever loving dogs**t out of myself I finally have myself an axle, and she is a beauty!

Got my 8.8, 3.73 LSD :cheers:

For $100 I pulled it complete with the U-bolts, shock mounts, sway bar and what appears to be a torque arm option? Swapped out the drivers side axle shaft for a passenger before I dragged it out since I'll have to shorten it anyway and I would rather not pay for it separately.

Everything one the axle is in good shape, real light surface rust on the rotors, light as in a rubbed it away with my thumb to expose clean metal. Truck must not have been sitting out in the yard long.

10102011505.jpg


10102011506.jpg


10102011510.jpg


10102011511.jpg


10102011509.jpg


Couldn't get these bolts so I got a little trigger happy with the sawzall here,

10102011508.jpg


After 2 days of wrestling with it and cutting/slicing/bruising every part of my hands/arms, it's finally home in my garage. :prayer:
 
Not much work with the dart past two days. Mostly been cleaning my garage out, my dad said I could toss all that moldy junk so I went to war. :protest: So much junk I made 6 six trips to the town dump site with my truck today and that was just for one side! Still have some more cleaning and organizing to do but I've got a lot more work space now. Still aiming to have my car on the road by spring, I'll have less time once next semester starts at college so I gotta get as much work done now while I've got time off from work.

10112011517.jpg


10112011520.jpg


Found this Hitachi air compressor next to the scrap pile at the town garage, its a 4 gallon 2HP and it still seems to work. :glasses7:
Now I just need air tools...

10122011522.jpg
 
Now that my two weeks off is over I haven't had as many entire days to spend in the garage. I'm working at the library in the city now as an evening guard, kind of cool the secret stuff you never see thats hidden in old library buildings. The one I'm at now has three basement levels and a boiler room underground full of archives back to the 17/1800s, which can only be accessed from a hidden staircase separate from the main flight of stairs. It's also very dark and dusty down there. Still pretty neat though. :happy2:

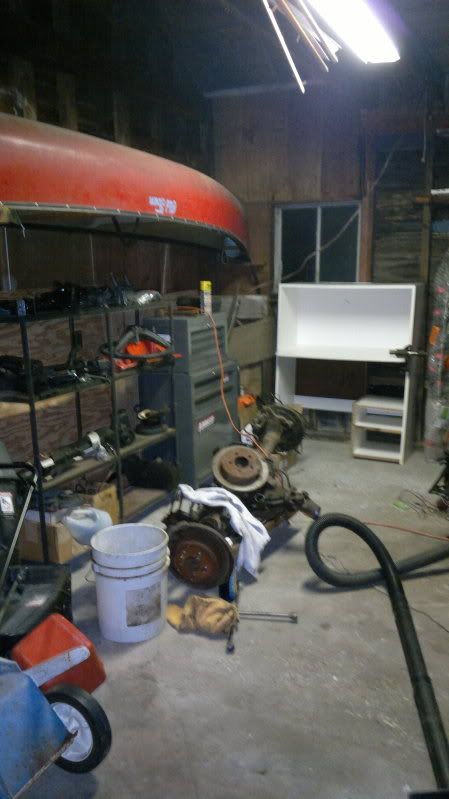
I've been spending most of my time on the car getting all the minor here-and-there bits stripped out of it. Removed the windows and regulators, door panels, body plugs, and a couple other small things.

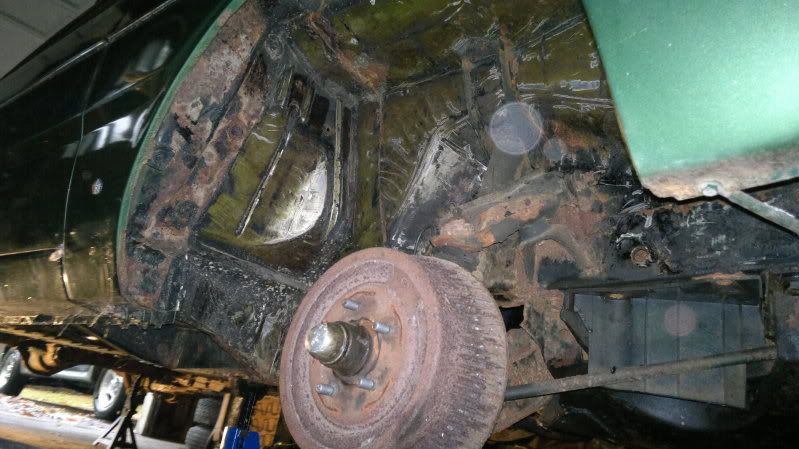
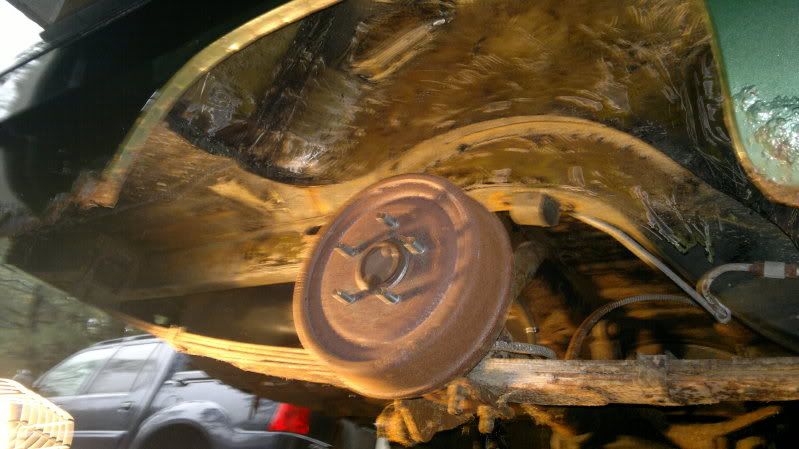
The big project, the one that took up the most time, and that I probably should have used some kind of respirator for. Was heating up that 1/2in layer of undercoating with a propane torch and then scraping it off. Since the car is getting media blasted its going to save a lot of time at the blaster not to mention $$$ to get that stuff off.

Pics time!

10192011551.jpg


10192011552.jpg


And the finale for today!

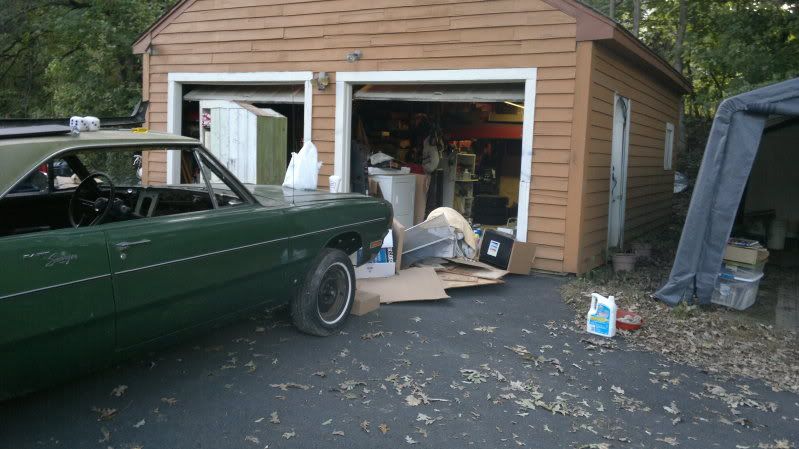
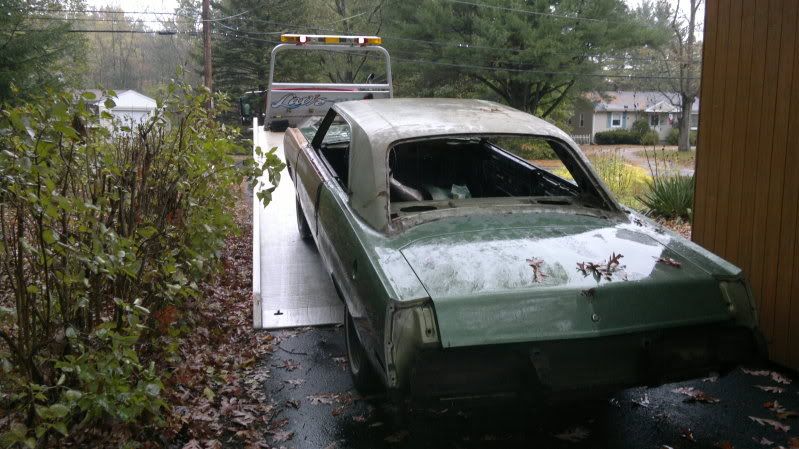
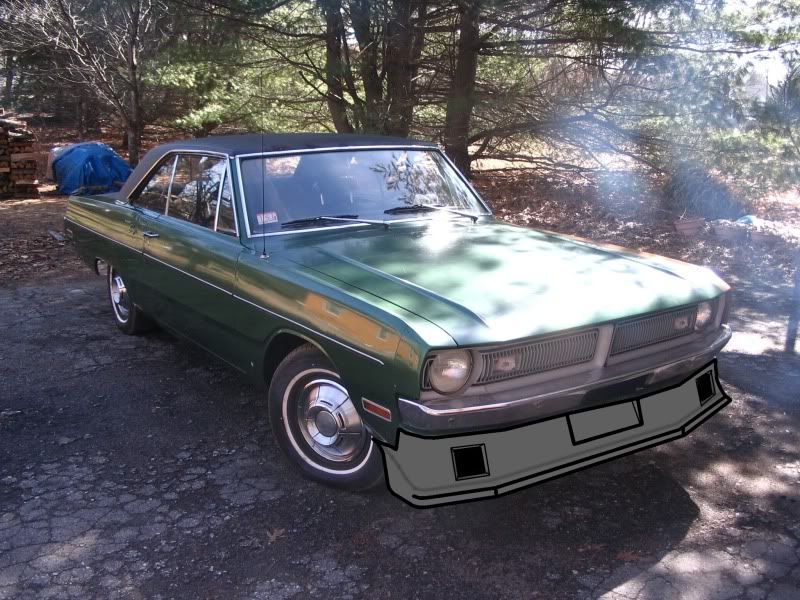
It's been raining steadily so I had to cover the car up while I waited.
10272011591.jpg


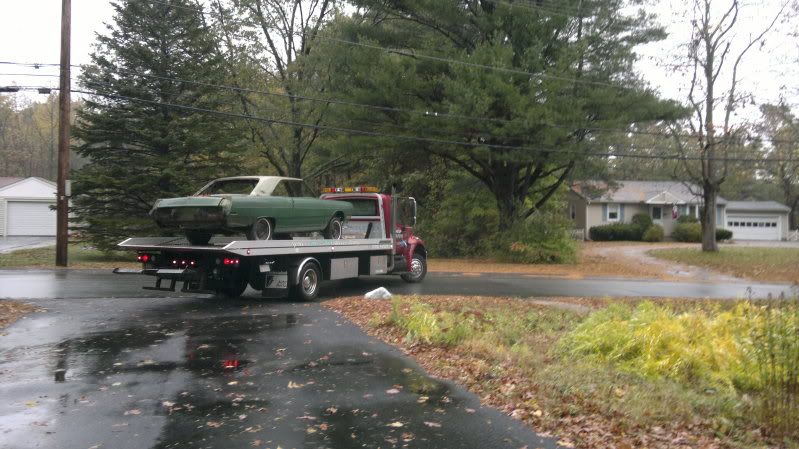
The owner of the body shop showed up with a rollback to haul the car off to his shop, bye bye for now.

10272011592.jpg


Next time I see it will be after it's put on the rotisserie and media blasted next week,

10272011594.jpg


I'm so excited :blob: I think the color I will be going with now is officially F8 dark/ivy green. I'm now looking for a go-wing and a dual snorkel scoop.

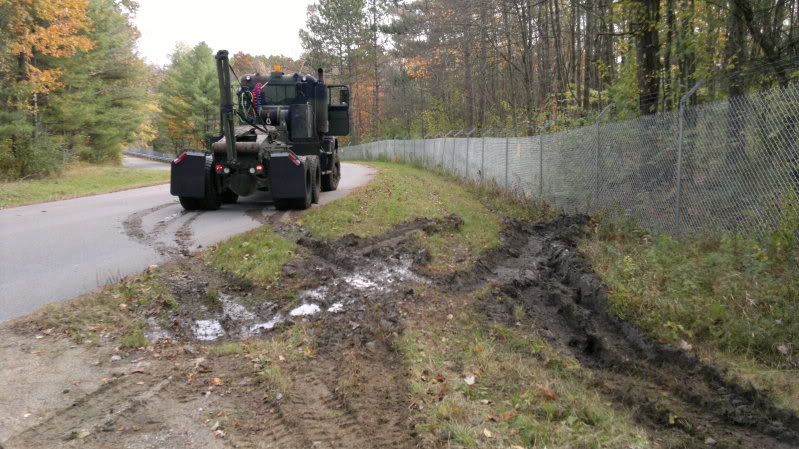
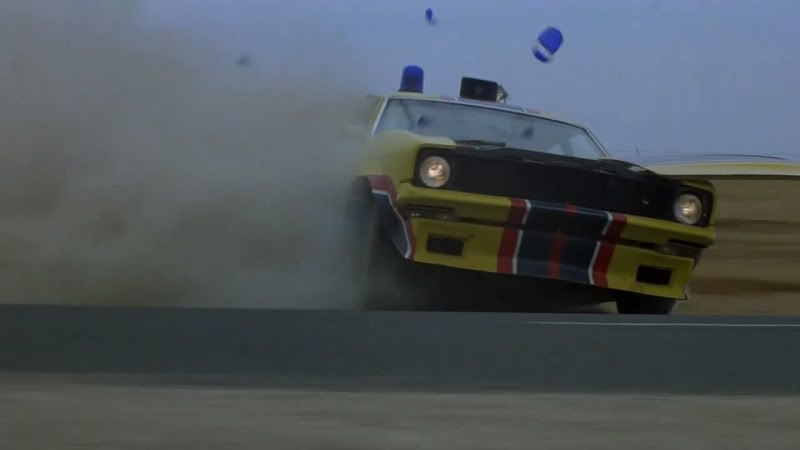
On a more random blog-ish note, did a little unintentional 6x6 mud slinging last weekend haha :cheers:

10222011573.jpg
 
Now that I've got more room in the garage I spent a little time tonight tearing down the engine. Later on I'll be uploading some concepts I've drawn up for a front air dam/diffuser that will blend into the valence, since I'm trying to build this for pro-touring/autocross.

Questions though, does anyone have any information on my block casting number? It's a 360-3 which from what I understand is somehow different from the regular 360's

Got a real great picture of the cylinders, you can really see the crosshatch on all 8 check it out!!

One of the pistons has some unusual wear on off the sides of the skirt, you can see it on the cylinder walls as well. It's smooth and not scored but it looks odd to me. What could have caused this?

In good news I have one of the "CFD" (Central Foundry Division) casting cranks, which from what I understand is a better casting than the other foundry chrysler sourced their cranks from.

10282011599.jpg


10282011603.jpg


Main bearings are nice and clean, normal wear pattern.

10282011606.jpg


10282011607.jpg


Heres that piston I was mentioning, again ideas why it was marked like that?

10282011609.jpg


10282011610.jpg
 
Maybe I can get some replies on this little fiasco I'm starting
oh yeah and what's up with the scuffing on that one piston skirt?

This is the first concept for my air dam/front spoiler. I'm taking a lot of inspiration from the ones used in mad max on the falcons actually. I'll be including ducts to route air through the dam and cool the brakes as well as directing some airflow up under the bumper to the radiator.

I haven't yet started on it but I'll be including a spoiler with an adjustable angle that will be mounted underneath the dam.

This is just a REALLY REALLY rough sketch up that I put together in a few minutes in gimp but it's what I've got so far. I'll be doing a lot more modifying my design. It WILL be painted the same color as the car, my goal is for it to be functional but also blend with the car so it doesn't just look wildly out of place when it's not on the track.

concept_passg.jpg


MadMax11979mp4_snapshot_000357_20111028_210228.jpg


Final plan will be to mock up the dam with wood, then fiberglass over it. Separate the fiberglass and reinforce it with steel support brackets behind it. The spoiler will be affixed with a joint on either side and at the center, and adjusted with a couple small turnbuckles mounted behind the dam.

Thoughts? Creative criticism? :cheers:
 
actually, since you are doing all this hard work, i suggest you take the block, crank, pistons/rods to the machine shop, and have them clean it, and test for cracks/leaks. also, they can check that cylinder,a nd all of them to be sure they are not "out of round"
 
Are those rings stuck on that scared piston if so you got trash in there and it pinched the piston on the rings and caused it to run on that side of the piston and rub the cyclinder wall.That piston skirt is broken at the bottom probably from the heat from the friction of rubbing the wall but thats quit a bit of wear on that piston.It would be a good idea to have that cyclinder checked just for a piece of mind.racing is tough on a motor and you dont want any part questionable in there.
 
Doesn't seem like the rings are stuck, I can rotate/move them around freely. The piston skirt definitely doesn't seem to be broken, it's not cracked anywhere near as I can tell.

Maybe something WAS stuck in there at one time and isn't anymore? It looks almost like something got wedged between the skirt and the cylinder wall briefly because even though the cylinder walls are smooth the skirt is scored around the bottom and looks like something dug into it. Could it have been something during assembly at the factory?

actually, since you are doing all this hard work, i suggest you take the block, crank, pistons/rods to the machine shop, and have them clean it, and test for cracks/leaks. also, they can check that cylinder,a nd all of them to be sure they are not "out of round"

Yeah I've been meaning to find a good machine shop in my area, couple places I have to stop by but I'll definitely have that cylinder checked. I'm trying to save the standard bore if I can.
 
The bottom picture is where it looks to be broken at the bottom of the skirt in the radius,its jagged looking but it may be the metal where it is roughed up and "smirred" downward.Also after looking closer it looks like it didn't get the rings but did smir up into the oil ring groove a little so thats good but it was probably something that got caught in it from the bottom which is still not good.IMO if it was from the factory it would be the same color as the piston skirt it looks fresher than that.The good nes i guess would be the piston is aluminum and the bore is steel so maybe it just roughed up the piston and didn't affect the bore.I know it looks bad but to do that amount of damage the piece wasn't stuck in there very long.
 
Yeah I looked at it closely, its not broken theres just a ridge on the edge of the skirt, from casting maybe. Nothing else in the whole rotating assembly has much wear on it and all the bearings are good so who know what got in there. Ah so the pistons are aluminum, explains why the bore didn't get damaged but the piston was scored.

I guess this just gives me the excuse I needed to buy some KB 107s :glasses7:
 
I'd at the very least replace that piston and make darn sure the cylinder it was in is still OK, assuming you intend to re-use the old pistons. I did not read all the posts.....so not sure what your plans are.
 
nah the piston isn't an issue I'll be going with some KB hypers, but I'm going to have the cylinders checked

appreciate the help from everyone
 
Was all your wrist pin clip in place.the picture of the block show a area in line with the wrist pin and that could have been what got caught in the piston.It's not lined up with the messed up piston.
 
You're right I didn't even notice it was in the same place as the wrist pin! Silly me :banghead:
It also looks to be about the same size as the wrist pin like it contacted there, could it have floated out at one time?

Checking out the piston, it doesn't look like it has any retaining clips for the wrist pin, here's some pictures I took unless I'm missing something but all of the pistons are the same way with no clips. Press fit/semi floating pins looks like.

10312011613.jpg


10312011612.jpg


10312011614.jpg
 
Well the thing is,aluminum heats up faster than steel so the piston "could" swell and cause the wrist pin to shift out one side.But if it did that it would still be shifted so I'm beginning to think that motor was rebuilt and those pistons were put in and the clip wasn't removed and got into the scored piston(this is just a guess).it's been awhile since I rebuilt an engine so I may be a little fuzzy on the factory pistons but I thought the factory ones had wrist pin clips.BTW that 360-3 from what i've read on here is thats the 3rd casting for that 360 block.Nothing "special" about it.
 
Hey Eric,
I finally found you on here! haha. Subscribed, and looking forward to seeing the Swinger back from media blasting.

-Mike
 
Hey Mike!

I was actually looking to see if you had a build thread for your car a few days ago lol. I know you're telling me, I'm excited to see what surprises show up under the paint. Should be done this week if everything goes according to plan (haha, plans) I'll definitely have some pics up.

Well the thing is,aluminum heats up faster than steel so the piston "could" swell and cause the wrist pin to shift out one side.But if it did that it would still be shifted so I'm beginning to think that motor was rebuilt and those pistons were put in and the clip wasn't removed and got into the scored piston(this is just a guess).it's been awhile since I rebuilt an engine so I may be a little fuzzy on the factory pistons but I thought the factory ones had wrist pin clips.BTW that 360-3 from what i've read on here is thats the 3rd casting for that 360 block.Nothing "special" about it.

I'd actually be tossing the idea around that the aluminum piston might have been misshapen by heat at some point, it would explain why it's rubbing like that. It's a low mileage engine but it did come out of a military vehicle, and I have first hand experience the way we run our trucks is not always kind on the engines especially in the heat department. It could have been idling for hours on a 100 degree day then wound up to 7k because the guy sitting in it got bored haha.

I could have sworn I read something about the dash 2s being truck engines and dash 3s being the block that was used for the truck and police/E58 360s (what mine is), something about a slightly thicker casting and different spark plugs.
 
I really don't know for sure about the 360-3 its just what I read on here.now even if it is just the 3rd revision of the cast doesn't mean it's not a better cast.When one wares down beyond spec they rebuild it and that cast may have been a better rebuild and they may have used that cast for specific assembly plants that made those vehicals.And that piston scare doesn't line up with the cyclinder scare so that throws a red flag to me that two things went wrong just hard to say what that was.Now that doesn't mean the motor is shot,just get it check and procede forward,you are on the right track anyway it turns out.IMO .010 over would be the worse case senerio and you mentioned your already planning to get new pistons.i know its extra money but it can be fixed if its out of round.BTW you can take your old rings place them in the cyclinder to see if it is out of round just use a piston with no rings to push it down to that spot and look for a gap,a flash light underneth help see around the ring.The thing that worries me is the groove in the motor has no hatch marks in it that I can tell so what ever happened happened after the last rebuild.
 
Well to my knowledge the engine has never been rebuilt before, I can double check with my caliper again but it's still a 4.000 standard bore. It's a 79 E58 that spent it's short lifetime in an air force dodge. The guy I bought it from had it in his garage for a decade as a backup engine and never touched it other than painting it for some reason.

I'll definitely try using a piston ring to see if it's out of round at all, but if the machine shop checks it out and tells me it's good I'm not even going to worry about it. Drive on.
 
Good deal.BTW I think that spoiler will look cool painted body color but it would help if the bumper was painted also.Either way it will be unique.
 
-
Back
Top