The Great Pumpkin - '71 Duster

-
So I made some more progress. Besides the front end, I got the Shumacher torque strap in. The previous owner installed a similar thing but it was pretty crude - just a flat steel bar that bolted between the left side cylinder head and the top of the front frame rail. I guess it worked but for me, there's always a better mousetrap.

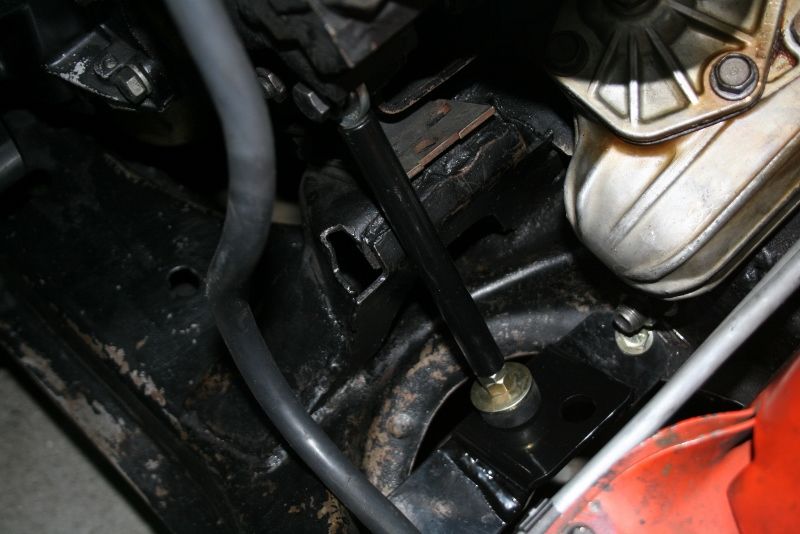
For years I had one of these sitting on my shelf from a B body but of course it wouldn't fit a A body, so I got the correct one through Mancini and put it in. Basically it requires drilling two holes in the K frame flanges and bolting in a plate/rod/heim joint thing which bolts to the left motor mount. It was a little tricky to position the plate/bracket thing so it sat relatively flat on top of the flange. Drilling the rear most hole was done from the bottom because there wasn't enough room to get the drill at the proper angle from the top. I ended up drilling blindly but I did OK. Took a little finagling to line it up but I got it in.

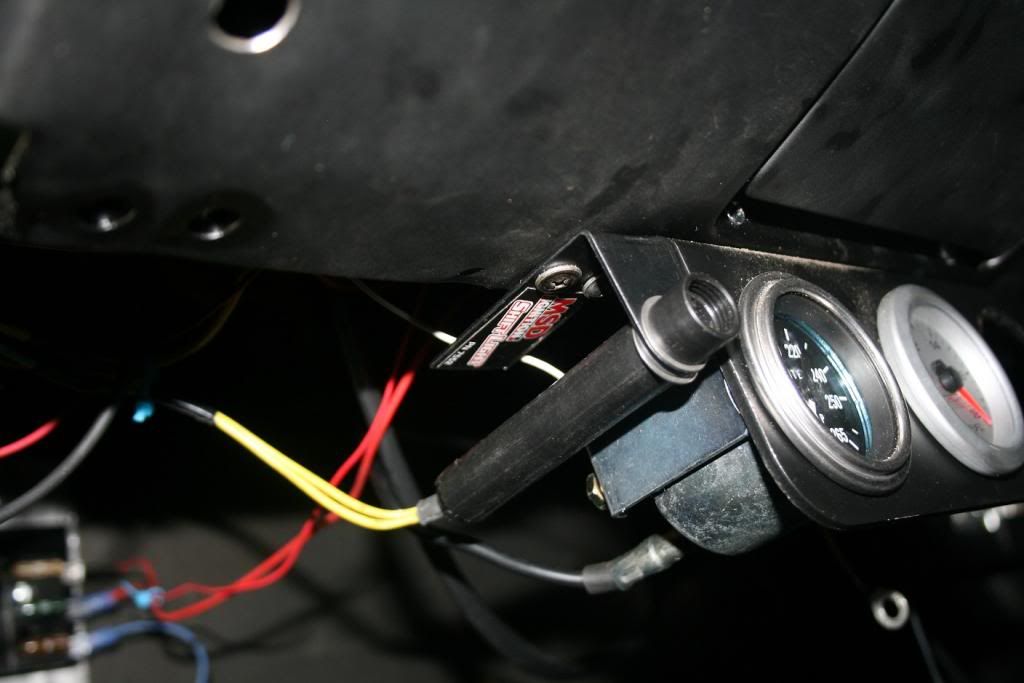
Here's the torque strap.
IMG_9993800x534_zpsdeaec420.jpg


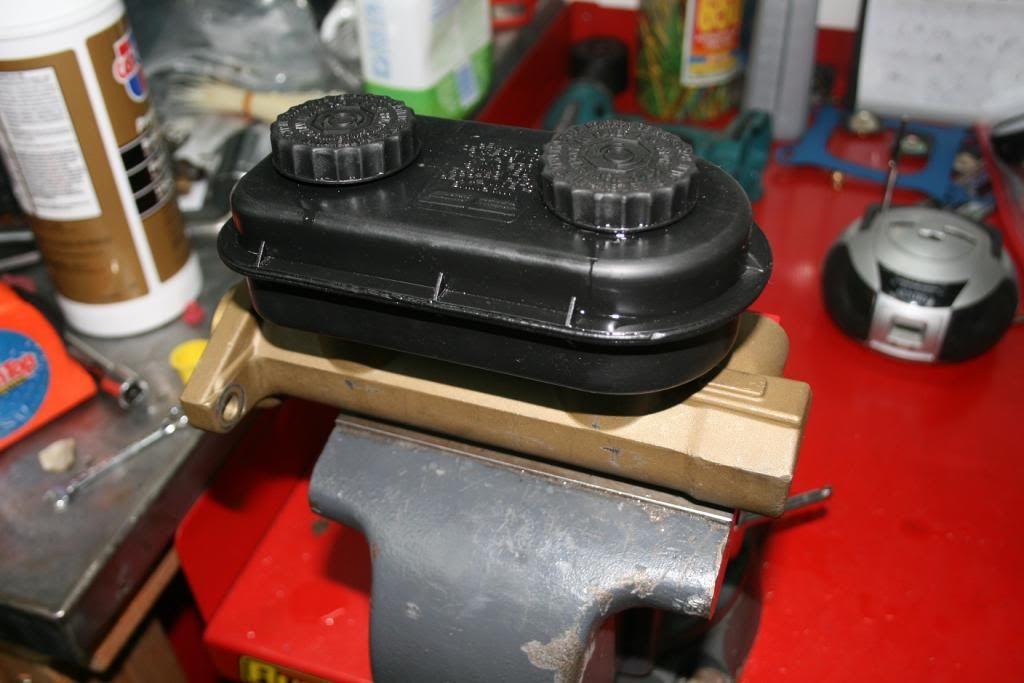
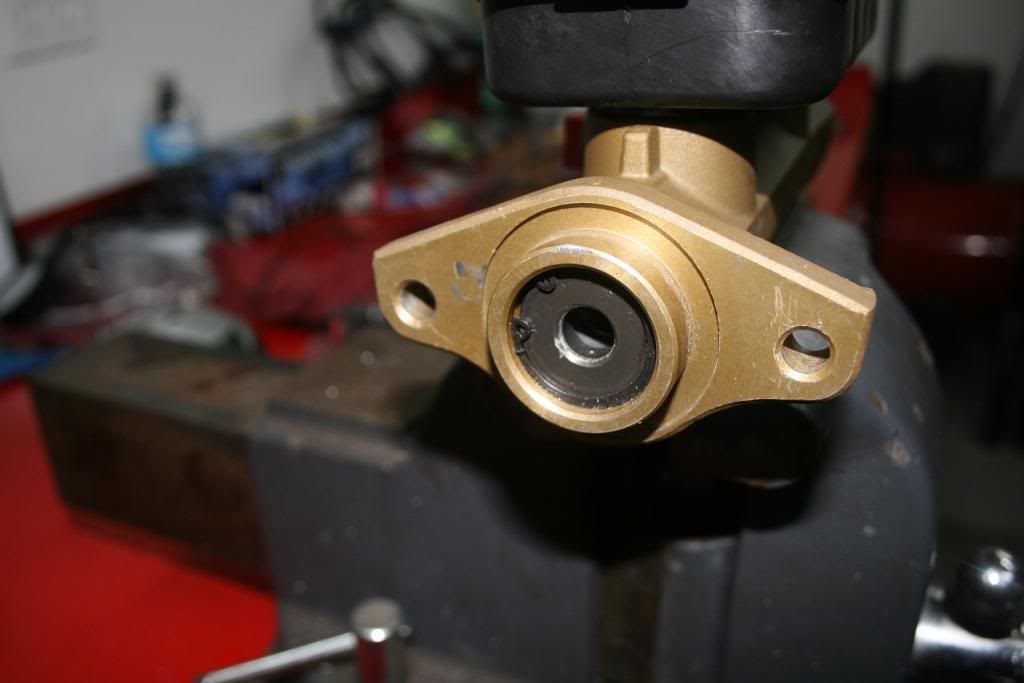
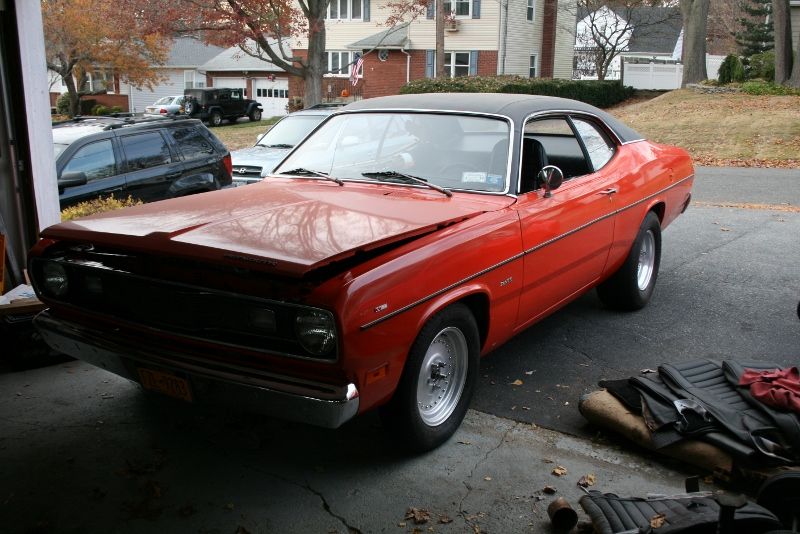
Besides the torque strap thing, I couldn't resist and I got the car back on the ground. After I got the front end rebuilt and in, I got the brakes assembled (except the master cylinder), put the wheels on loosely and set the car down. Its been about a year since I first took it apart so I'm feeling pretty good to be at this point. I am adjusting ride height and some basic alignment things right now. I will have to take some things back apart to finalize everything but it all looks good and rolls pretty easily. I'm stoked!

Here's a pic of the car off jack stands and rolling for the first time in almost a year!
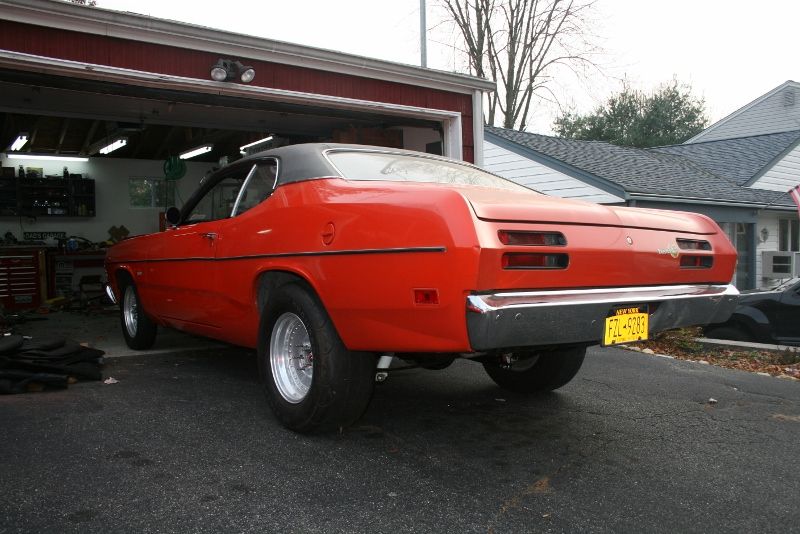
IMG_9987800x534_zpsd2a894f3.jpg


From the back.
IMG_9988800x534_zps8ac8f635.jpg


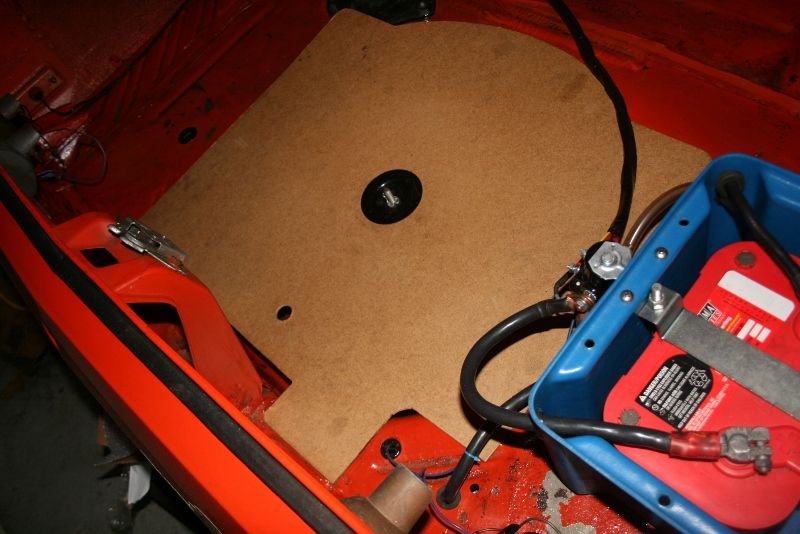
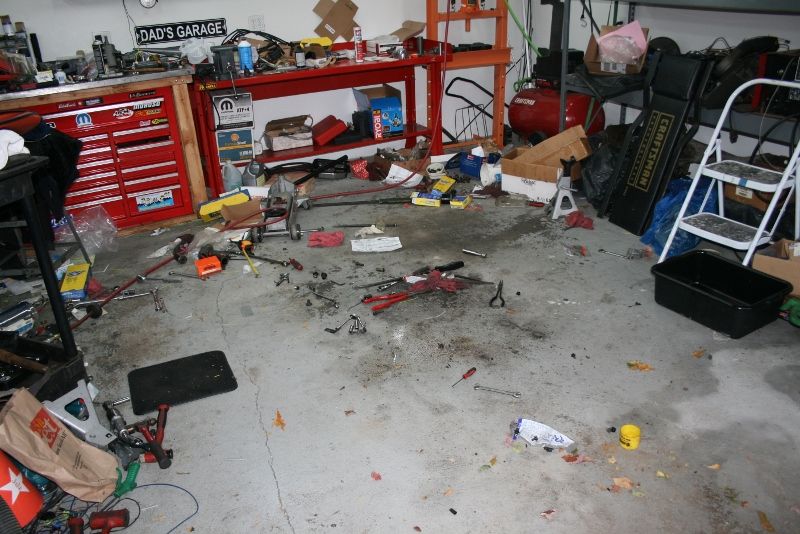
And here's the hole and the mess that was left after I rolled it out. I cleaned up a little after it was out but I have a long way to go. Still, it's a great feeling to see measurable progress.
IMG_9990800x534_zpse2dbf5ec.jpg


More to come!
 
So I was finishing up the front end and tightening everything up. Unfortunately, I cross-threaded the right side lower ball joint stud. It was spinning and not tightening so it needed to be removed and inspected. I was eventually able to power the castle nut off with an impact but the damage was done. I cleaned the threads but ultimately decided to order a new one. I should have known to tighten it with the car on the ground but I was all amped up to get everything in and I blew right through the proper procedure. Haste makes waste or so my wife likes to say. Such is life with textbook ADHD, skipping steps to get to the end result.

So besides the ball joint, almost ALL the brake lines I made are leaking. In my recent past, I was/am an ASE Certified/Chrysler factory trained, Level 4 technician in brakes. I know how to make a flare and I have good flaring tools. I took my time with this stuff, discarded ones I didn't like etc. But again, despite cranking them down with a ton of force, almost all of them leaked. It was driving me bananas. The leaking fluid ruined some freshly-painted parts and the fluid was all over the floor.

Turns out it's the stainless fittings. I called Inline Tube which is the place I got the stuff from. I went through my explanation over the phone and the guy told me very plainly to loosen and tighten them several times until they stop leaking. I've never really had to do that before but I guess the stainless fittings are little harder to get to seat to crush/form the seal. I suppose it makes sense but its no less frustrating. Some of the fittings are tough to reach. It can also get messy with the fluid leaking all over the place. I will try to repaint some of the stuff like the rear end housing but the left side brake backing plate would be tough to do without taking it all apart again.

I also decided to get a different shifter cable - I ordered a 4 foot 'performance' one instead of the 'super duty' type which is a lot less flexible and tougher to work with. I did not like the way the 5 foot cable was routed. It is basically laying on the headers and there isn't a whole lot I can do to alter it. I tried to run it to the passenger side first then back under the bellhousing but the angle of the cable was to harsh where it attached to the bracket on the pan rail. My idea here is that the 4 foot cable won't have to be looped as far forward. We'll see!

Hopefully I can get this irritating stuff resolved soon. I am getting close to being done with the reconstruction phase of this project. There's not a whole lot I can think of that needs to be finished - basically just fluids, alignment and basic tuning once I get it running. Stuff from Summit just showed up at my door so I'm gonna go bang this stuff out when I get a chance.

More to come.
 
Must be nice to have it back on all fours.

Strange, I thought the ball joint was the only part that SHOULD be torqued before setting it on the ground. I guess I will reread before I set my car down. thanks for possibly saving me a balljoint!
 
Must be nice to have it back on all fours.

Strange, I thought the ball joint was the only part that SHOULD be torqued before setting it on the ground. I guess I will reread before I set my car down. thanks for possibly saving me a balljoint!


Well, you're right and I stand corrected. I read the FSM ('67 m.y.) and it did not actually say anything about putting a load on it when tightening.

However... often you do need to put a load on it to help prevent the stud from spinning. When I was working, I'd often put a spin jack under a lower control arm or stick a pry bar between the knuckle and arm for that very purpose. Slightly different set up on the older cars but same principal.

While getting out the cross-threaded one here, I put a floor jack under the lower arm and I stuck a pry bar between the lower control arm and the back of the spindle to load it which helped to keep it from turning. I was thinking that it would probably help to have it on the ground next time when doing the final tightening to prevent it from spinning again. I didn't really think it through when I typed that but it actually might be kind of hard to reach the nut with the wheel on and the suspension compressed.

Maybe I'll just try not to cross-thread it this time. :D
 
So I put the new ball joint in and managed not to screw it up.

All the front end parts are now cinched down, cotter pins in and greased.

Did some preliminary adjustments for ride height and obvious incorrect toe. I measured from the center of the front fender through the center cap on the wheel to the floor - 27". Might lower it a little more but I have to take some more measurements and see where its at. Before I took it all apart, I made sure to take measurements and write them down so I had a place to start. It's already about 3/4" lower in the front than before.

Didn't look at the brake fittings but I didn't see any new leaks or larger puddles so I'm on the right track with that.

Also, finally got my clutch fan figured out. I needed to go with a 17" fan blade to fit in the OE shroud I had. For whatever reason, the 18" one I had was hitting the shroud. The radiator is coming out again so I can straighten some of the fins that got smashed when I was wrestling with the 18" blade. Hope it doesn't leak.

So a productive couple hours today. As long as all the things I messed with don't come back to bite me.

More to come.
 
Great to see you redoing a lot that needs to be done.
 
for the brake push rod check ace or miners for some all thread couplings. i needed them to elongate my parking break cable but ended up welding it instead because i didn't check:banghead:

edit: just saw you ordered an adjustable one. just use that much. better then my idea.
 
for the brake push rod check ace or miners for some all thread couplings. i needed them to elongate my parking break cable but ended up welding it instead because i didn't check:banghead:

edit: just saw you ordered an adjustable one. just use that much. better then my idea.

Funny how things work out, I ended up using the original and didn't need the adjustable one.

Guess I'll add the adjustable pushrod to the long list of things I bought thinking I needed but ended up using something else. We'll call that the Doh! list cause I like to spend dough on things I don't actually need.

ive got a few thing on that list and a "well i broke it but the parts might be handy" pile
 
Great progress !

Thanks!

It's been one step forward, two steps back lately but it's getting there.

I was out in the garage yesterday afternoon, it was COLD! Gonna have to start using the space heater.

So for those that have been following along, I wrested with the 4 foot shifter cable I got the other day and I'm not sure if its going to work. The shorter cable solves the issue of proximity to the headers but the way it is right now seems to be a hair too short for proper function.

If you're familiar with B&M ratchet shifter cables, you know how they get installed with the little swivel at the end. On this one, the swivel is all the way at the end of the threaded rod and it barely goes in and out of the selector lever. In addition, the point where it gets secured to the bracket is also all the way at the end of its travel. I did get it in but the shifter was binding between 2nd and 3rd so I didn't want to force it. I thought it may have been hanging up on something but I couldn't see for sure, there's a lot of things in this one little area by the starter/bellhousing/firewall to cause interference. Guess I'll just have to keep messing with it.

Conversely, I had the idea to go back to the 5 foot and use the original hole in the floor which was farther up the trans tunnel. That might help to take up some of the extra length of cable that was laying on the headers but still have it be long enough to work. The instructions say it should exit as close to the shifter as possible but that may not be feasible in this case.

I will also add that I'm glad to have a place to sound all this out, even if I'm just talking to myself. Writing these processes down can help to visualize things from different angles. It can be difficult to think clearly when you're laying on your back on a cold floor with your arms reaching around header tubes and cooler lines while scraping your knuckles on undercoating. :tongue5:

So yeah, one step forward, two steps back.
 
Wow, been over a month since my last update. The holidays suck, I've had absolutely no time to myself for weeks. I got out to the garage a few times here and there but not for any extended amount of time.

I did however manage to sort some things out though, mostly in regards to the electrical stuff I did. Pretty sure I did an OK job rewiring the car, no major problems, fires, explosions etc. I needed to replace a couple bulbs and fuses here and there and change some connections around but it was all pretty easy and it's finished.

I have not started it yet though so that is the last thing on the electrical punch list. I was waiting on an oil pump priming tool before I fired it up. It's been sitting for a while so I thought it was cheap insurance to get one of those and make sure I had oil in the right places before ignition.

Got some new 'resto'/detail type things also to spruce the car up - a new dome light lens, glove box liner and a trunk mat.

The only things left to do at the moment are to finish trimming the right side of the new carpet, install the passenger seat, install the new resto pieces, calibrate the A/F gauge, bleed the brakes, prime the engine, check the valve lash, install new spark plugs, fill the fluids and fire it up.

Once it's running, it's on to phase 2 which is tuning. It will need to be aligned before I drive it though which may not be until the spring. Right now there is too much salt on the roads to even consider taking it out, even around the block. I will be happy when the car is running though, I'm tired of the build part.

No pics of anything right now. More to come in the coming weeks though.
 
So the interior in the Duster is pretty much done. I really can't think of anything else there is to do. Carpet is all in and trimmed, both front seats are installed, steering components, dash, lights, gauges, glove box, dome lens etc. all done. Check!

I also accomplished a big step in repairing my heater delete fresh air vent. I removed the heater box a while back to save weight and de-clutter the car. When you do that, you're either going to need to put it back in or find some way to cover up the vent hole under the cowl. Right-side heater delete fresh air vents are basically impossible to find but I actually have two of 'em. One of them however, is different than the version most would recognize from an early-A/Hemi Dart application.

In any event, both vents had broken parts, the 'real deal' being the worse of the two. The original hinge was rusted and broke off at the ends, taking part of the vent door lip with it. The other vent is cable operated like a B-body but was missing the bracket for the cable.

The one I ended up using I actually got from Australia (thanks Gary/Aussieplymouths!) and fits an early '70's Valiant/Pacer/Ute. It is in fact their driver side vent since their steering wheel is on the 'wrong' side. It mounts the same though and the sheet metal opening on the underside of the cowl is also the same. It's ABS-type plastic as opposed to the fiberglass compound material of the early-A style. It's cable operated, is a one-piece body and is lighter. I thought about making a bracket for the cable to use it like that but I would have had to figure out where to put the cable. I abandoned that in favor of making a new door.

I had some 22 gauge sheet metal laying in my scrap pile. I had no plan to make a door for it initially but I figured I'd just see what I could come up with. I traced the original door I had and cut out the rough shape. I used a hammer and dolly to form the metal. I started working on it and a few hours later I had a door. I even replicated the little lip of the original to seal it against the lip of the vent box. Came out OK.

The hinges on these things are what always seem to cause problems - they rust/seize and eventually break. The hinge is basically just a rivet put through two protruding pieces of sheet metal and joined together. Not the strongest design but probably the cheapest.

So seeing as the hinges were shot and/or broken off, I had to figure out how to make this thing work like an actual door. I spent some time at the hardware store trying to figure out which hinge would work best. I ended up with a 'semi-overlay' type. The hinge kinda sticks out and does not interfere with the door when opening. This involved the least amount of alteration to the vent box as well, only had to make two additional small holes to mount the hinge. It's a little too big for my tatse and looks kind of out of place but it works. Plus, it's much sturdier than the original pivot hinge.

While looking at the hinges, I found a tension spring closure latch that looked like it would work to keep the door shut. It's basically like a mailbox latch. Works great - you can flip it open with your finger but it holds tight when closed.

Also dealt with the some details of the trunk area. I had a really nice trunk board left over from another project that I used. I had to modify it a little due to the location of the battery in the trunk and the wiring that goes through the floor. I cut out a corner of it so it wasn't interfering with the wiring. I was also lucky to find a hold down stud/cup/wing nut assembly on Ebay for cheap to complete the job.

I had ordered a trunk mat from a supplier a few weeks back but it wasn't what I was expecting. The material and pattern were completely different than what I took out of the car. I had unknowingly chosen an alternative to the OE rubber/gray plaid and it did not look right. Legendary sells rolls of original material that you cut to size. I may go with that so I don't have too mess with customizing a repro one to fit around my battery box.

Here's some pics finally after a long while without.

Here's the interior with both seats in.
IMG_0100800x534_zps8f5dc273.jpg


Here's the trunk with board. Note cutout in the lower right corner for the cut-off switch wiring. Trunk board hold down stud/cup/wing nut keeps it in place.
IMG_0102800x534_zpsc3d96c80.jpg


So here's the modified, right side vent box.
IMG_0101800x534_zpse276c414.jpg


A shot of the original early-A style door for comparison. Note broken hinges top and bottom.
IMG_0099800x534_zps80d1b209.jpg


Two more shots of the door, hinge and latch. Its gonna get painted and have some better hardware but this is what's going in the car. I may try to work on the other box at some point down the road but in the interest of moving forward, this will do for now.
IMG_0097800x534_zps6ccb5eaf.jpg


IMG_0098800x534_zps20c49f36.jpg


Hope to have some time over the next few days to fire the car up. Got my oil pump priming tool and new plugs all set to go.

More to come!
 
So I've finally finished things up to the point where it was time to start the car up for the first time in over a year - NO DICE! It turns over but won't fire. I've been through everything but I can't seem to figure it out. There are so many deviations from stock at this point I'm kinda feeling a little lost.

Here's what I've done to troubleshoot so far;

  • charged battery
  • checked grounds
  • verified distributor/cam timing about 5 times - correct
  • verified MSD is working following troubleshooting procedure in manual - good
  • checked voltage at MSD signal wire - good
  • checked voltage at MSD power wire - good
  • gapped spark plugs to .045"
  • verified plug wire firing order - correct
  • verified ignition switch wiring with FSM diagrams - good
  • rebuilt carb due to leaking secondary bowl
  • verified fuel getting to carb, good pressure, float levels set
I thought maybe the plugs were getting fouled so when I re-gapped them I cleaned them off but no change. They're probably fouled again from cranking without firing, probably need to go clean 'em off again.

There's old gas in the tank but it burns fine. It's a mix of pump 93 and Cam 2 100 octane unleaded. Does not smell bad or anything. I really don't think that's the issue. It's been pretty cold here so that may be a problem in itself.

It was also blowing fuses when the key was switched to the start position but it was because the alternator was powering up on the wrong circuit. I moved the wire to a different terminal in the fuse box and the fuses were good the next time I turned the key on.

So I'm out of ideas for the moment. Very frustrating but at least I've found these little issues and resolved those. Maybe someone can give me an idea.

:banghead:
 
FIRE, FUEL, AIR

Sounds like fuel and air are ok, what about the fire?
from your list above it doesn't sound like you verified if the spark plugs are making spark. you can use an in-line tester or do it the old fashioned way connect a loose plug to one of the wires and see if it gets spark.

you mentioned MSD, is that a box, or a coil? verify the coil is sending juice and the spark plugs are sparking to make sure that juice is getting through the wires. sometimes custom wires or tugged on wires are the invisible culprit


best of luck, let us know how it goes

You are absolutely right, I did not verify that there was enough juice going to the plugs. Probably not the best method to verify spark but I did hold the #1 wire away from the plug while cranking and it shocked the crap out of me so I figured it was OK. I did in fact pick up an inline tester this AM after I dropped my kids off at school. Hope that sheds some light on the situation.

It's gotta be something dumb. I mean, it wants to start. Par for the course with these types of things I guess. I'll figure it out. I hope.
 
Got the car running today!

So after about a month of trying to get this car started and going over every single thing I breathed on, I realized two things; A) I needed a new battery and B) I needed fresh gas.

So this week I got a brand new Red Top. I think the old one might have had a bad cell - it wouldn't hold a charge. It was 7 years old anyway, time for a new one. On another electrical note, it appears I have things wired correctly (save for one thing - more in a bit).

Next step was to drain the old gas from the tank and fuel system. After that, I took the tank to a radiator shop and had them boil it out to get rid of whatever crap was in there. When I got it back, I really cleaned up the outside of the tank, to the point where I had the D/A out trying to smooth out the top of it a little. Got all the grime and loose rust off and coated it with POR15 to prevent any further oxidation. The tank pad was shot so I used roofing tar paper and cut it to relatively the same shape as the OE pad. The tar paper won't absorb moisture. I used two sheets. Done.

So back together it went. 5 gallons of CAM 2 100 octane into the tank and turn the key. It didn't fire right away, it balked and bucked and backfired through the carb. I went on like that for a bit but I knew it was close. In a moment of brain fade, I failed to realize that the timing was way retarded. Turned it CCW and it fired. Took a while and several attempts to get it to stay lit but it finally ran. It's been over a year since it last ran, probably somewhere around Nov./Dec. of 2012.

So once it was running, I started checking timing, fluids etc. Save for one fitting on a tranny cooler line, there were no leaks observed. The cooling components seemed to be doing their job OK, the temp gauge was at 180. Good oil pressure the whole time, no concerns there. I checked the oil for metal, nothing seen so I guess that all the bucking etc. didn't do any damage. It did run fine before I took it apart and I didn't do anything to the engine but it was good to see anyway.

So the one thing that went totally wrong was the alternator - it wasn't charging. I'm not sure why. I put the car away before I figured it out but I have an idea that it might be the connector at the back of the alternator. It never felt like it was in all the way. More likely it's the wiring back to the trunk which I am dreading. Hopefully it's not a big deal what ever it is. I was so focused on getting the car running it took me a while to see if the battery was charging once it stayed lit. Once I saw that it wasn't, I shut it down but my brand new Optima was drained! I'll trickle charge it next time I'm gonna start it but I'm annoyed that I discharged a brand new battery.

Also, the brake pedal is going to the floor so I will definitely have to bleed the brakes again. I did it myself last time so I'm gonna enlist a helper this time around.

So overall I'm stoked. It was a big weight off my shoulders to know that it runs after all the crap I did to it over the last year. I'll figure out all the other stuff soon. Good day!

More to come.
 
I drove my car today for the first time since December of 2012. I can not describe the high, it was pure joy. Sure, it barely has brakes and it needs to be aligned but it runs and drives down the road.

All of my ideas and work have finally come together as a whole. There were a lot of stumbles, mistakes and things that I had to sort out but I stuck it out through all my hiccups and saw the project through. Save for the engine, I pretty much rebuilt or replaced everything on this car from stem to stern. Here's a list of what I can think of at the moment.

  • Re-wired the whole car including the starting/charging systems and the cut off switch. Installed Denso 60 A 1 wire alt. Performed ammeter bypass.
  • restored/rebuilt and detailed the entire front and rear suspension systems
  • replaced worn out steering box, installed new pitman and idler arms
  • converted the column to floor shift, rebuilt and painted to match factory suede paint. Installed repro Tuff wheel.
  • replaced MP orange box with MSD 6AL
  • installed new cap, rotor, coil and wires
  • rebuilt distributor
  • installed new carpet
  • converted car to fixed bucket seats
  • re-wired the dash and installed gauges including analog A/F ratio
  • deleted heater and radio with correct delete bezels and right-side heater delete fresh air vent
  • installed new trans cooler and made all new trans cooler lines, installed deep pan and new shifter cable, re-worked shifter mount
  • restored/rebuilt the entire rear end including a new aluminum diff, installed new Moser axles
  • Installed Caltracs
  • All new brakes with lightweight master, made all my own brake lines
  • plumbed and wired a roll control
  • re-plumbed the whole fuel system, made all new AN type lines
  • rebuilt the carb (about 10 times)
  • Re-worked cooling system including Griffin aluminum radiator, clutch fan and shroud

And on and on. I am happy to say that pretty much all of it works. Couple loose ends to tidy up but that's it.

I have learned a ton of stuff over the last year. It's funny, I thought I had some knowledge and decent skills from being a professional mechanic and messing with old cars for the last 20 years or so but I admit, I pretty much knew jack ****. I know it sounds corny but I feel like I've crossed a threshold into a new level of experience and understanding.

So now that it's drivable, I need to sort out the brakes. Not sure why they are so low. Everything is brand new so I can't really blame the parts. Pretty certain there is still air in the system somewhere. Hope that's all it is.

Aligning the car is basically just taking it to a shop and have them put it on a rack. It's way out right now. I installed everything and sort of eyeballed it but it's nowhere close. There's a shop close to my house so I don't gave to go too far with it.

So Phase 1 was the 'construction' part which is pretty much done. It's on to Phase 2 now which is test and tune.

My ultimate goal is to run better than the best time the P.O. said it ran. (11.97) Can't wait!

So yeah, pretty good day for me. :cheers:
 
So since the last update I have taken a few steps backwards. :banghead:

First major issue was that I basically had no brakes which was preventing me from doing any significant road testing. Turns out the 1 1/8 bore master cylinder I have is mismatched with the small piston SSBC calipers I chose. It is a somewhat common problem with these calipers and should be solved by going to a smaller 15/16 bore master.

Unfortunately I did not realize this when I planned out the brakes. There are a lot of variables when using aftermarket parts I guess. I had bought the master a couple years before without any knowledge of how bore and caliper piston area have a direct relationship to being able to stop the car.

The real crappy part of this is that it took me FOREVER to figure this out. I must have sent about a gallon of brake fluid through the system trying bleed the brakes over and over. I adjusted the rears rock solid, adjusted the pedal pushrod, adjusted the prop valve and on and on. Finally through research I figured out that the larger bore master I had was not providing enough pressure for the tiny little 45mm SSBC caliper pistons.

BTW, none of my neighbors could figure out how to help me bleed the brakes, they all sucked at it. One time one of them was pumping the throttle saying there were no brakes. Seriously! I'm under the rear end on my back and I'm like, what the heck is that squeaky noise? It was the throttle return spring! Hard to find good help around here.

Next major hassle was a hard starting/no starting problem. The car was almost impossible to start, either hot or cold. I was literally roasting my starter. What I initially thought was a tuning issue turned out to be a wiring issue. (naturally) The distributor pickup wires were reversed causing the timing to be too advanced. MSD does not mention this potential pitfall in their installation instructions so I had to read through their forums to figure it out. I started a thread on Moparts about it and one of the more experienced guys pointed it out early on. I had no idea what he was even referring to though until I went back and read through it again. I admit, I would have never thought to switch the pickup harness polarity since I had it wired correctly based on the instructions.

So once I understood what to do, I went out and switched the wires. The car started right up and stayed running. Whew! Man, this hot rod stuff is supposed to be fun but sometimes it's really not.

Also had to go back and make some additions to the charging system. The way I had the car wired at first, the car would shut off with the disconnect switch but the charge wire was still hot. Not good. At one point I was under the dash and had the disconnect off. I noticed the A/F gauge indicator was on. WTF? I stuck my test light on the firewall terminal and yep, voltage. Crap.

I killed my brand new voltmeter somewhere during this time too. Probably should have known there was a problem when the voltage sensing wire from the firewall terminal tried to weld itself to the gauge when the disconnect was off. Blew right through that red flag! :shock:

So more research led me to the conclusion that I needed to have a continuous duty solenoid (basically a giant relay) in the charge line between the alternator and battery. Unless you have a cut off switch that can handle alternator output going through it, (which I don't) you gotta either go directly back to the battery or install the solenoid (or some such device) to prevent the charge wire from being live after the switch is off.

My charge wire was too short to go back to the battery and I was not about to rip apart the interior of the car again to replace it so I got the solenoid. It's not cheap, about $45. The guys at the parts store thought I was nuts, (like usual) they couldn't figure out what I was doing with this silly solenoid but I had a plan. Had to make a bracket for it but I got it all wired up and it went in pretty easily. It handles the load and renders the charge line dead when it's off. It's powered from the battery side of the cutoff switch. Problem solved.

So I'm kind of in a holding pattern with the car right now. I ran out of money this week so I have to wait for a bit to get the master cylinder. Hopefully it will provide me with enough brakes so I can start driving this thing more aggressively to be able to sort it out. Still also needs to be aligned but I couldn't do that before the brakes. Pics below.

Here's the culprit that denied me brakes, ye olde truck 1 1/8 master cylinder.
http://i273.photobucket.com/albums/jj214/rmchrgr/IMG_0163a_zpscb24b31d.jpg

You measure the bore here with a small scale or with a dial caliper inside the flange.
http://i273.photobucket.com/albums/jj214/rmchrgr/IMG_0164a_zps5eb20ec9.jpg

Here's the continuous duty solenoid (chrome one) wired into the charge line. I put some rubber caps over the positive side lugs on both of the solenoids to prevent mishaps.
http://i273.photobucket.com/albums/jj214/rmchrgr/IMG_0162a_zps6f08a02f.jpg

I also relocated the shift light from behind the now vacant ammeter hole to this spot. Wires did not reach the fuse box from the left corner of the dash.
http://i273.photobucket.com/albums/jj214/rmchrgr/IMG_0167a_zps96e72637.jpg

Thanks for stickin' with me though all this. I know I can be a bit long winded. More to come.
 
Just found your build. It looks like you did about everything that I'm having to do as well. I too thought I knew a few things about wrenching but realized I knew not so much when I redid the car front to back. Looks like you did a fantastic job on your rebuild! Get those little kinks worked out and go have some fun! BTW, Dec 2012 was the last time I drove my car too! Can't wait to get it back on the road.
 
Just found your build. It looks like you did about everything that I'm having to do as well. I too thought I knew a few things about wrenching but realized I knew not so much when I redid the car front to back. Looks like you did a fantastic job on your rebuild! Get those little kinks worked out and go have some fun! BTW, Dec 2012 was the last time I drove my car too! Can't wait to get it back on the road.

Thanks for the compliments and for stopping by my humble build thread.
 
-
Back
Top